How to Take Great Night Sky Photos On iPhone
Taking pictures at night can be challenging. And, if you try to take iPhone photos of the night sky, you’ll often be disappointed by the results. The sky might look grainy, or the moon and stars may not show up in your photo. However, with a few simple solutions, you’d be surprised at what you can capture when you shoot the night sky with your iPhone! In this tutorial, you’ll discover how to improve your night sky photography with iPhone. And you’ll even learn how to create wonderful star trail photos.
1. Use iPhone 11 Night Mode
Do you have the iPhone 11, iPhone 11 Pro, or iPhone 11 Pro Max?
If so, you can use the new iPhone Night mode camera feature for stunning night photography.
Night mode in the iPhone 11 Camera app allows you to take better low light photos than ever before.
In the example below, look at the color and detail that Night mode has captured in the sky.
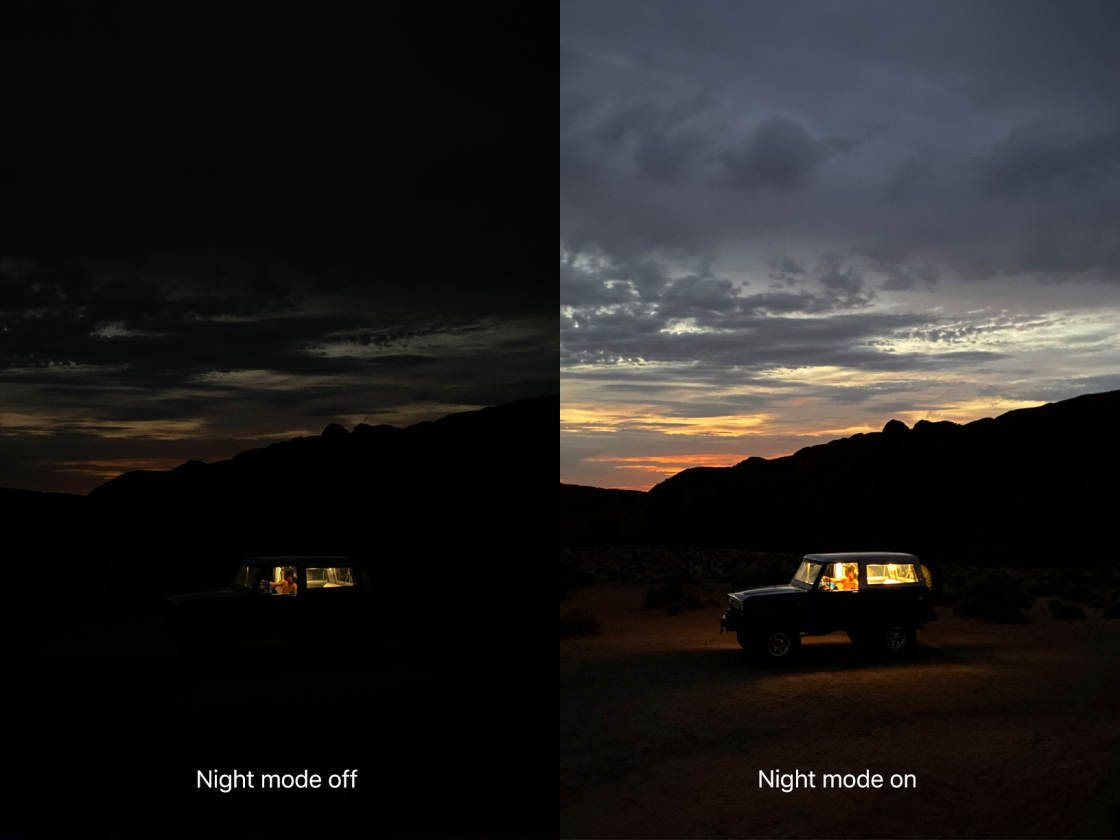
Night mode uses in-camera software to create sharp, grain-free photos with amazing color and detail.
When you shoot with Night mode, the camera captures multiple shots over a few seconds. These images are then blended into a single high-quality image.
So, how do you use Night mode on iPhone 11?
Night mode actually comes on automatically whenever you shoot in low light.
You need to ensure you’re using either the 1x Wide lens or the 2x Telephoto lens. (Night mode doesn’t work with the 0.5x Ultra Wide lens.)
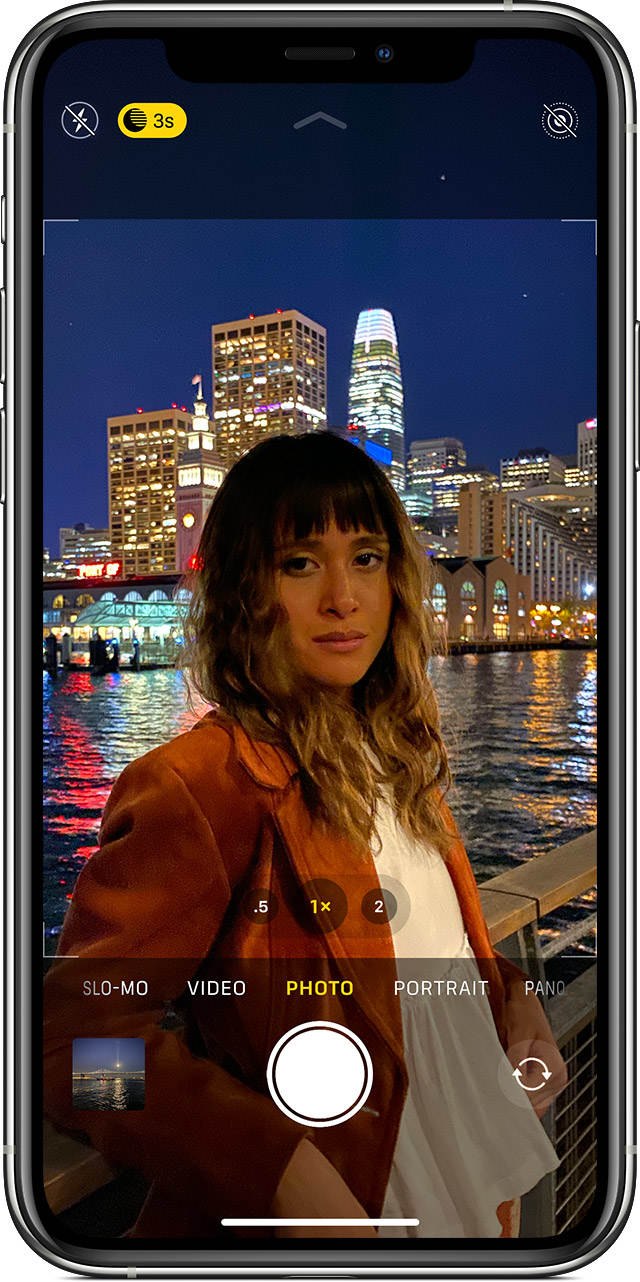
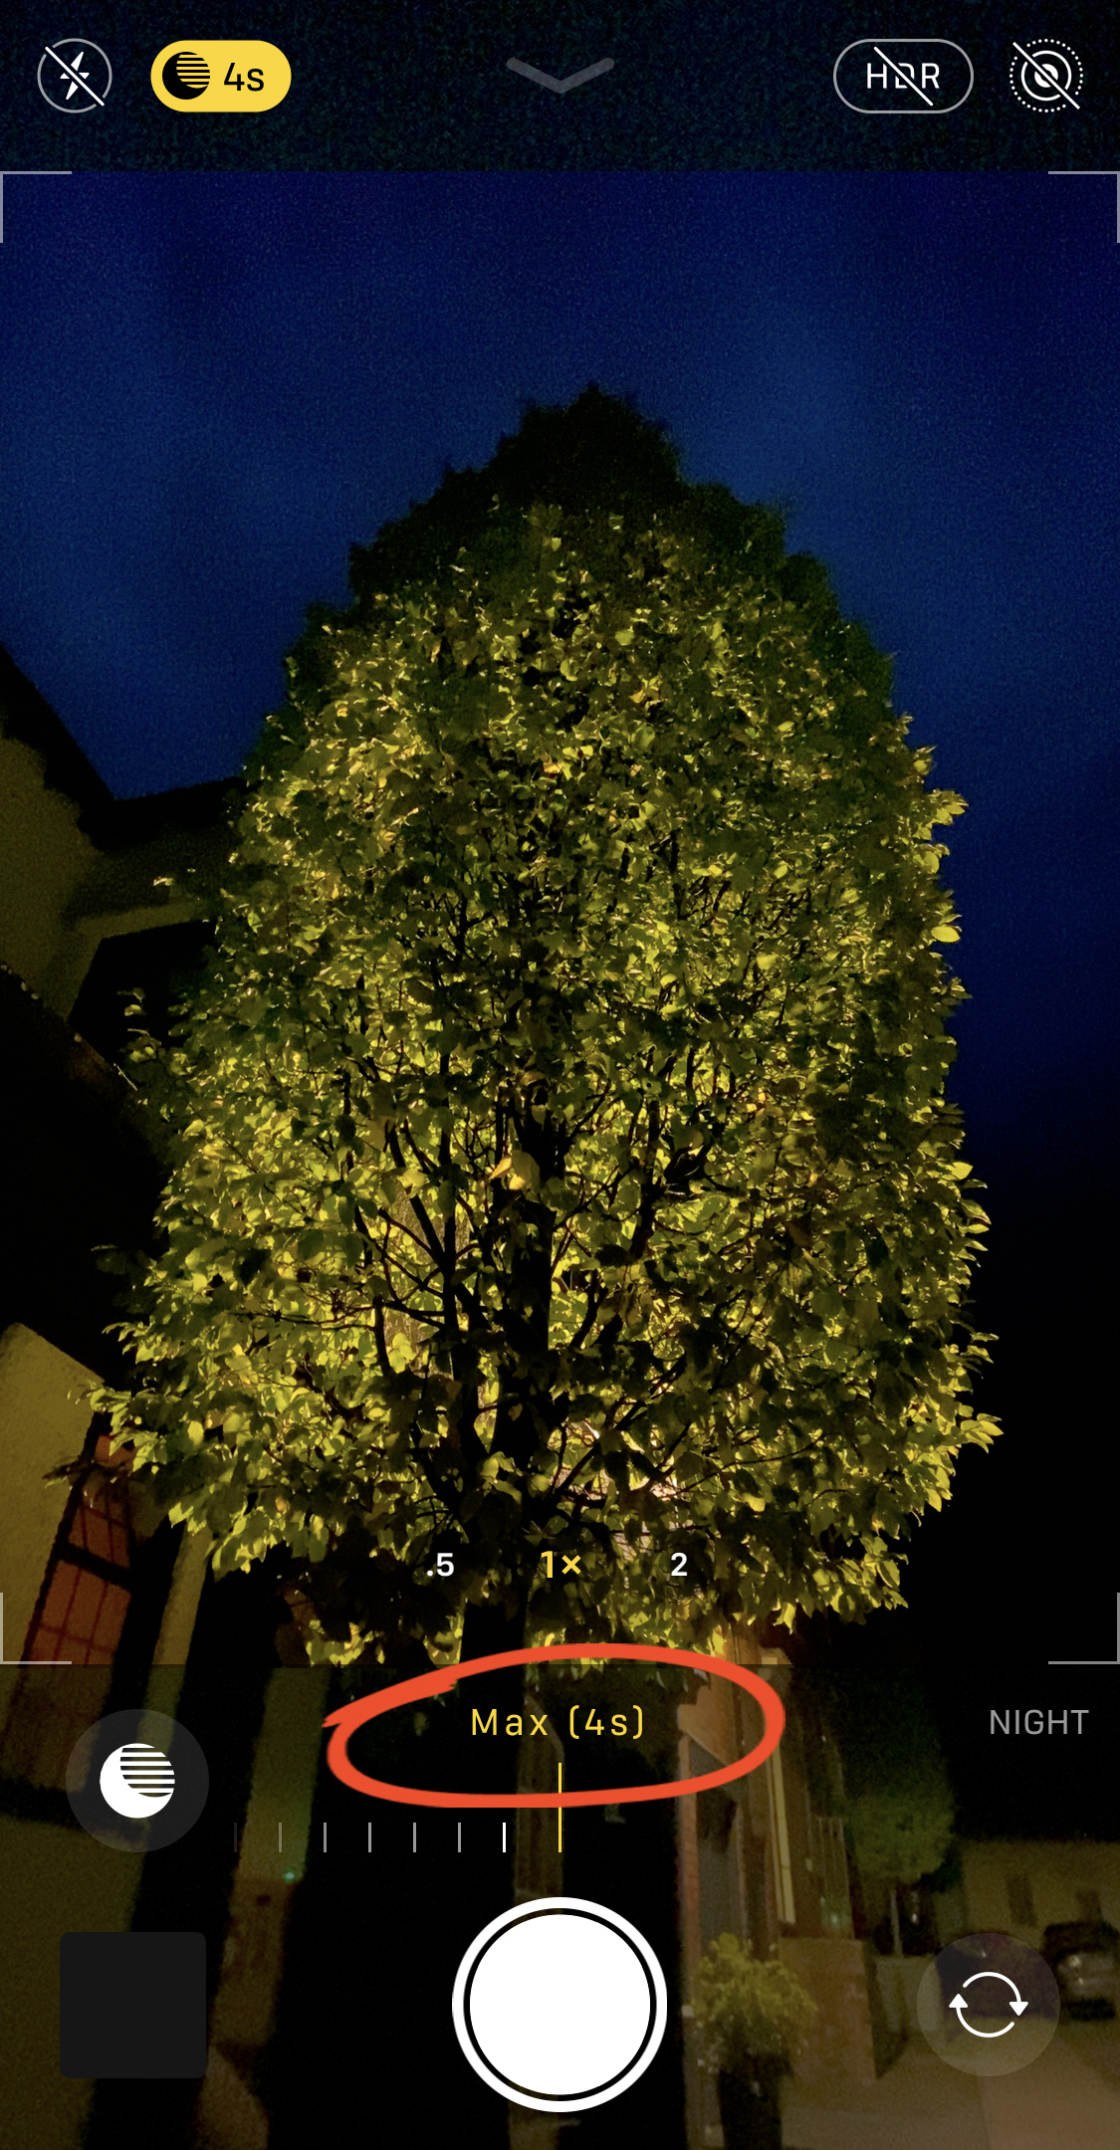
The Night mode (moon) icon appears at the top of the Camera app when you shoot in low light.
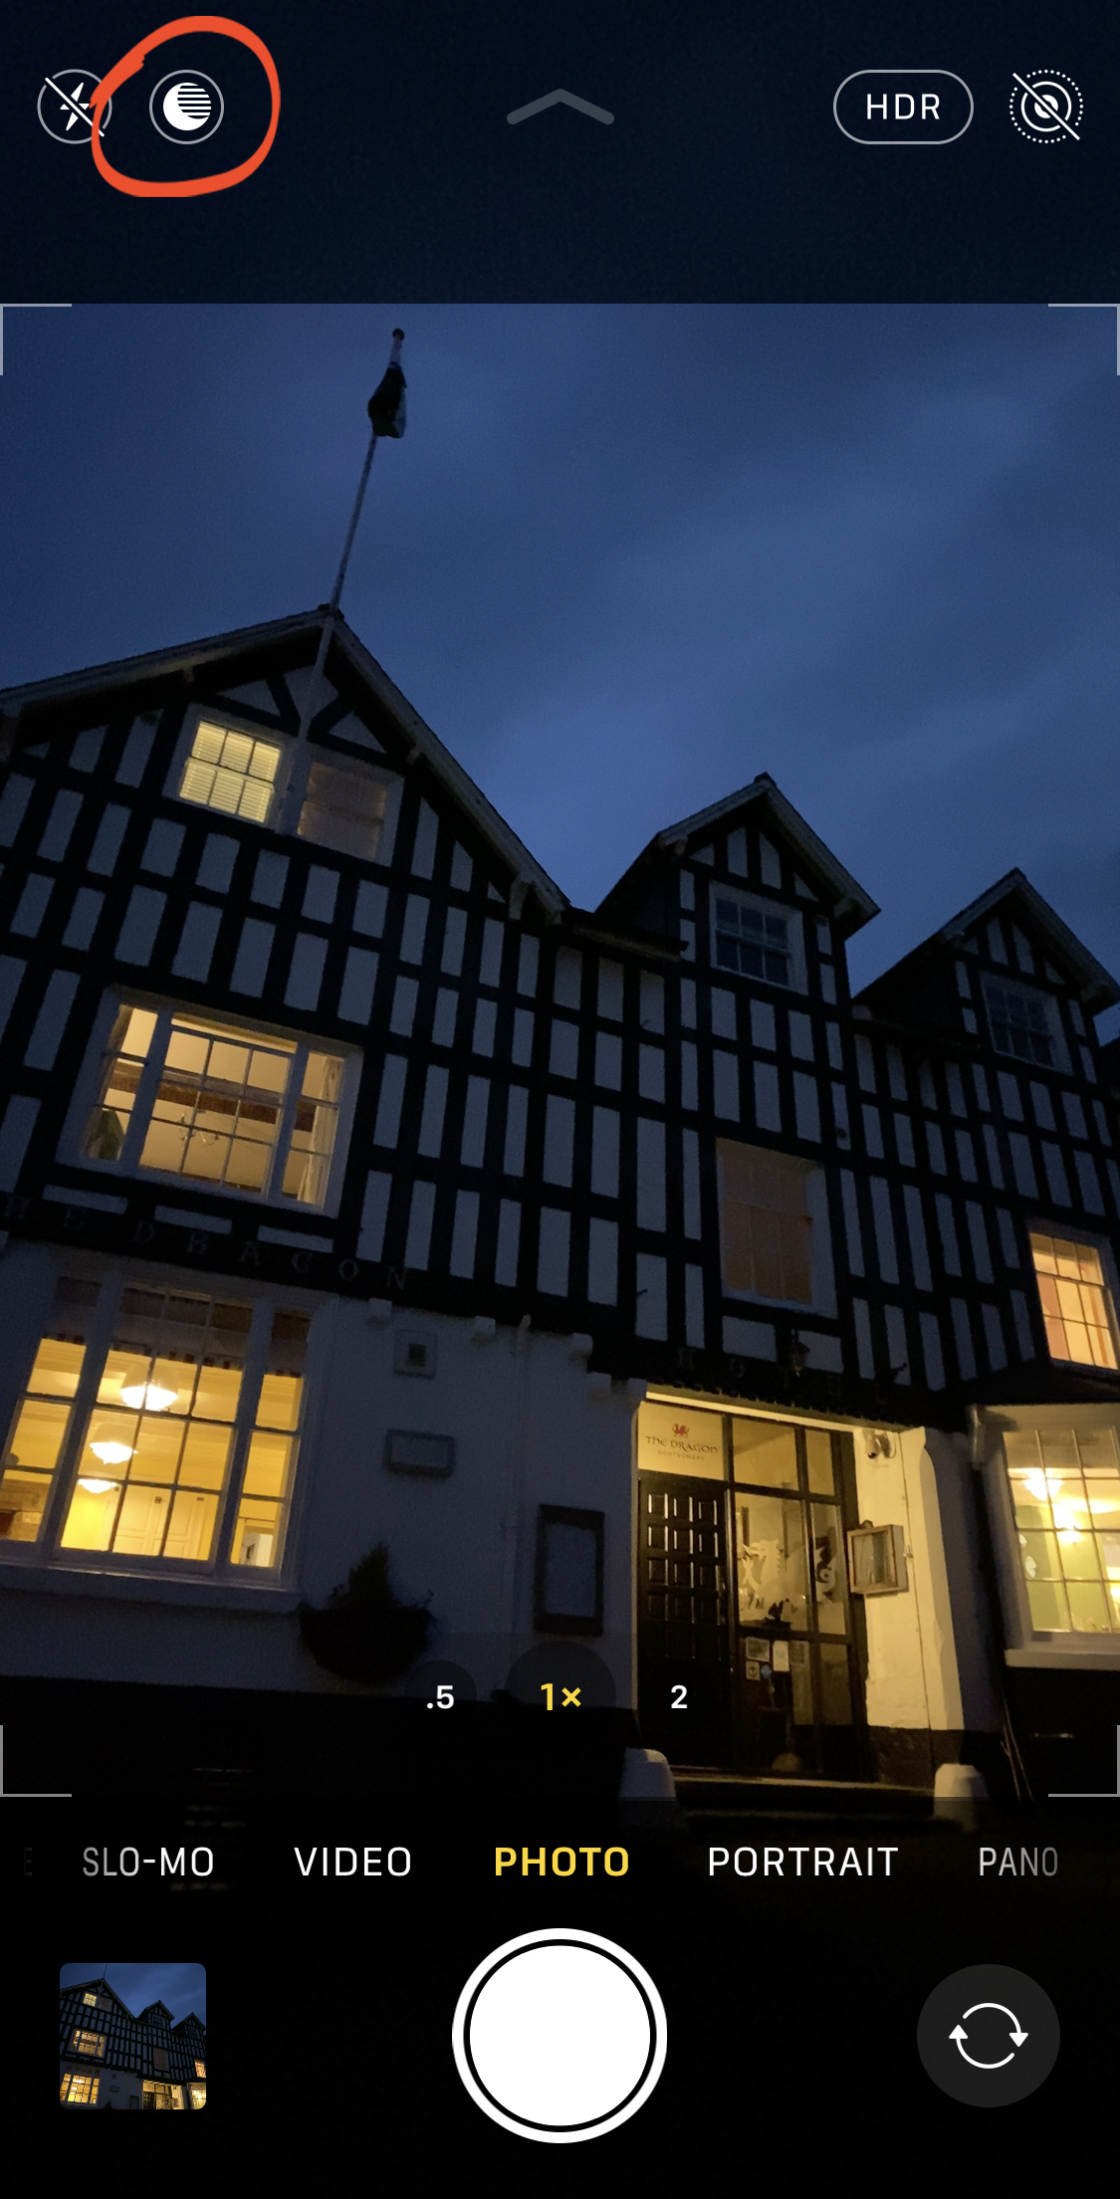
If the Night mode icon is white, tap it to activate Night mode. If the icon is yellow, Night mode is already switched on. (The icon appears white when the light is moderately low but not very dark).
As soon as Night mode is active, you’ll notice that the colors are more vibrant and more detail is visible.
This is perfect for capturing stunning photos of the night sky!
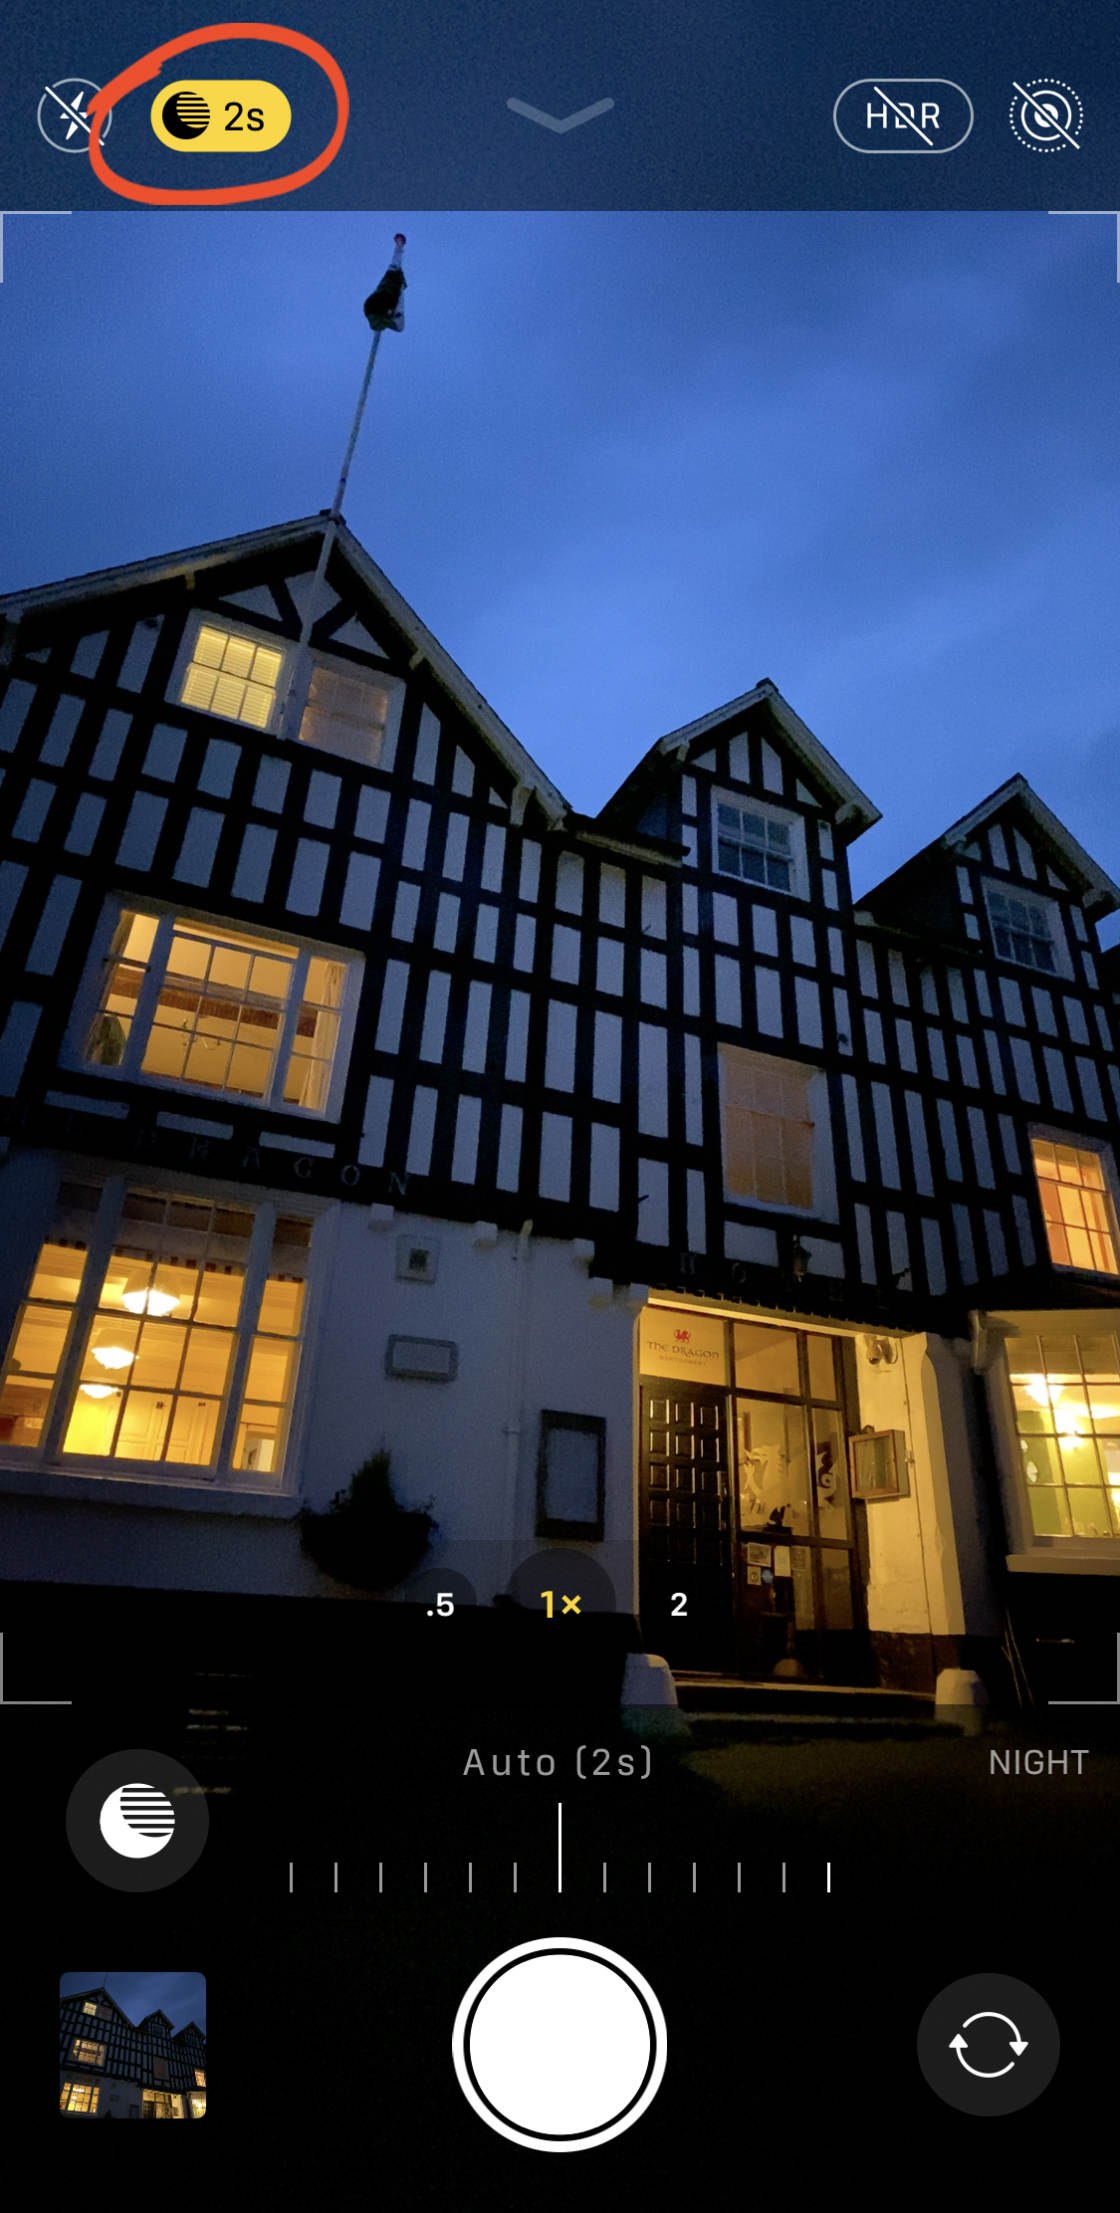
The number on the Night mode icon indicates the exposure time (in seconds). This is the time it will take to capture the photo when you press the shutter.
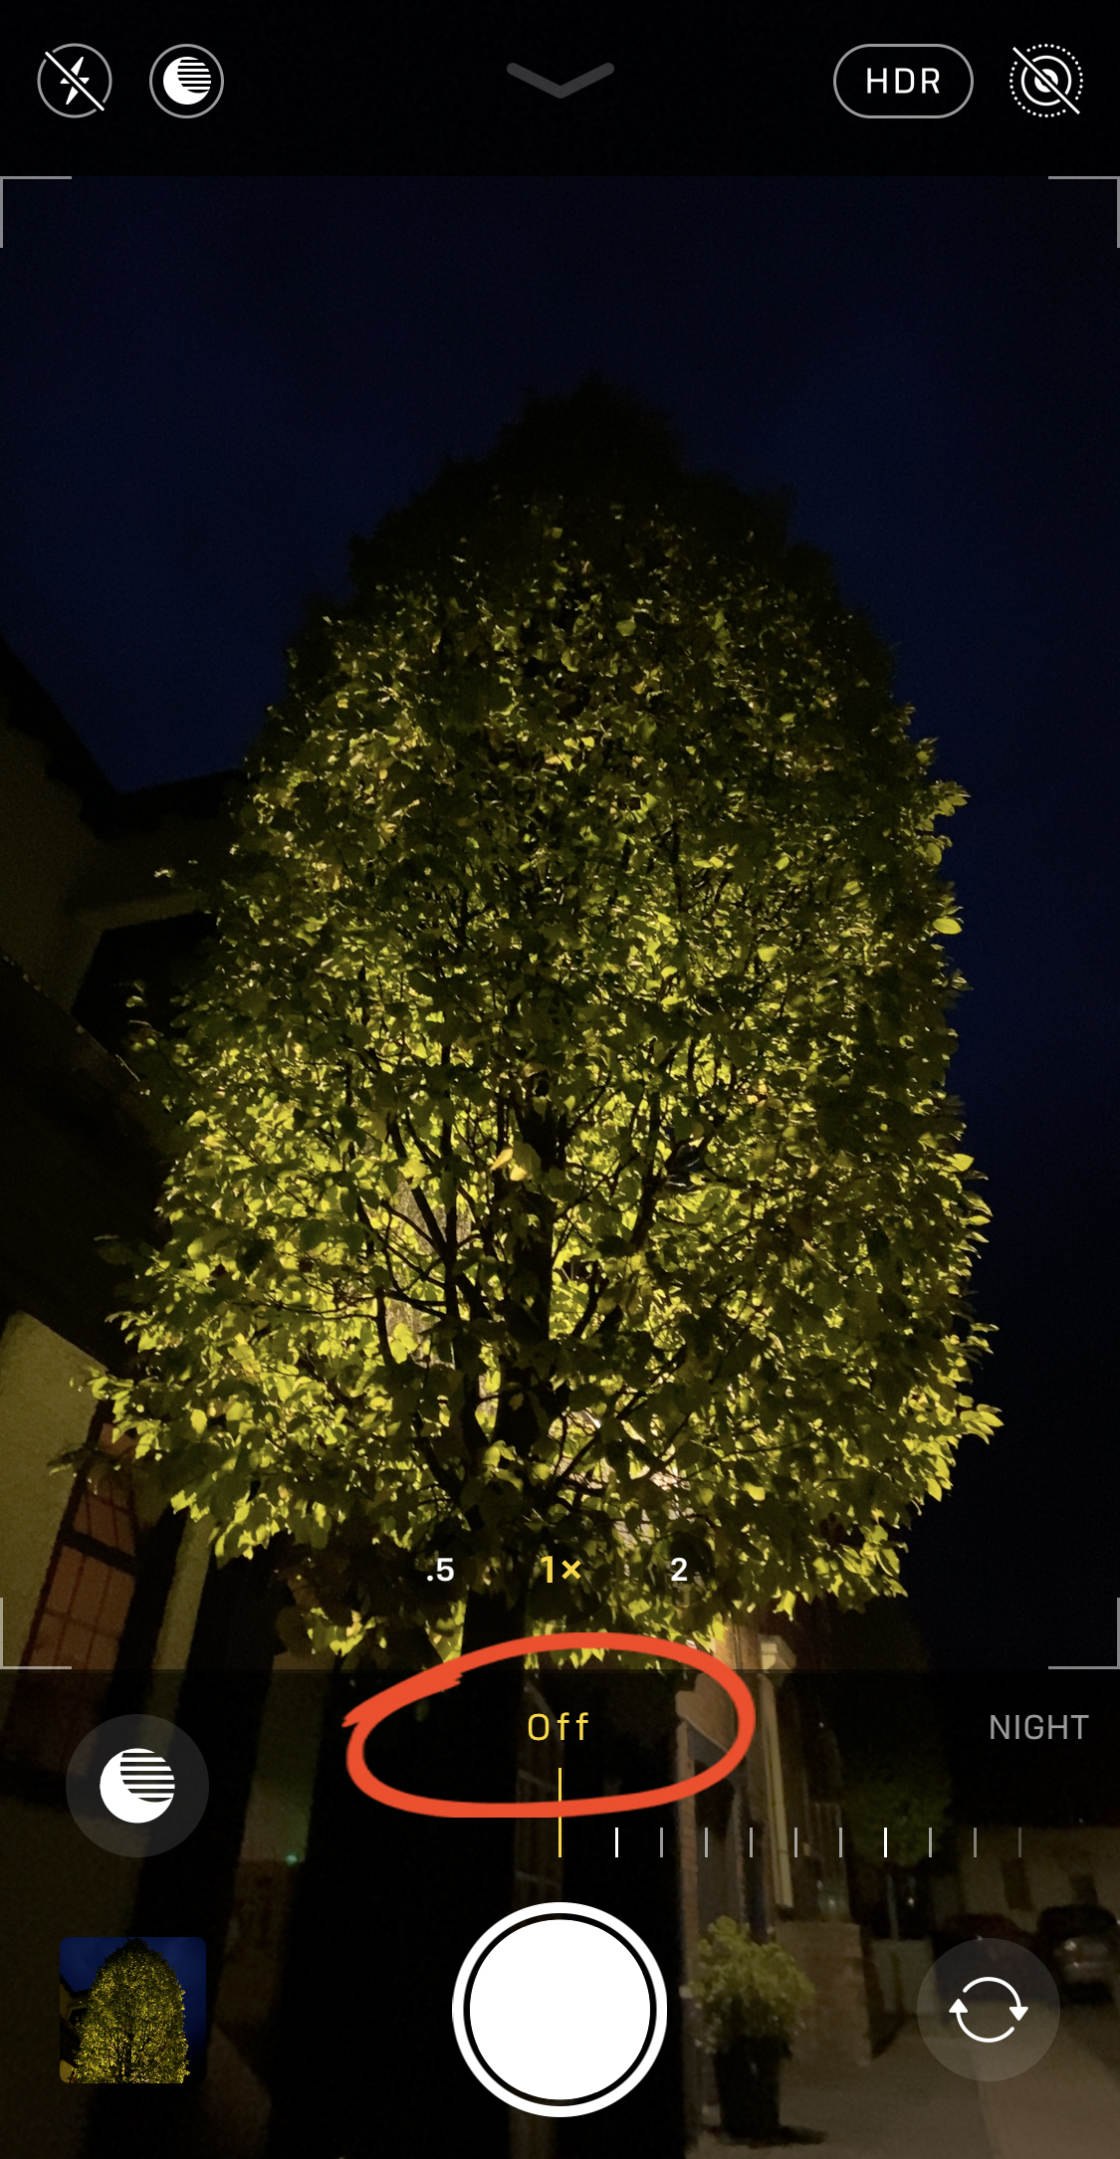
You can use the Exposure Time slider at the bottom of the screen to adjust the exposure time if you wish. (If you can’t see the slider, tap the yellow Night mode icon at the top of the screen.)
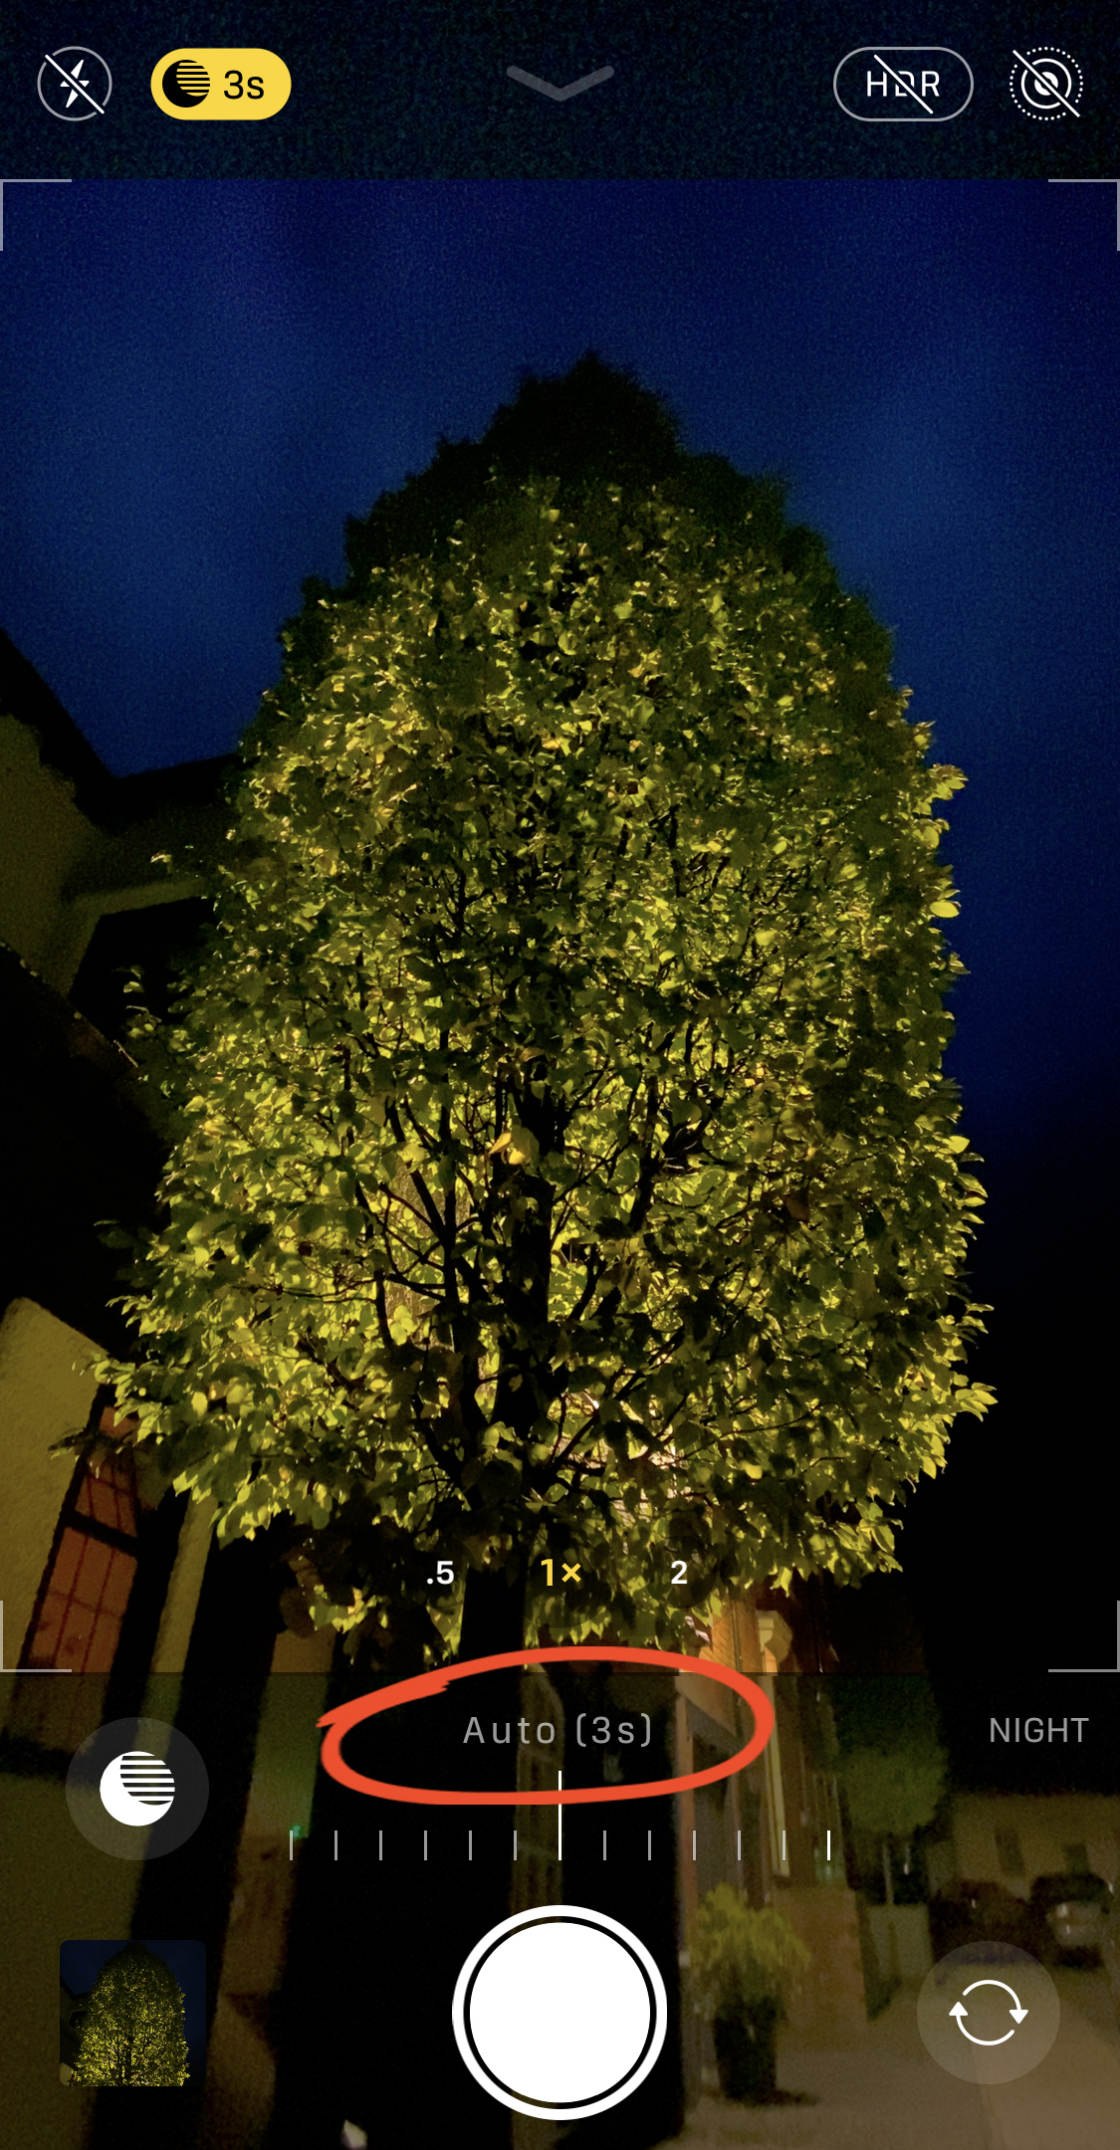
To begin with, the exposure time is set to Auto. If you want to increase the exposure time, drag the slider to the right to the Max setting.
If you want to switch off Night mode, drag the slider left to the Off setting.
When you’ve chosen the exposure time you want to use, press the shutter button to take a picture!
Hold your iPhone still until the shot is complete. The steadier you hold your camera, the sharper your picture will be.

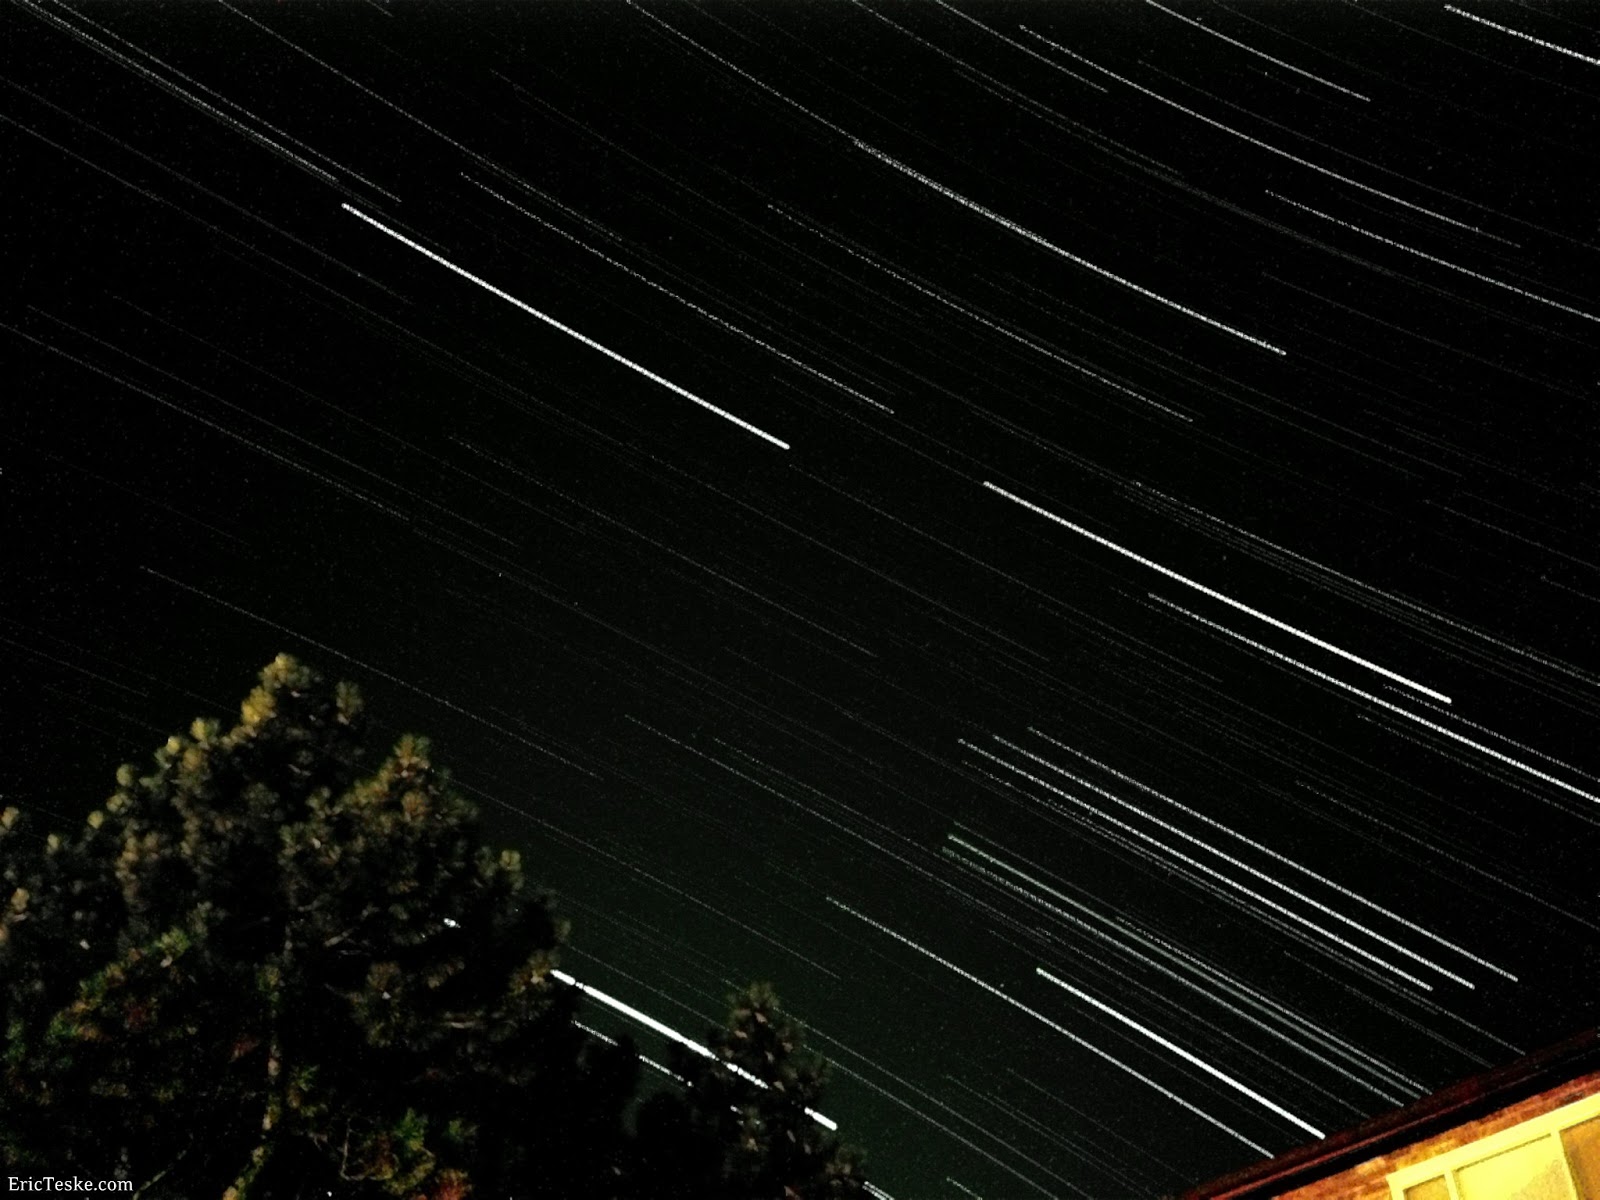
2. Photograph Night Sky Star Trails
Did you know that you can use your iPhone to make star trail photos?
As the Earth turns, the stars appear to move across the sky. If you take a long exposure photo of the sky, the stars will appear to make light trails or circles.
The North Star is the only star that appears to stay in the same place because it’s very close to the north celestial pole above the Earth.
Long-exposure photography facing the North Star reveals circular pathways as the stars (relative to us) move around the pole.
For star trails, I use the NightCap app because of its ability to take continuous back-to-back shots at timer-regulated intervals.
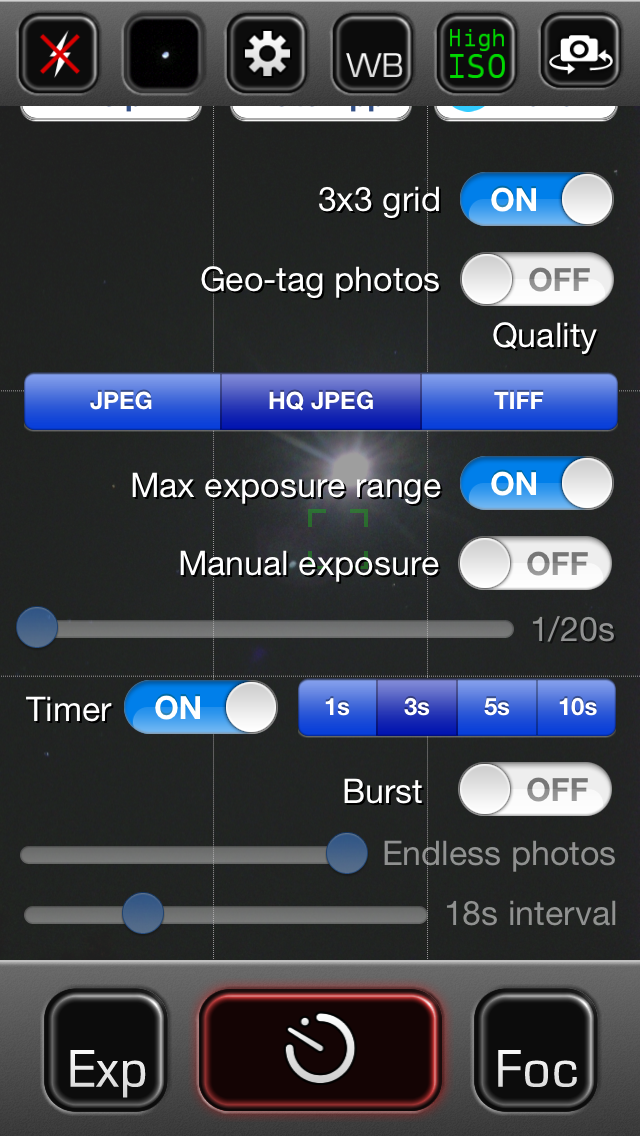
Manual exposure lets you select from 1/20 to 1-second shutter speed, or just do what I did and lock the exposure when you find the right combination of shutter and ISO. To give the stars enough time to travel a tiny bit between shots, set the interval to around 15-20 seconds.
You’ll definitely want to use an iPhone tripod and iPhone tripod mount to keep your camera steady. In fact, a tripod is one of our 6 Essential iPhone Camera Accessories.
I usually keep my iPhone plugged in so it doesn’t drain the battery too quickly (which can happen in about 10 minutes in the winter). Take back-to-back photos for at least 20 minutes to see some decent trails – the longer the better!
Now that you have a ton of grainy green and black photos filling up your iPhone, transfer them to your computer and stack them using the free software StarStaX.
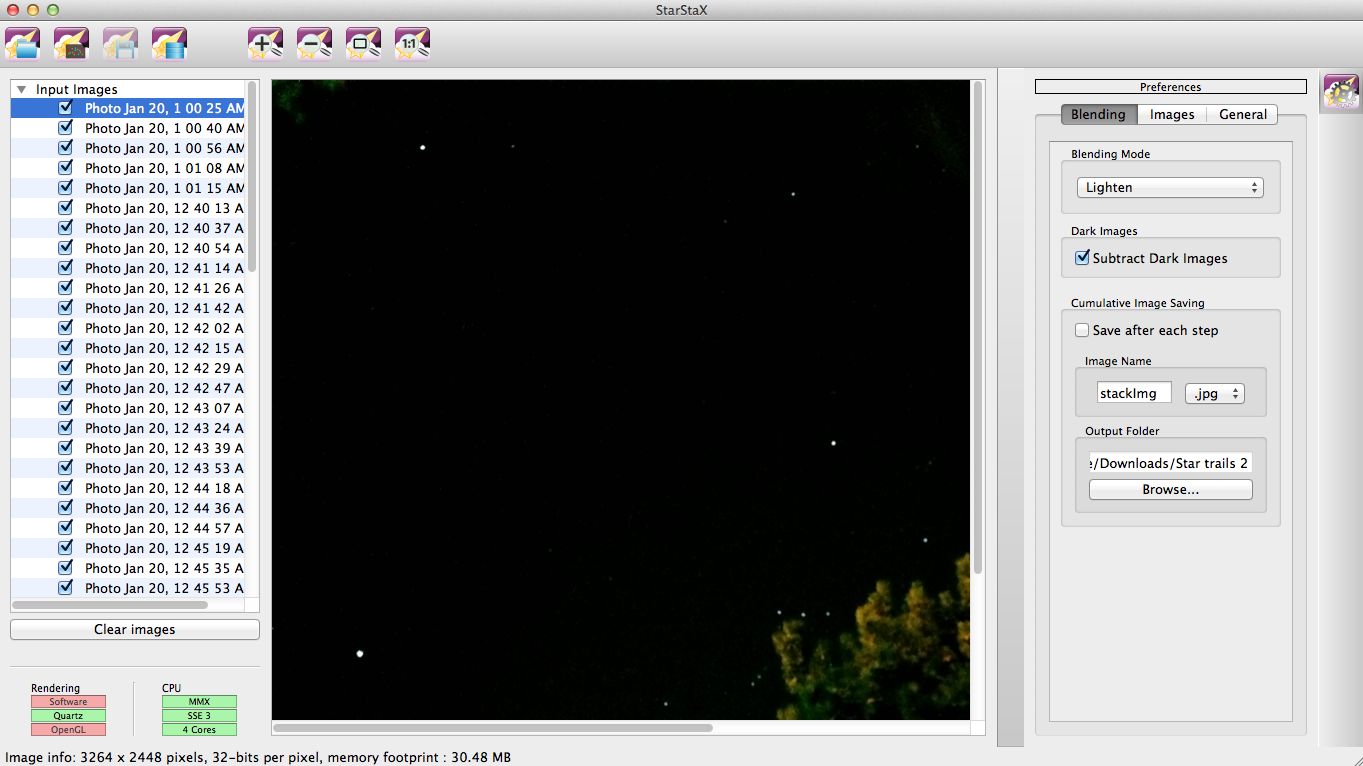
You can also stack them by hand in Photoshop using layers and the Lighten blend mode. You basically want to take the brightest pixels from each frame and layer them into the final star trail photo.
Star trail purists might give you a hard time for stacking (rather than leaving the shutter open the entire time for seamless trails on a single frame), but there just isn’t a way to manually keep the shutter open for this long on an iPhone.
In the photo below you can see the final star trail photo using the above process.
3. Shoot The Moon In The Night Sky
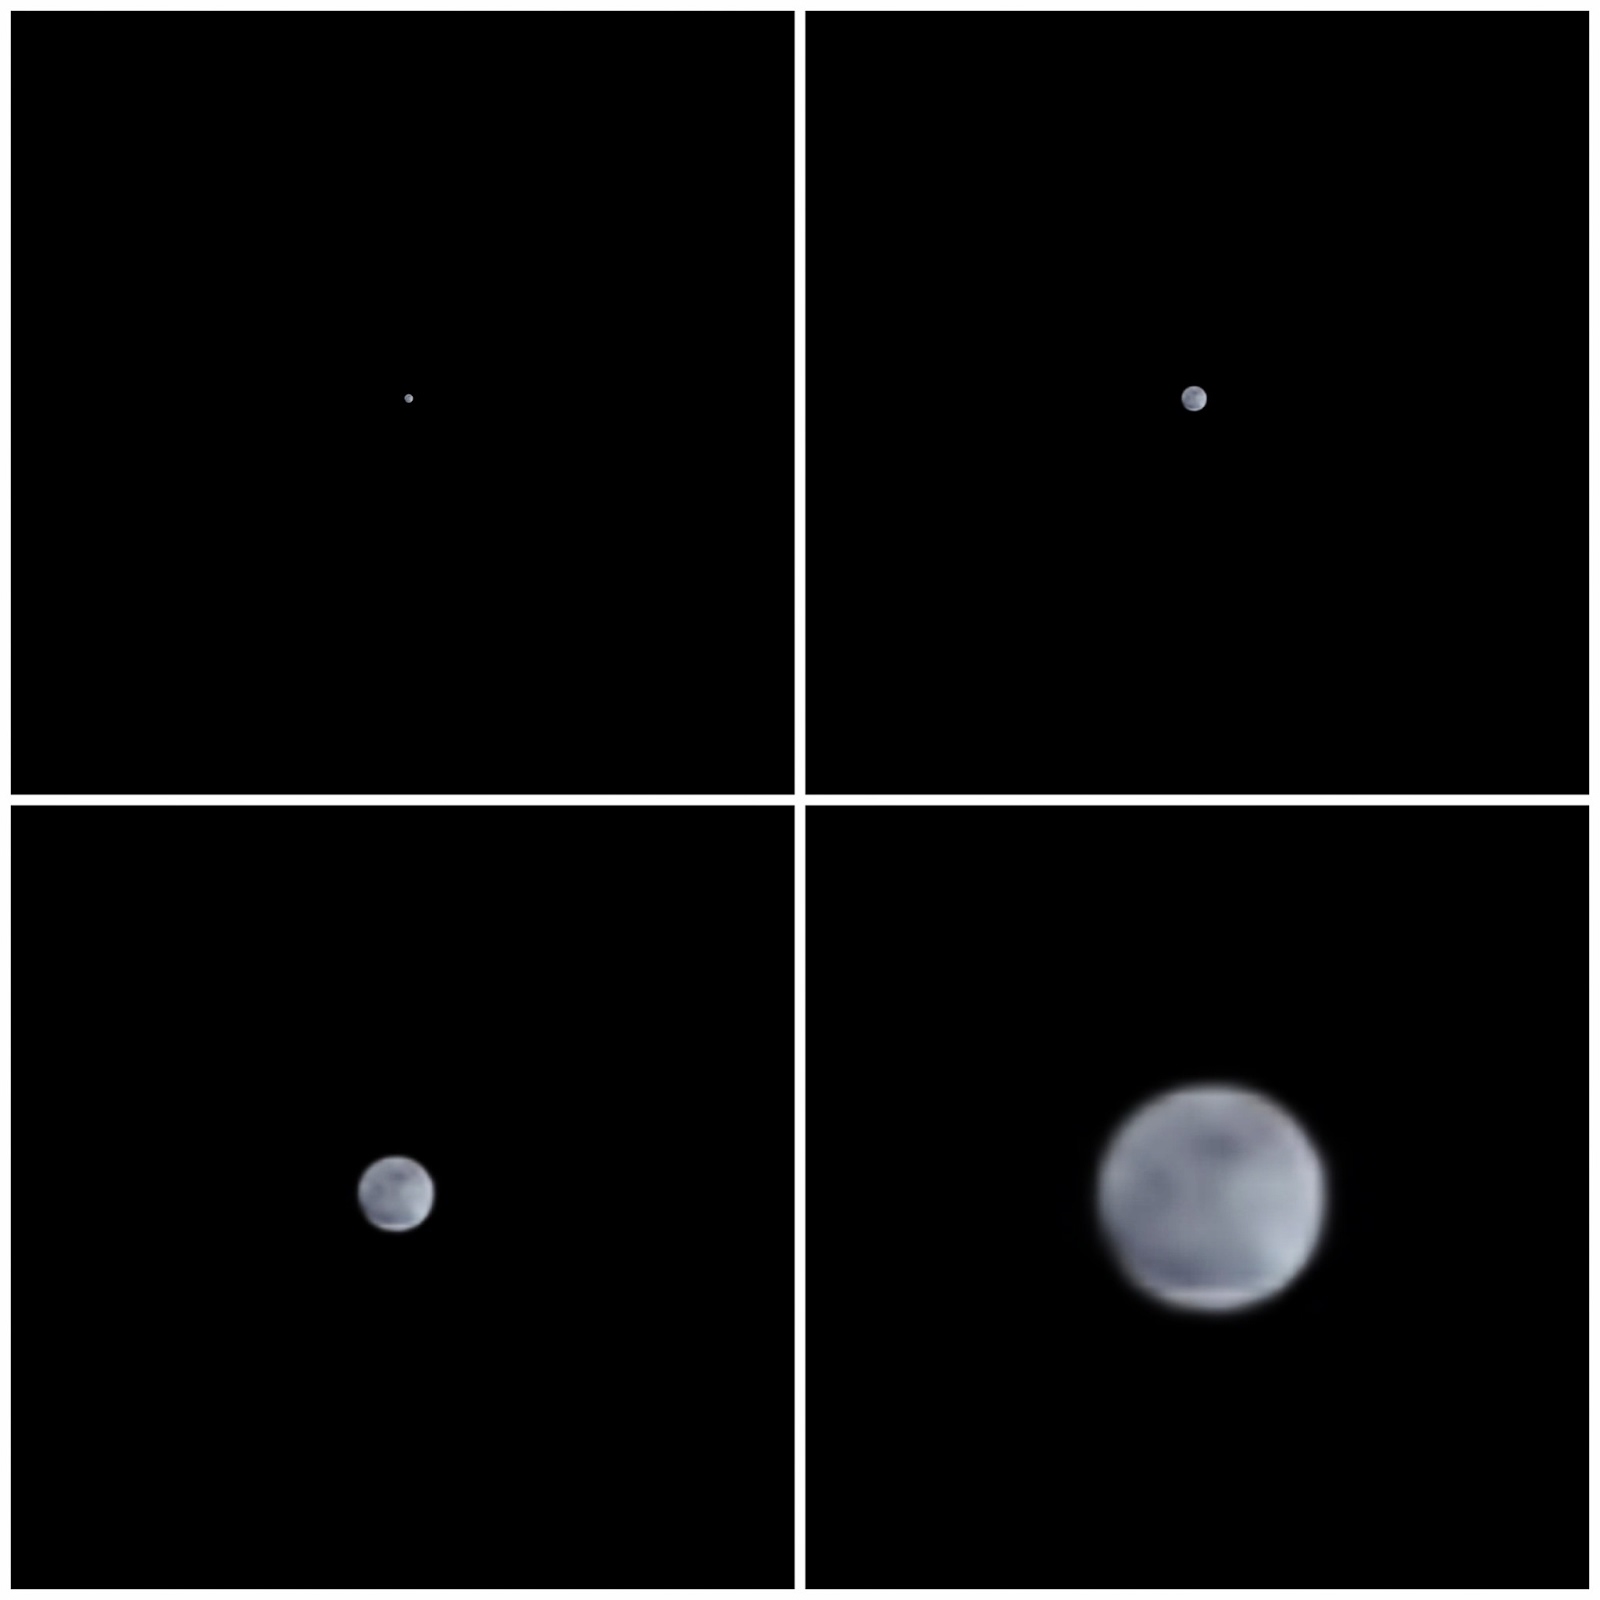
The biggest problem with shooting the moon on an iPhone is with image exposure. Because the moon is so small in the field of view, the camera won’t adjust the exposure settings to appropriately expose for the moon.
Most of the frame will be taken up by the dark sky surrounding the moon, and the result of this is that your camera will expose the scene for the dark sky. Because the moon is so bright relative to the night sky, the moon will be over-exposed.
Even if you tap on the moon to try to re-adjust the exposure point, it’s likely that the camera still won’t expose properly for the moon as it’s too small in the frame and there’s still too much black space around it.
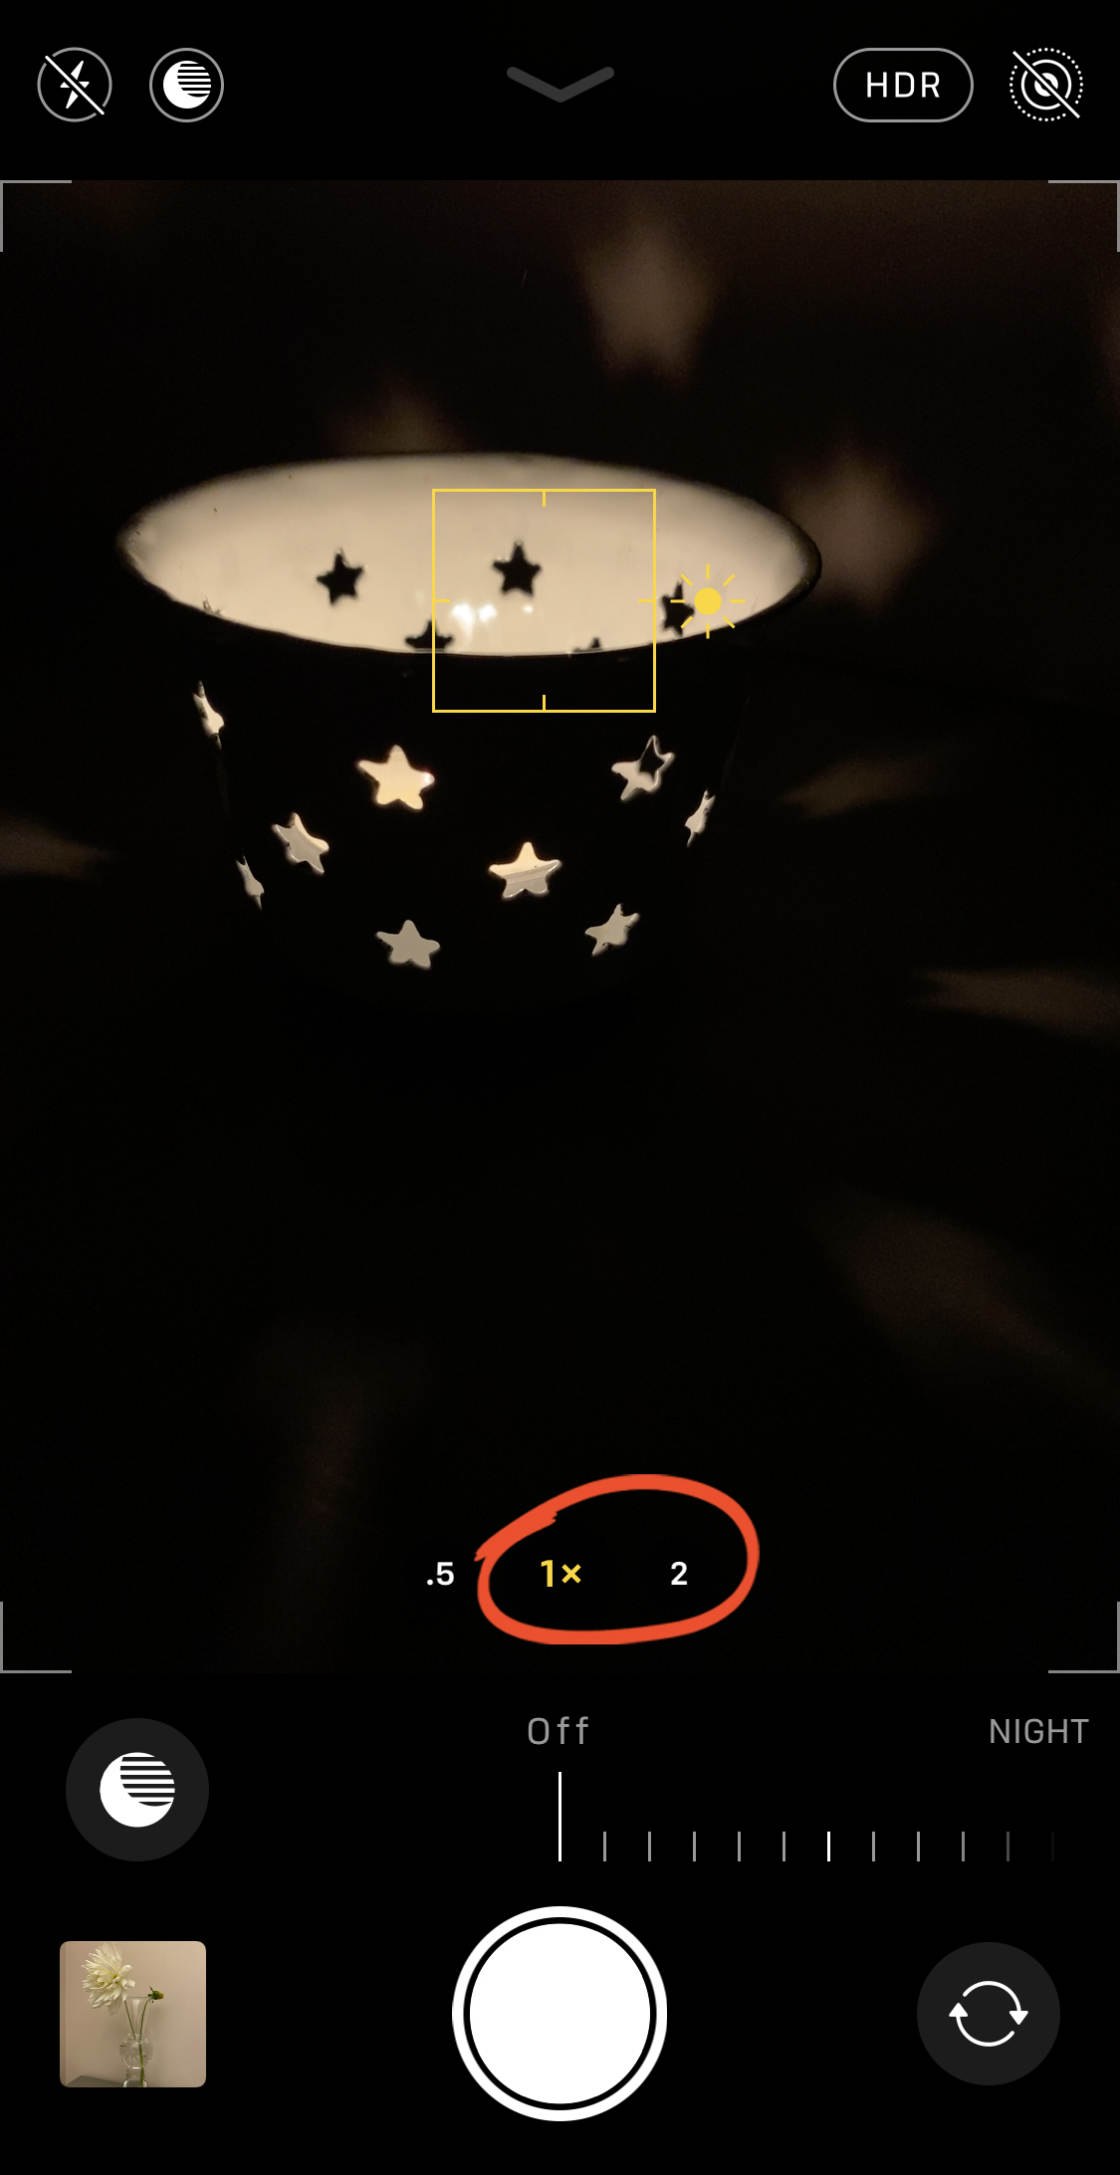
To work around this, you need to set the exposure manually. Luckily for us, this is very easy to do in the iPhone’s native camera app.
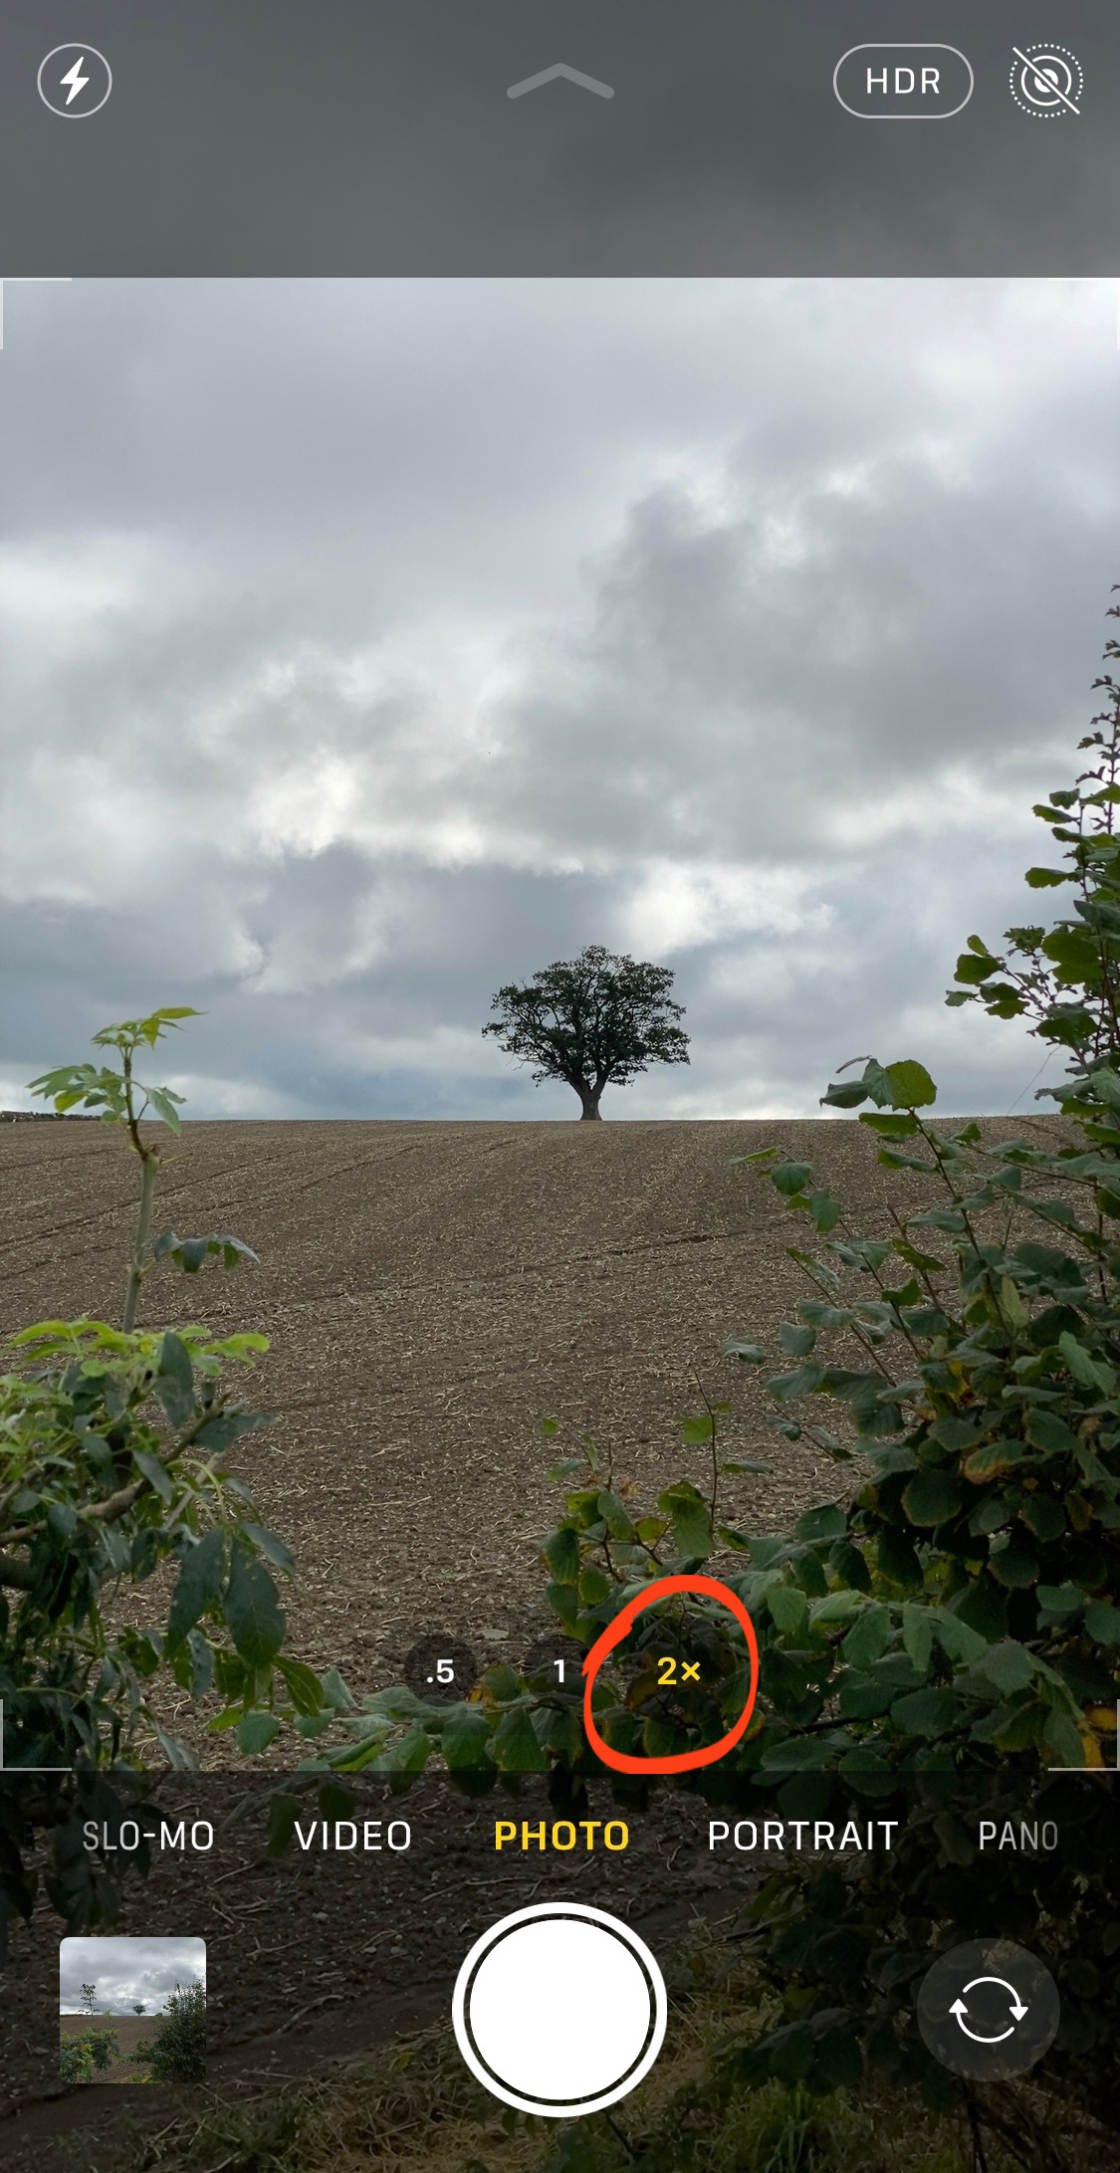
First of all, if your iPhone has the Telephoto lens, switch to this lens to zoom in so that the moon appears as large as possible in the viewfinder. You can switch to the Telephoto lens by tapping 2x in the Camera app.
Now, tap and hold the screen to lock focus on the moon. You’ll see AE/AF Lock in yellow at the top of the screen when focus is locked.
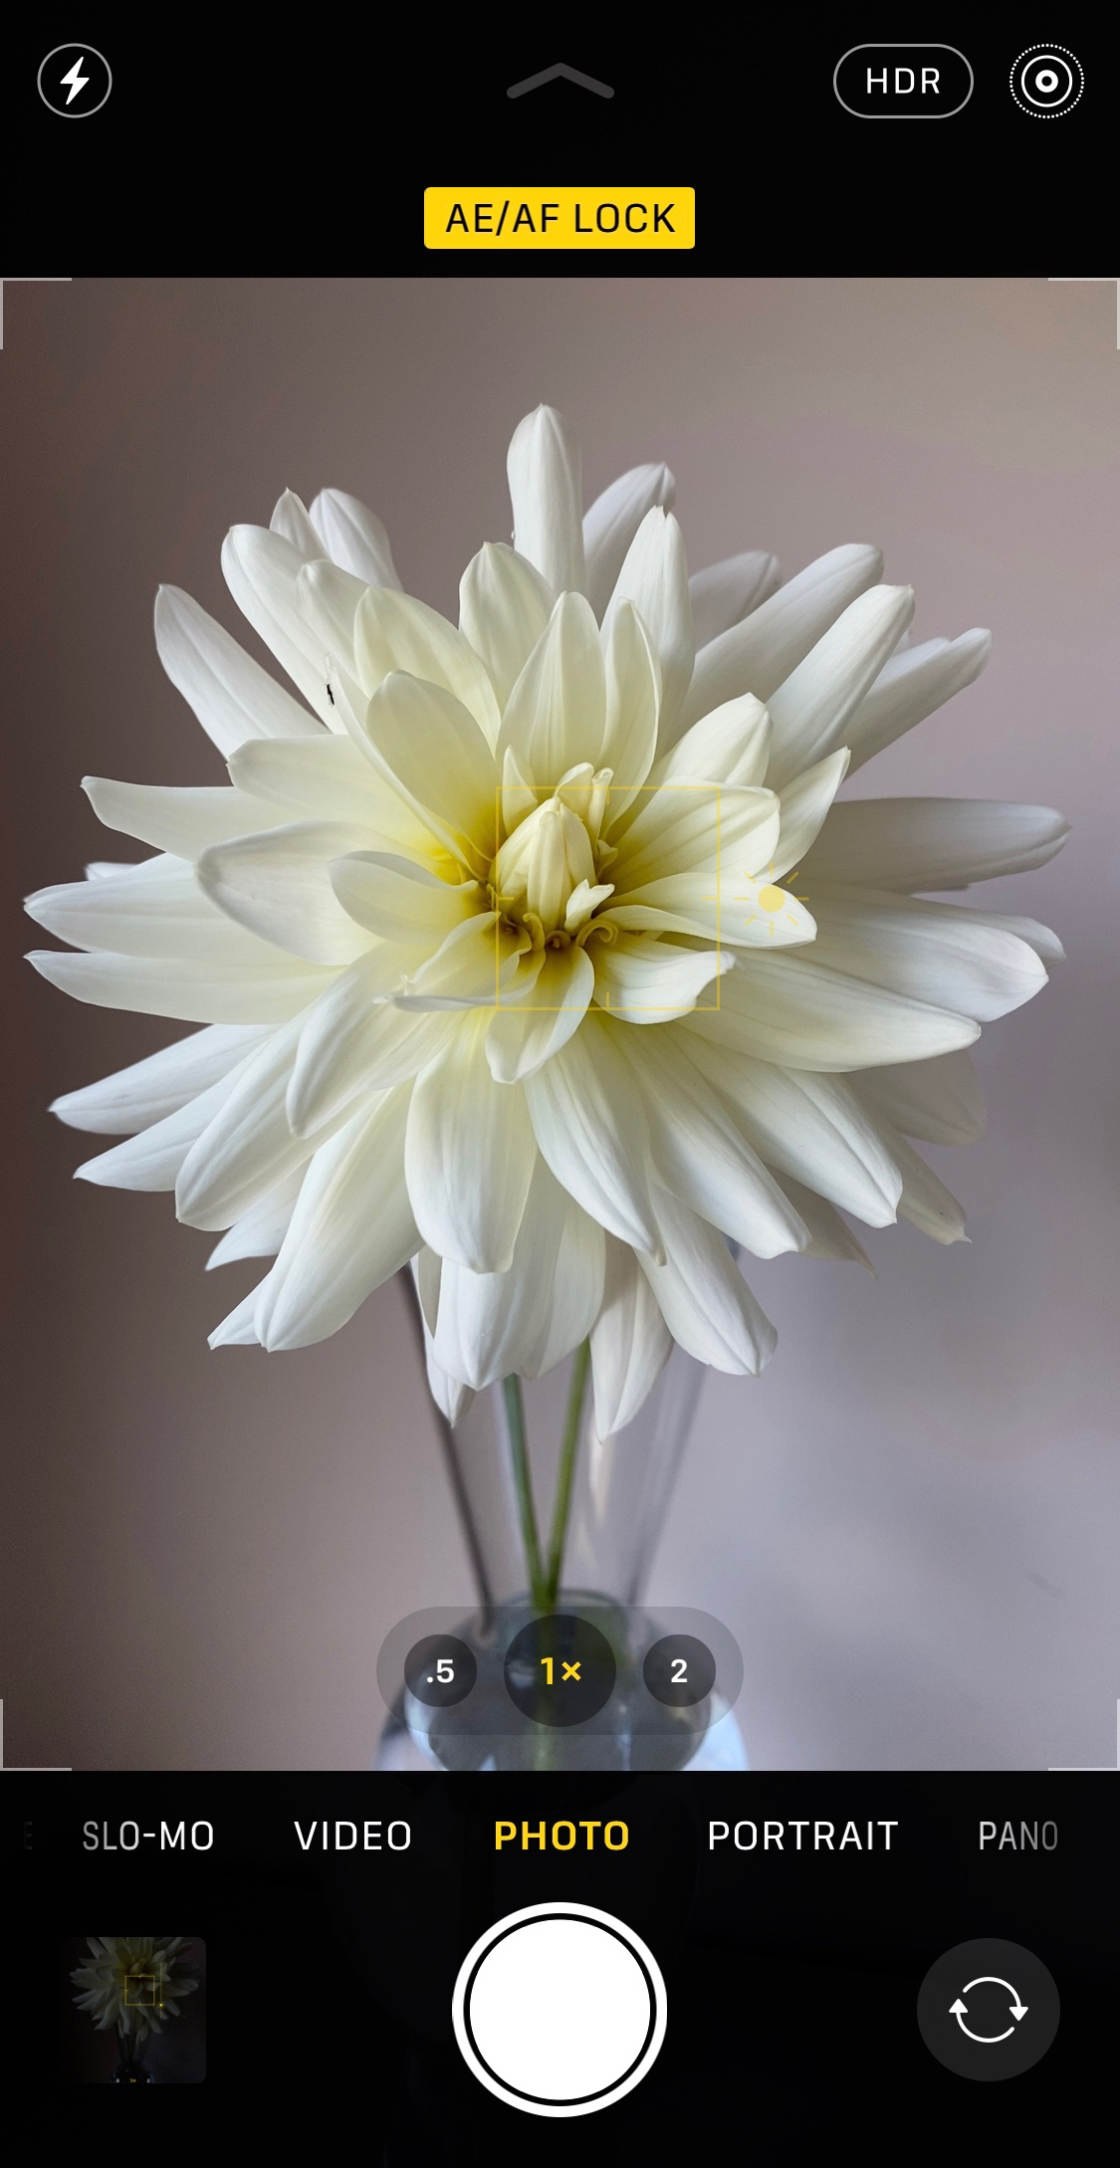
Then simply swipe down to reduce the exposure. You’ll see the sun icon on the exposure slider and the image will begin to appear darker as you swipe.
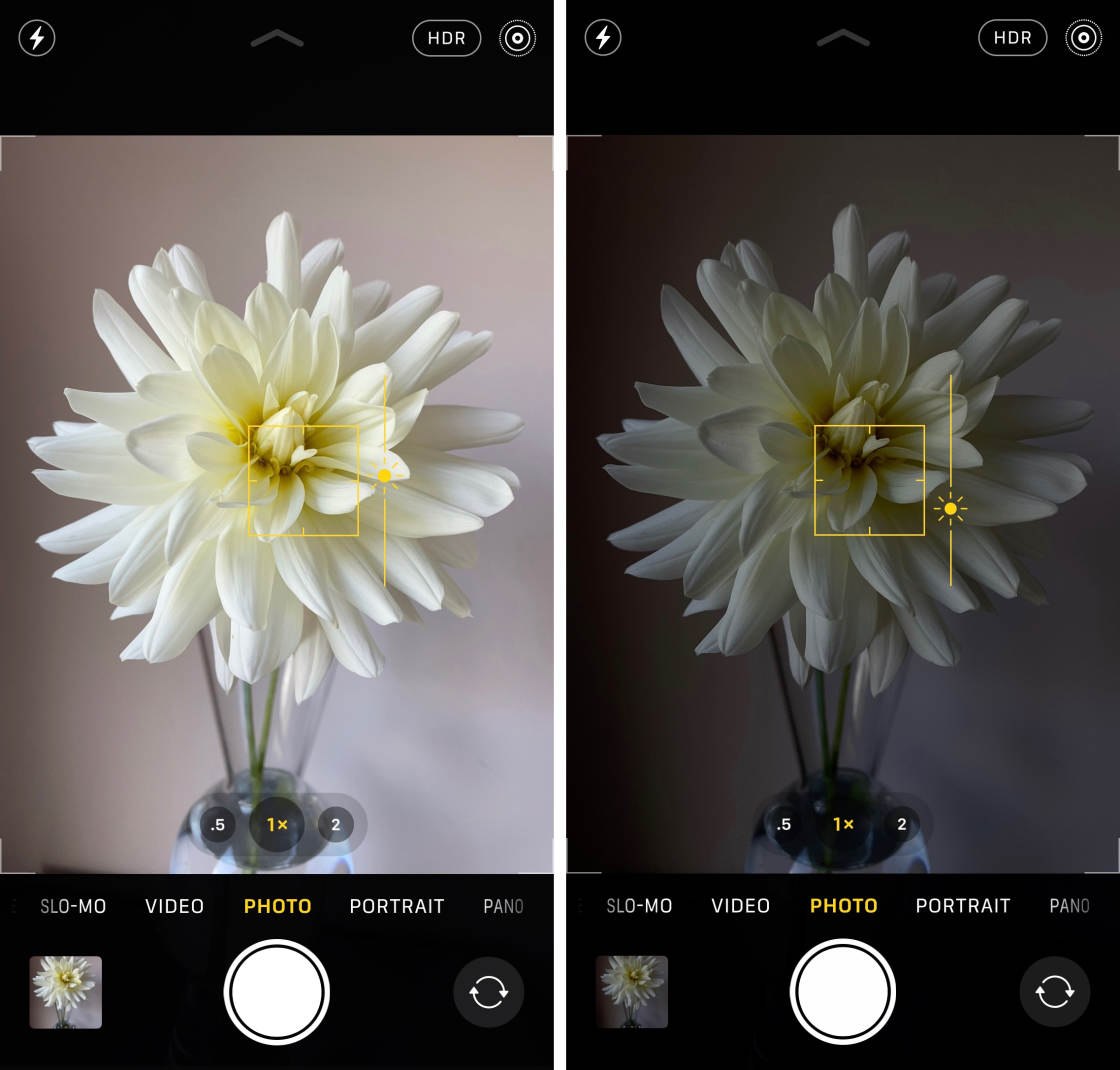
Focus and exposure is now locked. You can take as many photos as you like with these focus and exposure settings locked. (You can tap anywhere on the screen to unlock focus and exposure.)

It must be said that you should lower your expectations when shooting the moon with your iPhone.
The full moon will only take up a tiny portion of your photo. So it will appear extremely small. But, if it’s properly exposed, you should see differences in dark and light patches on the face of the moon when you zoom in on your photo.
The post How to Take Great Night Sky Photos On iPhone appeared first on iPhone Photography School.
About the author

By accepting you will be accessing a service provided by a third-party external to https://kendallcameraclub.org/