12 Mobile Photography Tips Every Photographer Should Know
Do you want to take stunning photos with your mobile phone? Mobile photography may seem daunting. But with a few simple tricks, you’ll be able to shoot the kind of photos you never thought possible! Read on to discover 12 mobile photography tips that will dramatically improve your photos.

Table Of Contents: Mobile Photography Tips
Click any title link below to go straight to that section of the article:
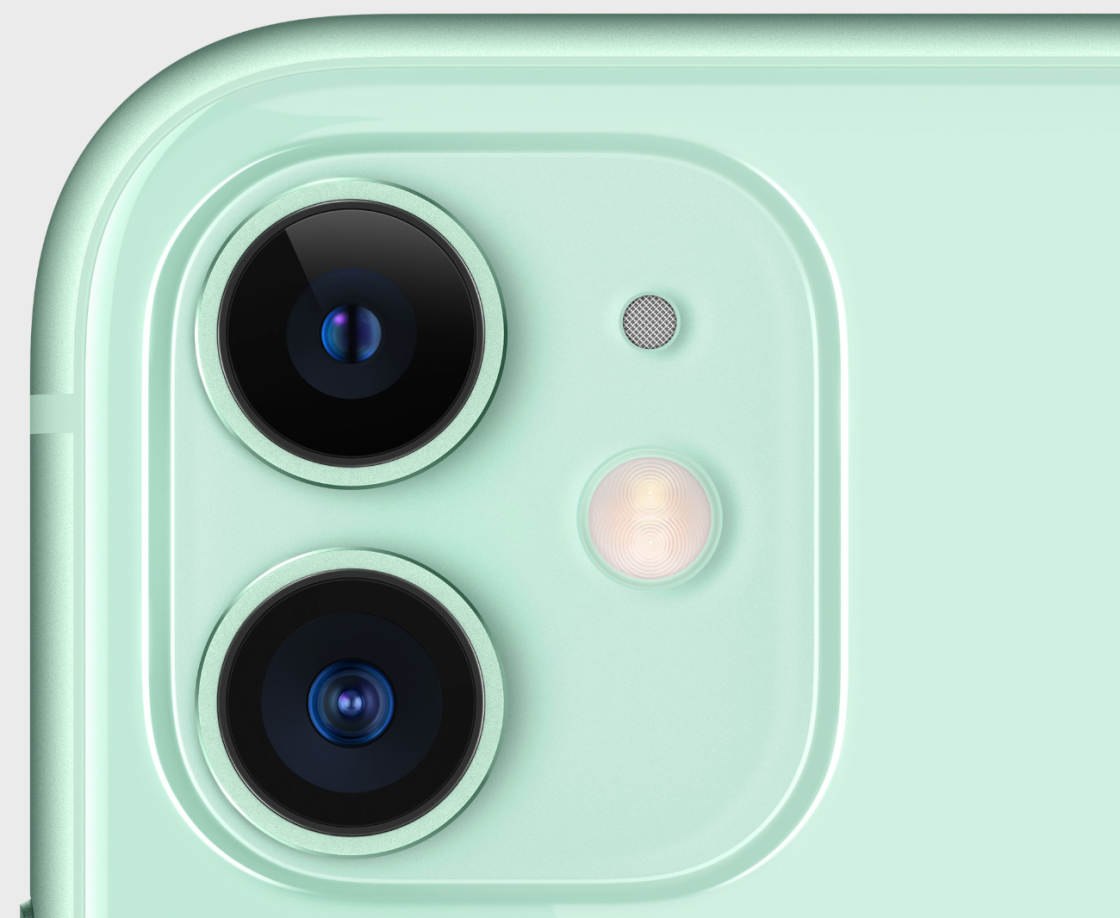
1. Clean The Lenses For Crystal Clear Photos
2. Set The Focus To Ensure Your Subject Is Always Sharp
3. Adjust Exposure For Perfect Brightness Levels
4. Use HDR For Evenly-Lit Photos With Amazing Detail
5. Shoot In Portrait Mode To Create Gorgeous Blurred Backgrounds
6. Activate Burst Mode For Incredible Action Shots
7. Switch Between iPhone Lenses To Zoom In Or Out
8. Keep Your Camera Steady For Sharp, Shake-Free Shots
9. Use The Rule Of Thirds To Compose Beautiful Mobile Photos
10. Use Leading Lines For Powerful Images With Incredible Depth
11. Experiment With Different Perspectives For More Unique Images
12. Simplify Your Compositions For The Most Striking Shots
1. Clean The Lenses For Crystal Clear Photos
Your mobile phone spends a lot of time in your hands, as well as your purse or pocket.
And as a result, the camera’s lenses can get covered in dirt, dust, and fingerprints.
A dirty lens will leave smudges, blurs, or dust spots on your photos.
And that won’t look good!
So here’s the first of our mobile photography tips:
If you want clear and sharp photos, clean your phone’s lenses!

Use a soft cloth (or even your t-shirt) to gently wipe the lens.
If you’ve been shooting at the beach or in dusty conditions, blow on the lens first. This will remove any sand or dust that may scratch the lens.

Cleaning your iPhone lenses might seem obvious. But most people don’t remember to do it.
So get into the habit of cleaning the lenses on your phone.
It will make a big difference to the clarity of your photos.
2. Set The Focus To Ensure Your Subject Is Always Sharp
Even if your lens is perfectly clean, sometimes your subject just doesn’t look sharp.
That’s because the camera’s autofocus doesn’t always focus where you want it to.
To ensure your subject is always in sharp focus, you’ll need to set the focus point manually.

So, how do you set iPhone camera focus?
It’s actually super-easy!

Simply compose your shot, then tap on the screen where you want to set focus.
(You’d normally want to set focus on your main subject.)
A yellow box will appear to indicate the focus point.
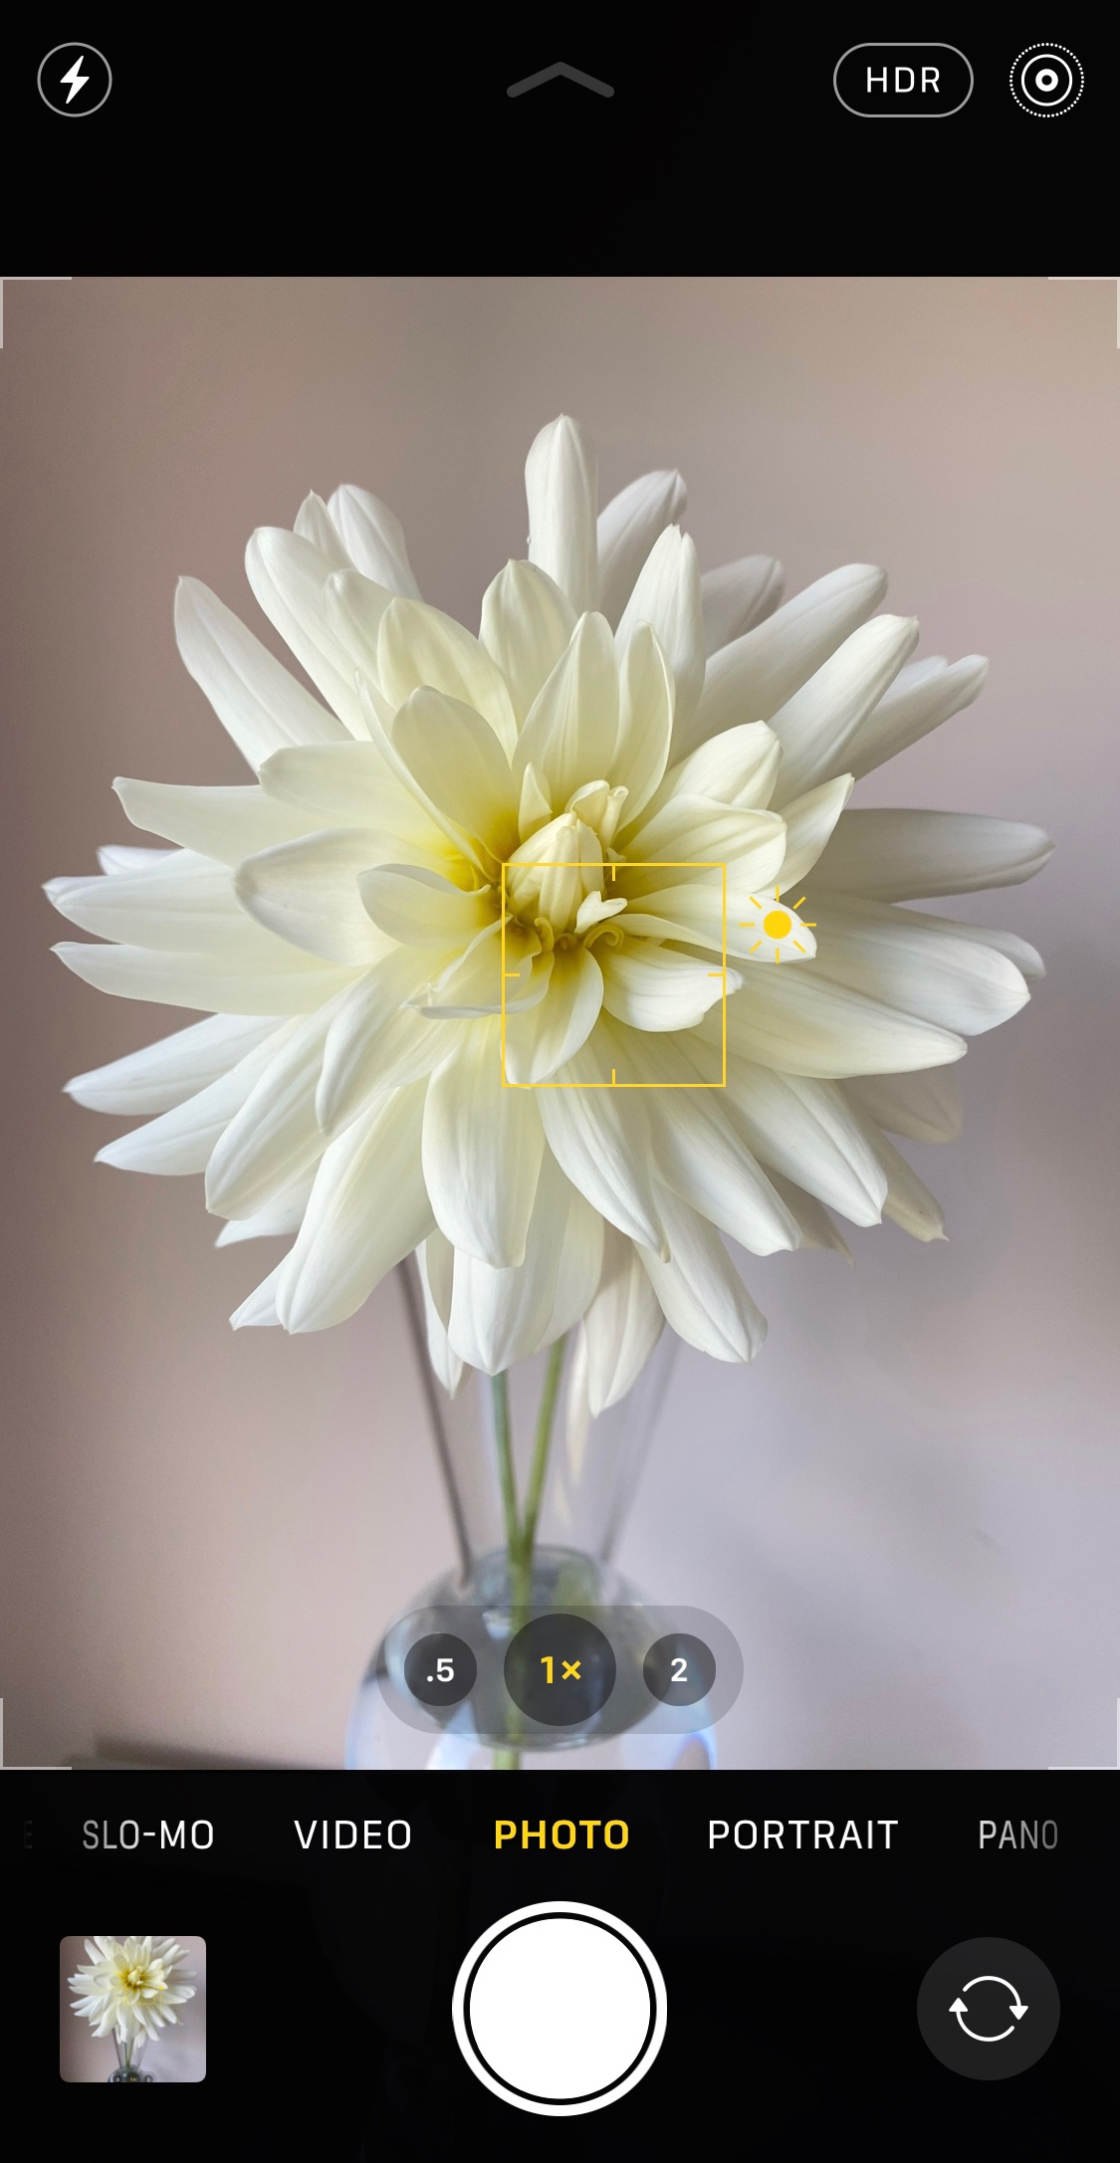
Now, just press the shutter button to take your photo.
The area that you set focus on will appear crisp and sharp.
Anything in front of or behind the focus point may appear out of focus.

Setting the focus is one of the best mobile photography tips you can learn.
It’s so simple to set focus. And it results in beautifully sharp photos that will stun the viewer!
3. Adjust Exposure For Perfect Brightness Levels
Do your photos often turn out too bright (over-exposed) or too dark (under-exposed)?

It doesn’t have to be this way!
So, how do you ensure your photos have the perfect level of brightness?

You simply adjust the exposure (brightness) before you take a picture.
Adjusting exposure in the iPhone Camera app is easy.
Start by tapping to set focus. Then swipe up or down to adjust exposure.
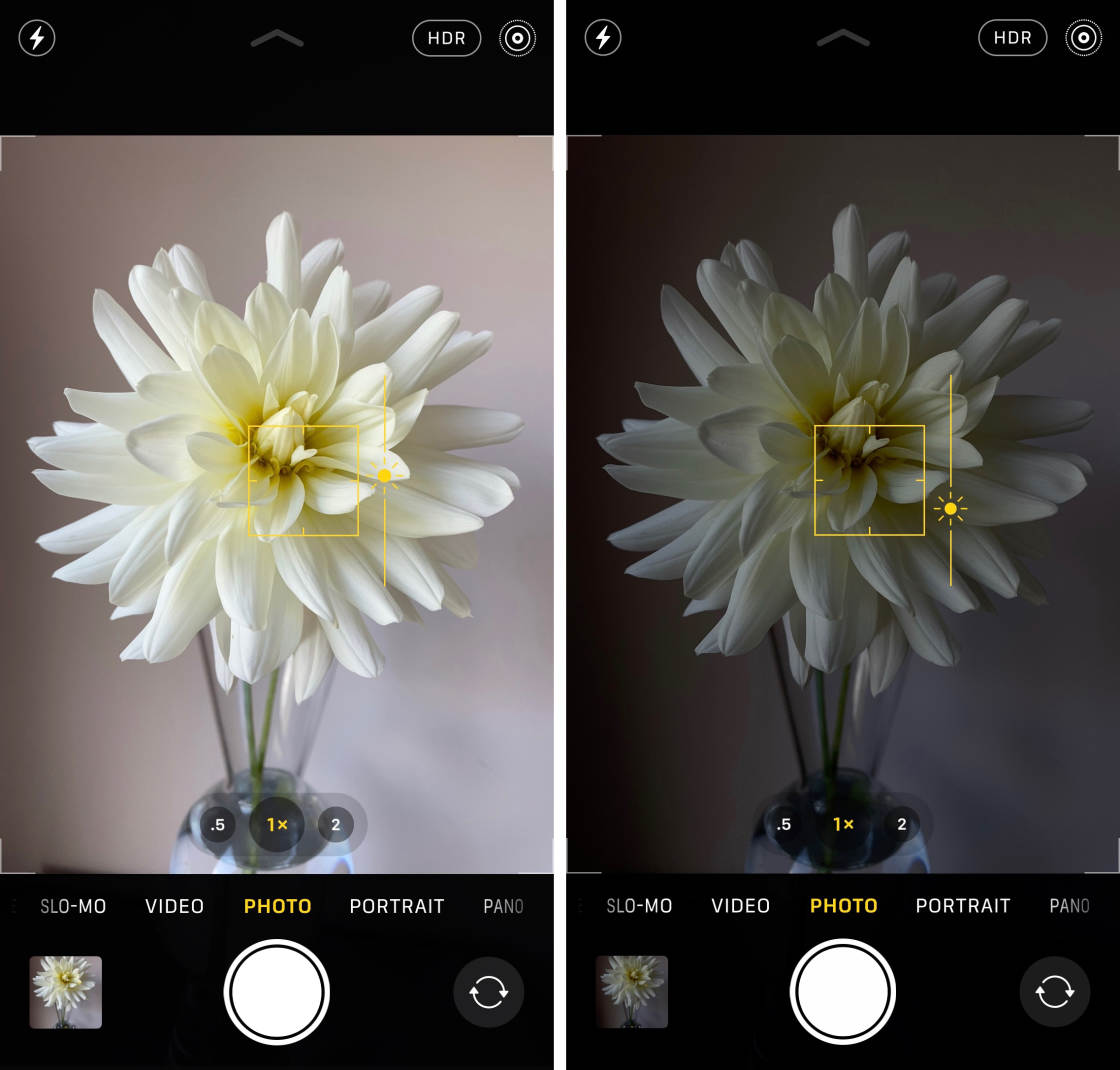
Swipe up to make the image brighter. Or swipe down to make it darker.
Try to ensure the most important parts of the scene are exposed correctly.
When they’re correctly exposed, they’ll have plenty of color and detail.

Of course, sometimes you might want to deliberately under or over-expose your photo.
For instance, you’ll need to reduce exposure to create a silhouette photo where your subject appears completely black.
Or you might want to increase exposure to create a photo with bright, clean whites.

As you can see, the iPhone’s exposure feature offers amazing control over the brightness of your photos.
However, if you’re photographing a high-contrast scene, it can be difficult to achieve a good exposure.
Luckily, the iPhone camera offers a great solution!
Read on to discover one of the best mobile photography tips for capturing well-exposed photos of high-contrast scenes.
4. Use HDR For Evenly-Lit Photos With Amazing Detail
Taking photos of high-contrast scenes can be a problem when it comes to exposure.
A high-contrast scene has both dark and bright areas – such as a landscape with a bright sky and dark foreground.

When you take a photo, the camera struggles to capture detail in both the shadows (dark areas) and the highlights (bright areas).
You’ll usually end up with one of two problems:
Either the highlights will be correctly exposed, but the shadows will appear too dark. Or the shadows will be correctly exposed, but the highlights will appear too bright.

Fortunately, the iPhone camera has an amazing feature that helps you create more evenly-lit photos.
It’s called HDR.
HDR stands for High Dynamic Range. And it allows you to capture detail in both the shadows and the highlights.

So, how do you shoot HDR photos with your iPhone?
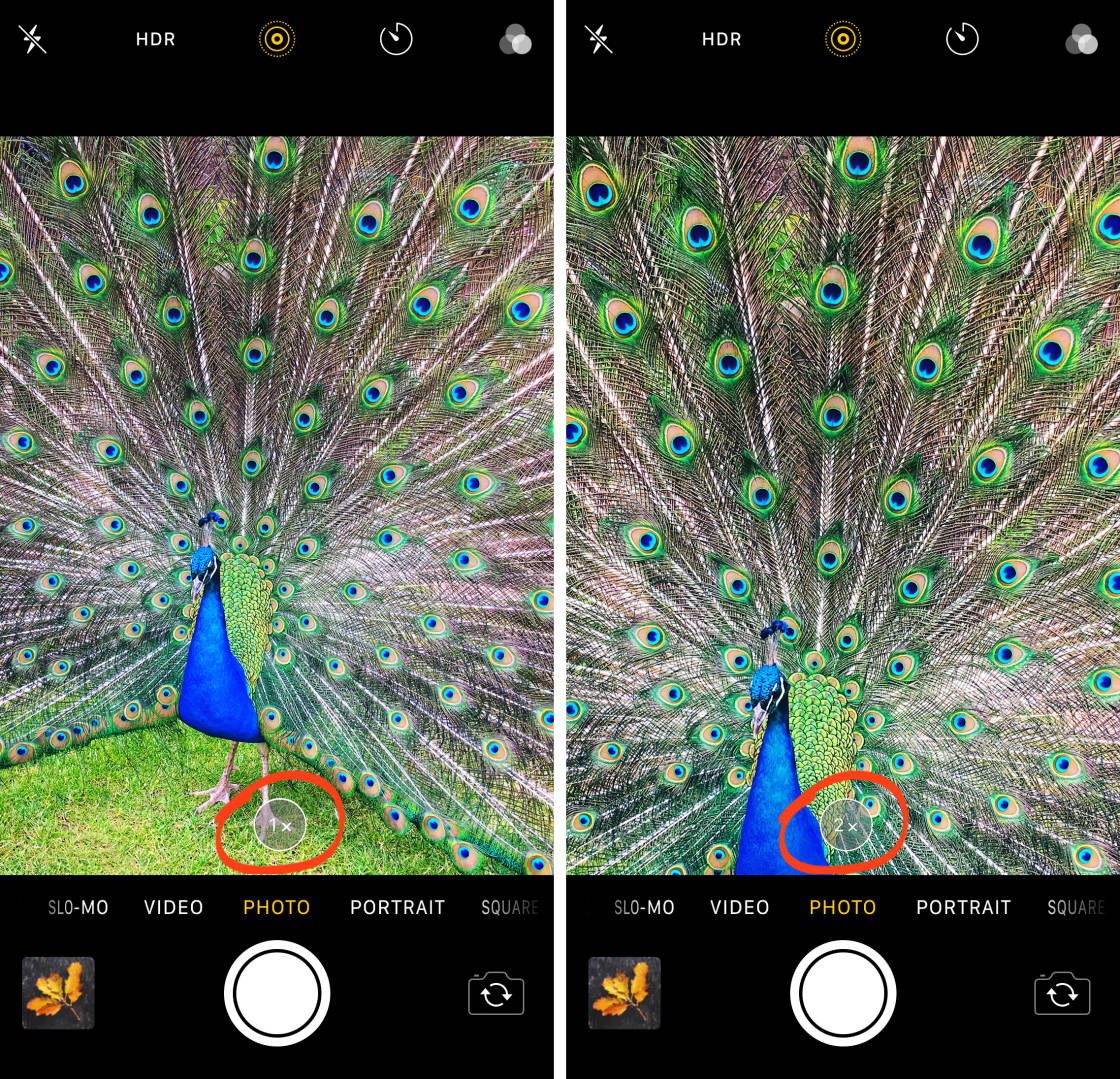
First, you need to check your HDR settings. Open the Settings app from the Home screen, and select Camera.
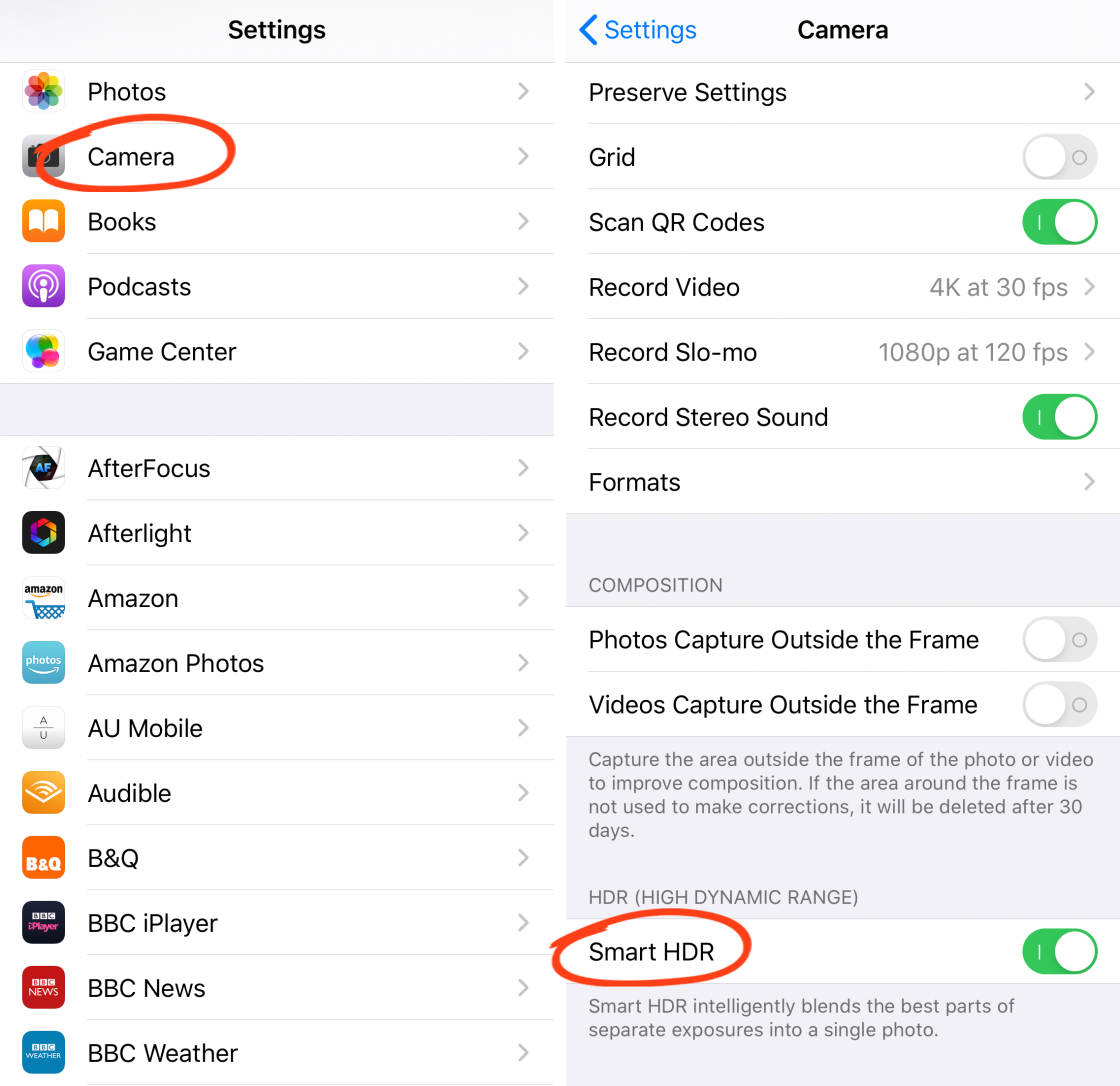
If you want your iPhone camera to automatically shoot HDR photos whenever it needs to, ensure Smart HDR (Auto HDR on older iPhones) is switched on. When you shoot, you won’t need to think about using HDR – your camera will do the work for you!
If you’d prefer to control the HDR setting manually in the Camera app, switch Smart HDR off in Settings. With Smart HDR switched off, you’ll see an HDR icon at the top of the Camera app. Use this icon to turn HDR on whenever you want to shoot HDR photos.
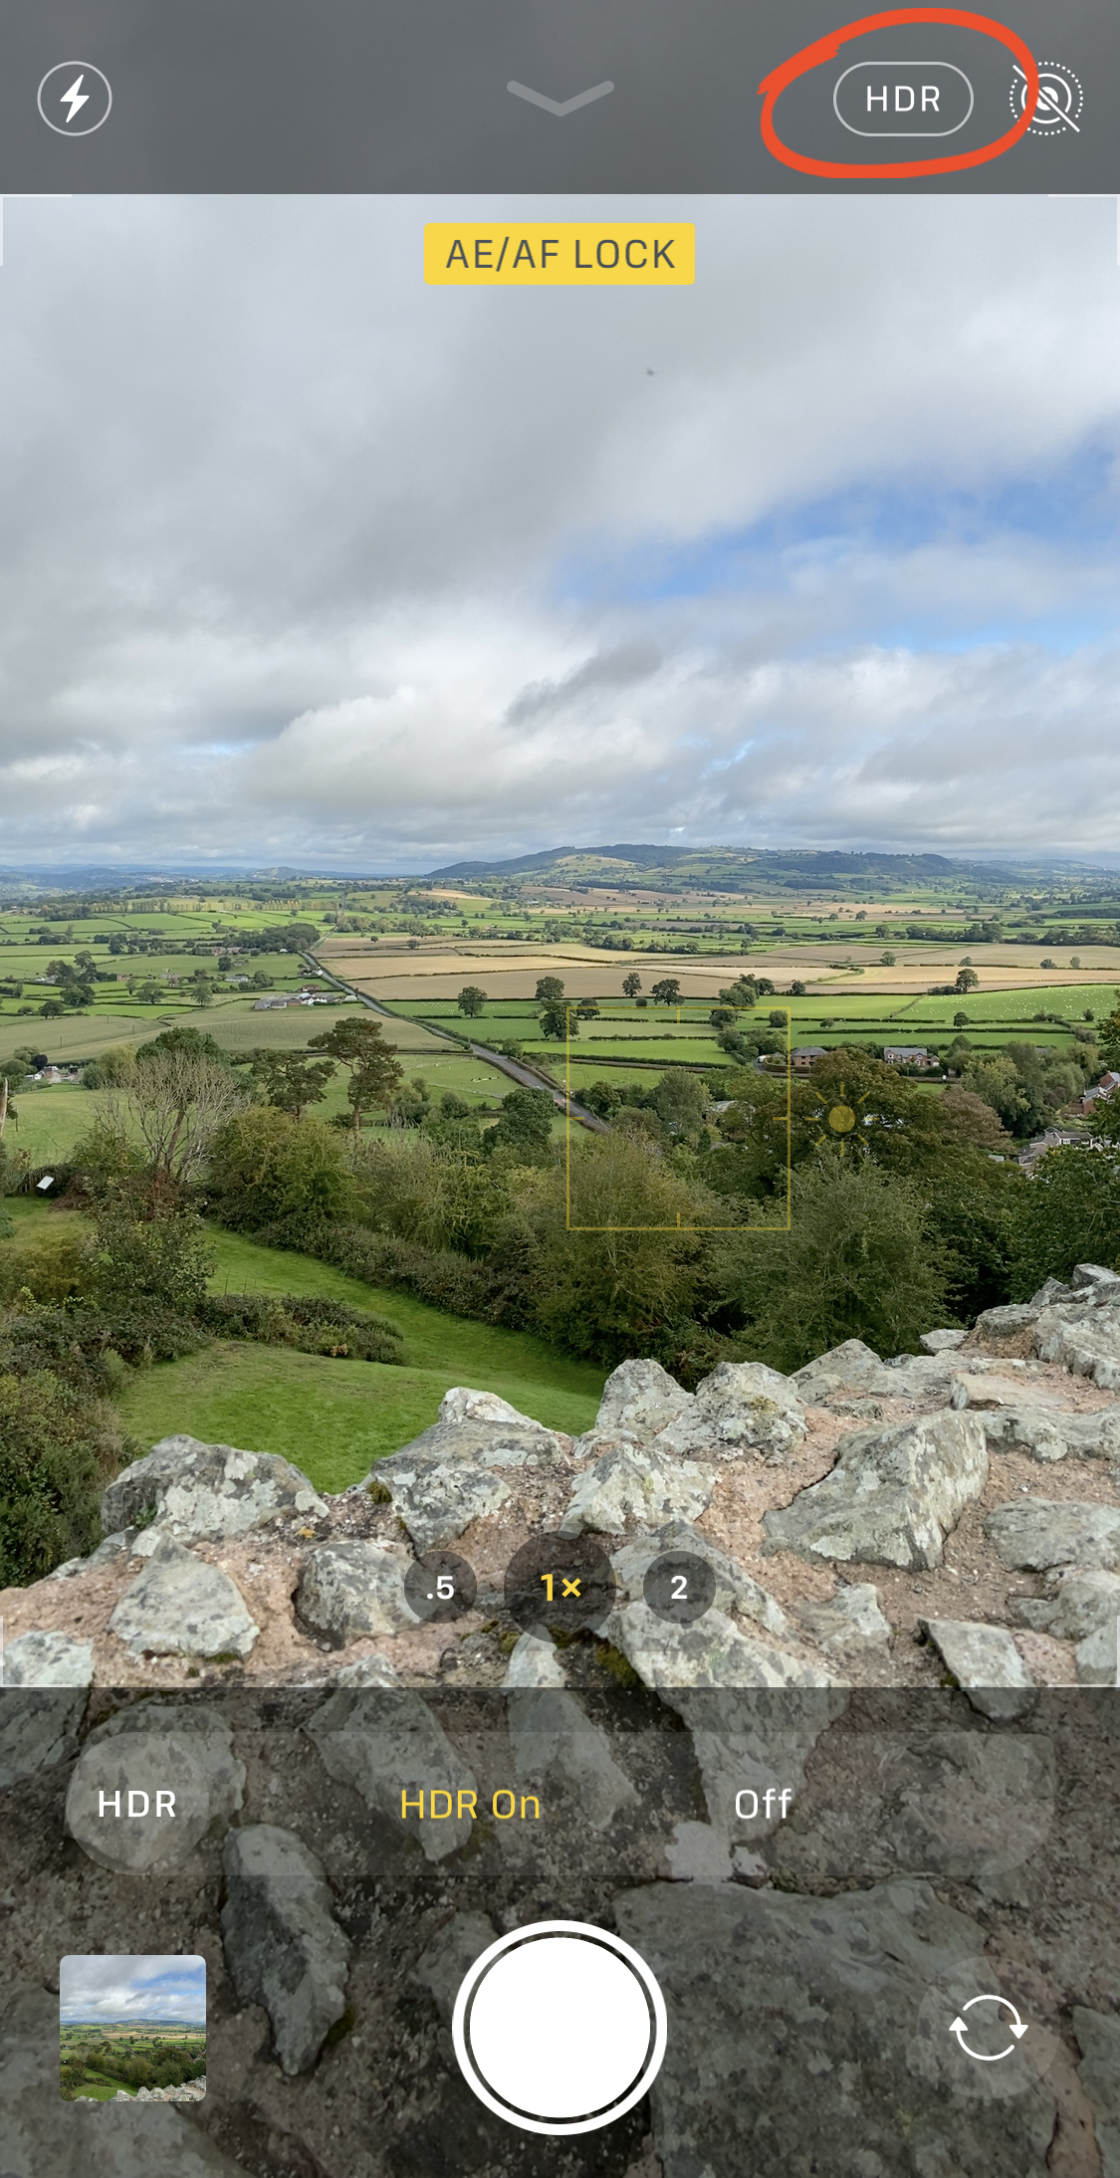
With HDR on, you can shoot beautiful photos with perfect exposure throughout the entire scene.

5. Shoot In Portrait Mode To Create Gorgeous Blurred Backgrounds
Do you want to shoot professional-looking photos with dreamy, blurred backgrounds?

You might think this is impossible with mobile phone photography.
But you don’t need a professional DSLR camera to blur the background in your photos.
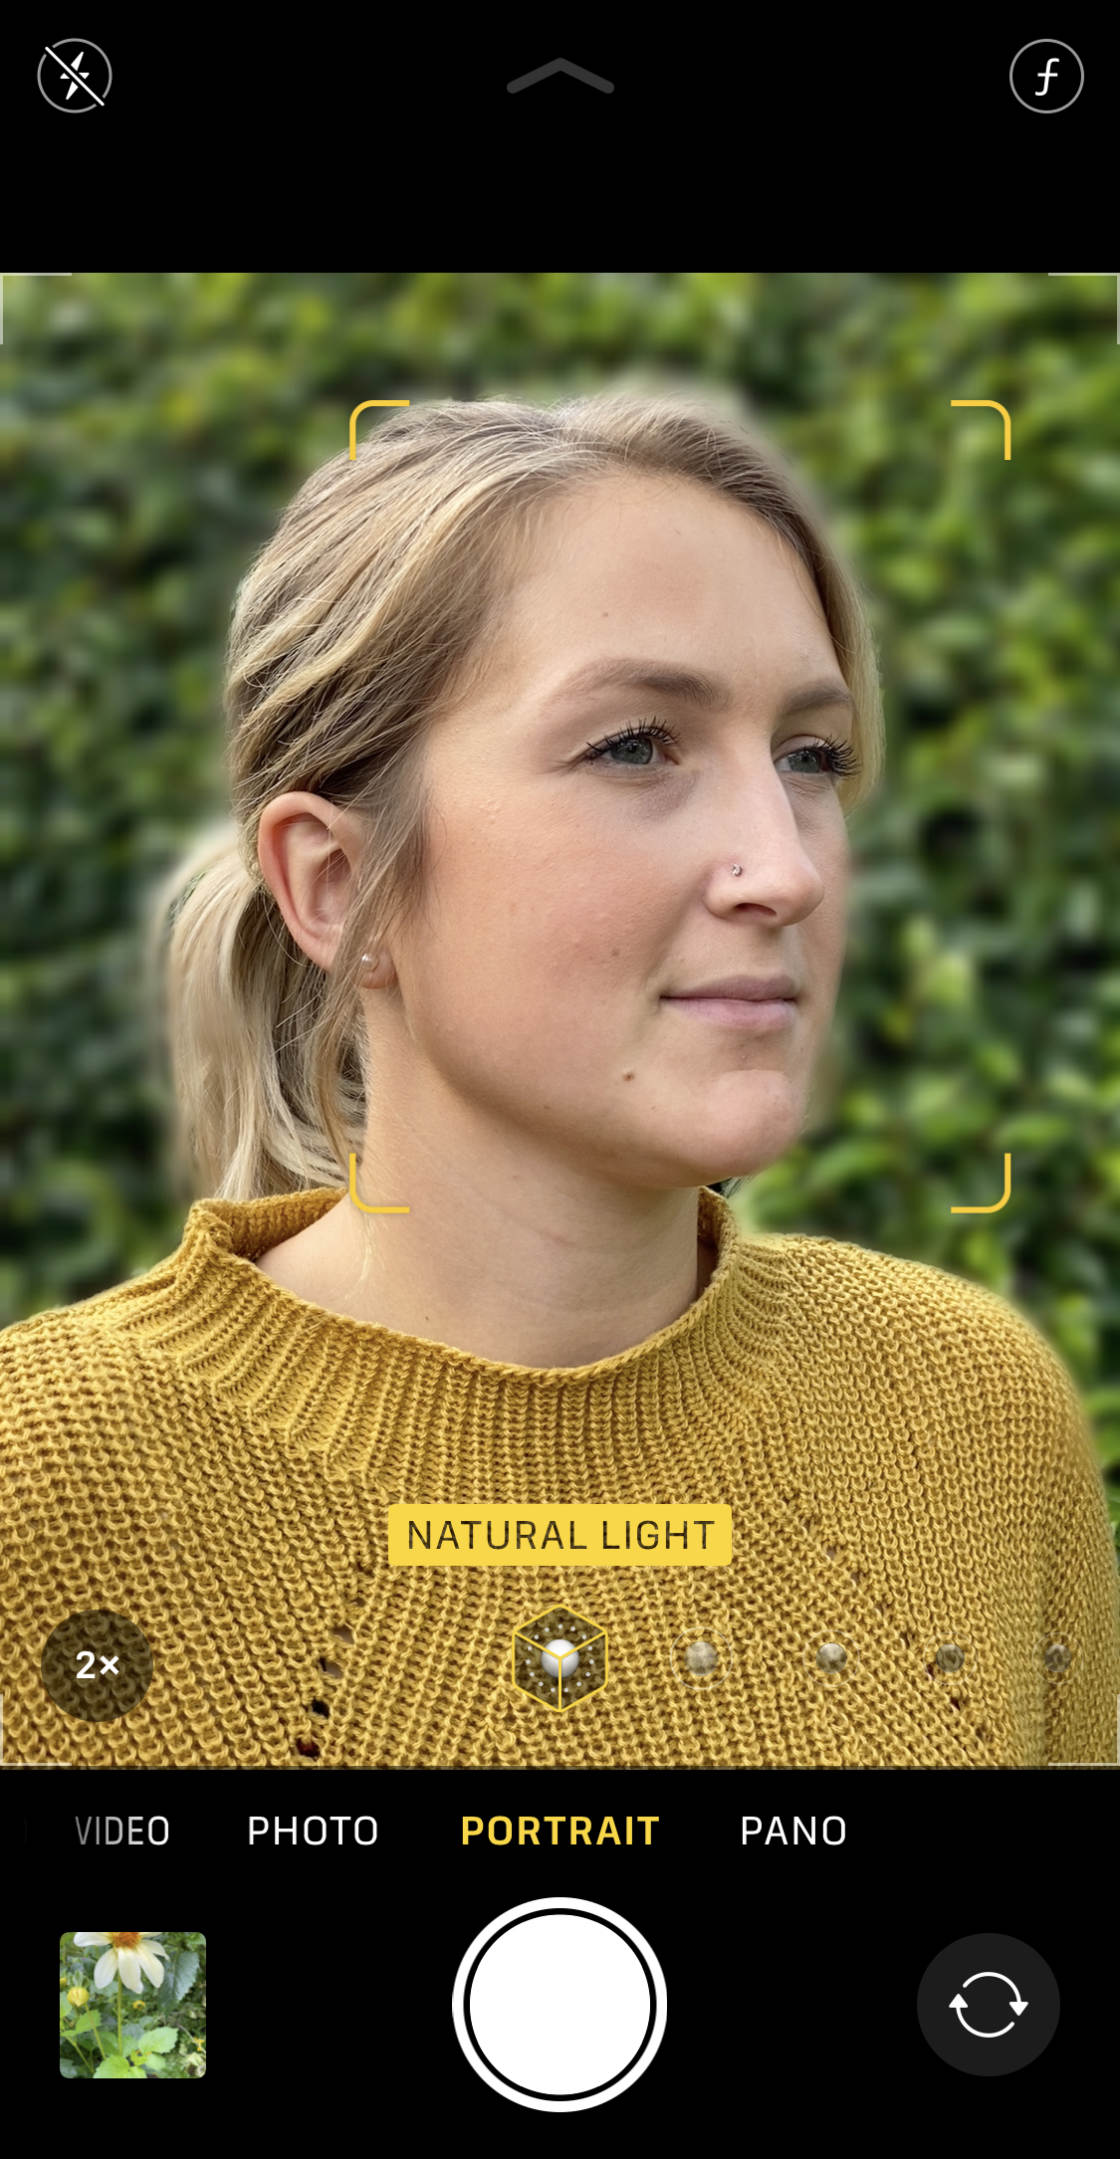
If your iPhone camera has Portrait mode, you can easily blur the background when taking pictures.
Portrait mode is available in the built-in Camera app on the following iPhones:
iPhone 11, iPhone 11 Pro, iPhone 11 Pro Max, iPhone XS, iPhone XS Max, iPhone XR, iPhone X, iPhone 8 Plus, and iPhone 7 Plus.
Portrait mode uses depth-effect software to keep your foreground subject sharp while blurring the background.

So, how do you use Portrait mode?
It’s simple!
In the iPhone Camera app, select the Portrait shooting mode at the bottom of the screen.
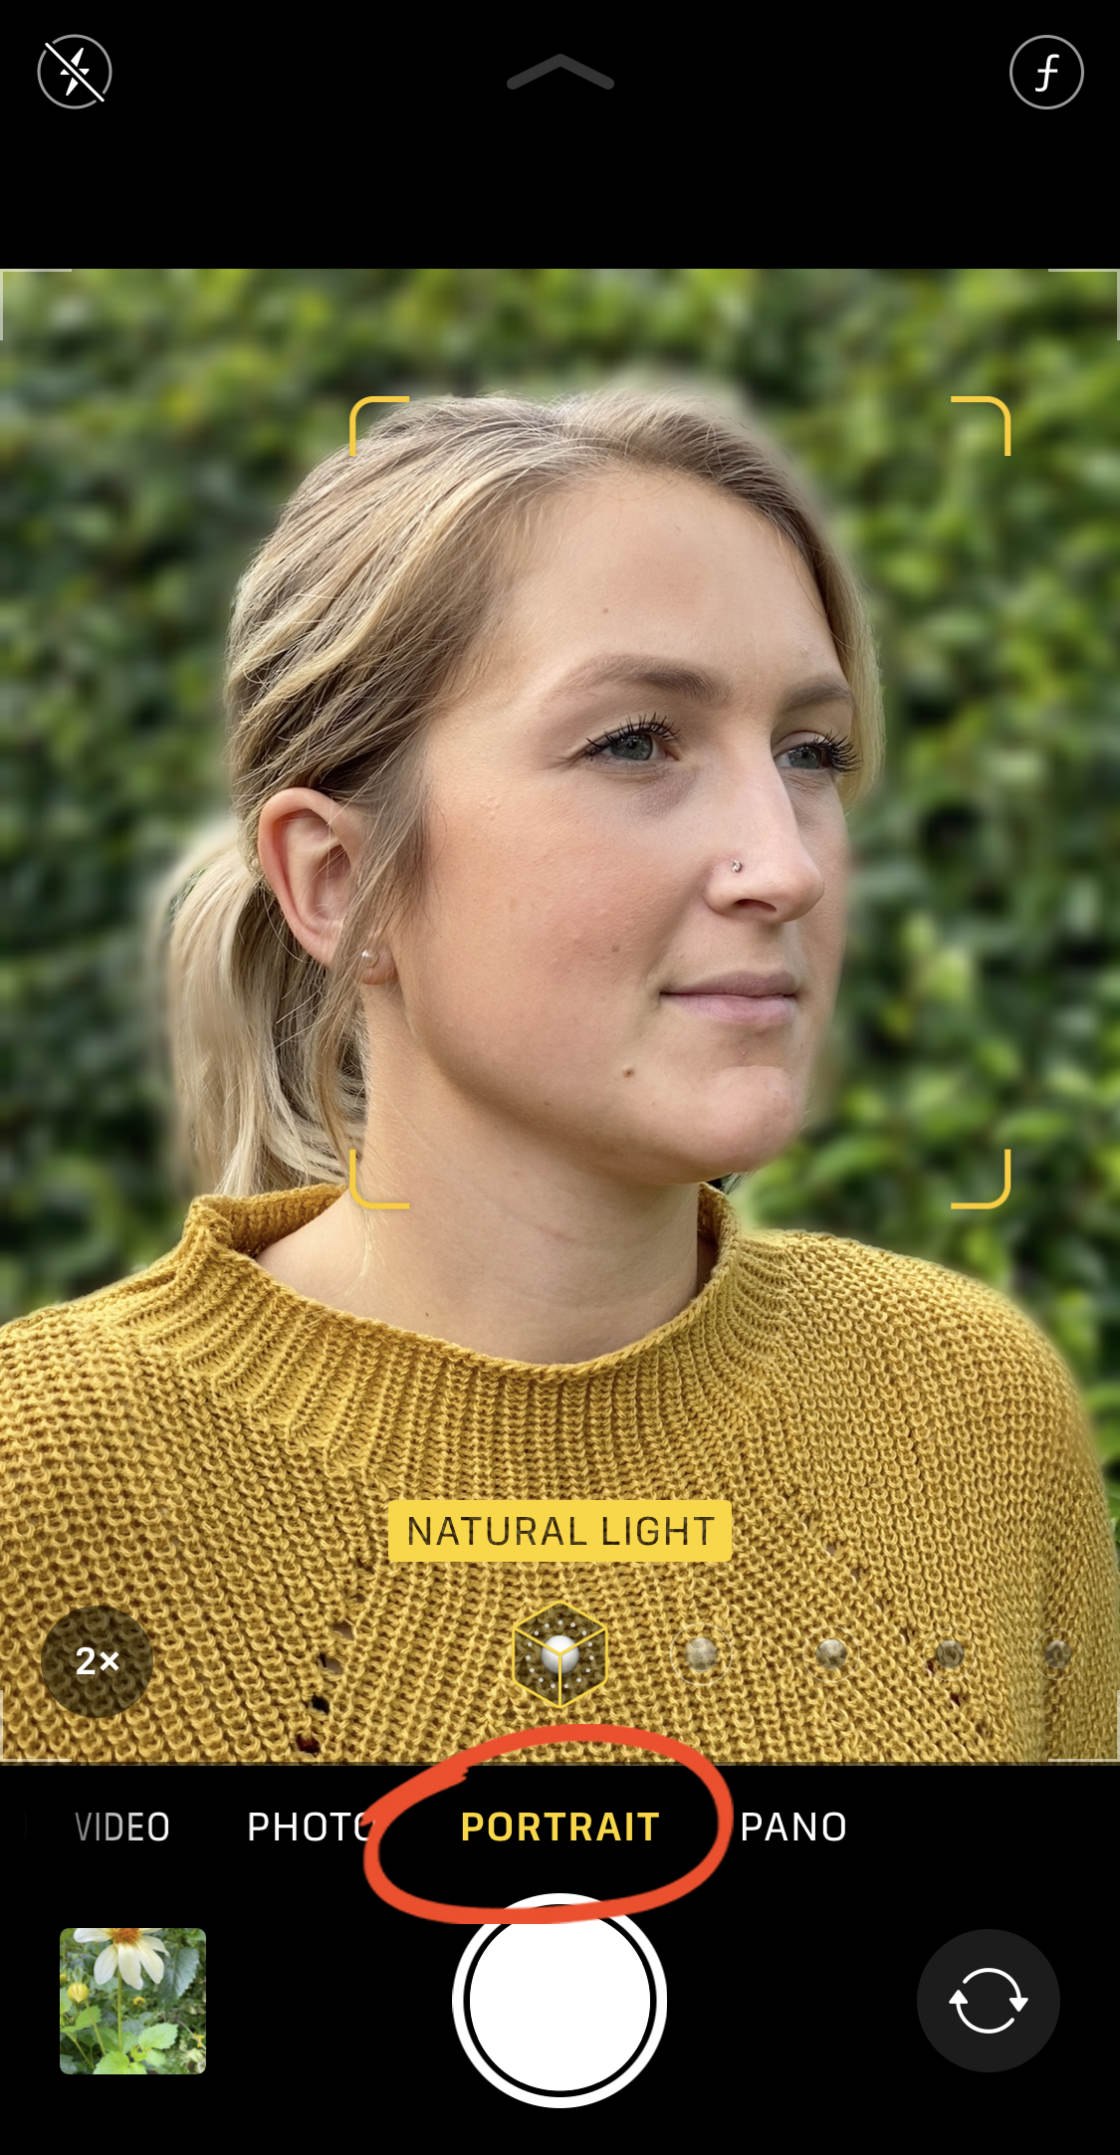
Compose your shot, making sure your subject is between two and eight feet away. (The depth-effect won’t work if your subject is too close or too far away.)
When you see the words Natural Light in yellow, you’re ready to take a shot.
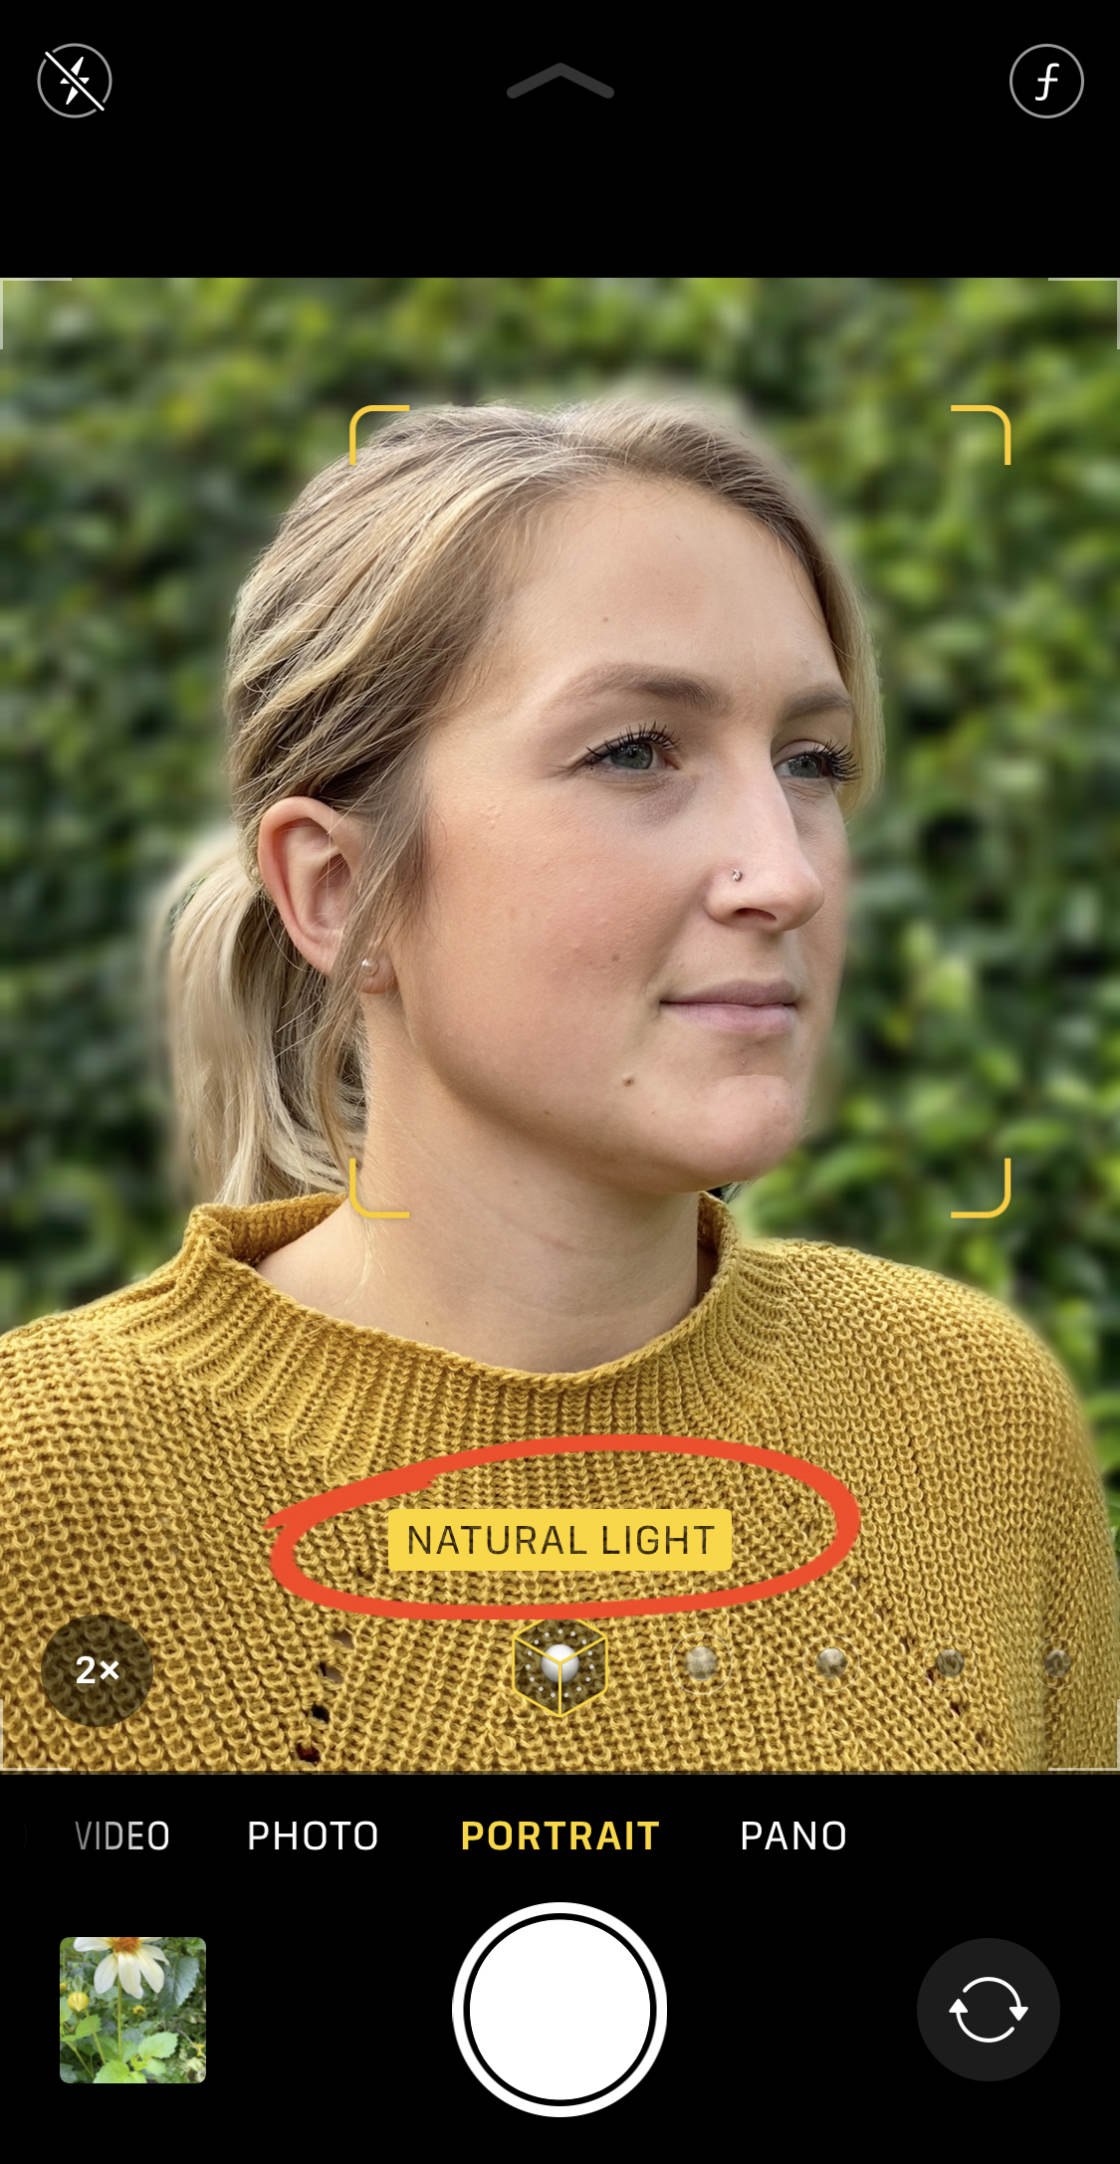
Press the shutter button to take a stunning photo with a beautifully blurred background!

Sometimes, you might not like the blur effect in a photo. But that’s not a problem!
You can easily remove the blur and revert to the regular version of the image.
Simply open your portrait photo in the Photos app, then tap Edit.
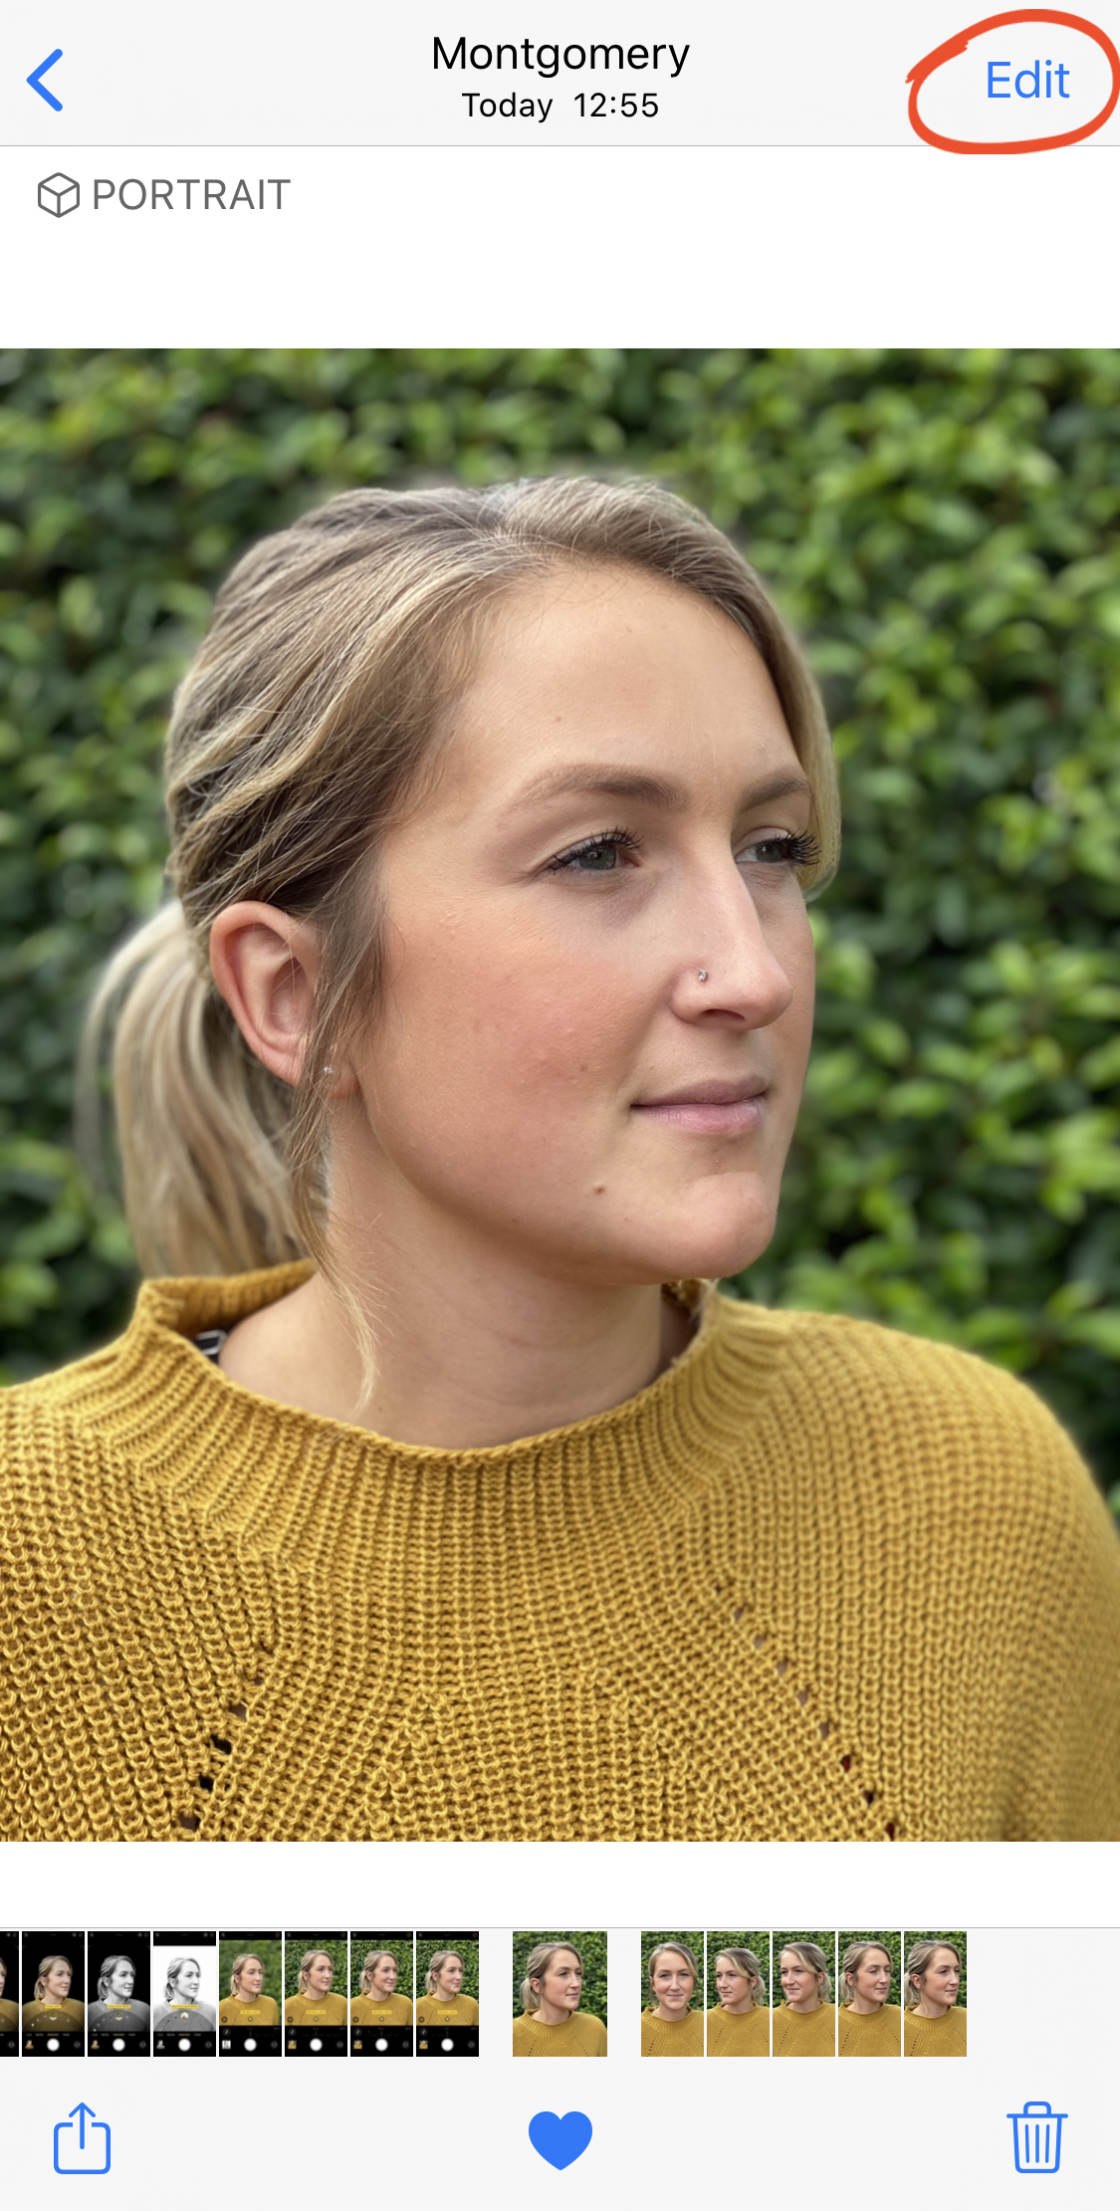
Tap the yellow Portrait option at the top of the screen to remove the blur effect from your photo. You can turn the blur back on at any time by tapping Portrait again.
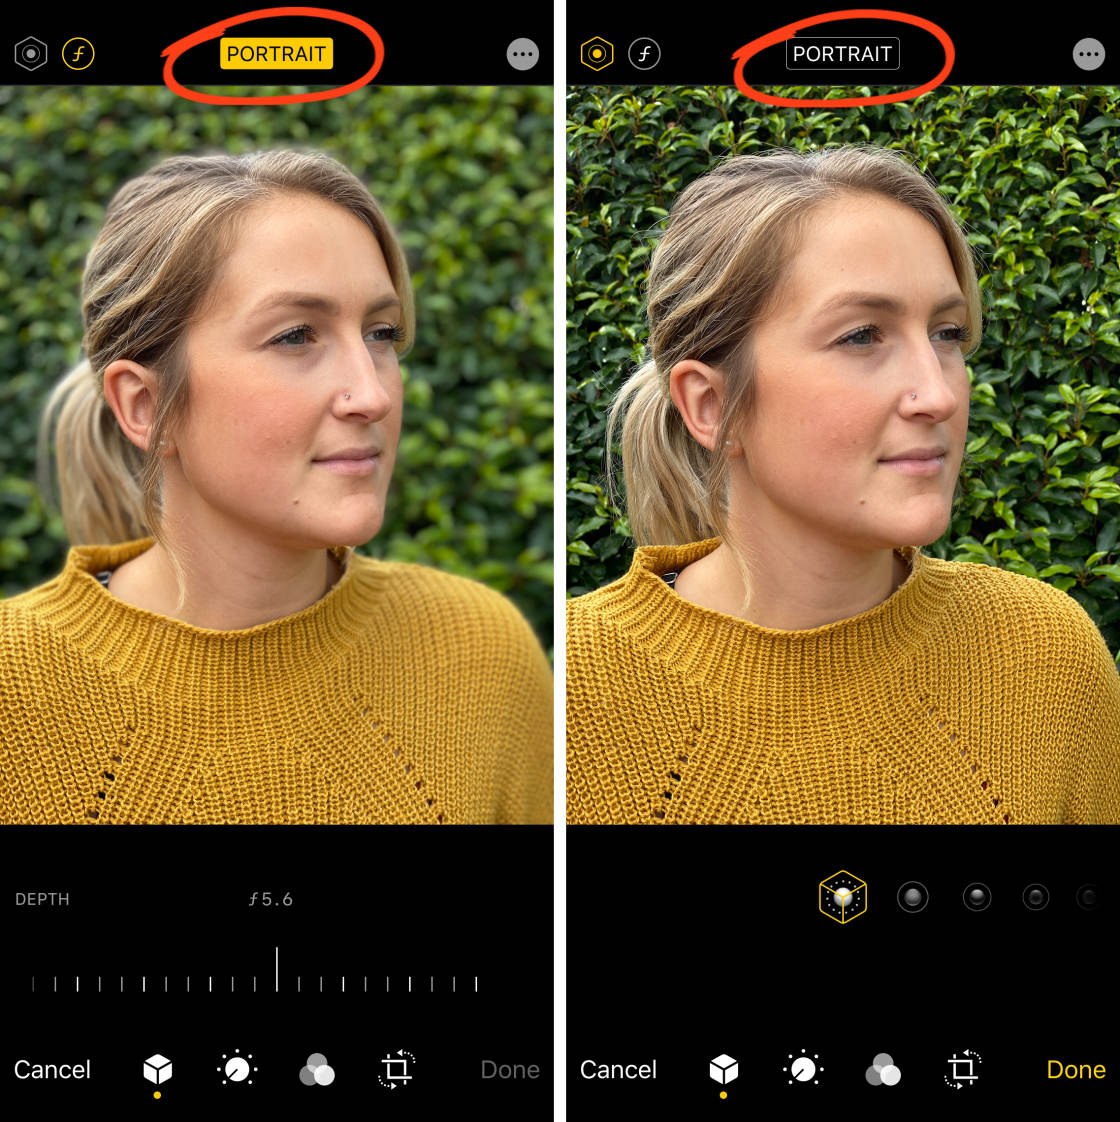
If you have the iPhone 11, 11 Pro, 11 Pro Max, XS, XS Max, or XR, Portrait mode also has a feature called Depth-control.
Depth-control allows you to adjust the strength of the background blur… after taking the photo.
To adjust the background blur, open your photo in the Photos app, then tap Edit.
If you have one of the iPhone 11 models, tap the f-number icon at the top left of the screen. (On older iPhones, you don’t need to do this.)

You’ll see the Depth slider beneath your image. Drag the slider left or right to make the blur stronger or weaker.
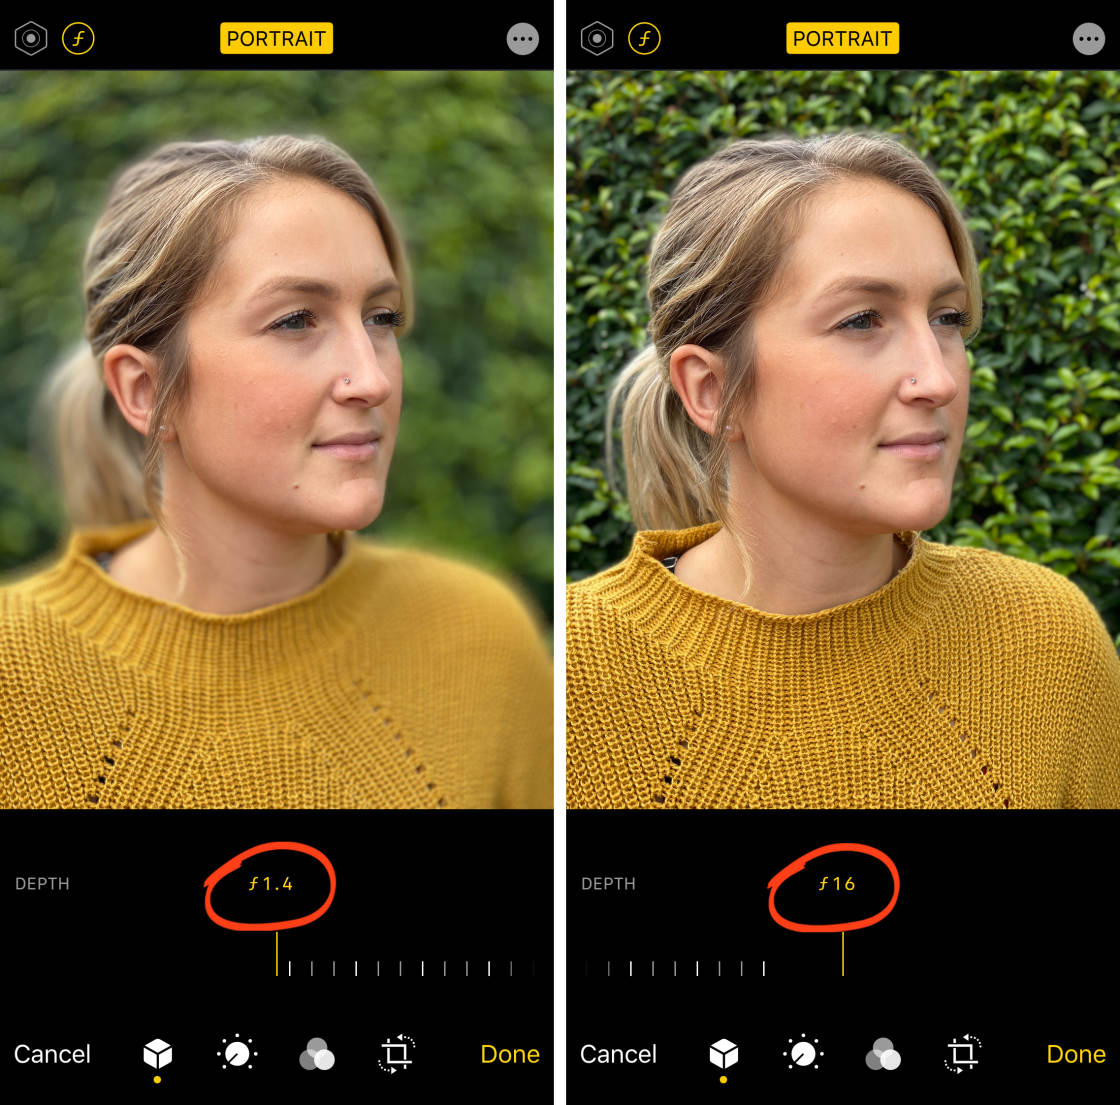
When you’ve finished editing your Portrait mode photo, tap Done to save the changes.
6. Activate Burst Mode For Incredible Action Shots
Do you find it hard to capture great action photos of moving subjects?
Do you often miss the perfect shot because you don’t press the shutter button at exactly the right moment?

This is a common problem when shooting subjects that are moving.
But the iPhone has a hidden camera feature that helps you shoot amazing action photos.
It’s called burst mode!

Once you discover burst mode, you’ll be able to capture perfect action shots every time!
So what is burst mode? And how do you use it?
If you have one of the iPhone 11 cameras, activate burst mode by sliding the shutter button to the left. The camera will keep taking photos in quick succession until you release your finger.
If you have iPhone XS or older, just hold down the shutter button to activate burst mode.

Within the burst of images that you capture, you should have at least one photo with your subject in the perfect position or pose.

To avoid filling up your iPhone, you can keep the best images from the burst and delete the rest.
To select the photos you want to keep, open the Photos app. Find your burst and tap to open it.
Tap Select at the bottom of the screen. Scroll through the images and select the ones you like. Tap Done, then choose to keep only the photos you selected.
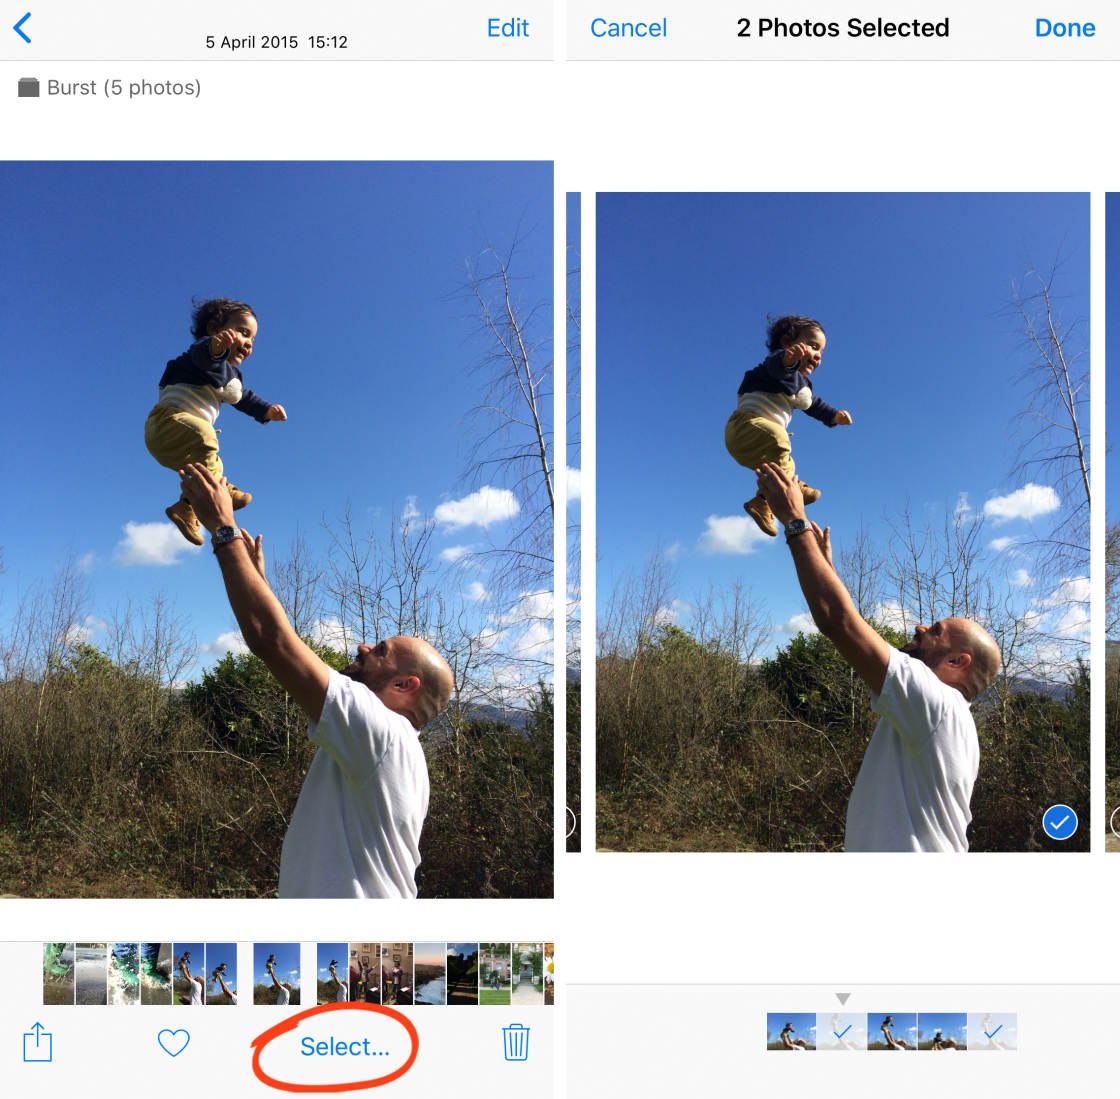
Burst mode is such an easy camera feature to use. And it will instantly improve your chances of shooting stunning action photos.
So ensure you use it whenever there’s movement or unpredictability in the scene.

Burst mode is perfect for photographing children and animals. It’s also great for street photography and capturing people on the move.
You can also use it to capture stunning water splash images.

Burst mode really will take your cell phone photography to the next level!
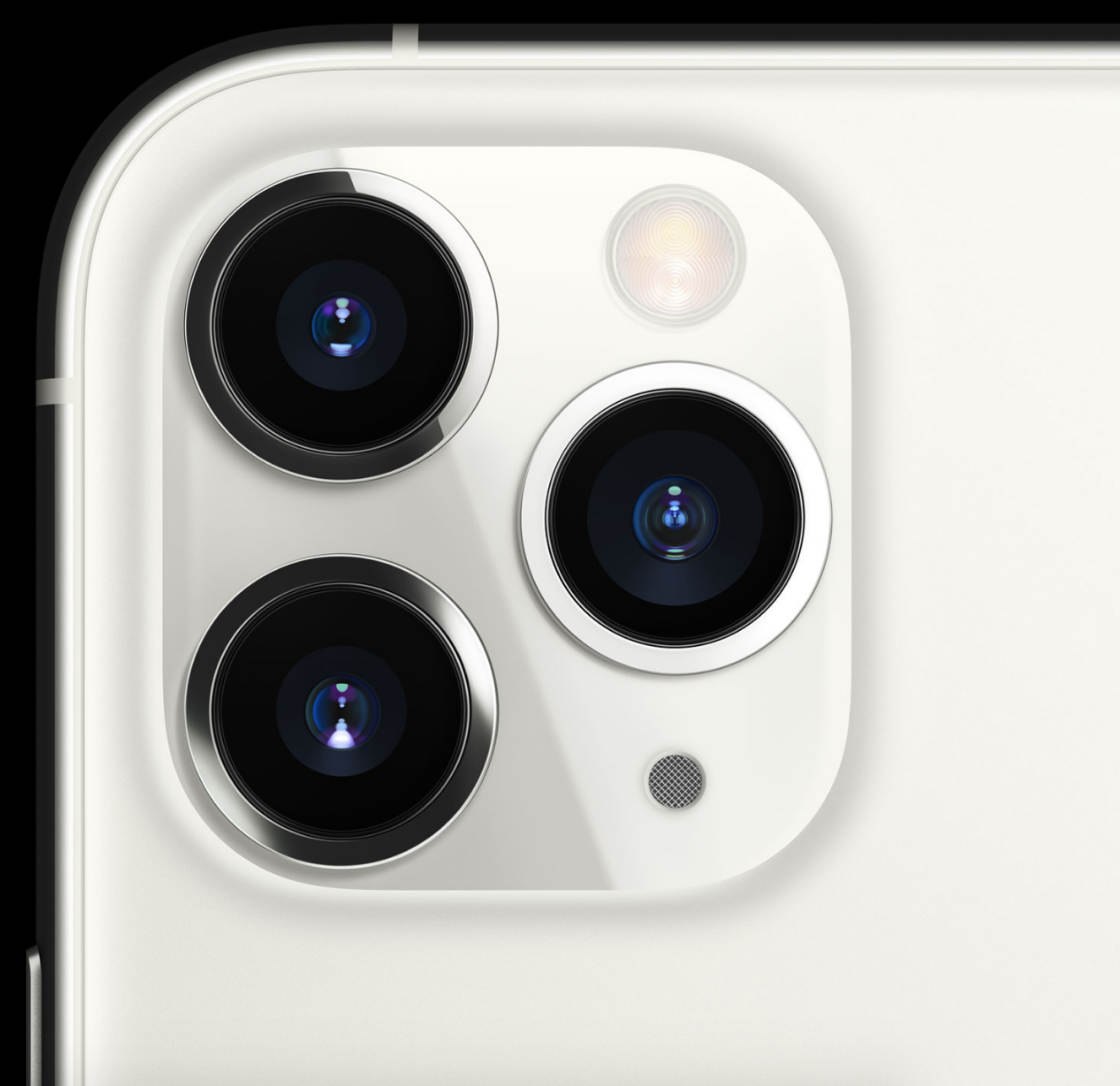
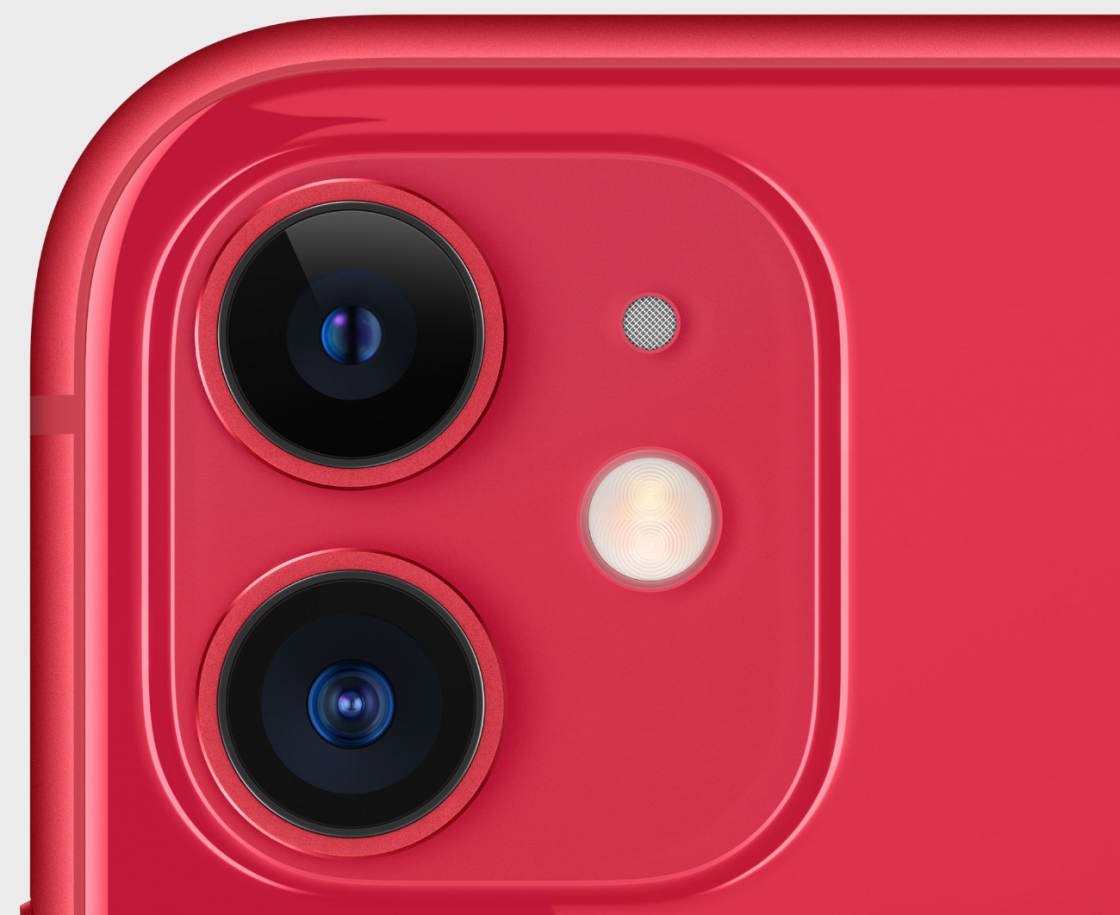
7. Switch Between iPhone Lenses To Zoom In Or Out
Do you have an iPhone with a dual-lens or triple-lens camera?

If so, you can easily zoom in and out by switching between the iPhone camera lenses.
Zooming in allows you to capture a closer view of the scene. And zooming out lets you capture a wider angle of view.
The lenses that you have will depend on which iPhone model you own.
The iPhone 11 Pro and iPhone 11 Pro Max have three lenses: Wide, Ultra Wide, and Telephoto.
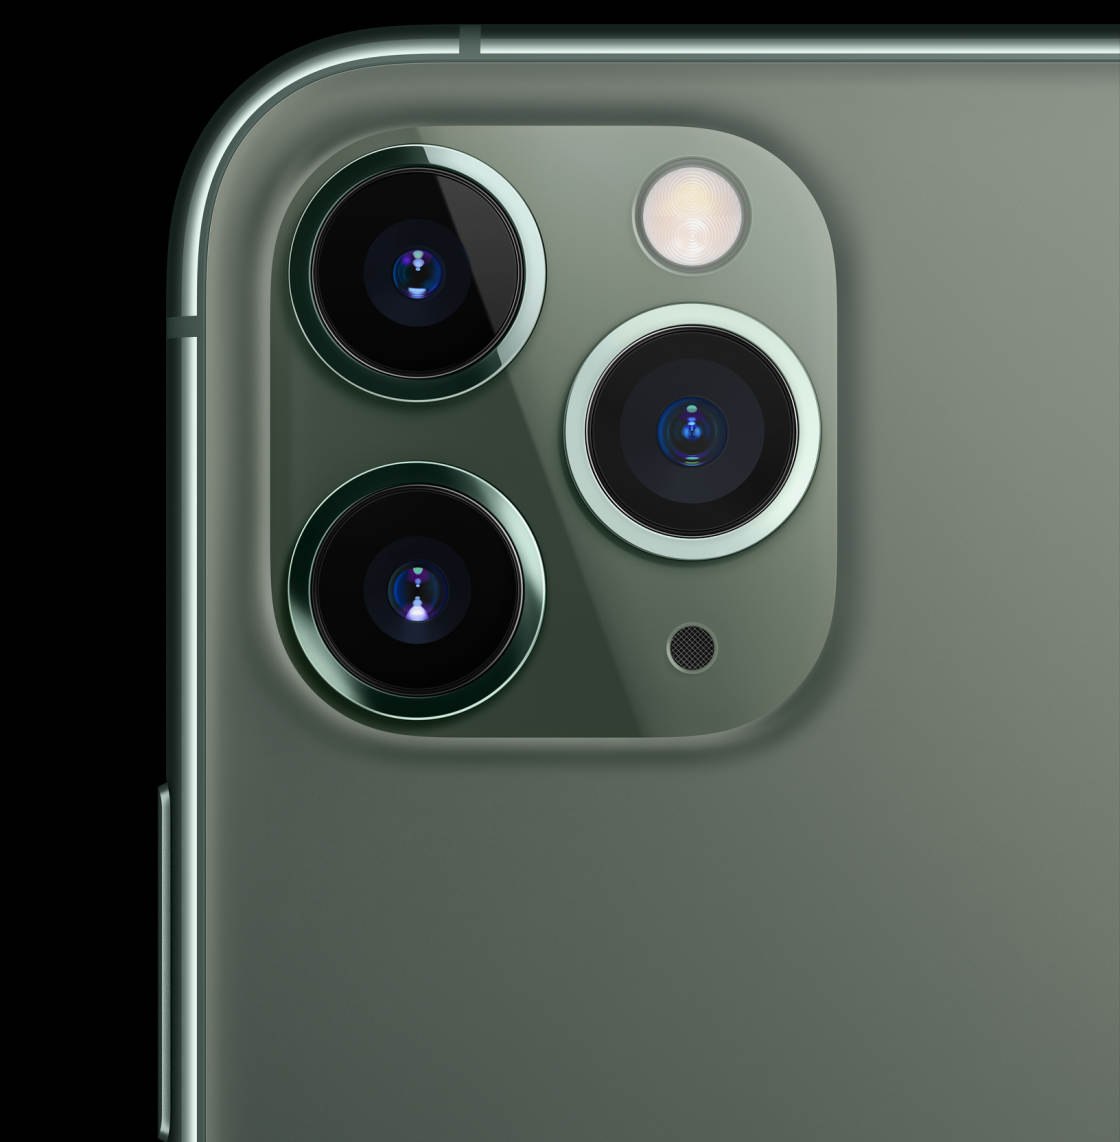
The iPhone 11 has two lenses: Wide and Ultra Wide
The iPhone XS, XS Max, X, 8 Plus, and 7 Plus all have two lenses: Wide and Telephoto.
Single-lens iPhones just have the Wide lens.
So, how do you switch between lenses when taking pictures?
You use the Zoom icons (0.5x, 1x, and 2x) at the bottom of the viewfinder.

0.5x is the Ultra Wide lens. 1x is the Wide lens. And 2x is the Telephoto lens.
Note that you’ll only see the icons for the lenses that you have on your iPhone.
To use the Wide lens, ensure 1x is selected.
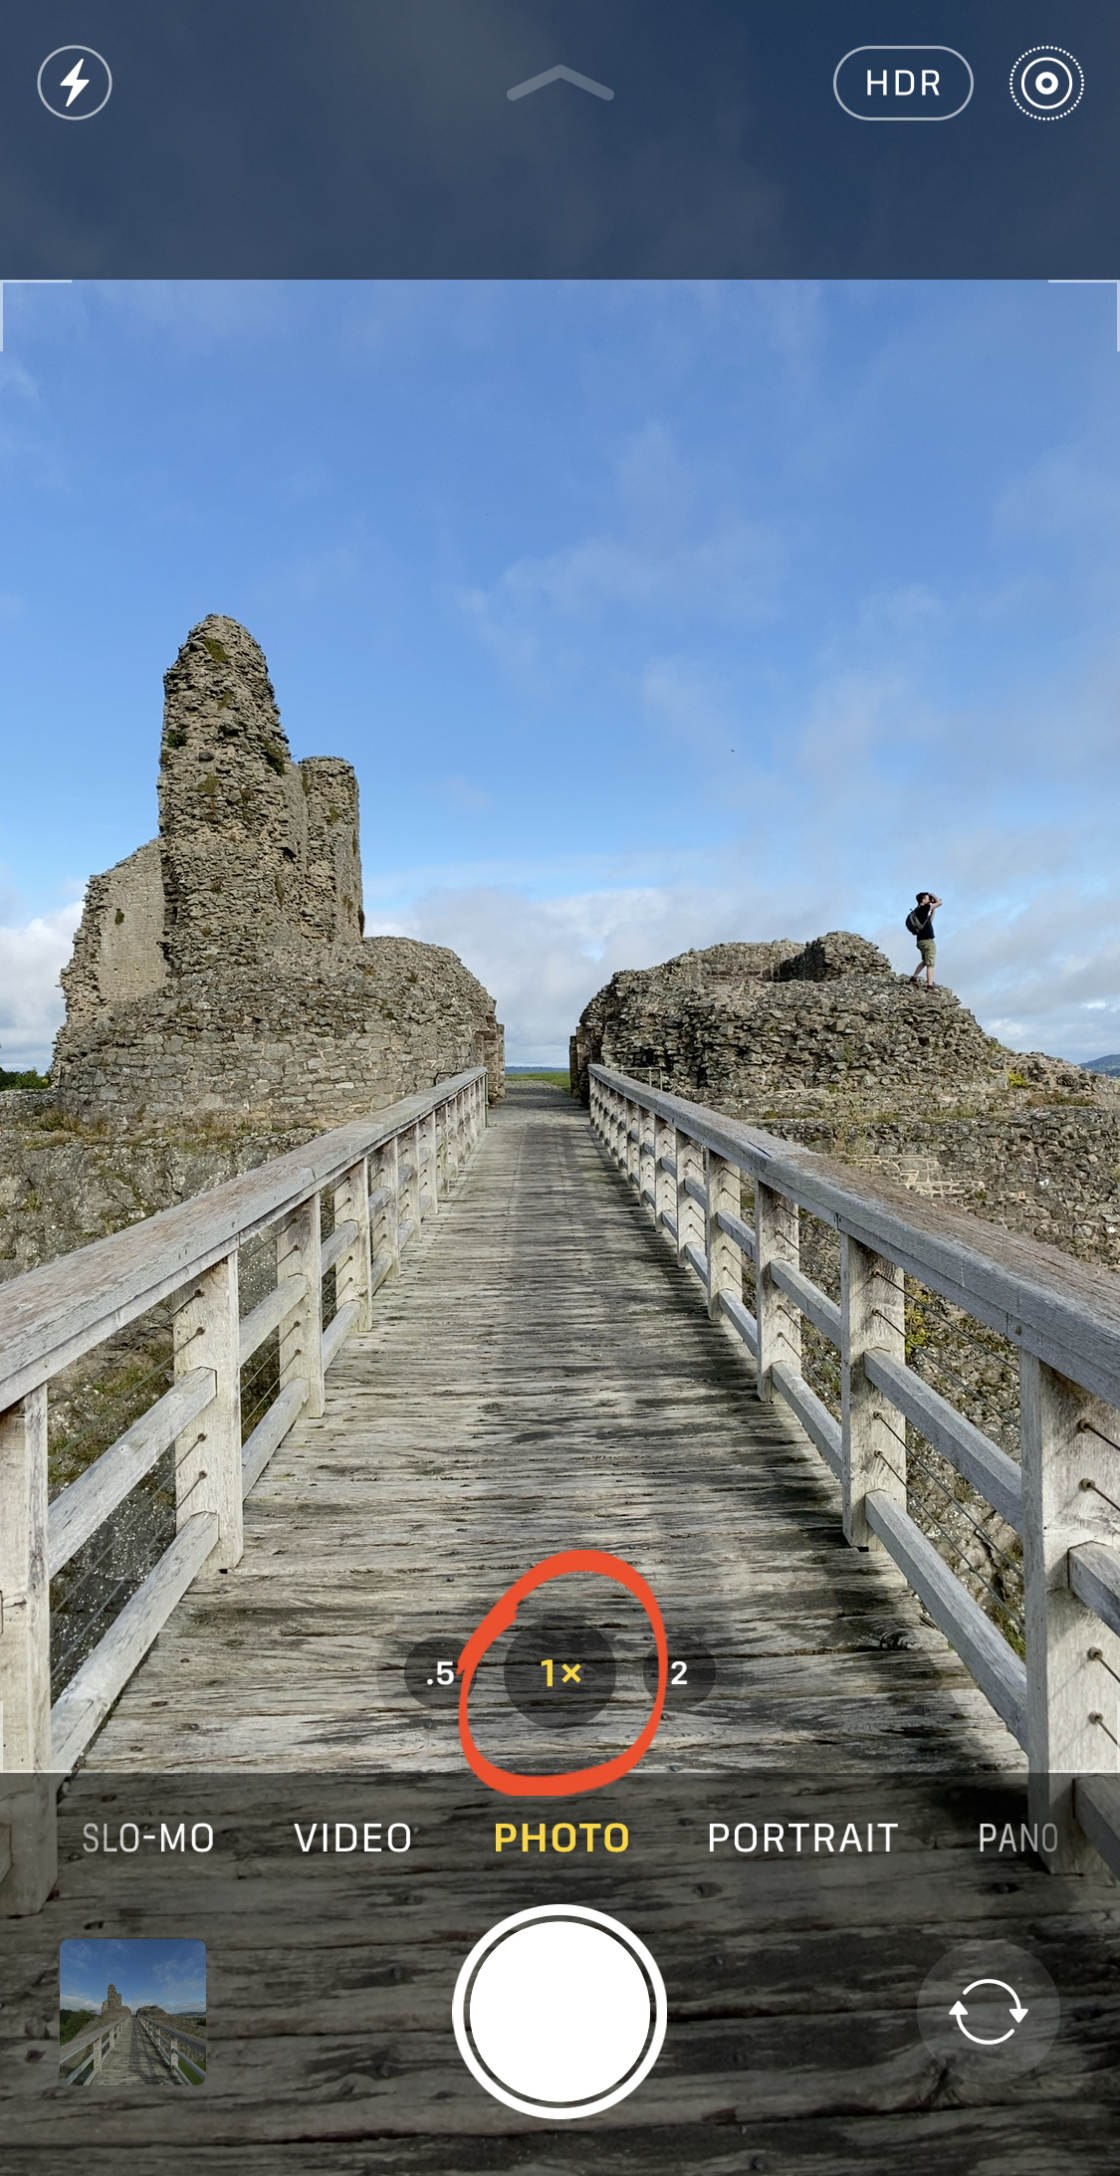
This lens has a moderately wide angle of view which makes it suitable for most shooting situations.
To switch to the Ultra Wide lens, tap 0.5x.
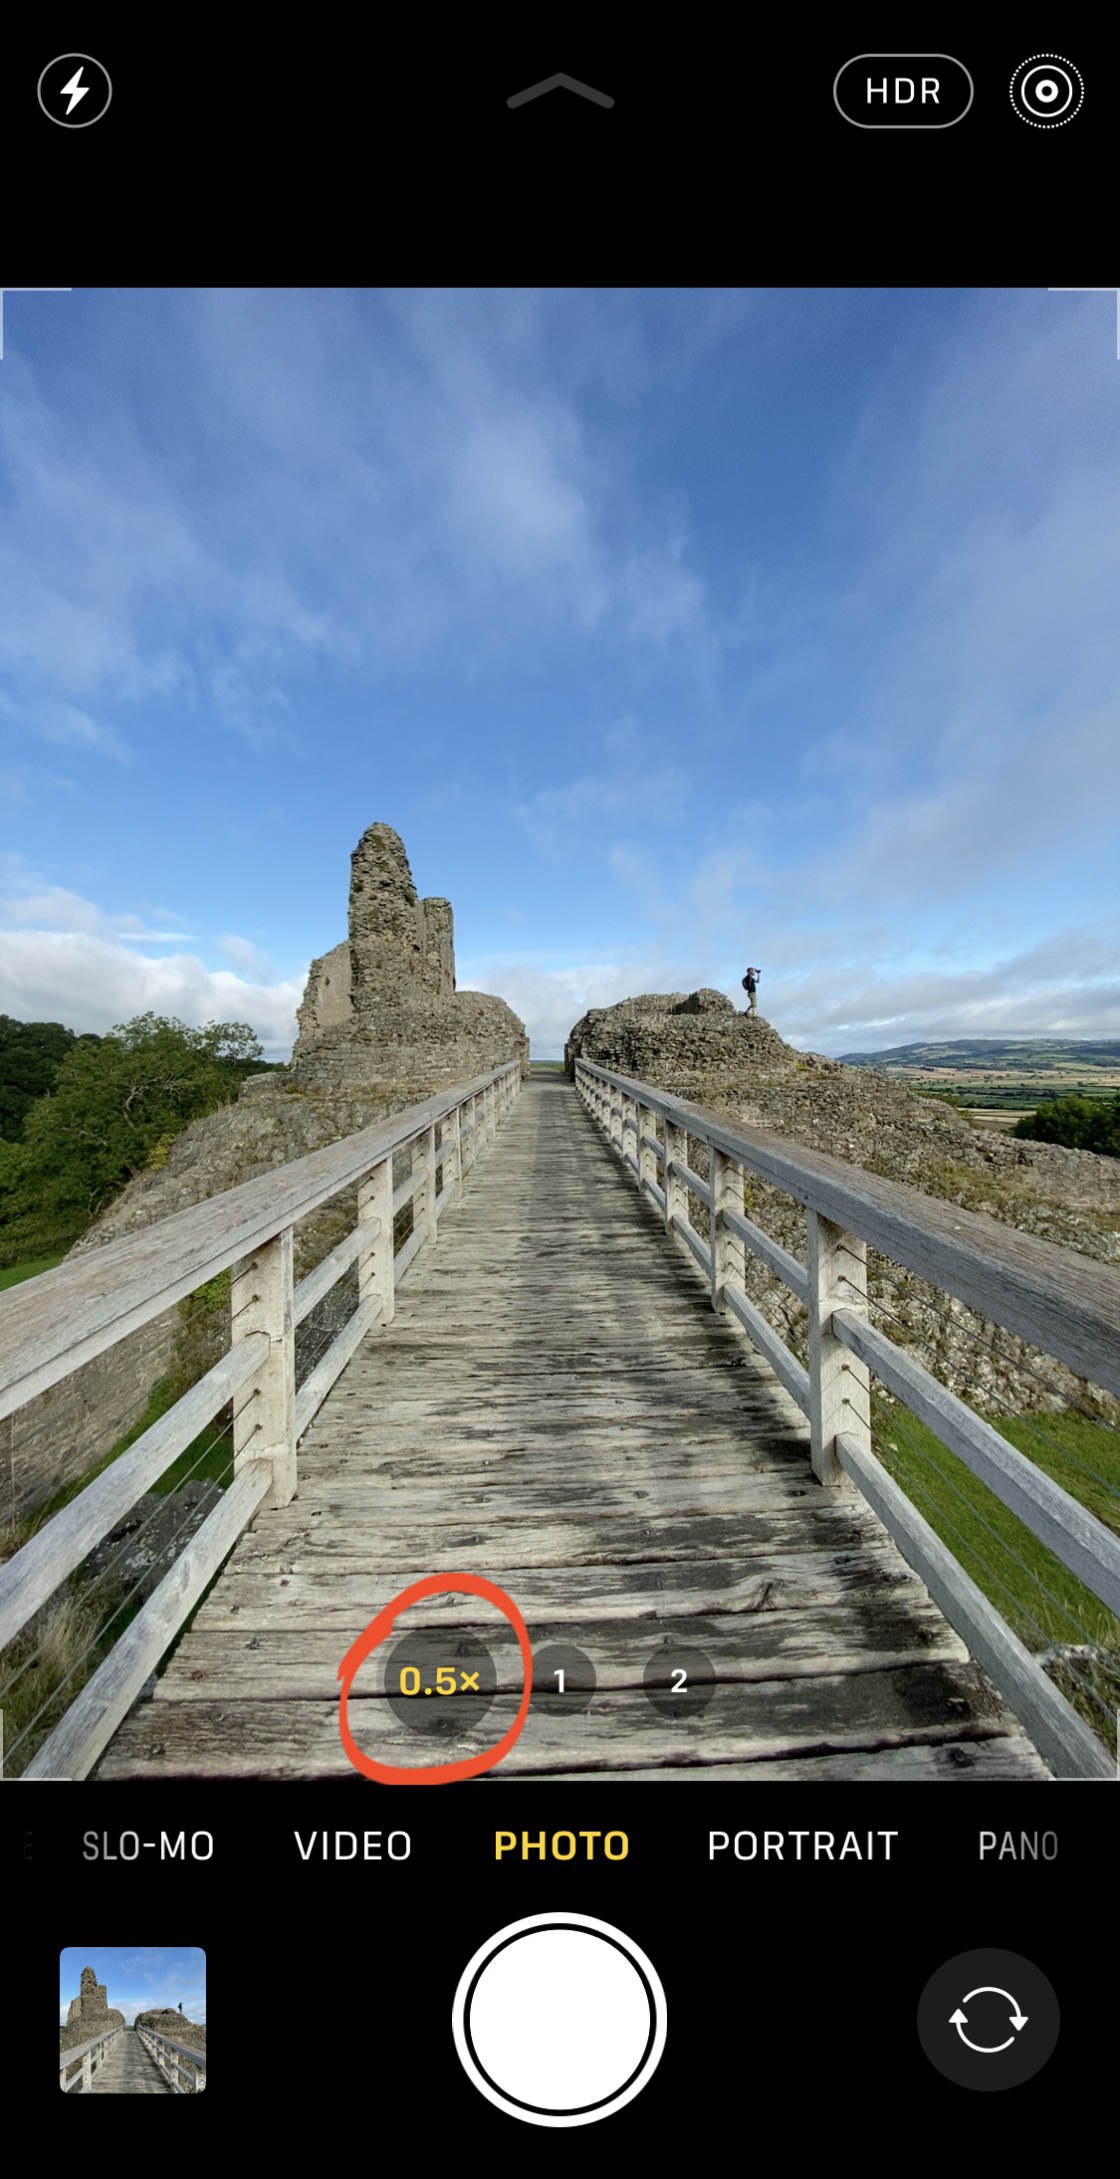
This allows you to zoom out to capture more of the scene in your photo. It’s perfect for shooting landscapes, cityscapes, and architecture.
Tap 2x to switch to the Telephoto lens.
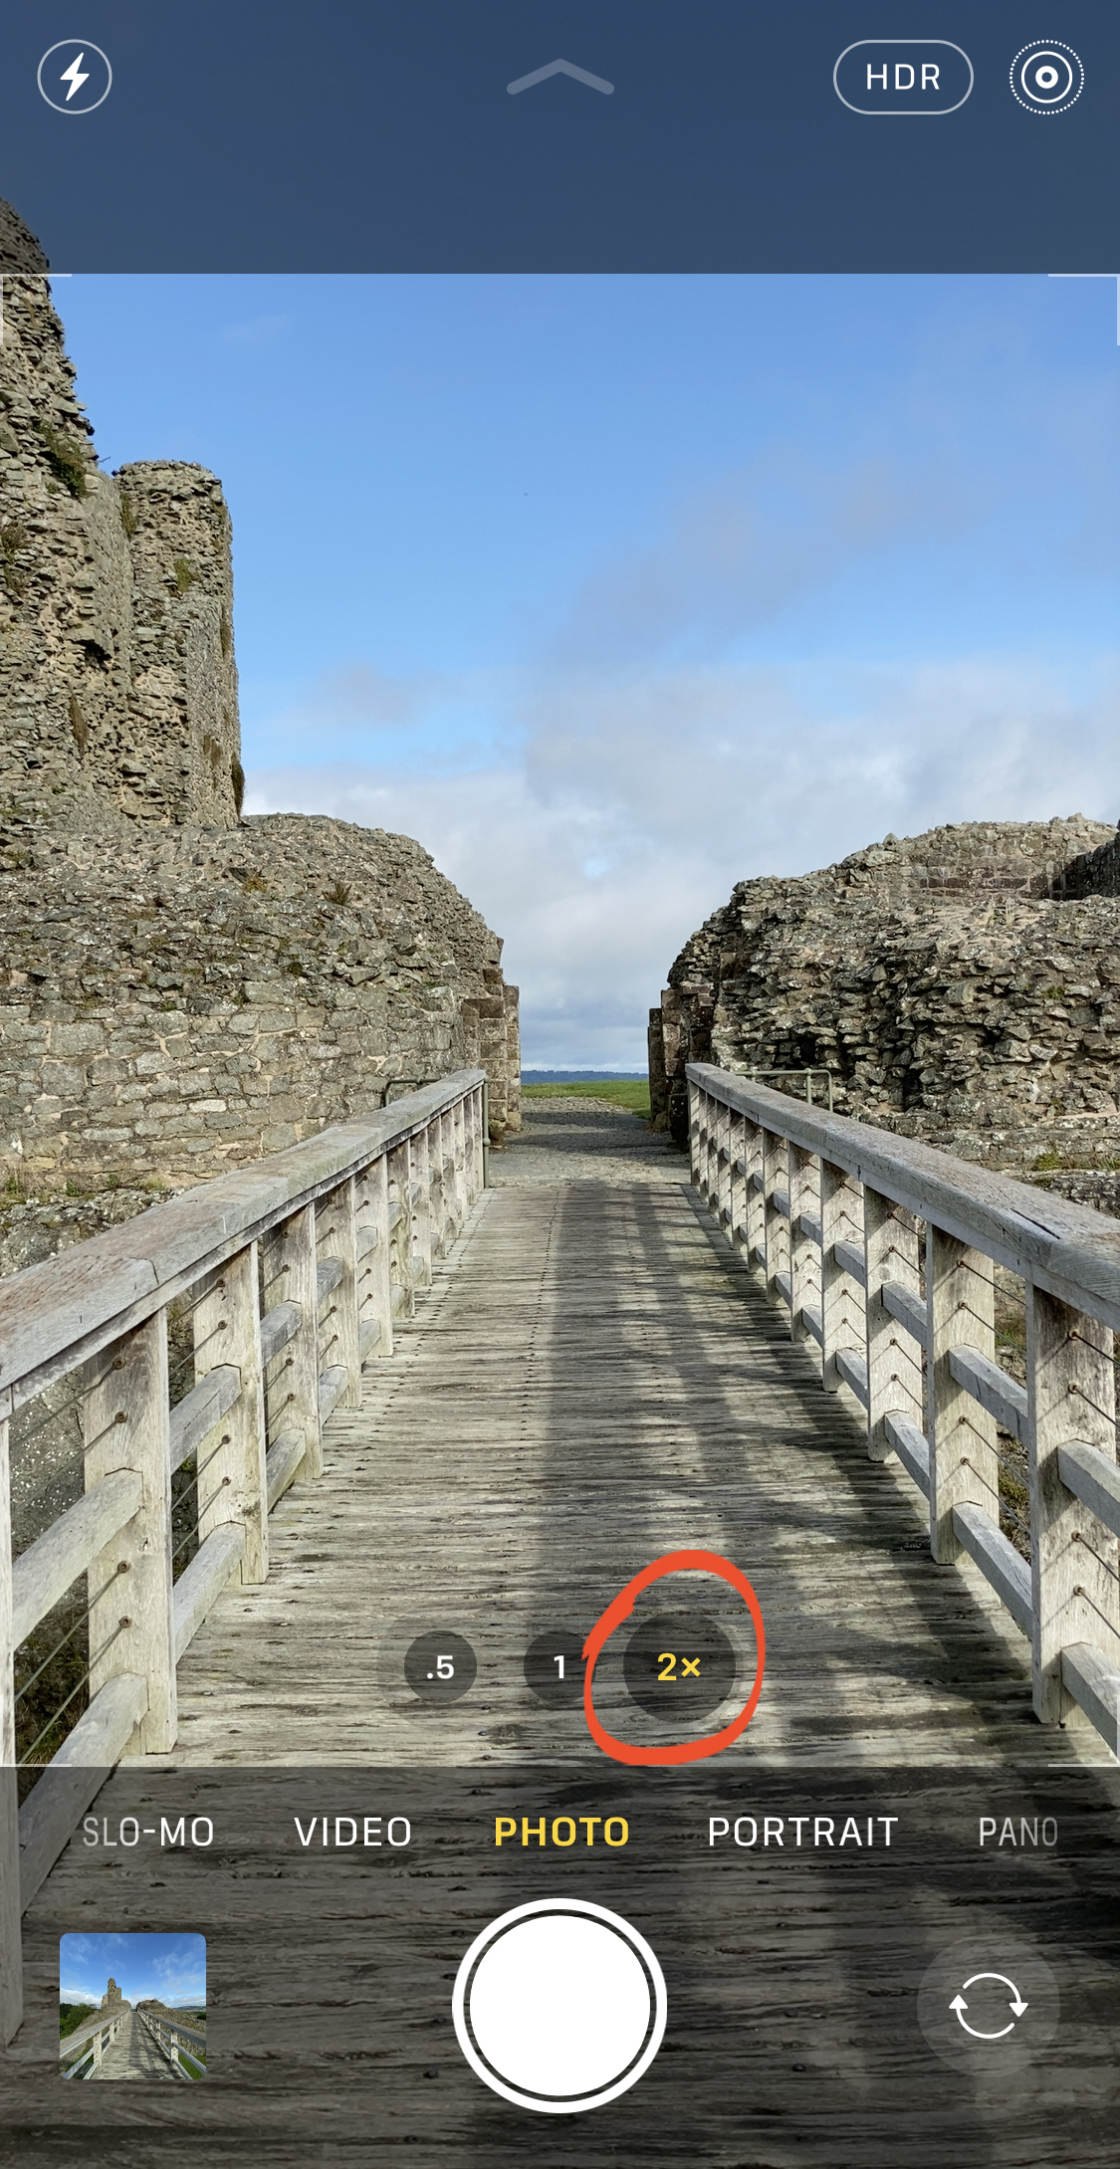
This lens allows you to zoom in and capture a closer view of the subject. It’s great for situations where you can’t physically get closer to your subject.
Below are three photos of the same scene captured with the Ultra Wide, Wide, and Telephoto lenses.
 Ultra Wide Lens
 Wide Lens
 Telephoto Lens
As you can see, you get very different results depending on which lens you shoot with.
If you’re not sure which lens to use, why not capture the scene with each lens and then compare the results!
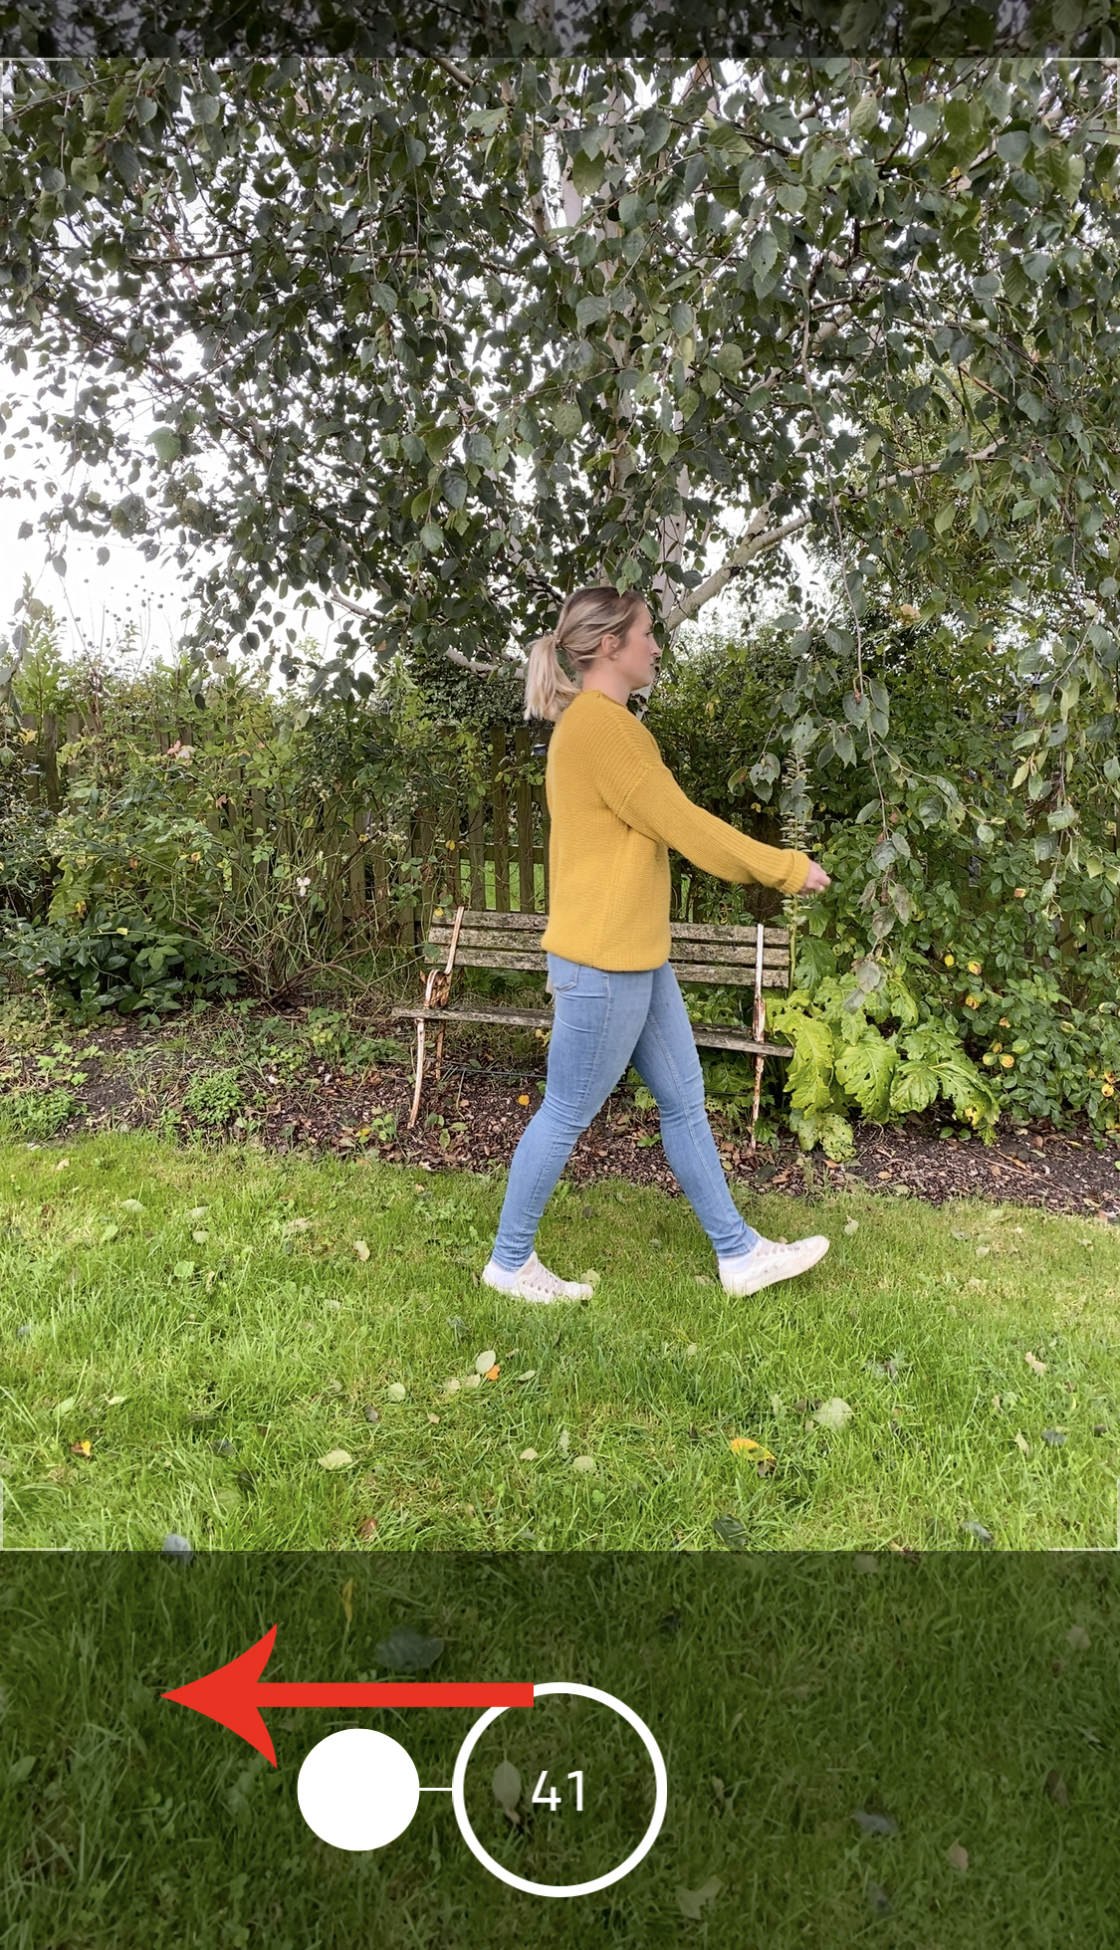
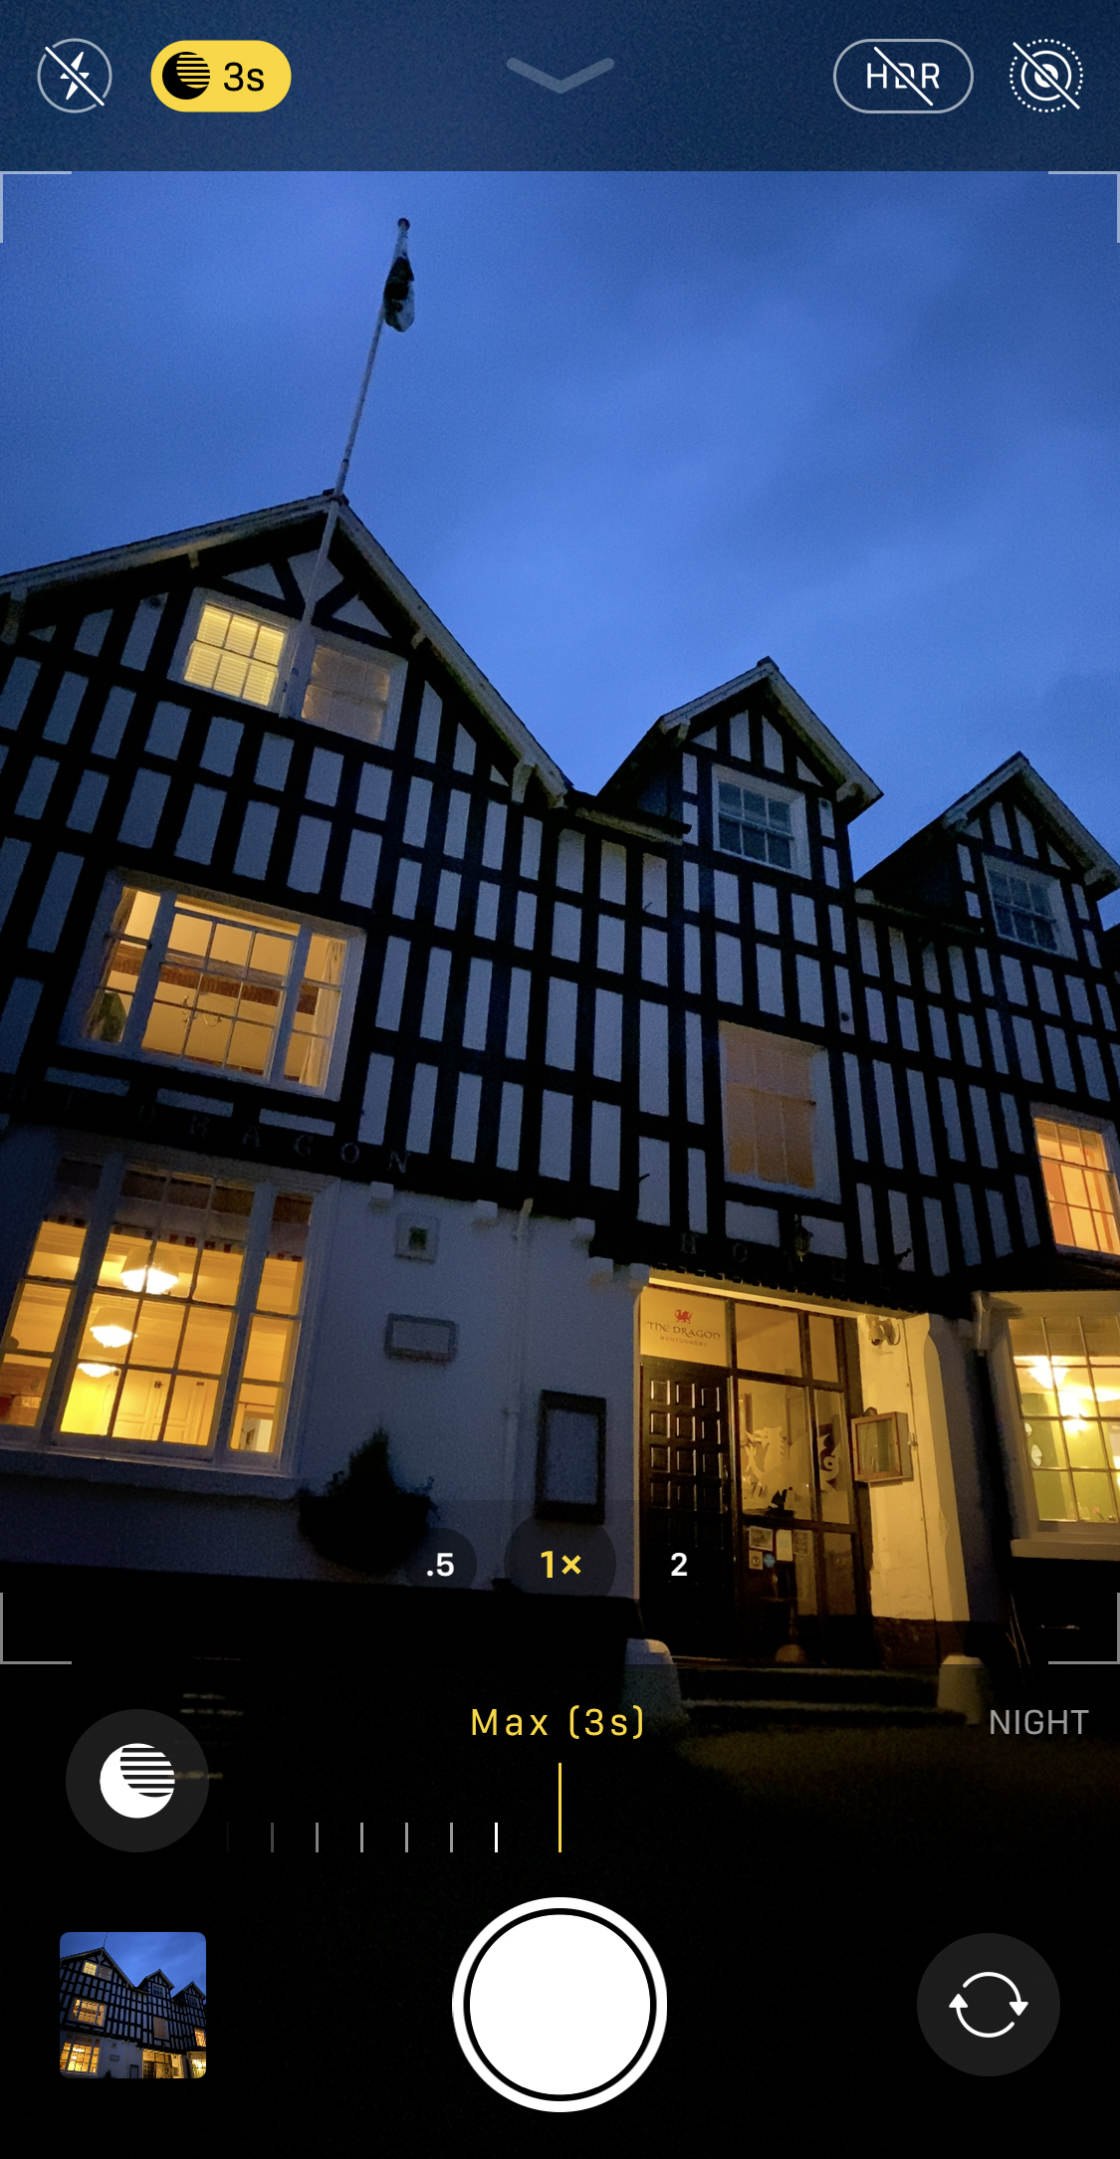
8. Keep Your Camera Steady For Sharp, Shake-Free Shots
Do your photos sometimes turn out blurry?
A common cause of blurry photos is camera-shake.

Camera-shake happens if you move the camera (even very slightly) when taking a photo.
Now, in bright light conditions, some slight camera movement usually isn’t a problem.
Because when there’s lots of light, the camera uses a fast shutter speed (to avoid too much light getting in).
A fast shutter speed freezes any movement in the scene, including camera movement. So in bright light, your shots will usually be nice and sharp.
But in low light conditions, the camera has to use a slower shutter speed. This lets more light in over a longer period of time.
During this longer exposure time, any movement (including camera movement) will be captured as a blur or streak.
And this is why you often get blurry photos when shooting in low light or at night.
To capture sharp photos in low light, you need to keep the camera really steady.

If you have an iPhone tripod and iPhone tripod mount, you can use them to keep your iPhone perfectly still when shooting.
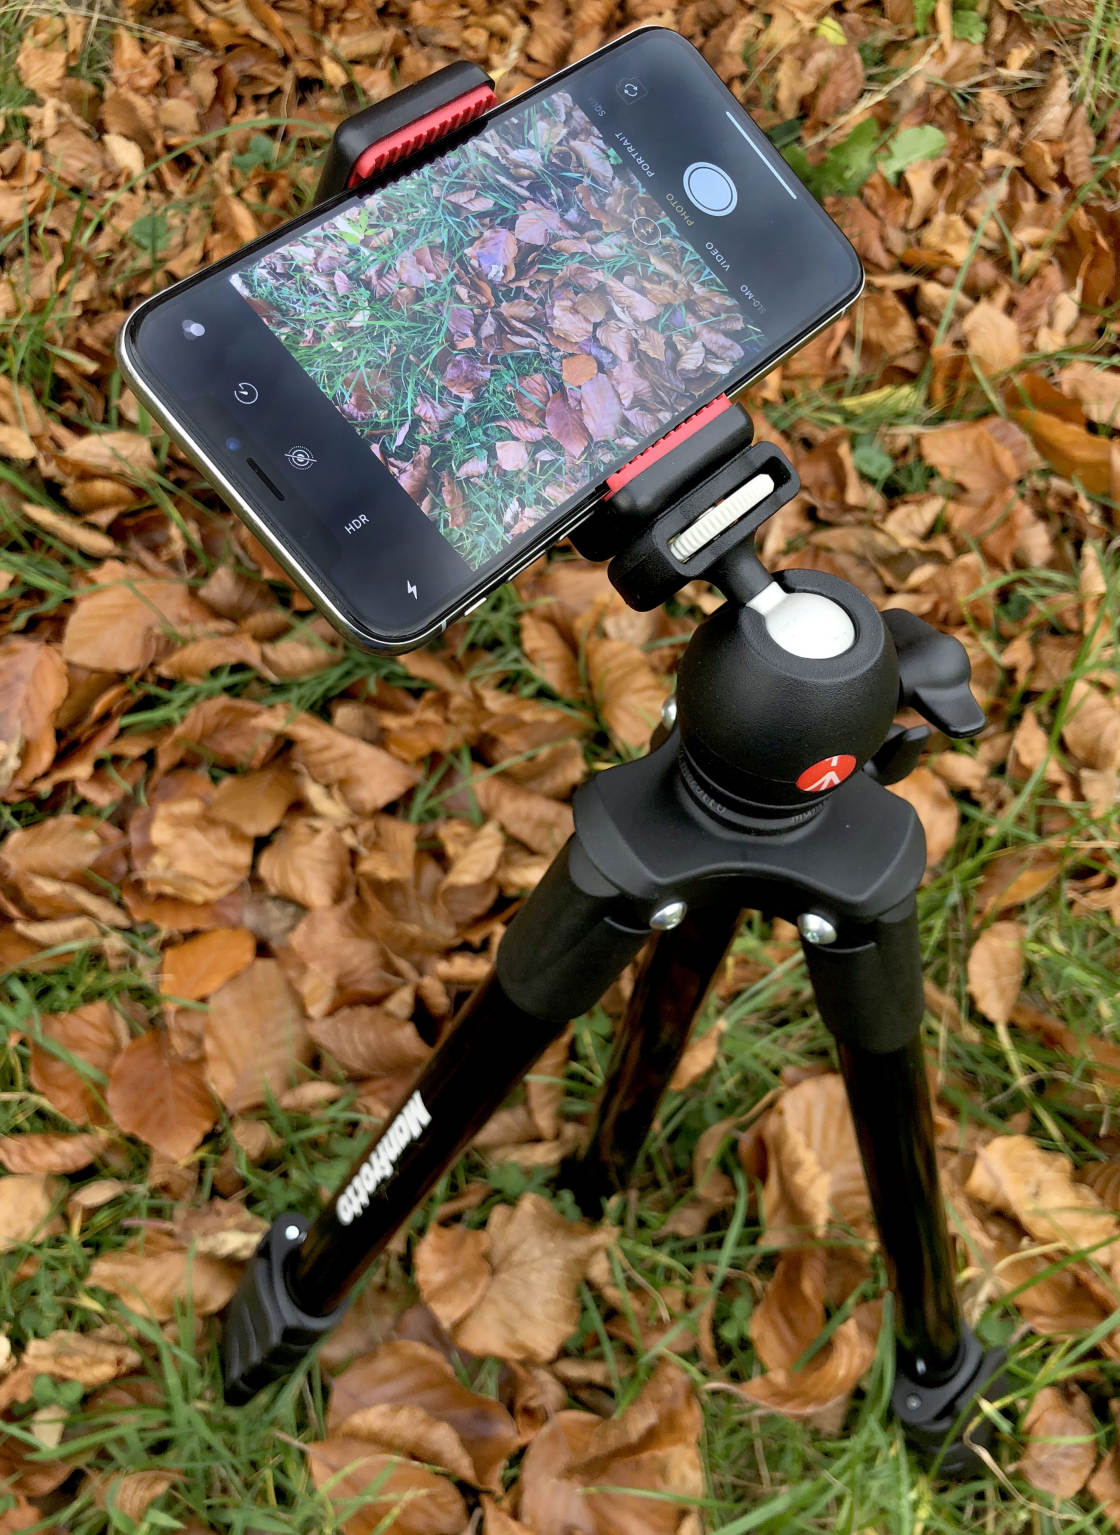
But what if you don’t have a tripod?
Here are a few mobile photography tips for keeping your phone steady when you don’t have a tripod:
Rest your iPhone on a solid surface, such as a wall or rock. Hold your iPhone with both hands, making sure you have a good tight grip. Lean against a wall or tree to steady your body. Position your elbows against your body to keep your arms steady. Crouch down and rest your iPhone on your knee.Just do whatever you can to keep your iPhone as still as possible – especially when shooting in low light.
If you do this, you’ll get the sharpest shots possible. And blurry iPhone photos will be a thing of the past!
If you have one of the iPhone 11 models, you can use Night mode when shooting in low light. This camera feature helps you capture sharper night photos with better color and detail.
But even with Night mode, you’ll still get the best results by keeping your camera as steady as possible!
9. Use The Rule Of Thirds To Compose Beautiful Mobile Photos
Getting sharp, well-exposed photos is crucial. But composition is equally important.
Good composition is what sets apart an average photo from an amazing one.

Composing a visually pleasing image involves careful positioning of the important elements in the frame.
So how do you decide where to place your main subject or focal point?
You use the rule of thirds!
The “rule” states that you should position the most important elements off-center – rather than in the middle of the frame.
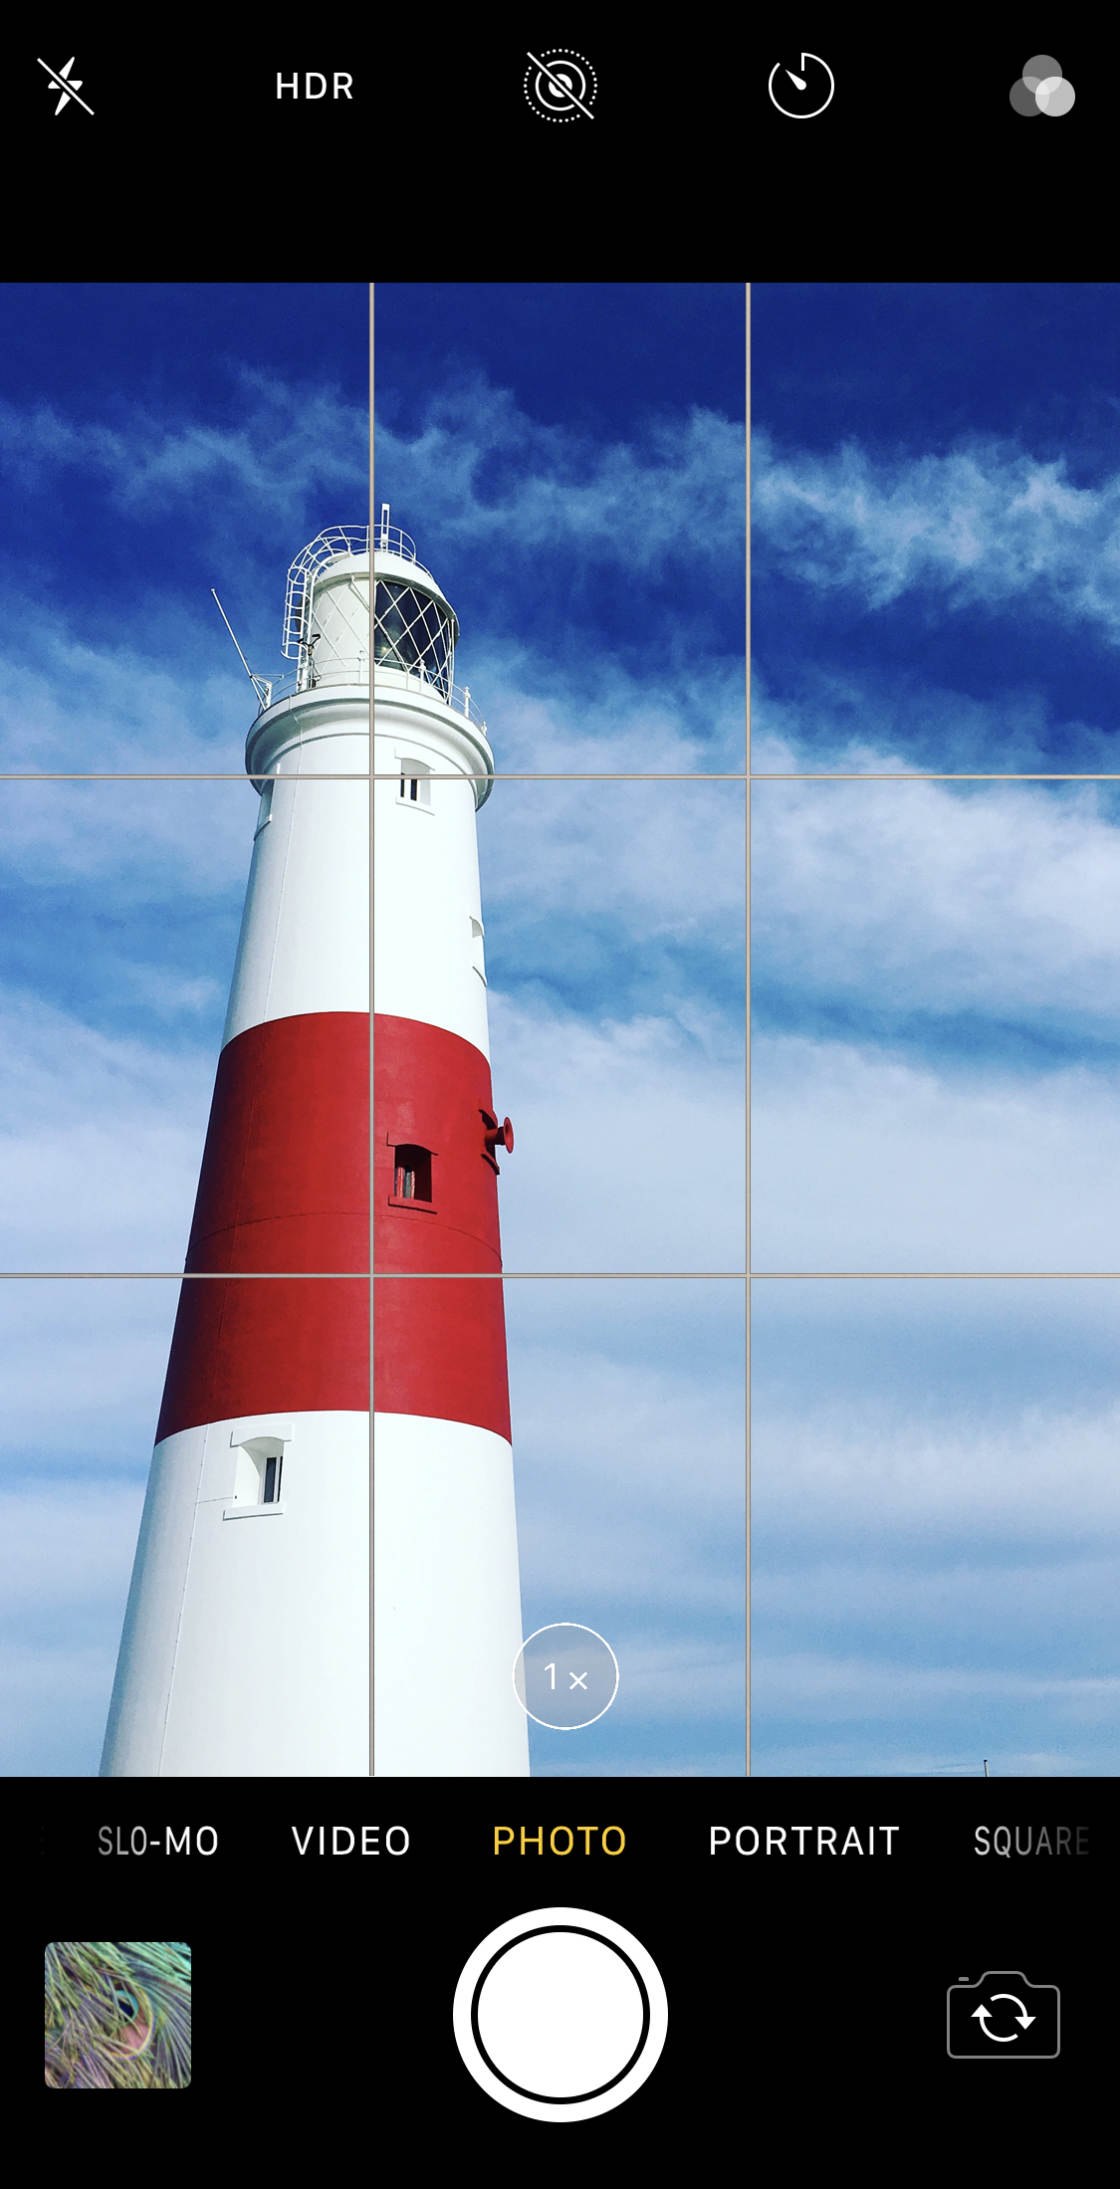
This creates more balanced and natural compositions – compositions that are engaging and pleasing to the eye.
Fortunately, the iPhone camera has a handy tool to help you compose using the rule of thirds.
What is this tool?
It’s called the camera grid.

To switch on the gridlines, open the Settings app from the Home screen of your iPhone.
Scroll down and select Camera. Then ensure the Grid option is switched on (green).
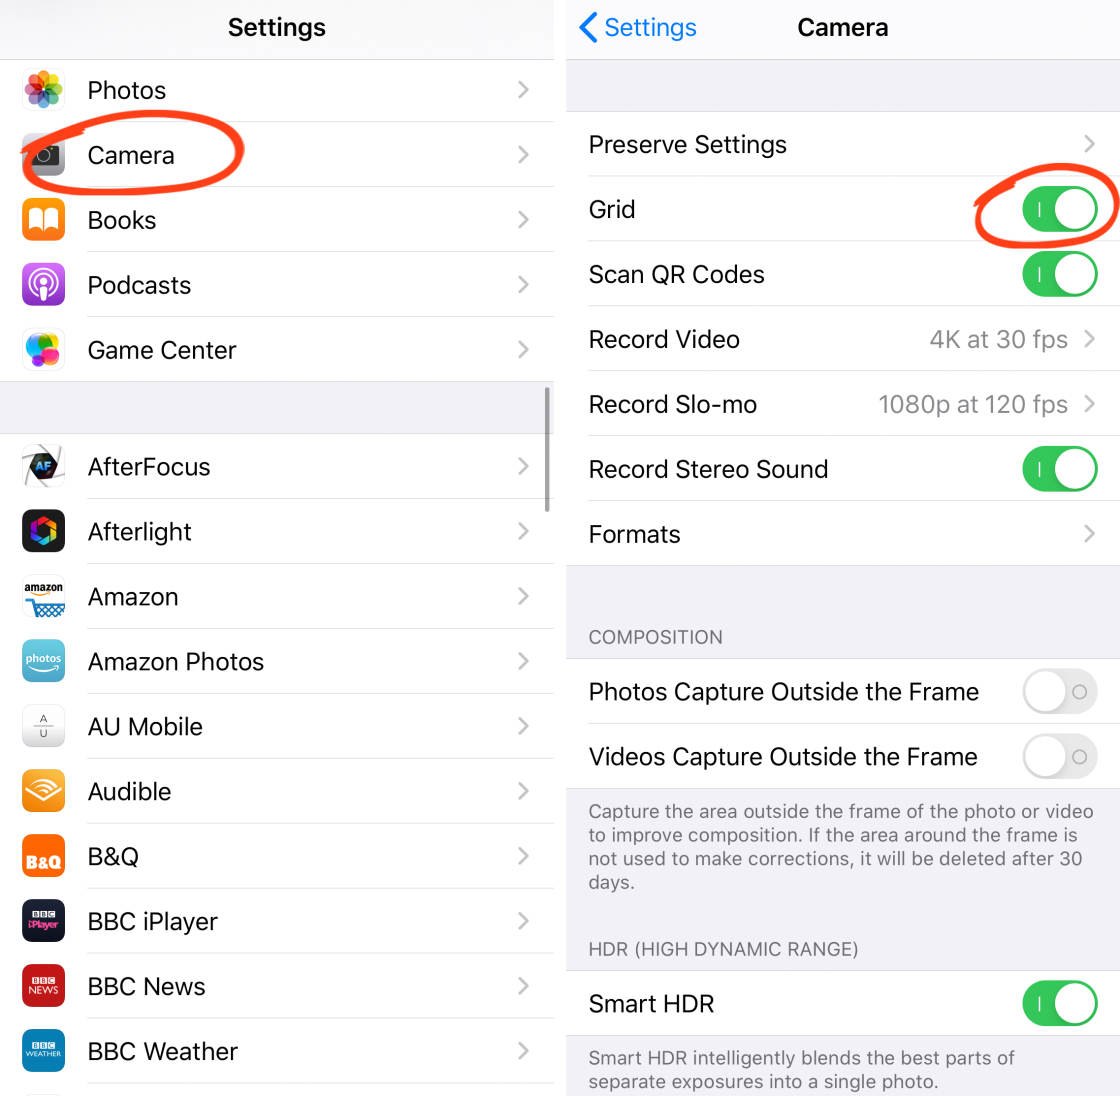
Now, open the Camera app.
You’ll see two horizontal lines and two vertical lines in the viewfinder.
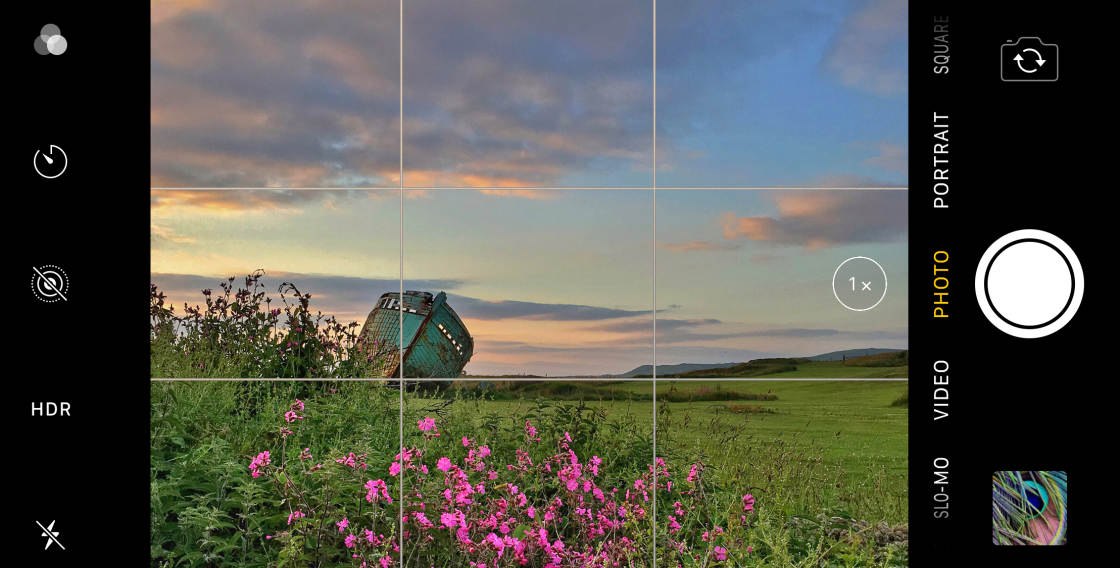
Now you can use the grid to help you position the key elements in your photo.
For example, you could position your main subject on one of the vertical lines, or where two gridlines meet.
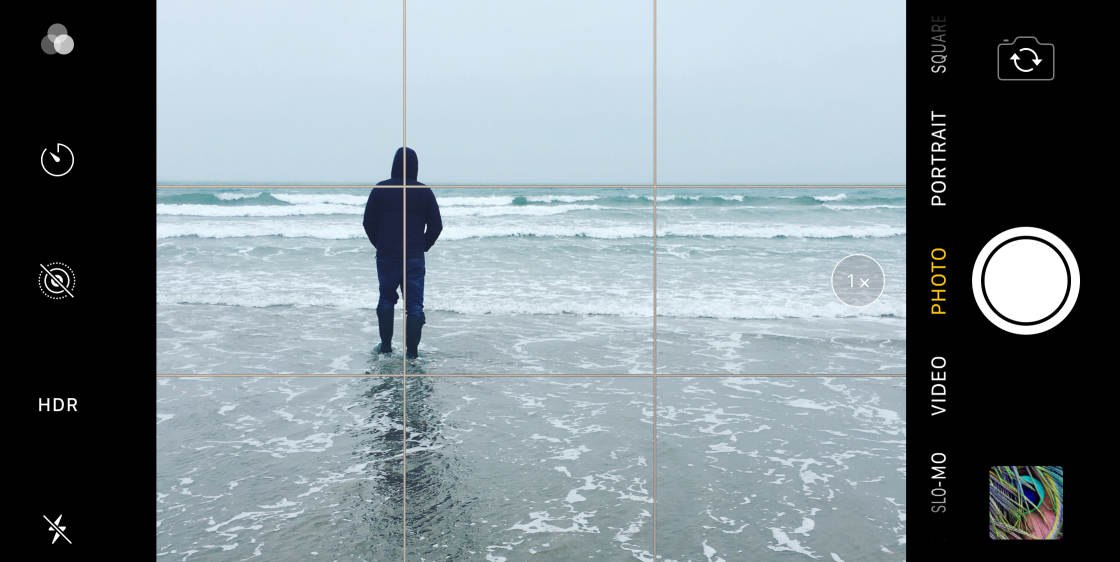
If you’re shooting landscape photos, position the horizon along the top or bottom gridline – rather than across the middle of the frame.
(You can also use the gridlines to ensure the horizon is perfectly level).
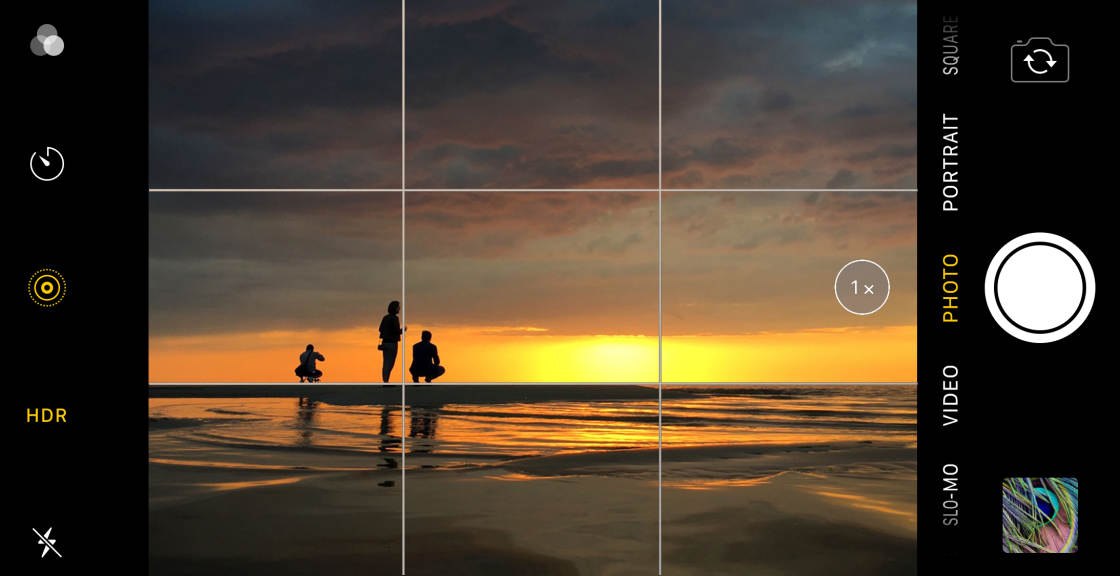
The iPhone camera grid allows you to compose stunning photos using the rule of thirds.
So make sure you switch it on. And use it to help you decide where to position the most important parts of the scene.
But remember, rules are made to be broken! So once you’ve mastered the rule of thirds, try breaking it on purpose.

Sometimes, placing your subject in the middle of the frame can create a striking image.
And if the scene is symmetrical, you can use a central composition to create perfect symmetry in your photo.

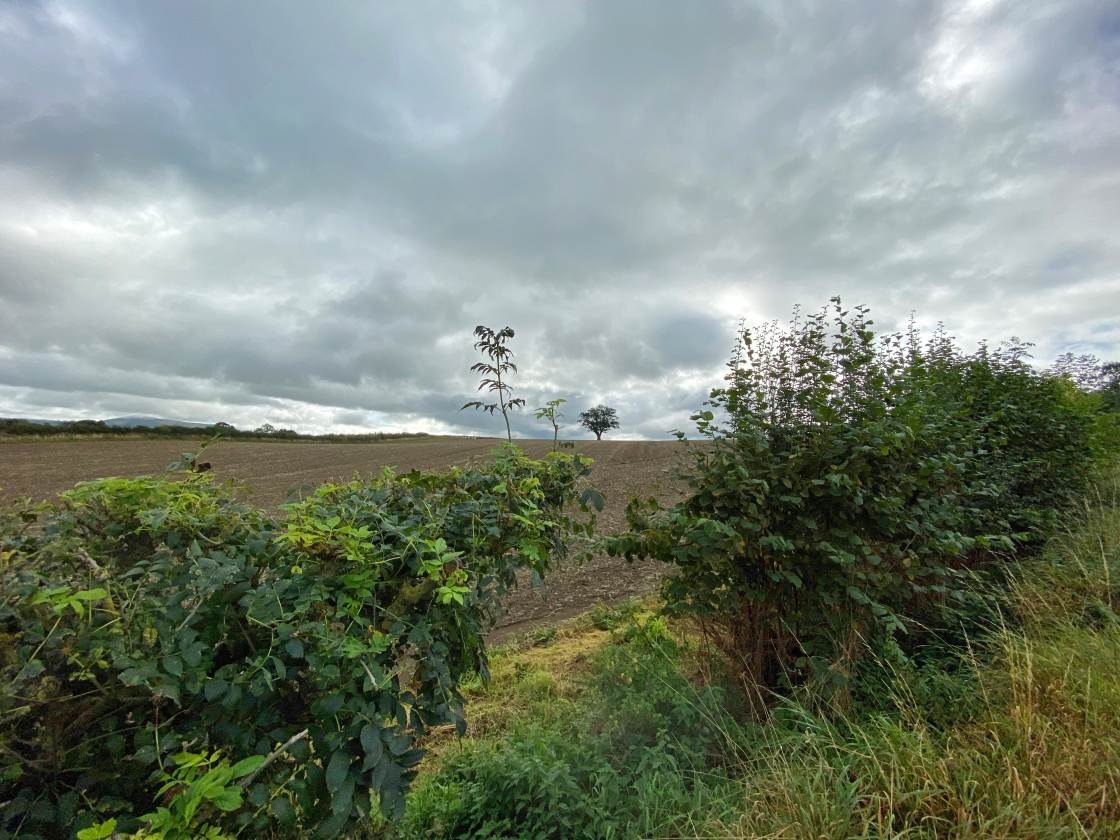
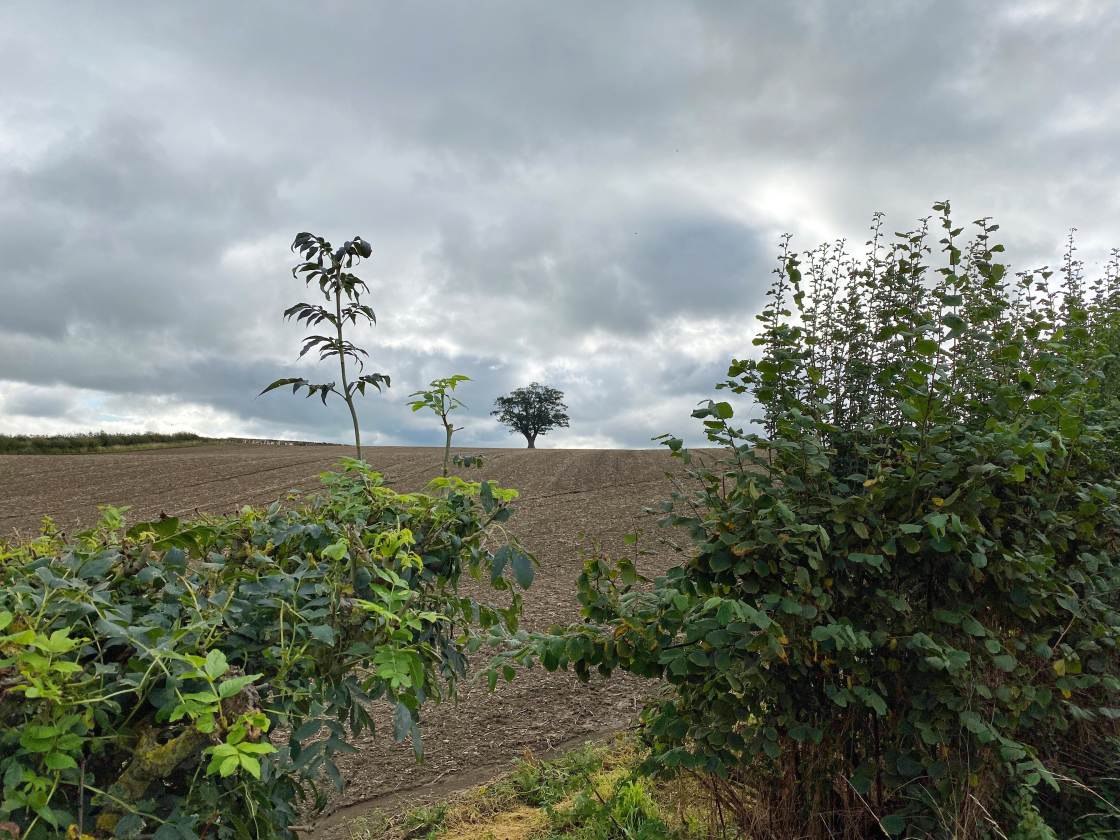
10. Use Leading Lines For Powerful Images With Incredible Depth
Do your images often look flat and lifeless?
Here’s one of the best mobile photography tips to avoid this:
Use leading lines.

Leading lines are lines that lead from the foreground to the background of the scene.
A leading line could be a path, a road, a river, or a railway line.
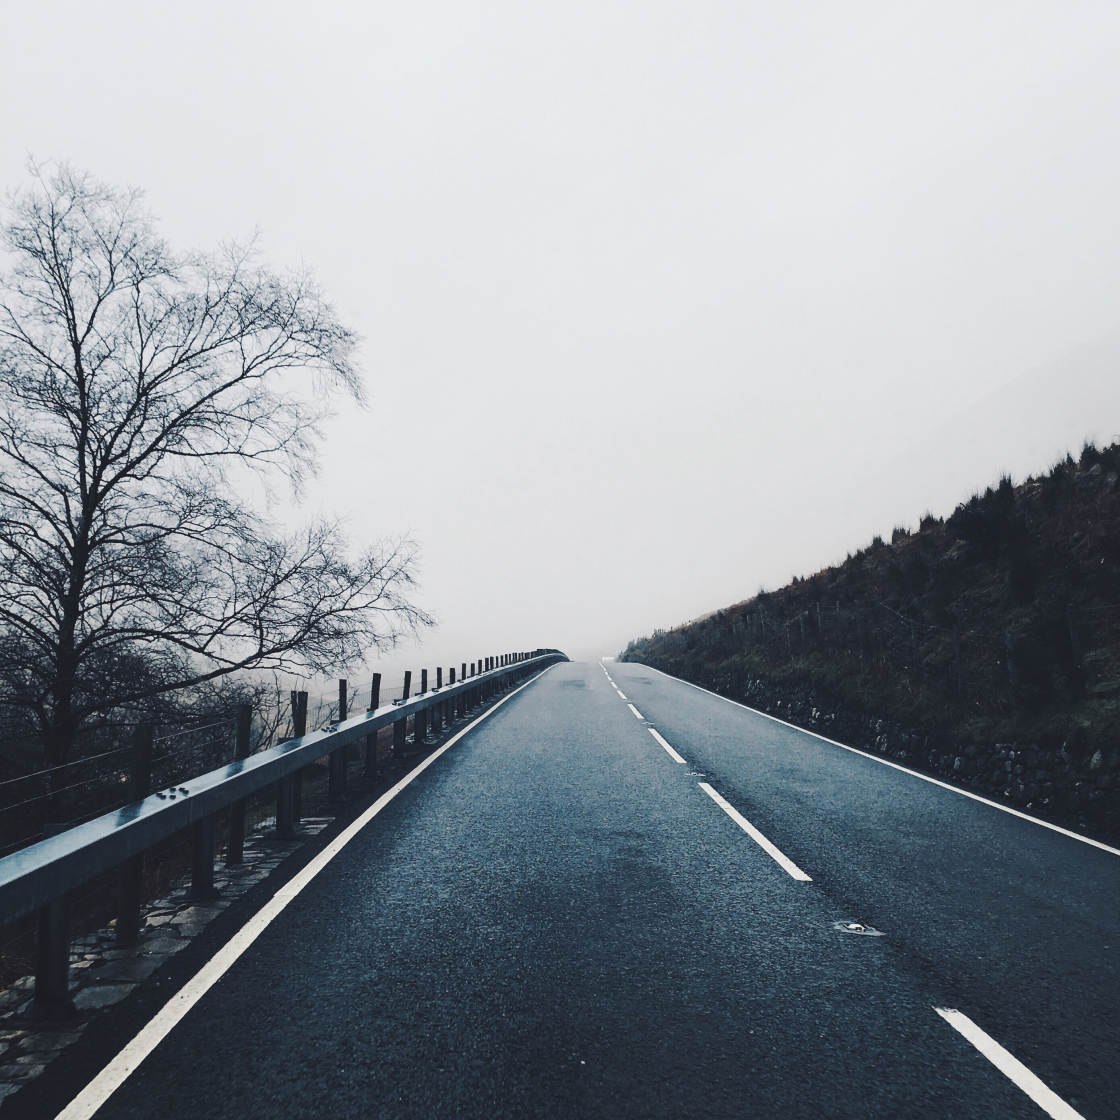
It could be a fence, a wall, a bridge, or a row of trees.

It could even be footprints in the snow or the water’s edge at the beach.

You can use anything as a leading line – as long as it draws the viewer’s eye into the image.
To ensure the leading line creates a sense of depth in your photo, frame the shot so that the line starts in the foreground.

The line should either lead into the distance or towards your main subject.
This is such a simple composition technique. But it will have a huge impact on your mobile photography.

So whenever you’re out shooting, look for leading lines. Then use them to create incredible depth in your pictures.
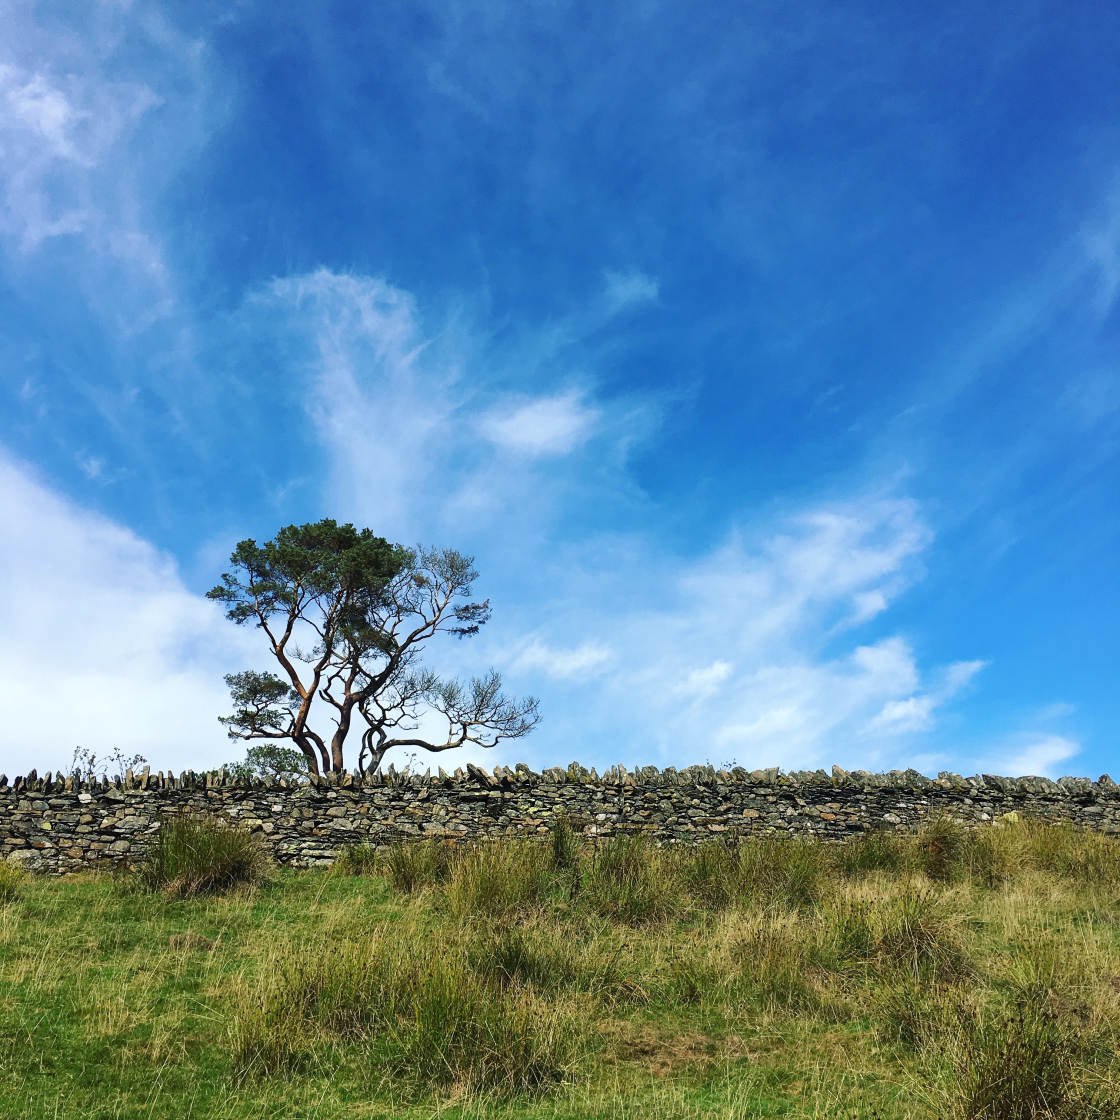
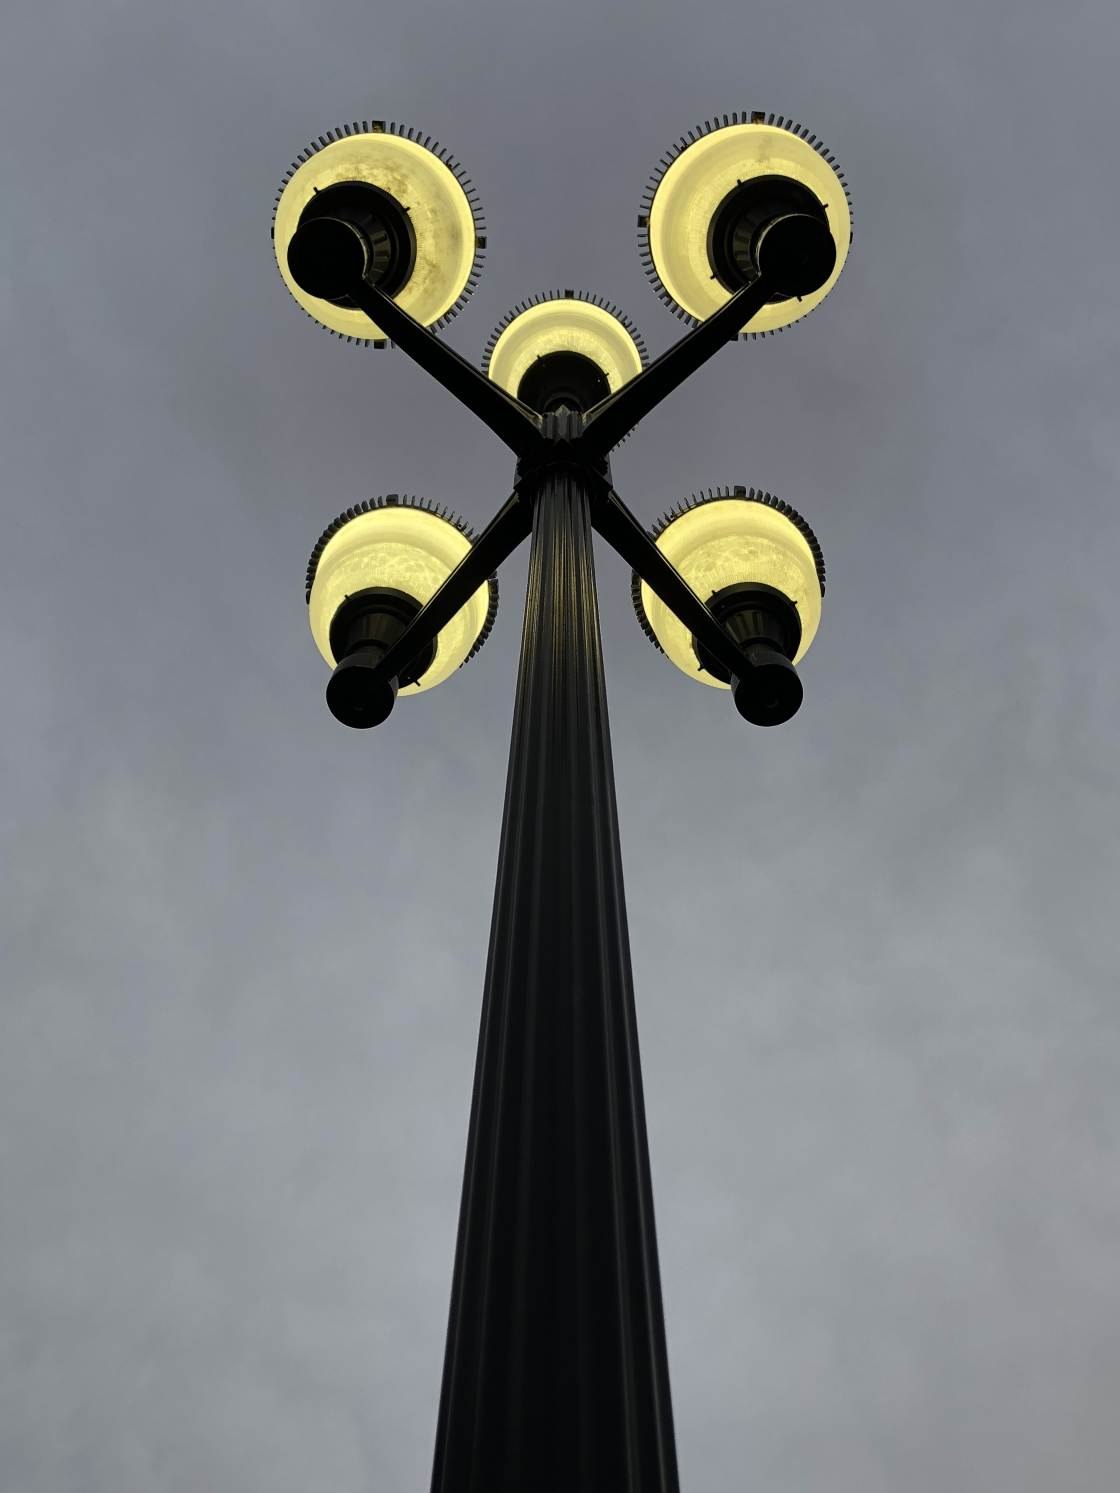
11. Experiment With Different Perspectives For More Unique Images
Most people take photos from chest height while standing.
But you’ll get far more interesting photos by shooting from a different perspective.

So, always look for an alternative point of view when taking pictures.
Would the scene look more interesting if you shoot from a low angle?
Try crouching, kneeling, or even lying on the ground.

Shooting from a low perspective is great for making foreground subjects loom large in your photo.
You could also try shooting straight up at a tall building, tree canopy, or decorative ceiling.

What about shooting from a high vantage point?
Could you capture a more unique photo by looking down on your subject?

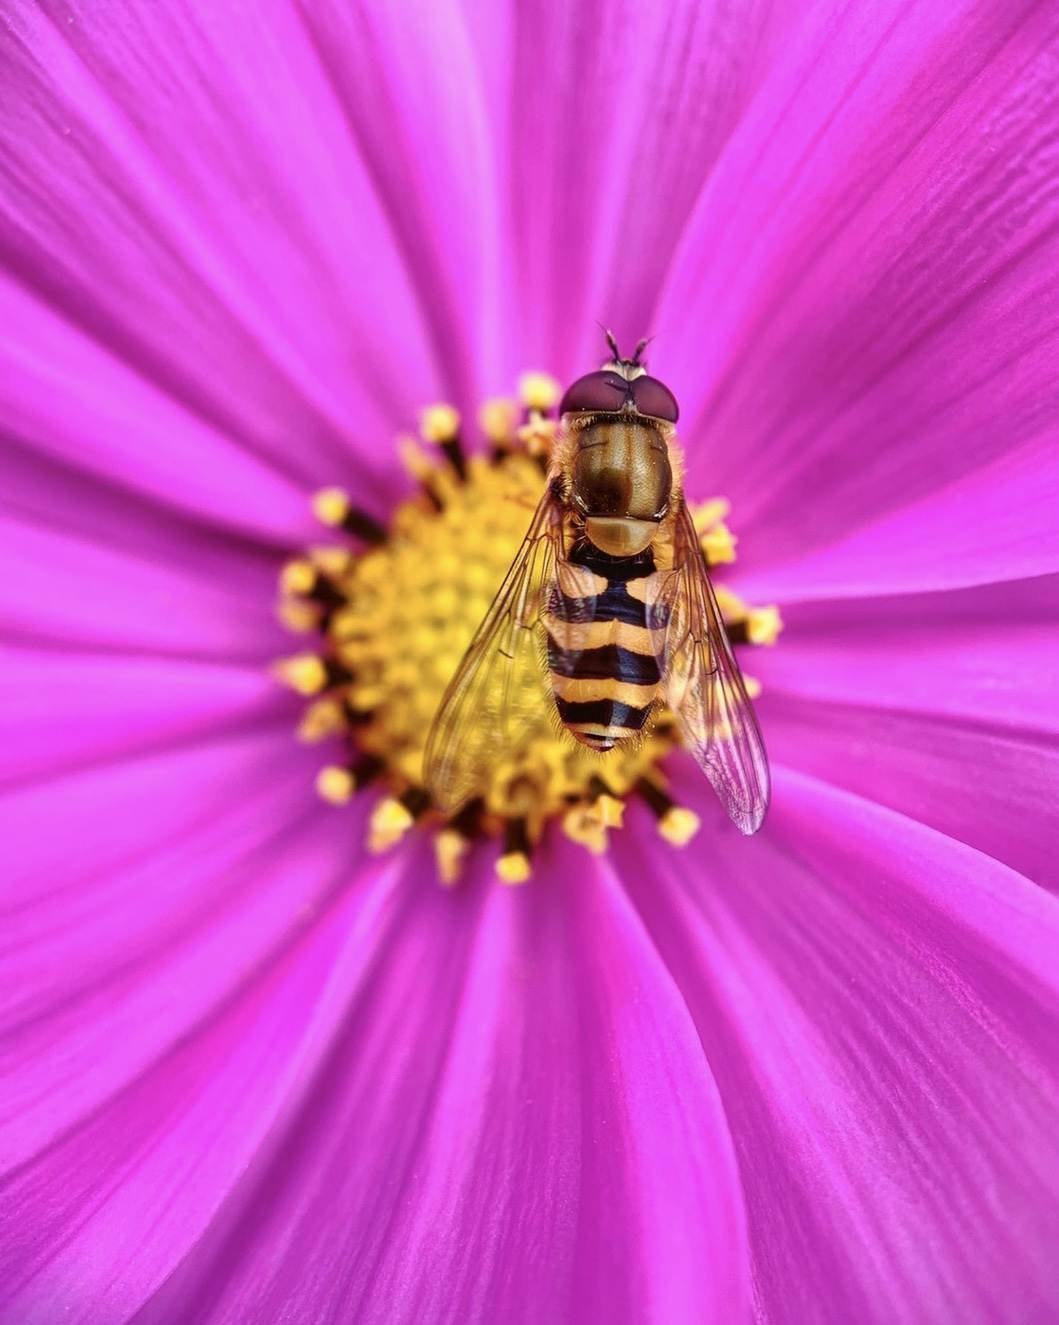
You could also get closer to your subject to capture its intricate detail.
You can create fabulous abstract images by getting close and filling the frame.

Here’s another perspective technique you can try:
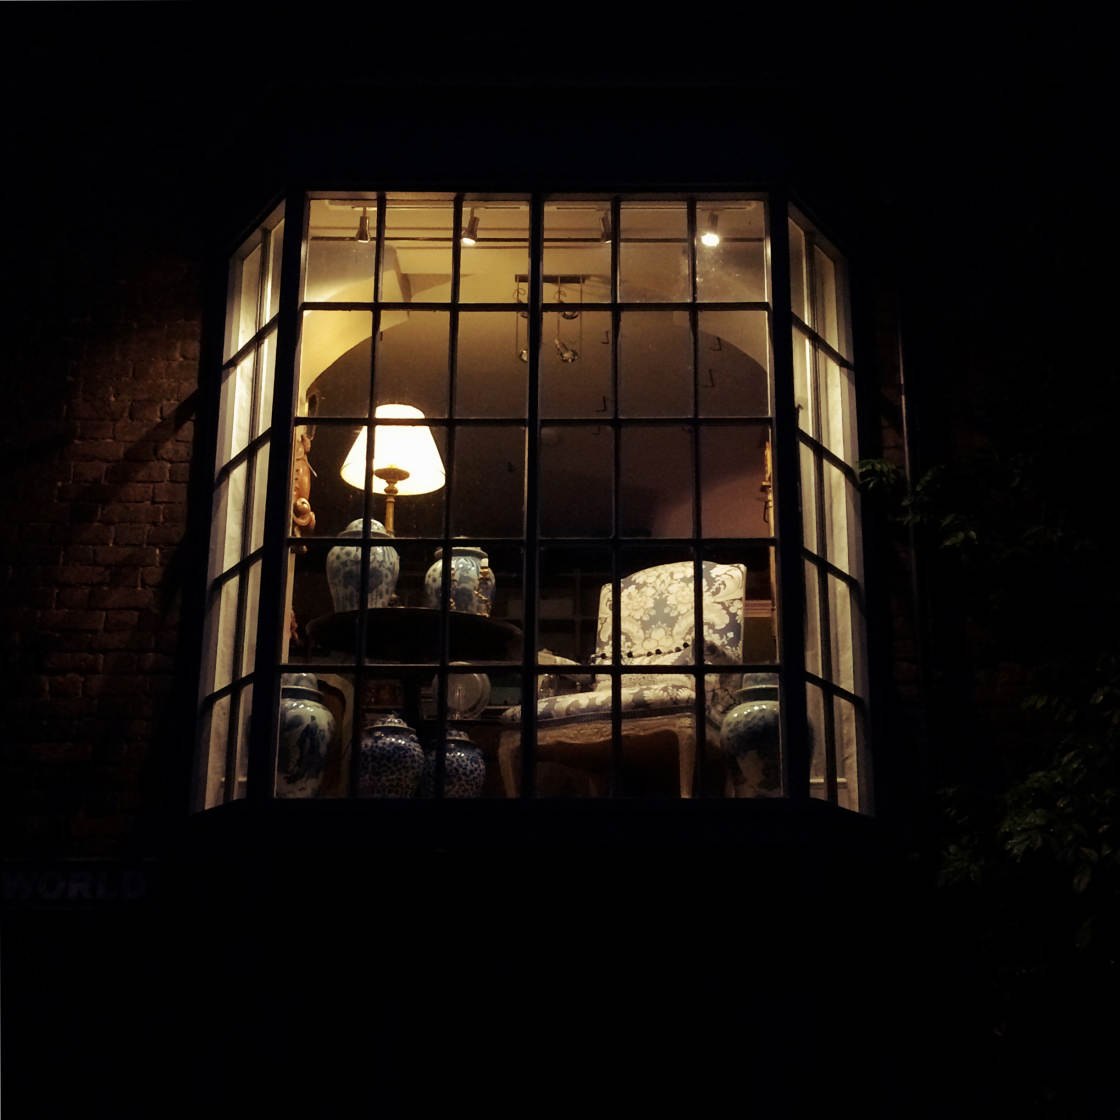
Shoot through a “frame,” such as an archway, doorway, or window.
This adds wonderful foreground interest to your photo. And it draws the eye through the frame towards the background.

For really unique images, try shooting through a semi-transparent object.
You could use frosted glass or a window with water droplets.

You can create wonderfully abstract images using this method.
So remember: Don’t always go for the obvious shot.
Try to come up with some different mobile photography ideas where you can shoot from a more unique angle.

It will make a huge difference to your photography!
12. Simplify Your Compositions For The Most Striking Shots
The best photos are often the most simple ones.

If there’s too much going on in the scene, your photo will be confusing. The viewer won’t know what to focus their attention on.
So, always aim to simplify your compositions.

How do you create simple compositions?
Here are a few mobile photography tips for creating simple, striking photos:
First, try to include only one main subject in your photo. The more subjects you have, the more confusing the photo will be.

Second, ensure the background isn’t too busy or distracting.
You might need to change your shooting angle to eliminate distractions.
Try taking a few steps to the left or right.
Or get down low so that you can include more sky in your photo.

Another option is to get closer and fill the entire frame with your subject.
This is an easy way to remove the background completely.

And finally, try to include lots of empty space in your picture.
In photography, this empty space is called “negative space.”

Including large areas of negative space helps draw attention to your subject.
And it creates wonderful, minimalist photos that really catch the eye.
So don’t forget one of the most important mobile photography tips:
Keep your compositions simple. Because simple images are the most striking!
The post 12 Mobile Photography Tips Every Photographer Should Know appeared first on iPhone Photography School.
About the author

By accepting you will be accessing a service provided by a third-party external to https://kendallcameraclub.org/