Ten of My Favorite Lightroom Masking Shortcuts

Here they are – my top 10 favorite Masking shortcuts (in no particular order):

Shift + O toggles you through the different Mask colors (you’re not stuck with just that red tint overlay).

When you’re using the Masking Brush the [ and ] bracket keys (to the right of the letter P) let you change brush sizes. Hitting the left bracket key makes the brush smaller – the right one makes it larger.

Press the letter O on your keyboard to hide the red overlay tint on your masked area (as shown below) .


Pressing the letter ‘n’ creates a New Mask using the same masking tool you used last, so if you were just using the Linear Gradient Mask tool, it creates a new mask and you can just start dragging to make another Linear Gradient without a trip to the Mask tools menu.

You can press Shift-W to open or hide the Masks panels.

Press the letter “h” on your keyboard to hide the Mask pins on your image from view.

To give your mask a Mask, in the Masks panel right-click on (or Ctrl-click on Mac) on any Mask and from the pop-up menu that appears, chose ‘Rename‘ (as shown below).
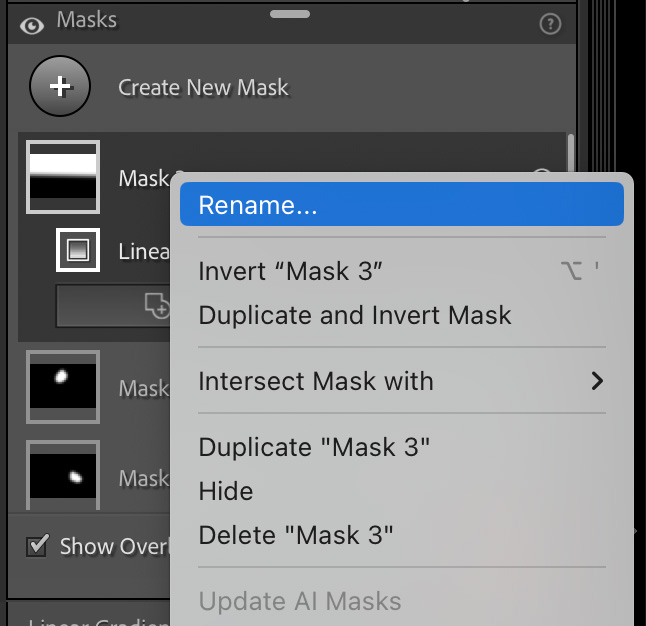

Press the [ ‘ ] apostrophe key to invert your mask.

Press ‘m’ to get one of my most-used masking tools: the Linear Gradient (probably my #1 most-used is the Brush).

Switch the Brush tool to the ‘Eraser’ Brush – hold the Option key (Mac) or Alt key (PC).
There ya have it. Hope you found those helpful. 
The Worldwide Photo Walk is Almost Here

Saturday, October 7, 2023 all around the world – it’s free, it’s fun, and it’s all a great cause (to support the Springs of Hope Orphanage in Nakuru, Kenya. Sign up for a photo walk near you at worldwidephotowalk.com – see you there!
Have a great weekend everybody! #RollTide and GoBucs!
-Scott
The post Ten of My Favorite Lightroom Masking Shortcuts appeared first on Lightroom Killer Tips.
By accepting you will be accessing a service provided by a third-party external to https://kendallcameraclub.org/