Renaming-mania: renaming catalogs, folders, collections, photos, templates, and presets: Part 2
Picking up from last week where we covered renaming catalogs, folders, and collections, let’s run through the rest of the files you might want to rename.
Renaming Photos
There are a few opportunities to rename photos in your workflow. You can choose to rename as part of the import process, you can rename from within the Library module after import, and you can even choose to rename the copies created during export. One thing all these options have in common is that they can leverage Filename templates. Several Filename templates are included by default, but you can create as many custom Filename templates as you need using the Filename Template Editor, which we’ll get to in a bit.
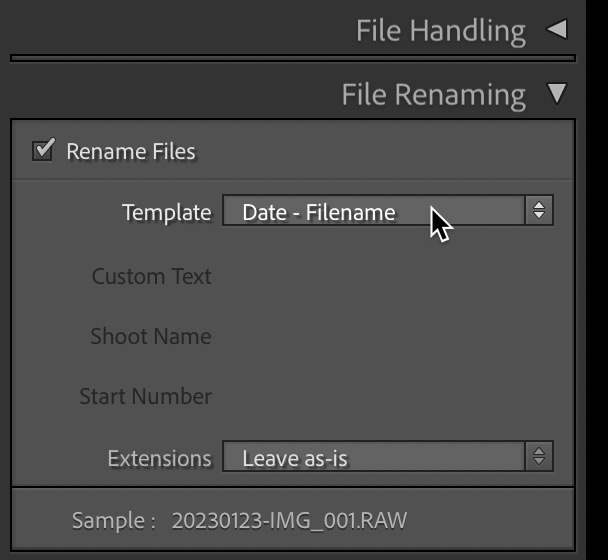
To rename photos as part of the import process, you have to be using a Copy or Move function (can’t rename using Add), and then simply check the Rename Files box in the File Renaming panel of the Import dialog and choose a desired Filename template.
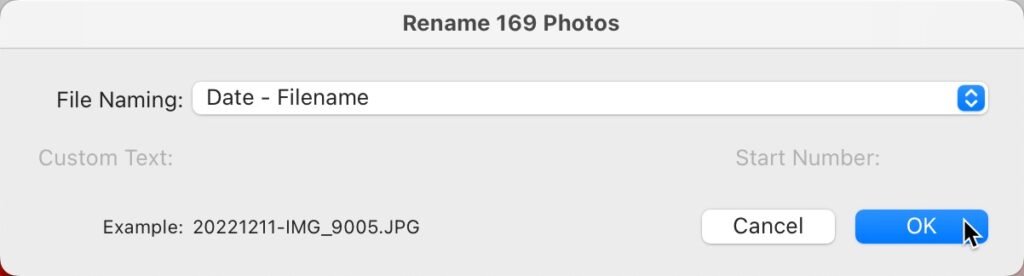
To batch rename in the Library module, go to the folder or collection containing the files you want to rename, select all the files you want to rename, and go to Library > Rename Photos to open the Rename dialog where you can select a desired Filename template. With the template selected, click OK to rename all selected photos.
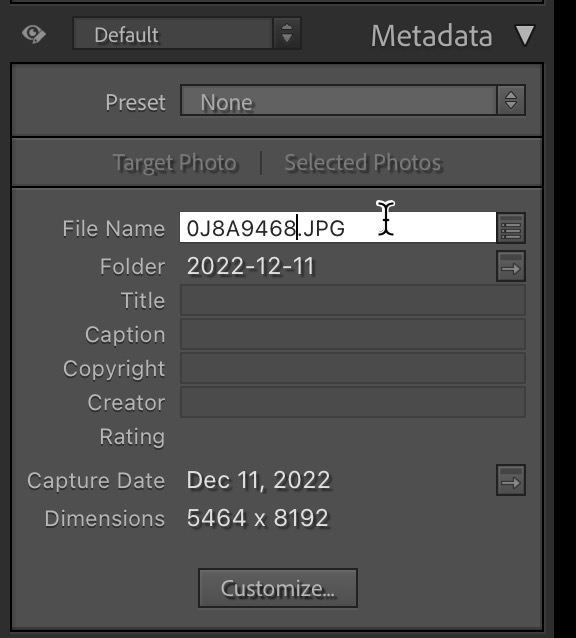
If you just need to rename a single photo, select the photo, expand the Metadata panel set to Default view, and simply type the new name in the File Name field and press Return (PC: Enter). Just like with renaming your catalog file, be certain to retain the file extension when renaming. And, just like when renaming folders you want to do it within LrC so that you don’t break the connection between the file and the catalog.
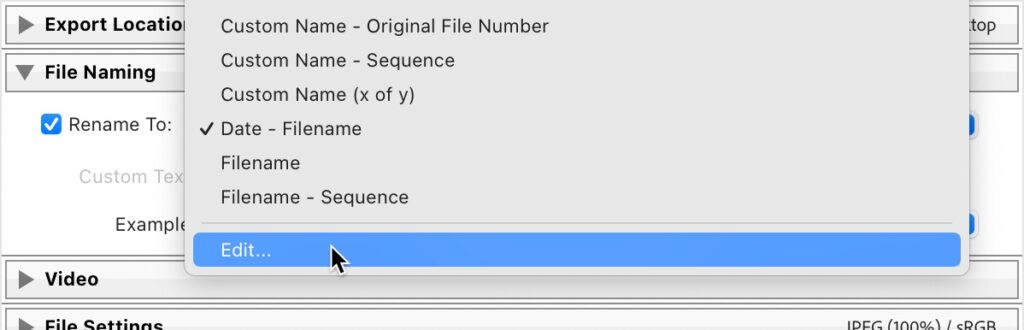
To rename copies during export, simply expand the File Naming panel of the Export dialog, check the Rename To box and choose the desired Filename template from the drop-down menu.

Ok, I’ve mentioned these Filename template files a number of times, so let’s look at how to create a custom Filename template. From any of the locations I just mentioned, instead of selecting an existing Filename template, scroll to the bottom of the drop-down menu and choose Edit to open the Filename Template Editor.
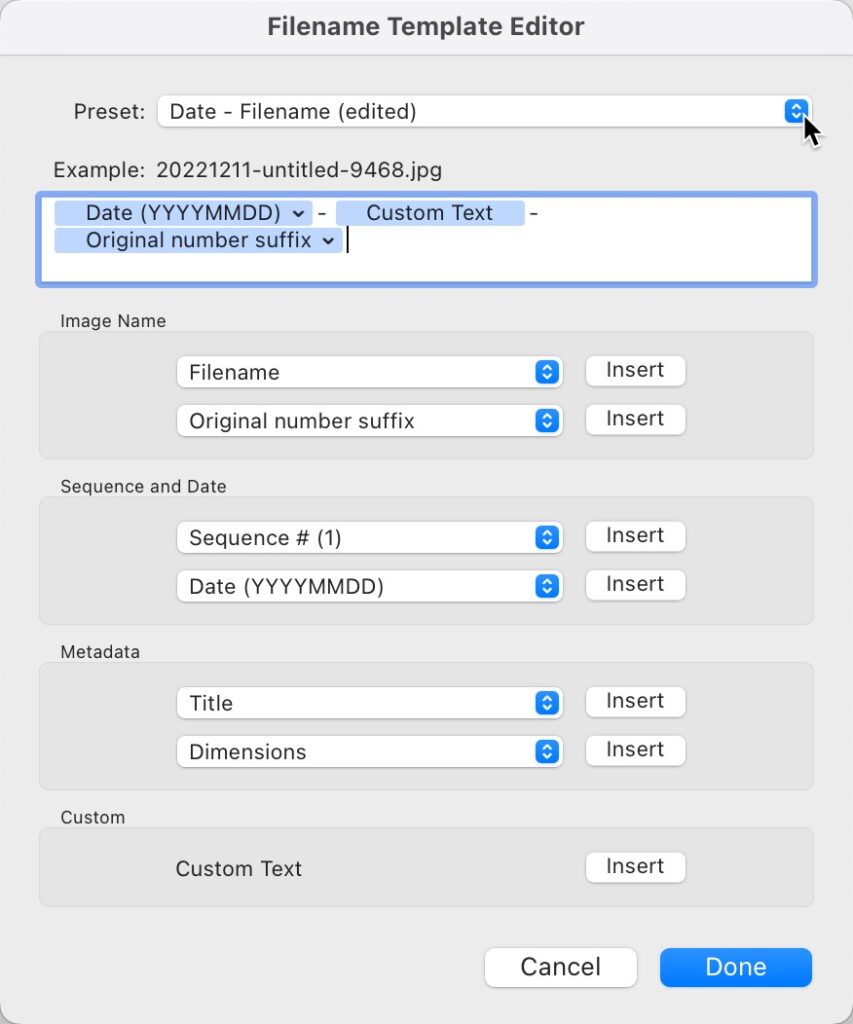
Within the Filename Template Editor you’ll find a drop-down menu at the top to choose between existing templates, an editable field for creating custom templates, and four groups of tokens for building a template. Let’s go through the process of creating a Filename template that uses the date the photo was captured, a field for adding custom text that we can populate as needed when renaming, and part of the camera generated file name.
Step One: Select and delete all tokens in the editable field at the top to start with a clean slate.
Step Two: In the Sequence and Date section, select the desired date format token that works for your needs. I selected Date (YYYYMMDD). I like to separate tokens using a hyphen between each one (to make it easier to read after renaming), so I’ll type a hyphen right into the editable field after the date token, and then do that again after each other token until I get to the end of the name. Feel free to type anything else you want hardcoded into the filename.
Step Three: In the Custom section, click the Insert button to add a token for entering custom text during renaming. Add a hyphen after that if you wish.
Step Four: In the Image Name section, choose the Original number suffix token, which retains the numeric part of the camera generated filename. If you don’t want to use any part of the camera generated name, feel free to use a Sequence number token in this place instead. You just want something that will increment with each file so each photo has a unique name.
You can continue to add any other tokens you wish. Notice above the editable field there is an example of what this filename will look like when used (note, where it says untitled will be replaced with whatever custom text you insert at the time).
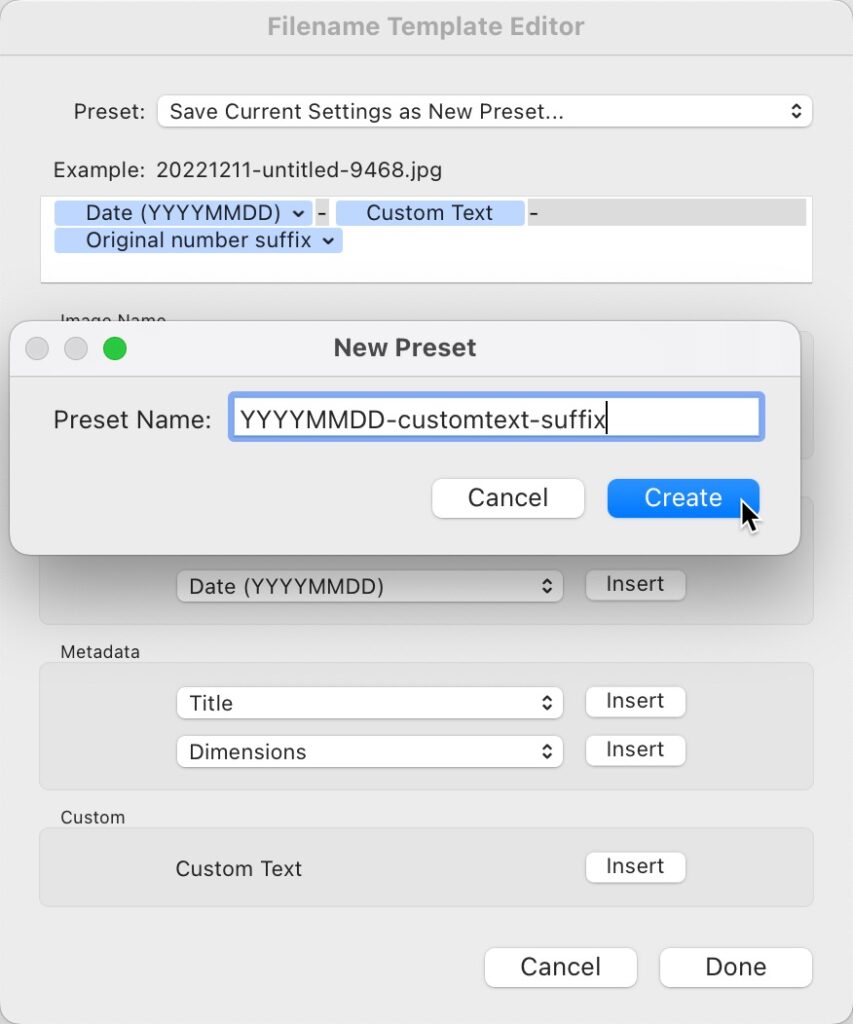
Step Five: Click the Preset drop-down menu at the top and choose Save Current Settings as New Preset, then enter a meaningful name in the New Preset popup dialog that appears and click Create. I like to name the templates in a way that reflects how they work, so for this one I called it YYYYMMDD-customtext-suffix, so when I see it in the list of templates I remember what it does.
Click Done to exit the Filename Template Editor when ready to move on. The custom Filename Templates you create will be available from Import, batch rename in Library, and Export.
Renaming Templates
On the subject of templates, for reasons I don’t know or understand Adobe uses the words templates and presets pretty loosely and somewhat interchangeably. For example, in the Filename Template Editor we just worked in you can see the templates are accessible by using the Preset drop-down menu. Go figure. So, if you decide at some point that you want to rename any of your custom Filename Templates, here’s the secret handshake.
Step One: Open the Filename Template Editor just like we did before.
Step Two: Click the Preset drop-down menu and select the template you want to rename from the list.
Step Three: Click the Preset drop-down menu a second time and select Rename preset “[presetname]” from the list that now appears. This opens the Rename Preset popup dialog box where you can enter a new name and click Rename.
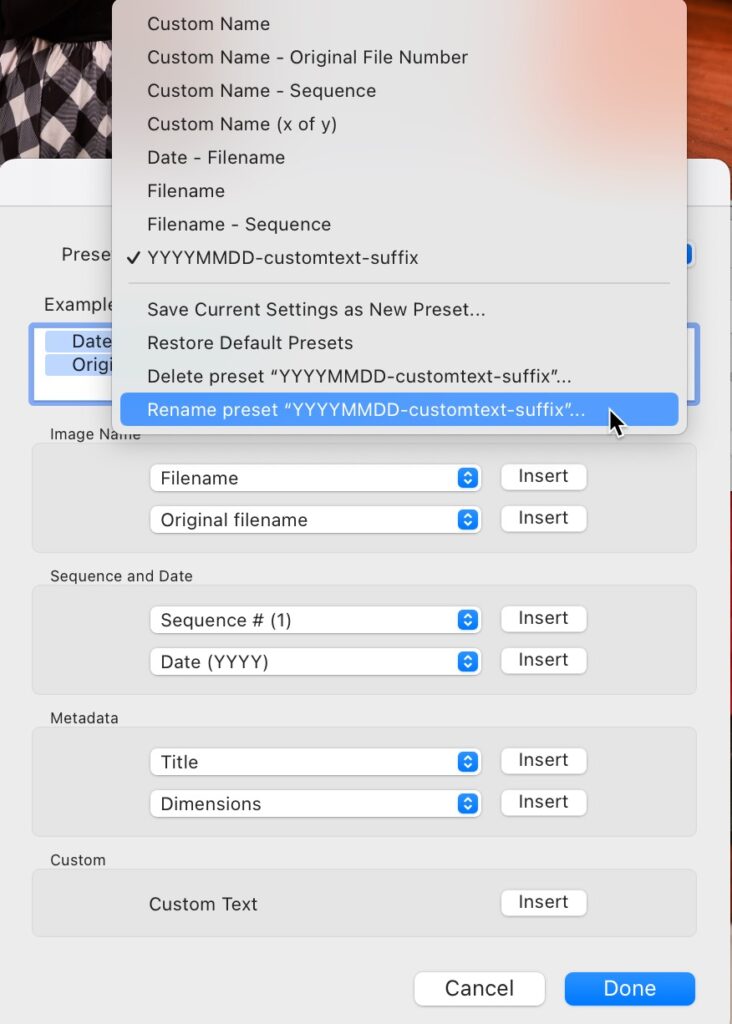
Note, there is also an option in there to delete the selected preset/template if needed.
In closing, there are a few other little odds and ends that you may one day want to rename, like Develop presets or keywords. These are straight forward in that you simply right-click the one you want to rename and chose from the contextual menu that appears. The only thing to keep in mind is that in general, LrC only allows you to rename custom bits you created and not the templates/presets that come pre-installed with the program.
The post Renaming-mania: renaming catalogs, folders, collections, photos, templates, and presets: Part 2 appeared first on Lightroom Killer Tips.
About the author

By accepting you will be accessing a service provided by a third-party external to https://kendallcameraclub.org/