Making the Most of Local Adjustments and Their Masks
Being able to adjust specific regions of our photos without leaving Lightroom Classic is a huge time saver, but there are some nuances to the tools that you’ll want to keep in mind.
[Editor’s note, this originally appeared in the April 2021 issue of Photoshop User Magazine.]
The addition of the Adjustment Brush, Graduated Filter, and Radial Filter to Lightroom Classic (LrC) years ago was a huge boon to workflow efficiency as it allowed us to stay in LrC more often, and possibly avoid a trip to Photoshop completely. However, there were always situations where those three tools just did not offer the precision that was needed to successfully isolate the subject we wanted to adjust. For many years the best we could do was use the brush within each respective local adjustment tool to erase away unwanted areas of adjustment, but this has a few drawbacks. Within the last couple of years, we gained the Range Mask function within each local adjustment and with it, a very powerful tool for refining exactly what part of the photo we want to adjust, however that has its own limitations. In this article I want to explore scenarios where a simple erase can do the job, where range mask works better, and where you may just need a bit of both to get the job done.
Auto Mask and Range Mask
The first tool to consider when using the Adjustment Brush is auto mask , which does a great job along high contrast edges. So for example, if I wanted to adjust the foreground rocks in this photo I could grab the Adjustment Brush, check Auto Mask in the brush settings section (bottom of panel), and as long as I keep the crosshair in the cursor below the sky I can brush right up to the edge without affecting the sky.
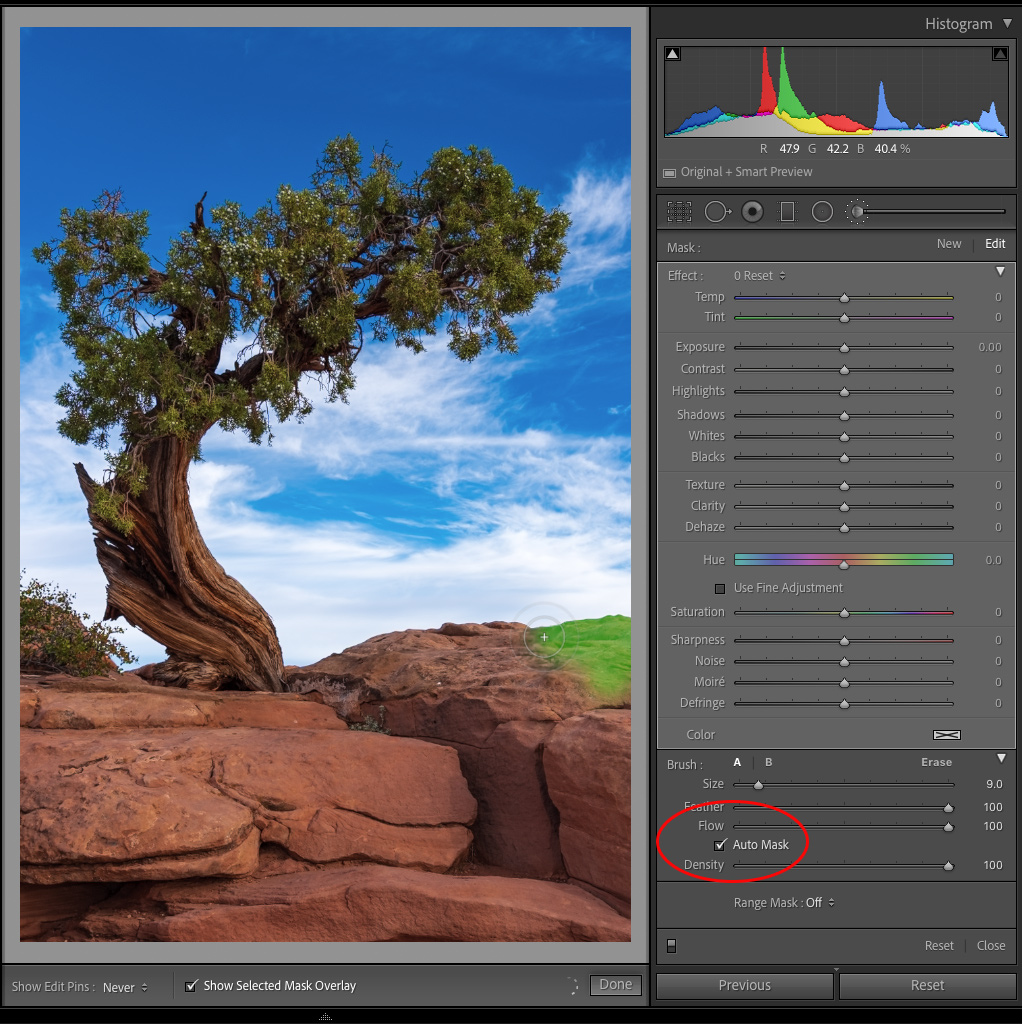
I recommend turning Auto Mask off though when you are brushing within a safe area, because it can sometimes miss regions you do want to adjust if those regions are not close enough in similarity (different tonality or hue) to where the cursor was brushing. I also recommend turning on the Selected Mask Overlay, which you see here in green. The overlay can be enabled by checking the box in the Toolbar below the main workspace, or by pressing the O key. Press Shift+O to cycle through the different color overlays (or go to Tools > Adjustment Mask Overlay). The overlay shows where you have brushed without even needing to have any adjustments dialed into the tool. Press O to disable the overlay when you no longer need it.
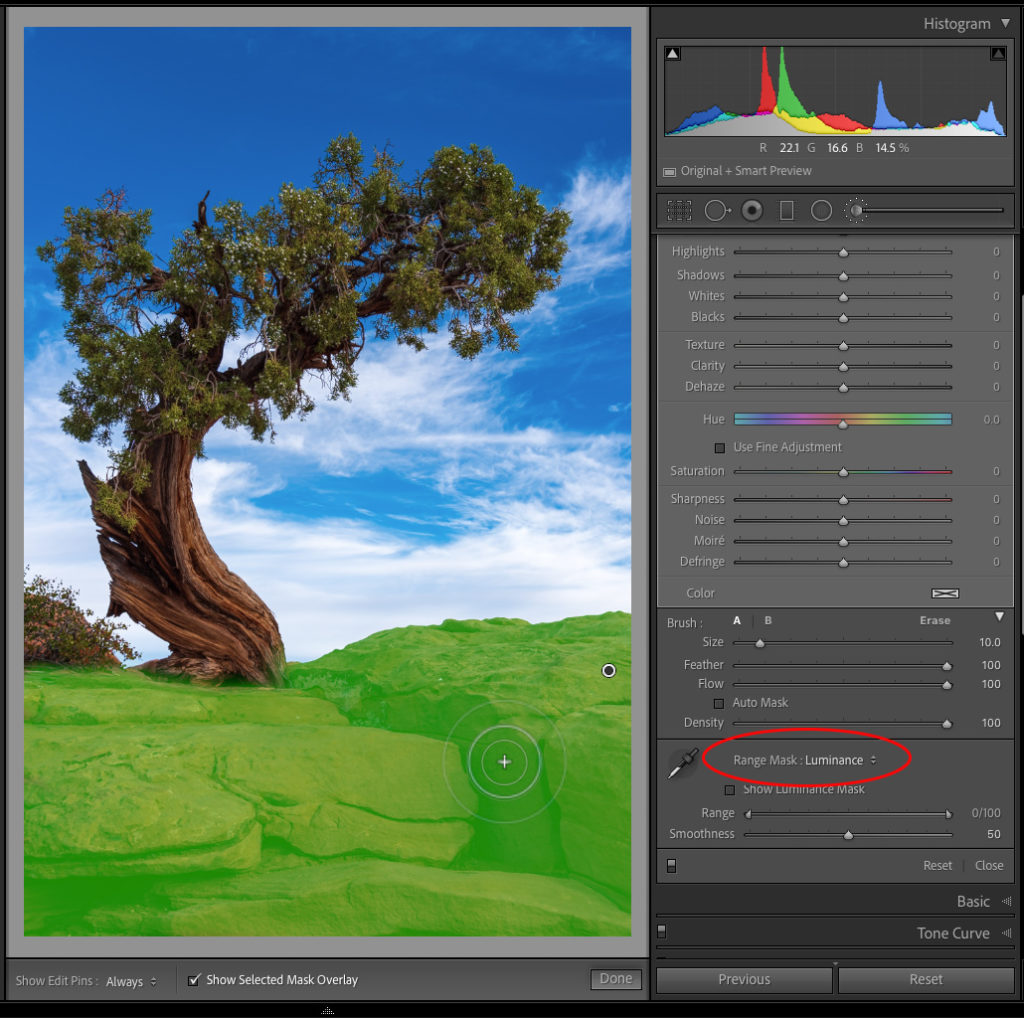
In this instance, I first only want to adjust the brighter regions of the foreground rocks, so I’m going to use Range Mask to help me limit the adjustment based on luminance values. Below the brush settings, click the Range Mask drop-down menu and choose Luminance to reveal its options. The eyedropper is the Luminance Range Selector tool, which allows me to click within the affected area and select the luminance values I want to affect. As soon as you click, you will see the control knobs on the Range slider shift to limit the adjustment to the luminance values you clicked on. Alternatively, you can skip the selector tool and just adjust the Range manually.
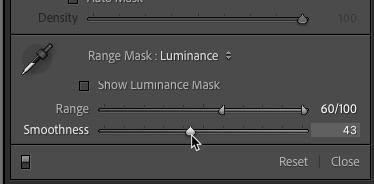
My goal is to brighten the brighter regions to add more contrast to the rocks, so I clicked on the brightest part of the rocks to set my starting range. At this point it is a good idea to dial in some of the settings you want to use (if you haven’t already), so you can see the results in real time. I’m starting with a +1 Exposure setting. With my starting range set between 55 and 100, I can see the effect of my increased Exposure. Now I can fine tune the results to get the desired look. If I want to expand the range of affected tonal values I can drag the left control knob on the Range slider to the left, and if I want to reduce the range of affected tonal values I can drag the knob to the right. I settled on a range of 60 to 100. The Smoothness slider can be used to smooth the transition between the affected and unaffected area to further refine the result.
There are a couple of options to visualize the mask while you tweak. First, check Show Luminance Mask to see the mask (affected area) appear under a red overlay. Alternatively, hold down Option (PC: Alt) while you move either the Range or Smoothness sliders to see a grayscale version of the mask, with the white areas corresponding to the affected areas, and black areas representing the areas removed by the mask.
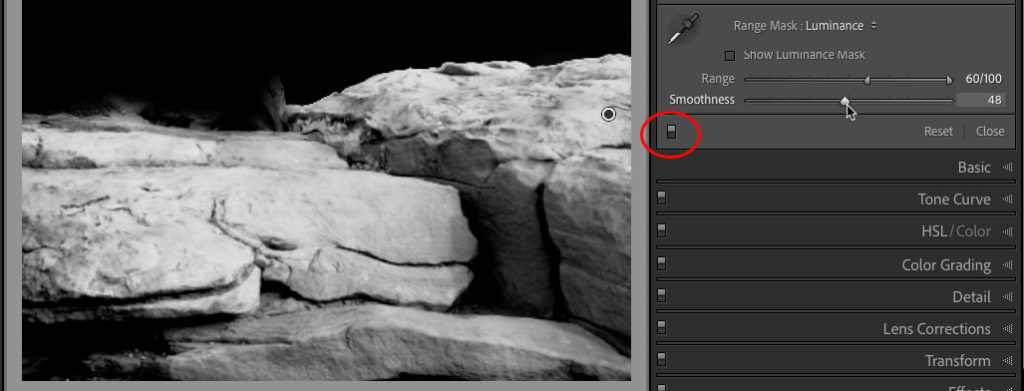
It is also helpful to see a before and after view of your adjustment by toggling the switch in the lower-left corner of the adjustment panel up and down (down disables that panel’s adjustment). When using the Adjustment Brush, Auto Mask and Range Mask are a powerful team for focusing your adjustment exactly where you want it to be, with a lot of control.
Join me next week with a look at using a Graduated and Radial filter together, along with modifying them with a brush and Range Mask for even more control.
The post Making the Most of Local Adjustments and Their Masks appeared first on Lightroom Killer Tips.
About the author

By accepting you will be accessing a service provided by a third-party external to https://kendallcameraclub.org/