Lightroom Classic Interface Mac vs. Windows
I know as a writer and educator that it is important to note the operating system differences in Lightroom Classic when they come up. I also know as a human being who uses the software primarily on one operating system that it is easy to lose sight of those differences sometimes. So, in the interests of helping those folks who are not dual-operating system fluent and encounter those places where there is a difference, this post is for you.
Thankfully, there really aren’t that many differences, but I know that when they come up and when are not called out, it can be very frustrating for the reader (I know because I hear from those people). I’ll start with the most common place I hear about, and then move through the rest.
Print Module
The place that seems to trip people up the most is in the Print module. On a Mac, there is a Page Setup and a Print Settings button on the bottom of the left panel group.

On Windows, there is only a Page Setup button.
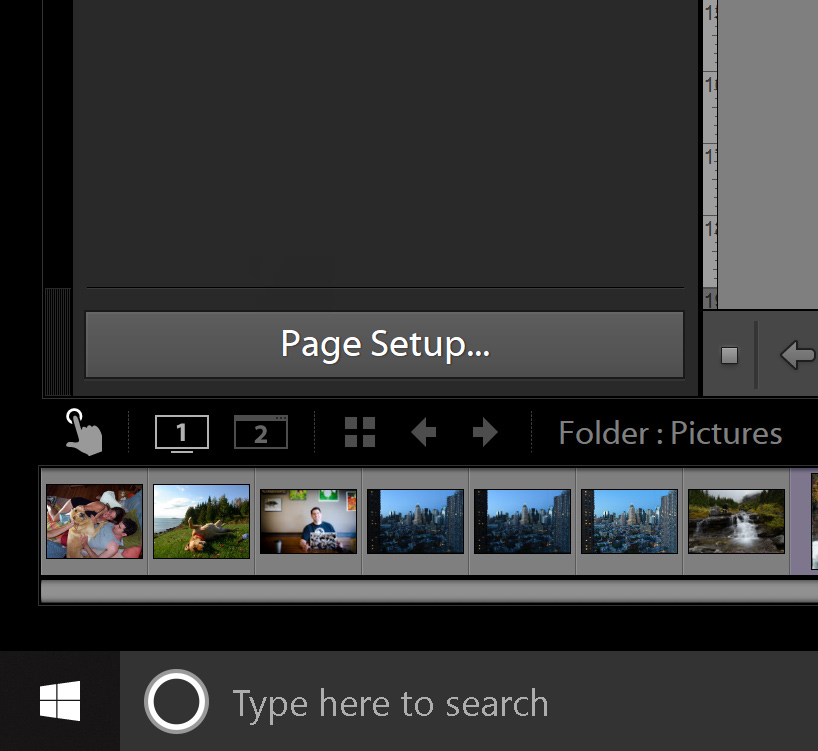
Side note, that little hand icon under Page Setup is for jumping into the “Touch Workspace” that only shows up on Windows tablet computers (bonus difference!).
It is really easy for a Mac-centric author of tutorials to forget that difference, which can really confuse Windows users who think they are somehow missing a button.
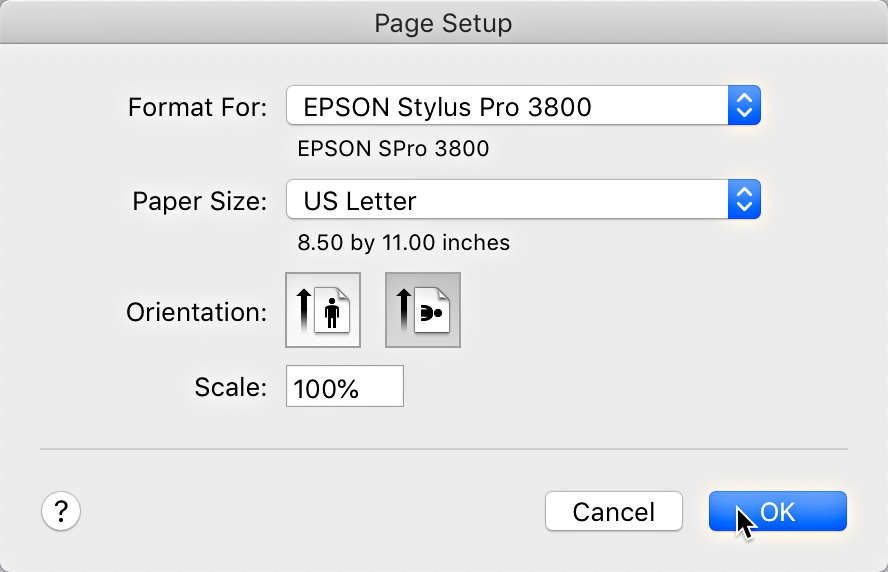
The reason there is a difference here, and really everywhere that there is an interface difference, is because the operating system gets involved. When printing, Lightroom Classic has to involve the operating system and the printer driver to get the job done. On a Mac, clicking the Page Setup button opens the Page Setup dialog box where you select the printer, the paper size (borderless and non-borderless options for each size), and the paper orientation.
On Windows, clicking the Page Setup button opens the Print Setup dialog box that also allows for selecting the printer, the paper size, and the paper orientation. Depending on the printer, there may also be a Source drop-down menu for choosing where the paper is fed from.
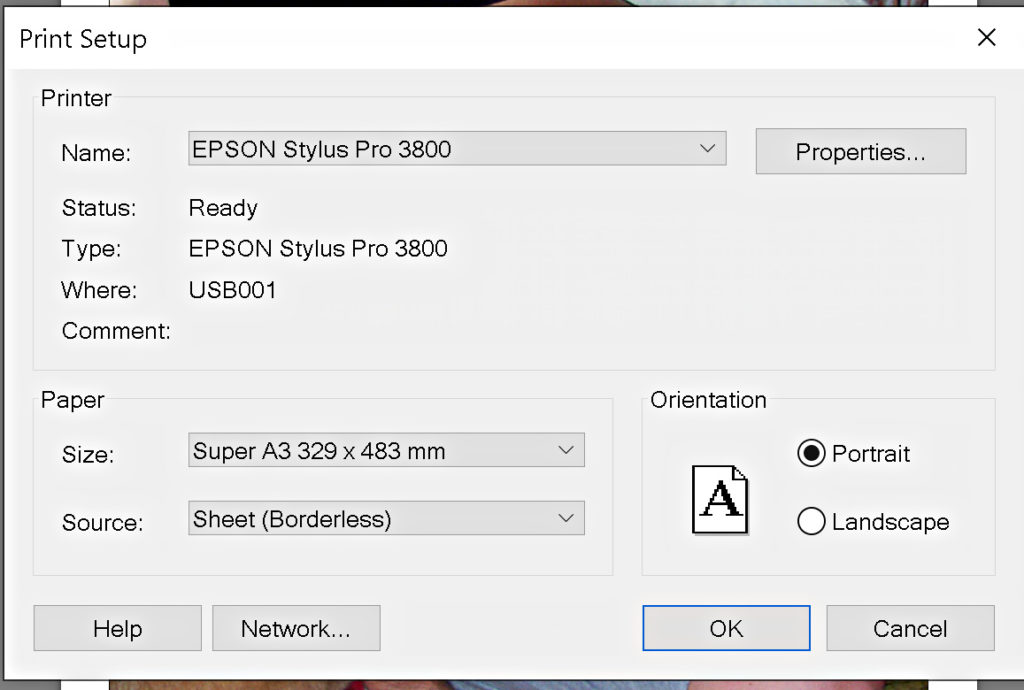
Notice on the Windows Print Setup dialog box there is also a Properties button? Clicking that takes you to the advanced properties of the printer driver where you can select things like Media Type, Print Quality, Mode, and a host of other advanced settings (the contents of this dialog will vary with the printer you are using). Those are the same types of settings a Mac user would access via the Print Settings button that appears on the Mac interface and not on Windows. That’s all there is to it. So, if you are following a tutorial showing a Mac interface and are instructed to click Print Settings you now know that means you need to click Page Setup and then click the Properties button to access the same settings. Ok?
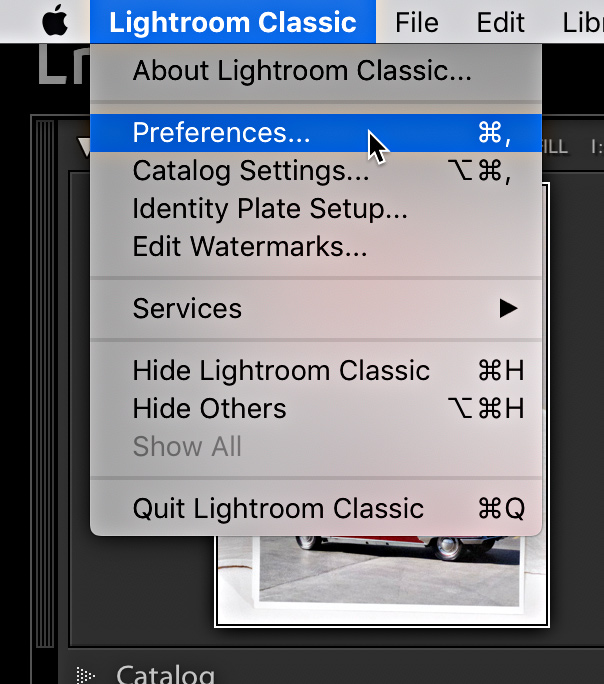
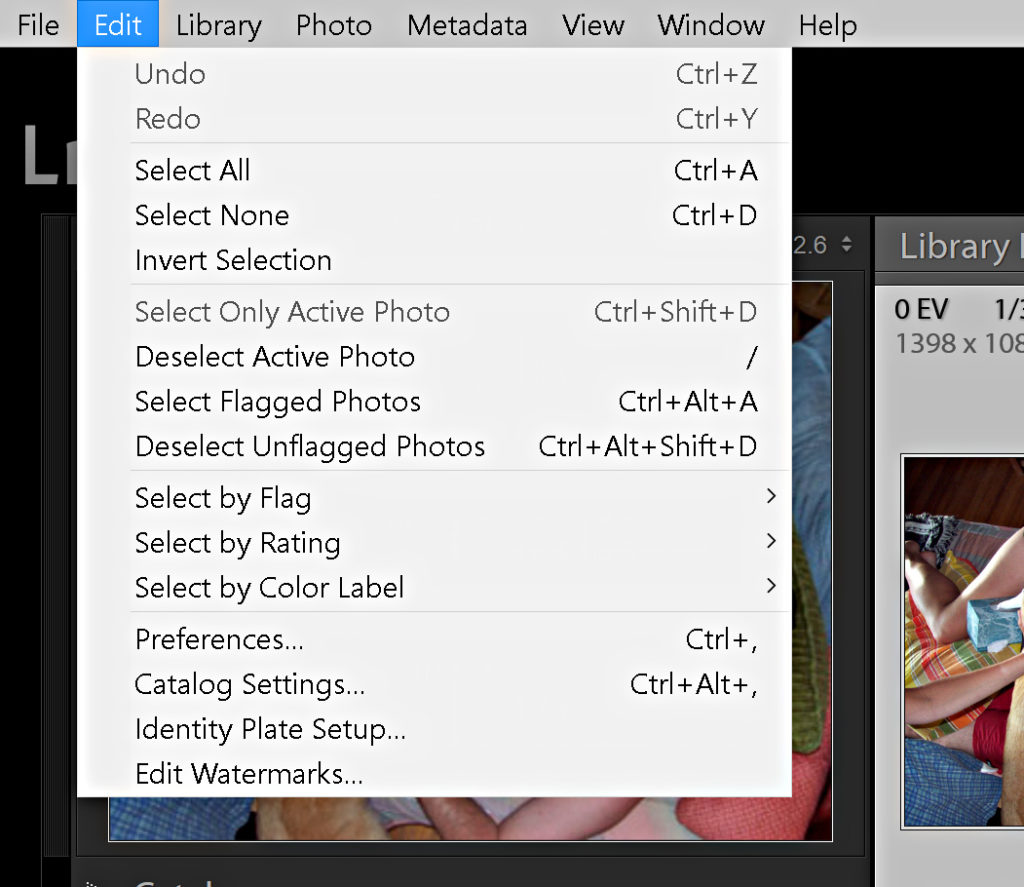
Preferences, Catalog Settings, Identity Plate Setup, and Edit Watermarks
This little cluster of menu options lives in under the Lightroom Classic menu that exists on the Mac operating system (on a Mac, every program has a menu with its own name that houses things like preferences).
On Windows, there is no special Lightroom Classic menu so that little cluster of menu options are found under the Edit menu.
Keyboard Shortcuts
The most well known differences between Mac and Windows is the keyboard. Here’s the decoder ring:
Mac CMD key = Windows Ctrl key
Mac Option key = Windows Alt key
Along with keyboard shortcuts there is the old throwback to when the Mac mouse did not have a right-click button on it, and so on a Mac it is possible to invoke contextual menus by holding the control key and clicking on something. These days Mac users either have a multi-button mouse or just use the track pad or some other input device. The “right-click” convention could involve a two-finger tap on the Trackpad or a press of a button on a Wacom pen, so I feel it is finally time to let go of saying “control-click” for Mac and “right-click” for Windows. Don’t we all know that right-click means open the contextual menu however you do that? Anyway …
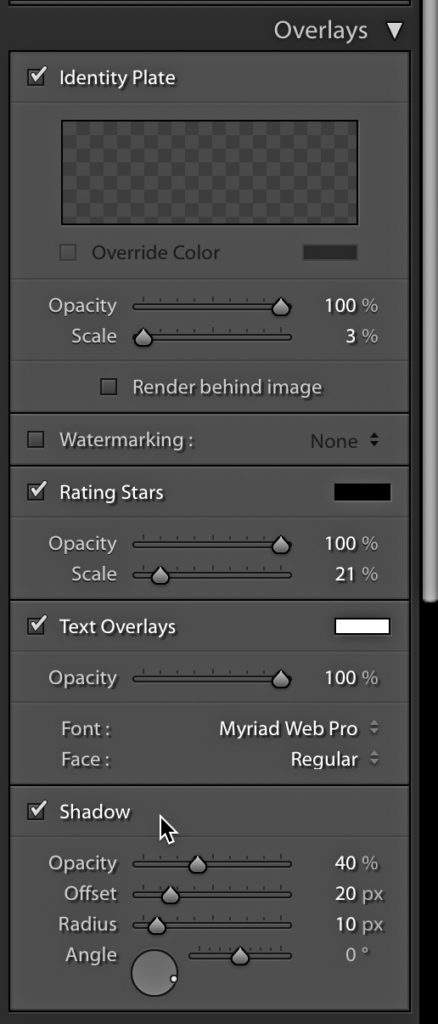
Drop Shadow on Overlays in the Slideshow Module, say what?
The award for the most unused difference between the operating systems goes to the Shadow control in the Overlays panel of the Slideshow module on a Mac. I have no idea why this does not exist on Windows (except that no one uses it?), but for all the many years it has existed on Mac I can’t recall anyone asking about it. So there you go.
Adding Folders and Exporting
The other time you will encounter a visual difference in the interface is if you have to interact with the file system by either adding a new folder in the Library module or exporting to a location on your system via export. In those circumstances you will see an operating system specific dialog box for navigating down through the folders to find your destination or add a new folder.
Those are all the places I can think of that look and act differently depending on the operating system you are using (or the author of whatever tutorial/video you are viewing was using). I apologize for any time I may have left out one of those details that caused confusion for anyone. Now you have this Mac to Windows translation guide to help you out.
The post Lightroom Classic Interface Mac vs. Windows appeared first on Lightroom Killer Tips.
About the author

By accepting you will be accessing a service provided by a third-party external to https://kendallcameraclub.org/