Leverage Lightroom Classic Snapshots in Photoshop
Even if you use Lightroom Classic for the majority of your editing needs there are still times when you just need to do something in Photoshop. This can be intimidating for some people who are very familiar with editing in Lightroom, but feel a bit disoriented when they head to Photoshop. I want to share a simple Lightroom Classic tip to help you have an easier time should this happen to you.
The key to this tip is to take advantage of creating Snapshots in Lightroom Classic’s Develop module before you head to Photoshop. Here’s a refresher on Snapshots if you are rusty on the topic, but basically a Snapshot is a way to preserve an editing state so that you can easily switch back to it if needed, and you can create as many as you need.
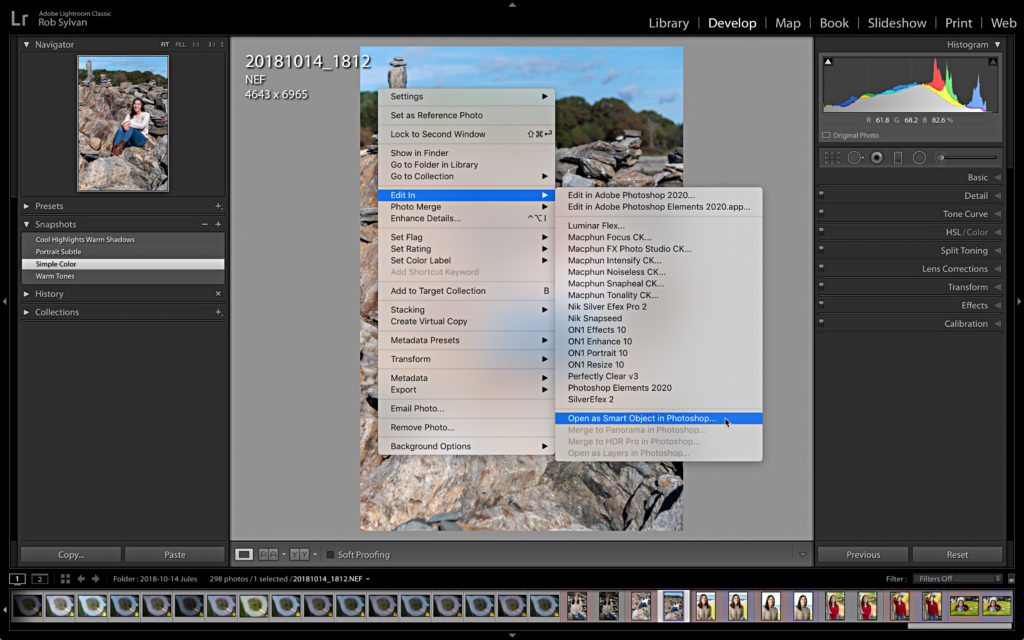
When it is time to head to Photoshop, you can use the Edit in > Open as Smart Object in Photoshop, which embeds a copy of your original raw photo, plus all edits (including Snapshots) into the smart object layer in the copy (TIF or PSD based on your Lightroom Classic preferences) that opens in Photoshop.
So, let’s say you were editing a senior portrait (shout out to all graduating seniors who having alternative ceremonies this year!), and you came up with a few variations on the final image, and you wanted to see how each one looked with a simple text overlay you created in Photoshop.
Start by creating your different looks in Lightroom Classic, and saving each look as a Snapshot.
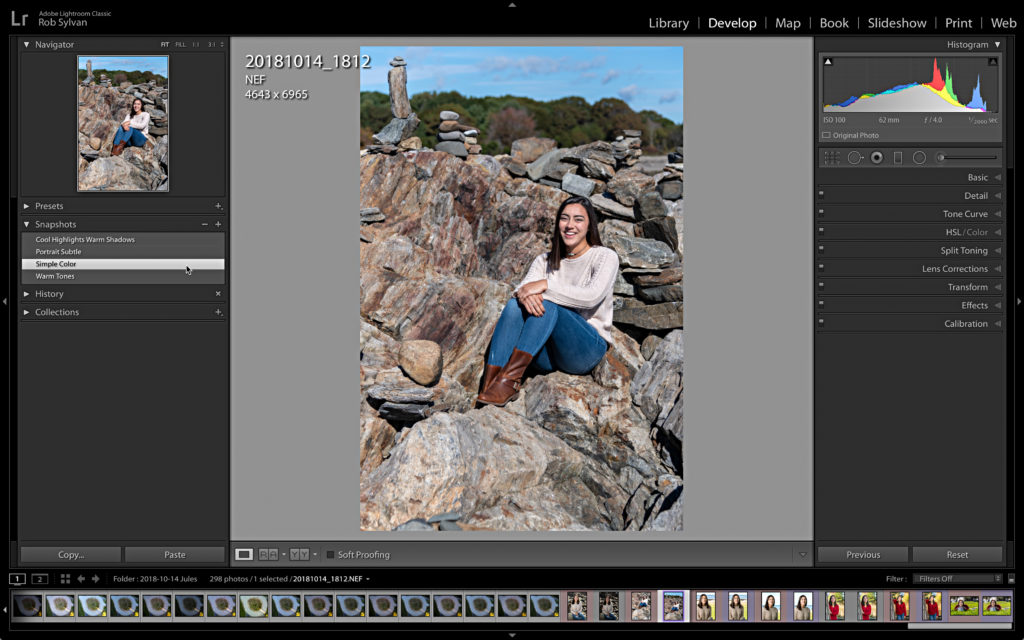
Then, when you are ready, use the Photo > Edit in > Open as Smart Object in Photoshop menu to create a new copy with the original raw photo embedded in the smart object.
Then create your overlay (or whatever it is you are doing in Photoshop).
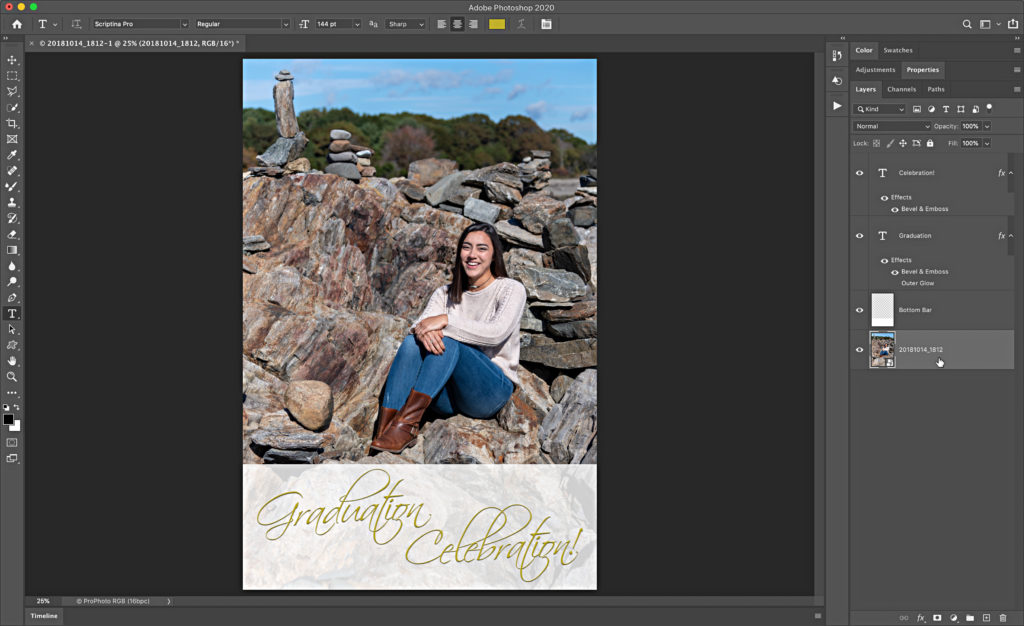
Then to switch between the different looks, double-click the smart object icon in the Layers panel to open the copy of the raw photo into the Camera Raw plugin, and open the Snapshots tab.
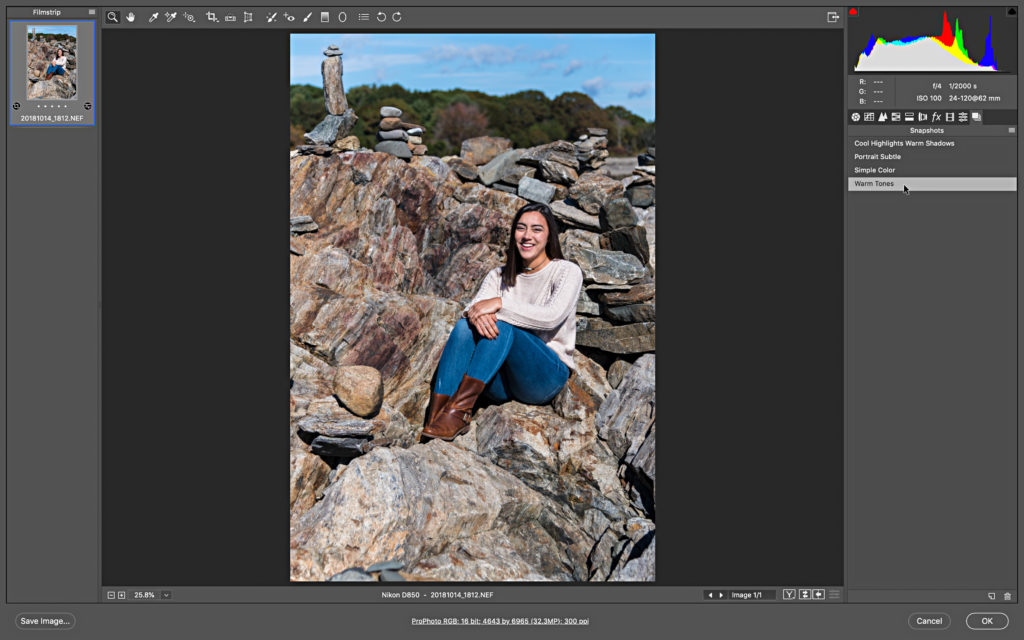
Click on the Snapshot you want to apply, then click Ok. While you have the full editing capability of Adobe Camera Raw available, you don’t need it because you did all of your edits in Lightroom Classic and saved each look as a Snapshot. After clicking Ok, you return to Photoshop and see the updated look.
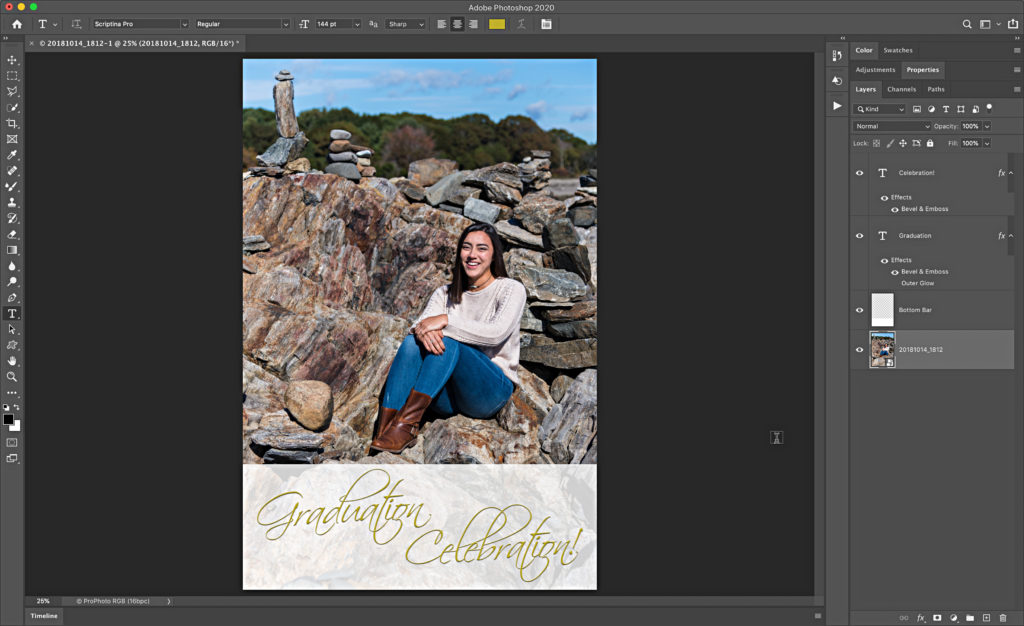
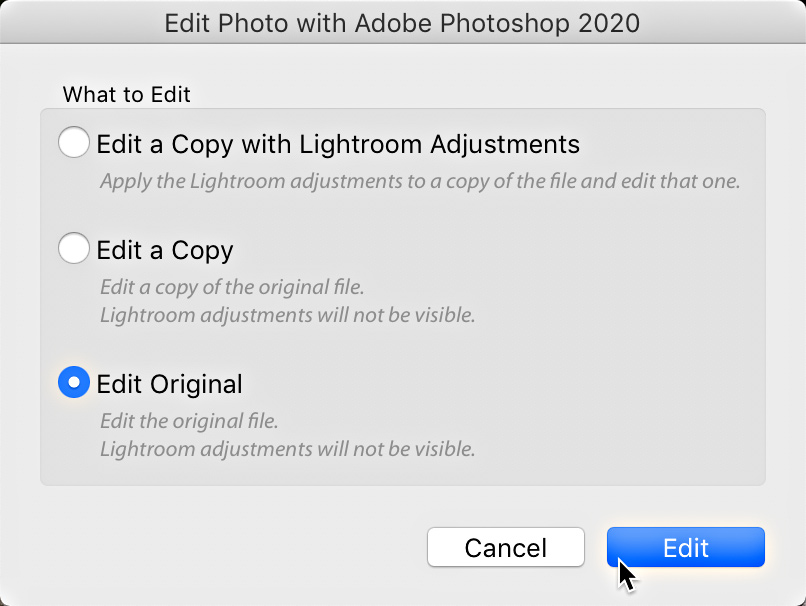
You can jump right back to view another Snapshot for comparison the same way. Once you’ve picked the final look, use the File > Save command to save the copy to the same folder as your source photo and add it to the Lightroom Classic catalog. Should you need to send that layered file back to Photoshop for more editing, use the Edit in > Edit in Photoshop command, and choose Edit Original, to open it right up to where you left off.
Hope that helps!
The post Leverage Lightroom Classic Snapshots in Photoshop appeared first on Lightroom Killer Tips.
By accepting you will be accessing a service provided by a third-party external to https://kendallcameraclub.org/