Lightroom tethering is an essential feature for studio photography. It allows you to instantly and continuously upload your images to Lightroom while shooting. This means that you can check images on a good screen as the shoot progresses, making sure you have the right focus and best shots.
Today, we will guide you through all Lightroom tethering features. We will show you how to set up a tethered shoot and how to make the most of it. This ultimate guide to Lightroom tethering will transform your photoshoots to be more efficient and effective.
What is Lightroom Tethering?
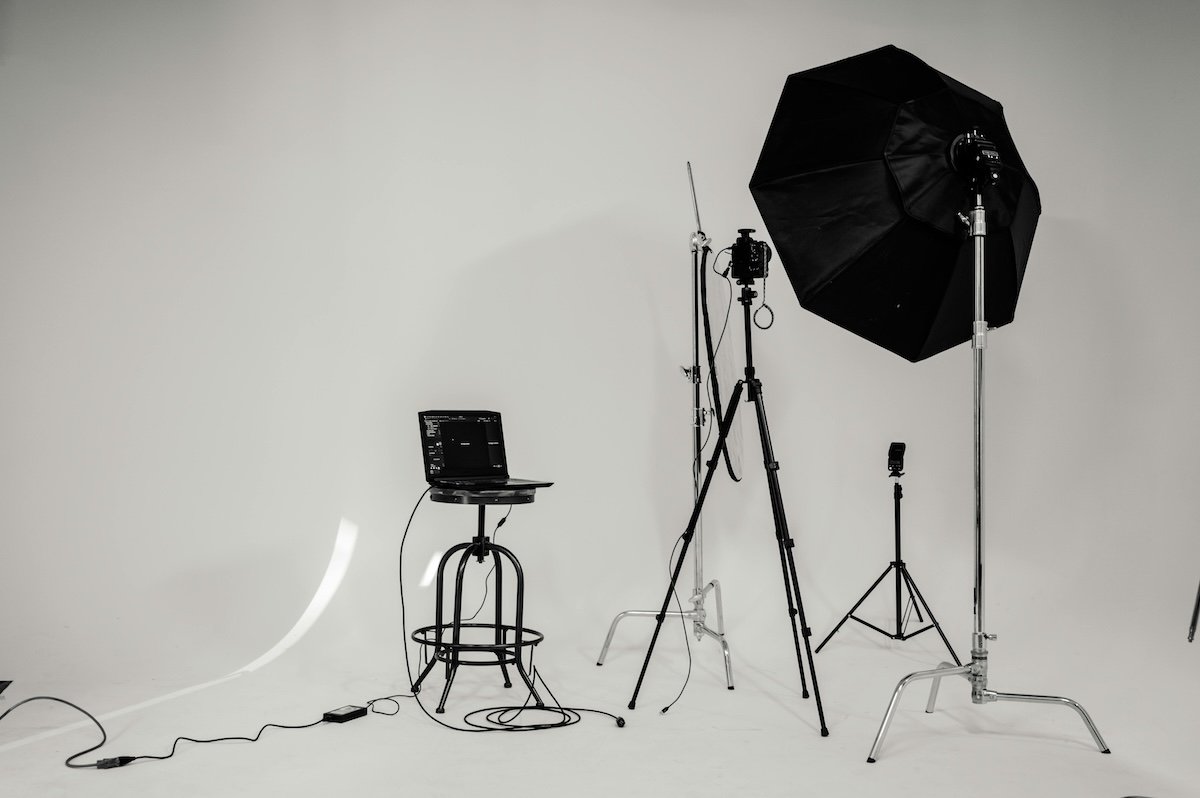
Lightroom tethering involves plugging your camera directly into the computer while shooting. This allows you to control your camera and upload your images instantly. Tethered shooting is most common in a studio, but it can also be done on location.
The images will appear on your screen as you shoot them. This is incredibly helpful for a smooth shoot between the photographer and model. An assistant can be on hand to check the photos coming in to make sure everything looks up to scratch.
Tethered shooting is also helpful for composing product shots. Lightroom tethering lets you control the camera settings and press the shutter release from the computer. This allows you to keep the camera still without touching it. Therefore, you can adjust the scene you’re shooting without interrupting the camera.
© Brett Sayles
Lightroom Tethering in Lightroom vs Lightroom Classic
Adobe Lightroom now comes in two different versions: Lightroom and Lightroom Classic. Both versions have many of the same functions; what differs are the approaches to editing processes.
Lightroom does not have tethered shooting. This means you must use Lightroom Classic to start a tethered shoot. You get both versions of Lightroom when purchasing any Adobe Lightroom package.
Tethered Capture in Lightroom Classic
What Do You Need For Lightroom Tethering?
You need Adobe Lightroom, a digital camera, and a USB cable to start your tethered Lightroom shoot.
You must ensure you have a long USB cable for tethered shooting. This will allow you to walk around with your camera without damaging the camera or the computer. Laptops are best for a more portable shooting setup.
You may also need a tripod if you keep the camera in the same place. This is particularly important for product shots or producing composites.
© Skylar Kang
How To Start A Lightroom Tethering Photoshoot
Let’s now guide you through setting up your own Lightroom tethering photoshoot. Make sure your camera is compatible with Lightroom tethering; you can check from this list here.
Plug in Your Camera
The first thing you will need to do is connect your camera to your computer. Then, you will want to open Adobe Lightroom Classic.
Ensure your camera is turned on before starting a tethered capture session.
Start a Tethered Capture Session
To start your Lightroom tethering session, go to File > Tethered Capture > Start Tethered Capture…
This will open up a Tethered Capture Settings dialog box. Here, you can make file management choices that will help keep your shoot organized.
These options include naming the photoshoot session, automatically adjusting the file names of your photographs, and selecting the import destination. All these options are super helpful and give us control in important places.
Lightroom also allows us to automatically apply metadata keywords to every photo. This is particularly helpful if you perform many photoshoots. It means you can search for the shoot using simple keywords.
Tethered Capture Session
After finishing your Tethered Capture Settings, press OK, and Lightroom will search for a connected device.
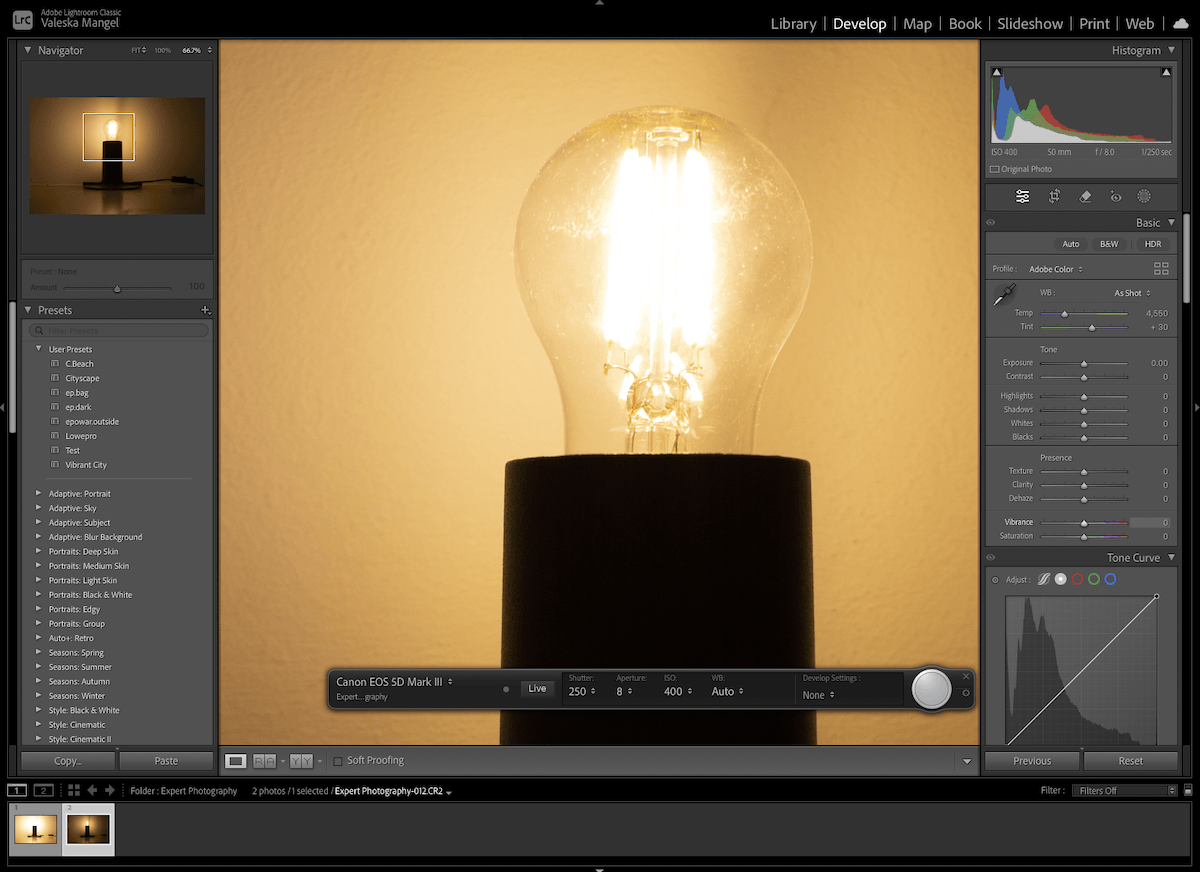
Once the program has your camera connected, you will get the Tethered Capture interface. From here, you can shoot on camera or use these controls to take your photos. Each photo will be uploaded directly to your library.
Tethered Capture Control Box
Control Your Lightroom Tethered Photoshoot
We will now dive into all the different ways you can control your tethered photoshoot in Lightroom.
Shutter Release
You can take pictures through the camera like normal. But, the tethered photo shoot box allows you to take photos from the computer. You can do this by clicking the big grey button toward the right end of the dialog box.
The shutter release is almost instantaneous. This is ideal for time-sensitive shoots, such as using live models or even wildlife. The image will appear in your Lightroom Catalog in a couple of seconds.
Click the big grey circle to trigger the shutter
Camera Settings
Like the shutter release, we can edit the camera settings from the computer. The Shutter Speed, Aperture, ISO, and White Balance are controlled by drop-down menus.
Once you click the new settings, your camera’s settings automatically change. This is a great feature because it means you do not have to risk moving the camera to change the settings.
A feature like this is ideal for times when movement should be kept to a minimum. It is also helpful if you have to place the camera in a difficult location that is not easily accessible.
Develop Settings
Lightroom allows you to automatically apply presets to your images as they are imported. You can choose from any preset, whether a stock one or one you have made or bought online.
This is helpful for photographers as you can automatically see how your images will look in your desired style. This may change how you compose or light your shoot. It will save you from getting to the editing process and wishing you had balanced elements differently.
Preset options in Tethered Capture
Live View
Tethered Shooting also includes a Live view. This Live view is brilliant for times when you want to keep the camera as still as possible. It is also perfect for situations where you place the camera in a hard-to-reach location.
The Live view allows you to rotate the screen. This is helpful if you plan to edit your shoot in portrait mode.
If you return to the tethered shooting dialog box with the Live view open, you will see more options. This new array of options allows you to control the focus.
You can control the arrows, which have 3 different increments in each direction. Even the largest increment you can move it in is quite small, so the smallest option is great for fine-tuning your focus.
You are also able to autofocus. Please set your autofocus point before placing your camera where it needs to be. The autofocus button will allow you to shoot a moving model or subject more easily than pressing the increment buttons.
Other Lightroom Tethering Tips
Zoom
One of the most useful features of tethered shooting is that you can zoom into the images as they come into the computer. This allows the assistant to check the focus smoothly without disrupting the shoot.
The best part about the zoom is that it will stay zoomed in on the next photo. Therefore, you can constantly check the zoom as the shoot progresses.
Every time a new picture loads in, the zoom and its location will stay the same
Adjustments
You can make adjustments to each image while being connected through tethered shooting. Unlike the zoom feature, these adjustments won’t continue to the next imported image.
An example of adjusting a image mid-shoot
Conclusion: Lightroom Tethering
After reviewing all these features, we can see how easy and useful Lightroom tethering can be. It allows us almost full control of our camera without being anywhere near it. This is primarily useful for fashion shoots, but it can be used for almost any genre of photography.
Lightroom has done a brilliant job of providing useful controls in an easy and simple manner. This makes quick choices and quality control checks as simple as possible. Every photographer should become familiar with Lightroom tethering as it may be the ideal tool for a future project.