By Kendall Camera Club on Wednesday, 17 November 2021
Category: Photography Blogs

Give Recommended Presets a Try

A new feature recently added to the cloud-based Lightroom apps for Mac/Win, iOS/Android, and even your web browser (lightroom.adobe.com) puts AI in charge of analyzing your photo and serving up a wide range of presets you can explore as potential starting points for your next edit. These Recommended Presets are pulled from edits shared by other photographers in the Lightroom in-app community. You can access this feature across the entire Lightroom ecosystem of apps, but I think it is easiest to explore from within Lightroom on your Mac/Win computer (just another reason to use Lightroom for desktop).

This works with both full resolution photos imported into Lightroom and smart previews synced from Lightroom Classic. Start by selecting the photo you want to see a recommended preset for and switch to Edit view (press E in Lr for desktop).
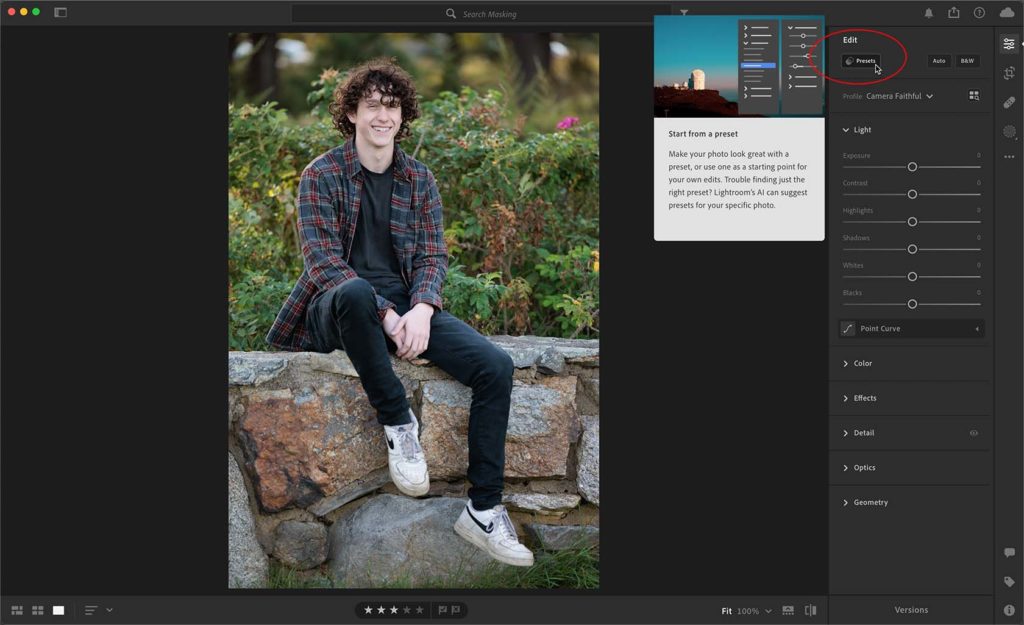
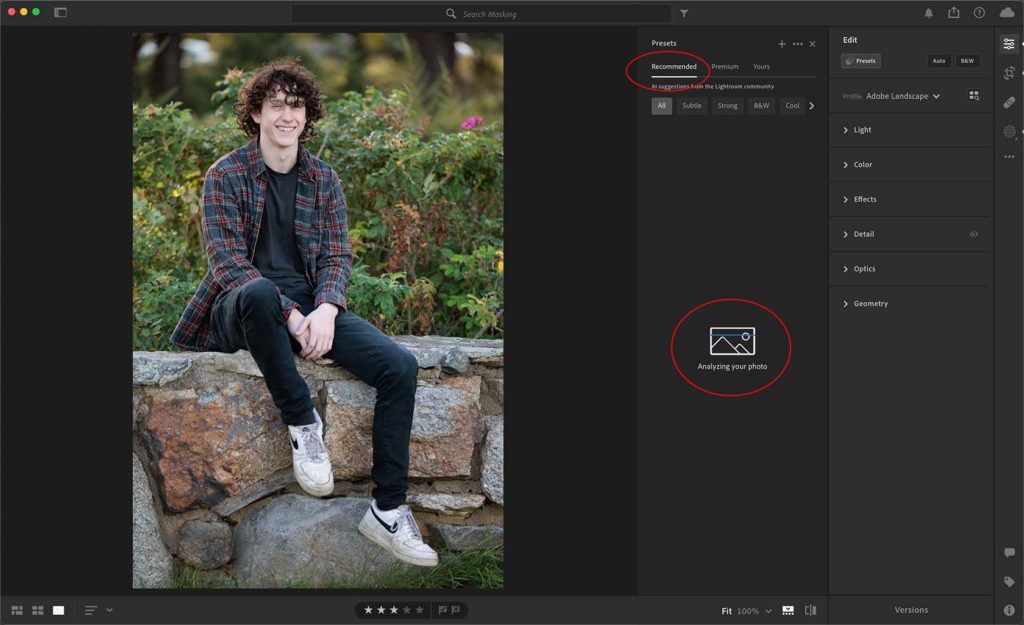
Then click the Preset icon to open the Presets panel and click the Recommended tab.

Lightroom’s AI will analyze your photo (comparing against photos in the Lightroom community with similar subjects and histograms) and then suggest a variety of presets to explore.

You can move your cursor over a preset thumbnail to preview how it looks on your photo, and a benefit of doing this in Lr desktop is that you’ll also see the settings included in the preset displayed in the respective panels so you can understand what is driving the visible change.

Across the top of the Recommended Presets tab is a carousel of filters to help you home in on a subset of presets that may more closely align with your own editing taste. As you move your cursor over preset thumbnails you’ll also see a More like this button, which will filter the presets down further.

If you find a preset you like, you can click it to apply the included settings to your photo. Additionally, if you click the three-dot menu it opens a popup with the options to save the settings to your presets, save the settings as a Version for the active photo, as well as info on the fellow Lr user behind the preset being used.

Like any preset, this can be used as a new starting point, a point of inspiration, or a learning tool. After applying, you are free to further refine any settings to your hearts content. The next time you find yourself stuck on how to proceed or curious to see editing options you may not have considered, give the Recommended Presets a try.

The post Give Recommended Presets a Try appeared first on Lightroom Killer Tips.

Original link
(Originally posted by Rob Sylvan)
Leave Comments