Get Oriented to Masking
I love the new Masking tools in the latest version of Lightroom Classic, Lightroom, and Adobe Camera Raw, but I admit, it can take a bit of getting used to when you first see the change to the icons in the Develop module. If you’re a KelbyOne member, be sure to check out Scott’s latest class on Masking to get the full scoop. This week, I just want to help you get oriented to the new icons, the new panel, and some of the features you’ll find within.

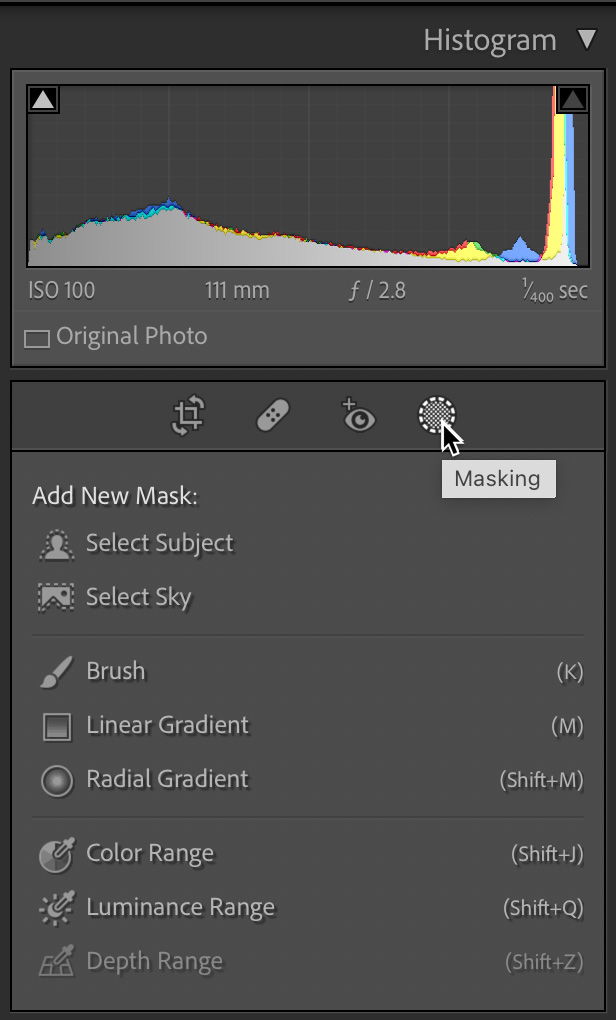
The most disorienting change is the replacement of the old Adjustment Brush, Graduated Filter, and Radial Filter icons with the single new Masking icon. Hopefully, once you click that Masking icon you are relieved to see tools you were looking for. However, they did get a slight refresh on the names, and while the names have changed, the basic functionality is the same. Here’s the cheat sheet with the old name first:
Adjustment Brush = BrushGraduated Filter = Linear GradientRadial Filter = Radial GradientWhy the name change? I suppose to bring it in line with the names used in the cloud-based version of Lightroom. Thankfully the keyboard shortcuts remained the same for all three.
Additionally, we gained completely new AI-based tools for selecting the sky and a subject. While the sky sort of goes without saying, the subject, in my experience, seems optimized on people and animals, but if there aren’t either of those in the scene it will grab the most prominent subject (YMMV). Experimentation is the best way to learn the limits and power of those tools.

In the previous version we were able to apply a Range Mask within one of the three local adjustment tools (brush, grad, and rad), but now the former range mask tools can be used on the entire photo by themselves. To learn how to mimic the old Range Mask behavior check out my post from last week on Intersect Mask. I’m sure there will be many more tutorials exploring how to use those tools in the future as well.
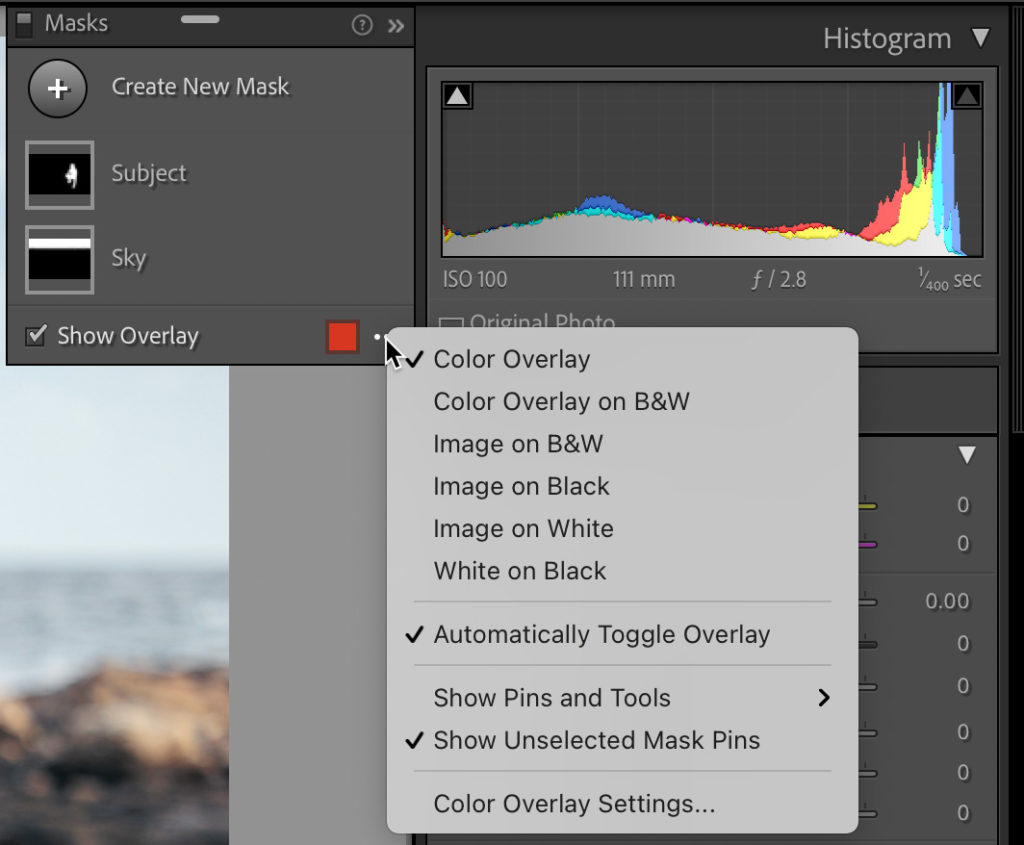
The other new functionality we gained is in how we interact with the masks we create. In this case I applied a Select Sky and Select Subject mask to help me edit this photo. We can rename individual mask groups by double-clicking the name or clicking the three-dot menu and choosing rename. This is a huge help when you have multiple masks on an image (and you will have multiple masks).
Then there are the options for the overlay. We still have the default colors of red, green, white, and black, but now we can also apply a completely custom color of our choosing (click Color Overlay Settings to access color picker). Beyond colors we display the color overlay on a B&W image, image on B&W, image on black, image on white, and white on black. If you’ve ever used the Select & Mask feature in Photoshop you’ll understand these options right away, but if you haven’t simply try each one in turn and you’ll quickly get the hang of it. The goal of each of these overlays is to give us more power to evaluate what is affected by the mask so that we can refine it further.
By default, the overlay will appear as soon as the mask is applied to show you where it is, but then will automatically disappear as soon as you move any of the adjustment sliders. You can disable that behavior by unchecking Automatically toggle overlay. When disabled, you can toggle the overlay manually by pressing O just as you could in the previous version.

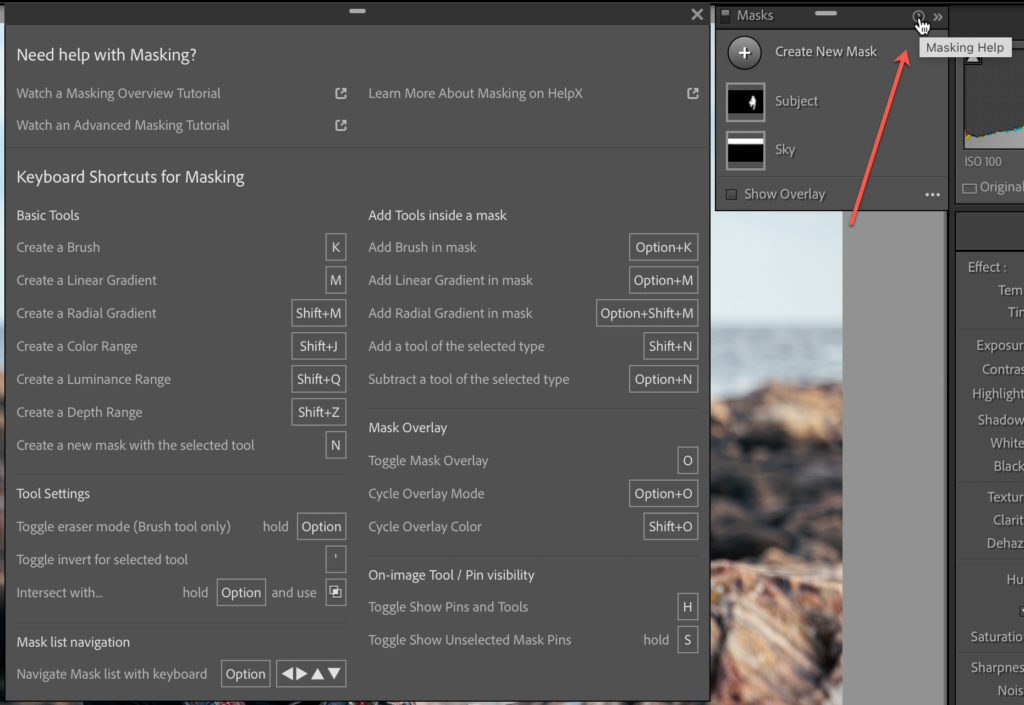
For a full look at associated keyboard shortcuts for Masking, click the question mark icon at the top of the Masks panel. While you’re up there, notice the Turn off masks icon at the top-left of the Masks panel for a quick way to see the Before/After view of your masking edits.

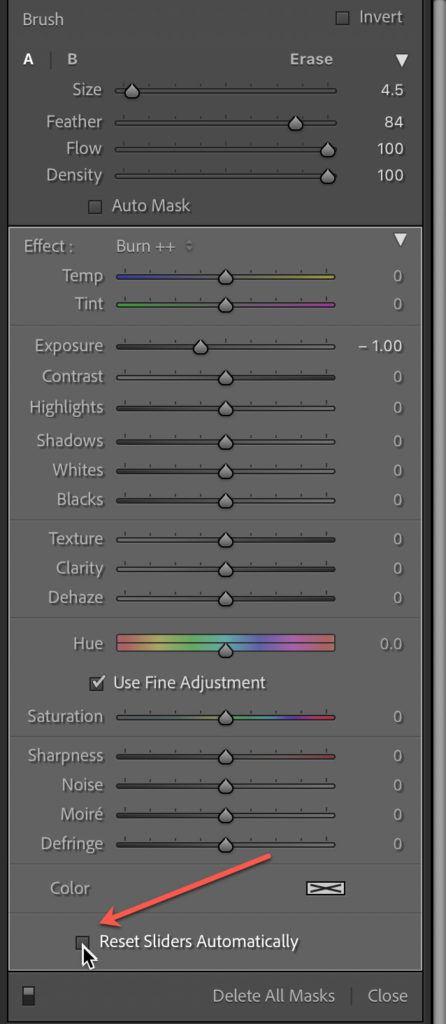
One last tip, another new default behavior is to automatically reset all editing sliders to 0 for each new mask. If you want to retain the mask settings from the last mask uncheck Reset Sliders Automatically at the bottom of the panel containing the adjustments. This way you can select a preset from the Effects drop-down menu for the mask you create, and those settings will remain for the next mask you create, and so on. However, if you want to start with a clean slate for each mask leave that box checked.
Ok final note, if you don’t see your local adjustment presets under Effects after upgrading to the new version, the most likely suspect is the Store presets with this catalog checkbox on the Presets tab of the Preferences. That setting may have been changed/lost in the upgrade to the new version, and if that happens your presets appear to have vanished. Changing the setting on that preference to what it was in the previous version should bring your presets back.
The post Get Oriented to Masking appeared first on Lightroom Killer Tips.
By accepting you will be accessing a service provided by a third-party external to https://kendallcameraclub.org/