Adaptive Presets in Lightroom Classic: Part 1
The updates to Masking in the latest round of updates from Adobe have made making AI-based selections easier and more powerful than ever. You’ll definitely want to check out previous articles that get you up to speed on how to use the upgraded Masking tools. In addition, our ability to incorporate those AI-based technologies into presets has evolved as well, and that’s what I want to cover in this post.
[Editor’s note: This first appeared in the January issue of Photoshop User magazine – Rob]
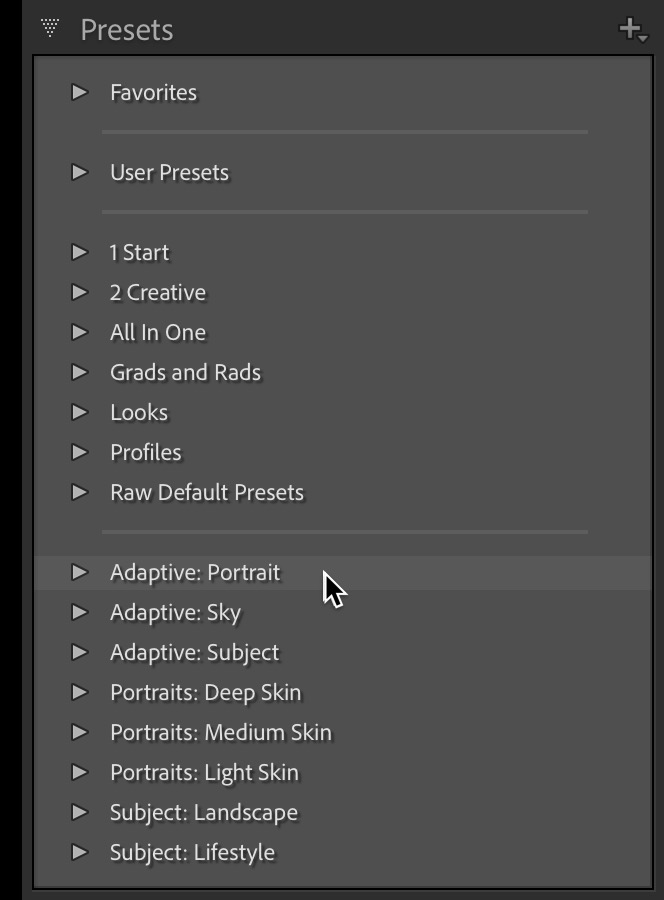
Exploring Included Adaptive Presets
You may have noticed new additions to your Presets panel in the Develop module that start with the word Adaptive. There are three Adaptive groups now, one for Portrait, one for Sky, and one for Subject. The presets in these groups were created by Adobe to give you a taste of what is now possible to include in a preset. We’ll use these to understand how they work, then I’ll show you how to create and modify your own.
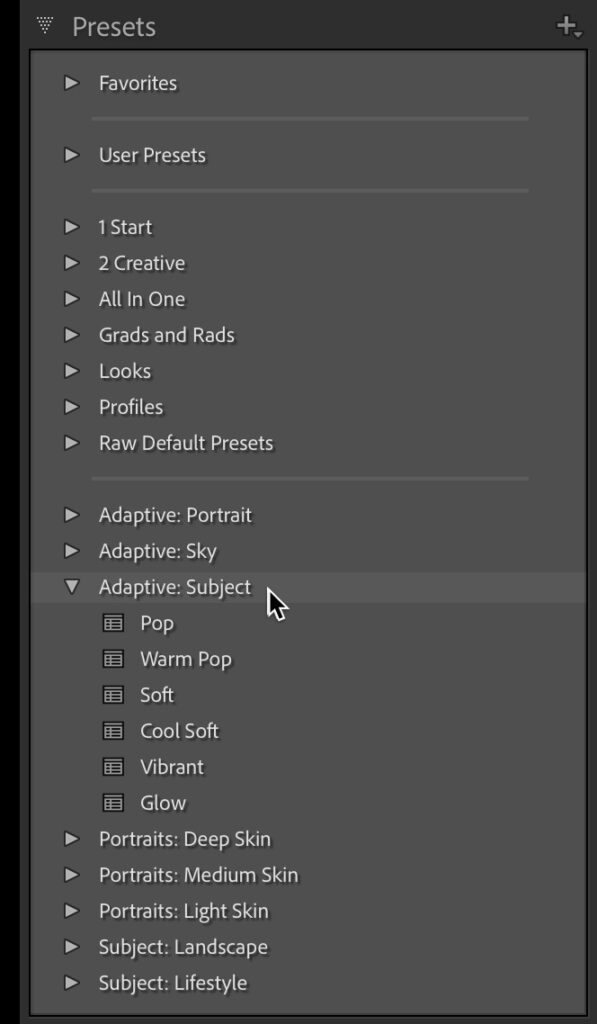
Let’s expand the Adaptive: Subject group and see what’s included. You should see names like Pop, Warm Pop, Soft, Cool Soft, and so on. What all the Adaptive groups of presets have in common is that they are designed to leverage one of the AI-based types of Masking tools to automatically detect either a person, sky, or subject respectively, then create a mask for it, and then apply the included settings to that mask. So, select an unedited photo that has some kind of obvious subject (I’m always curious to see if the AI thinks the subject is the same subject I expect), and move your cursor over each preset slowly (as it may need a moment to generate a mask on the fly based on the photo’s subject), and you should see the look of the subject change based on the settings in the respective preset.
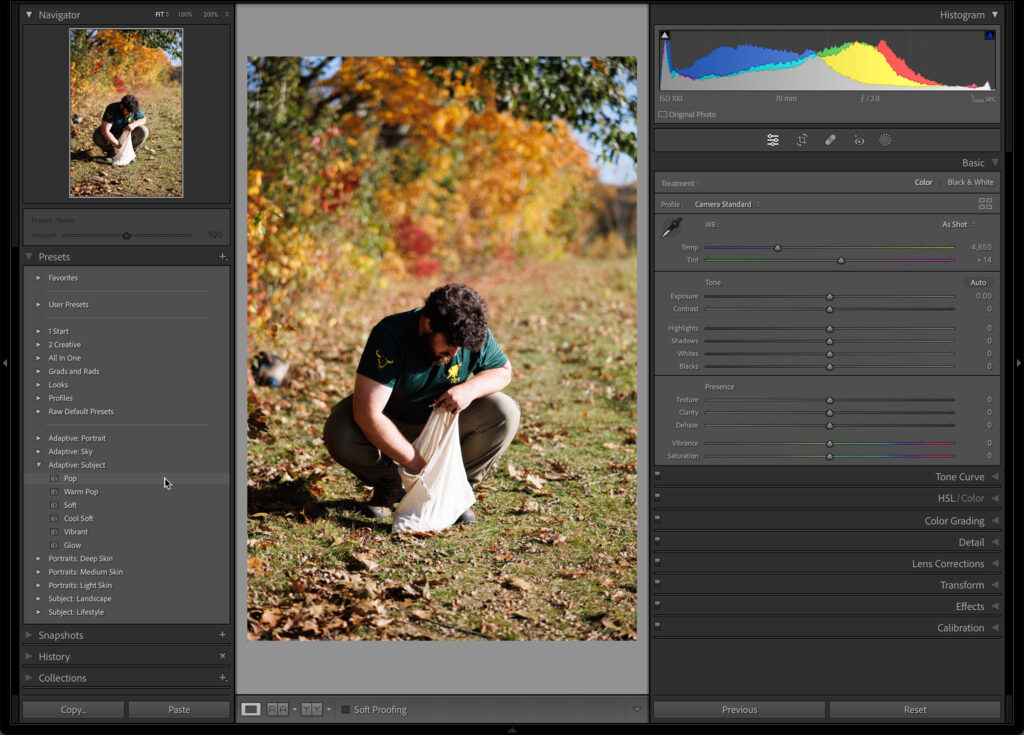
When you find a look that you are curious about, click on it to apply it to the photo. Then, click the Masking icon to open the Masking tools so you can select the mask it created and examine the settings. I clicked on the one called Pop, and I can now see it included settings for Exposure, Texture, and Clarity, which were applied to the mask it created for what it considered the subject (and in this case, I would agree).
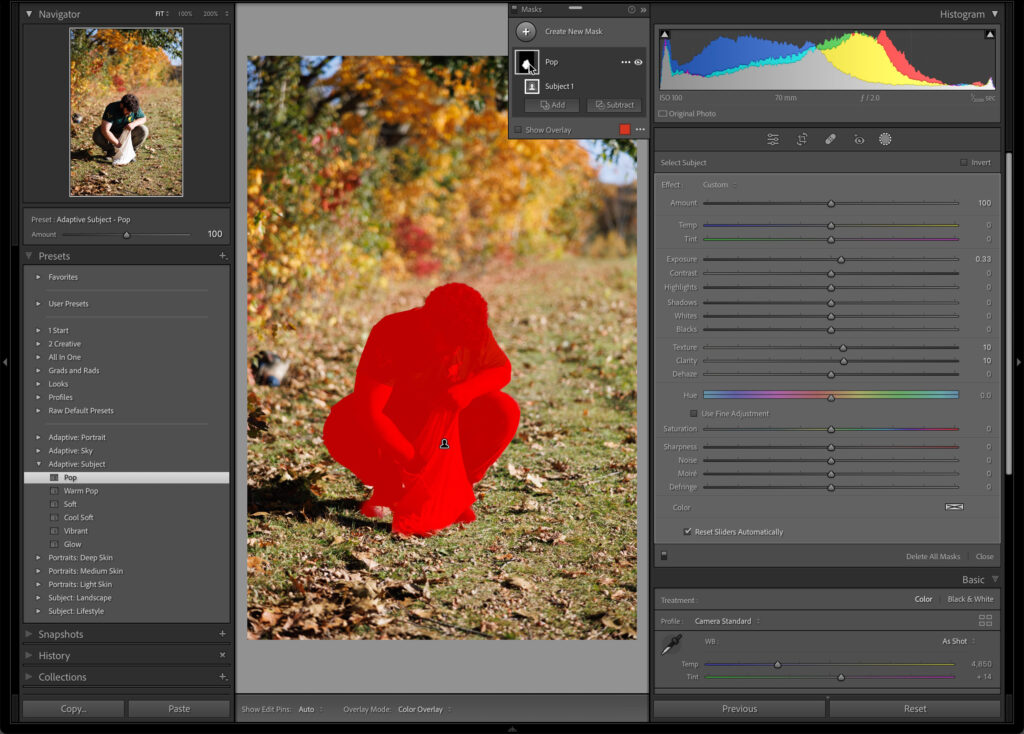
Now, you may or may not like the look of any of the included presets, but I highly encourage you to click on each one in the Subject group and examine what it masked, how well it masked, and what settings it used to get its look. As you explore those presets think about what you would do differently, what settings would you change, and what other mask types would you like to create.
Now, select an unedited photo of a person where you can see their eyes and teeth (along with the rest of their face). Expand the Adaptive: Portrait group to see the included presets and click the Masking icon to open its panel (there should not be any masks yet). Click the first preset, Enhance Portrait to see what masks are applied to your photo. You should see a mask for Teeth, Iris and Pupil, Eye Sclera, and Face Skin. Explore each mask’s settings.
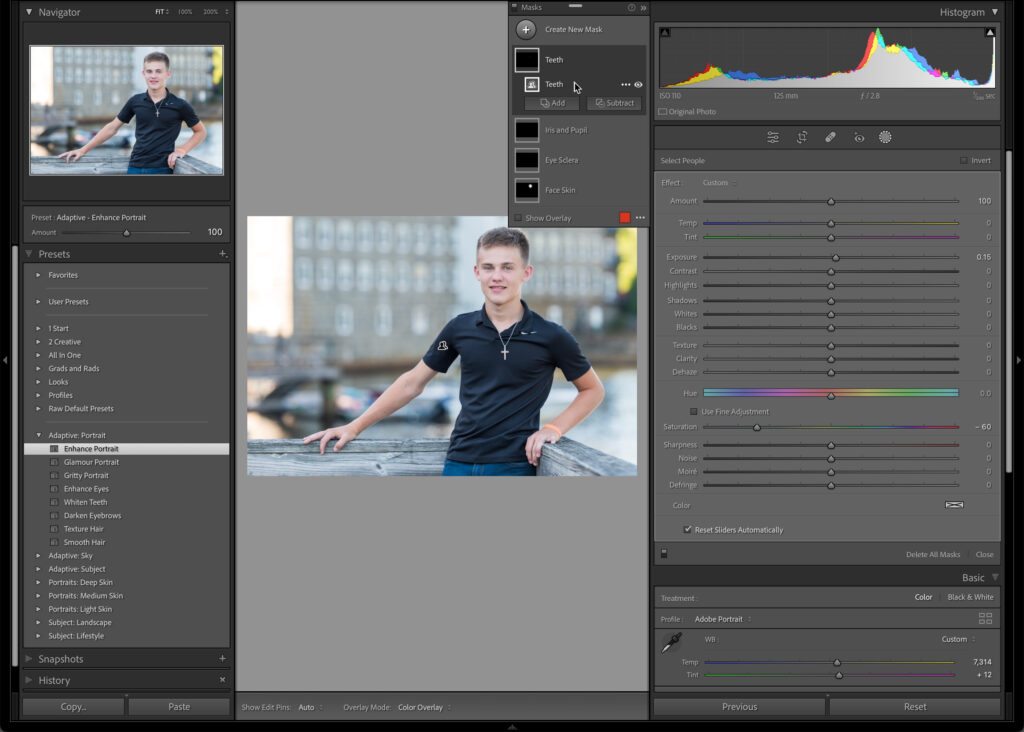
Now, in turn, click each of the other presets in the Adaptive: Portrait group to see those masks added to, and in some instances replace, the masks created by the first preset. By the end your photo may not look great, but that’s not the point. The point is that because of the updates to how portrait masks can be generated it is now possible to automate the creation of masks (with settings) for individual features, such as hair, teeth, face skin, and so on. Furthermore, you can create an individual preset for each feature alone and know that you can later apply them all to a single photo and they will stack accordingly. This is incredibly powerful when applied to a single photo, but now think about applying presets to a batch of photos at once, and it just may change your workflow!
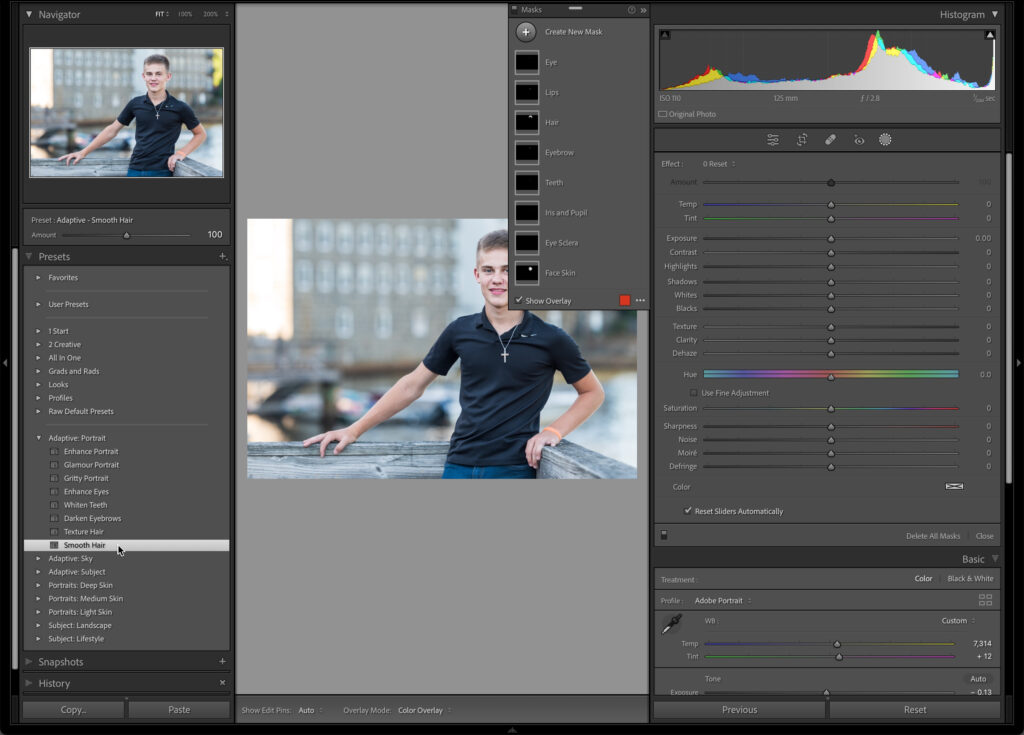
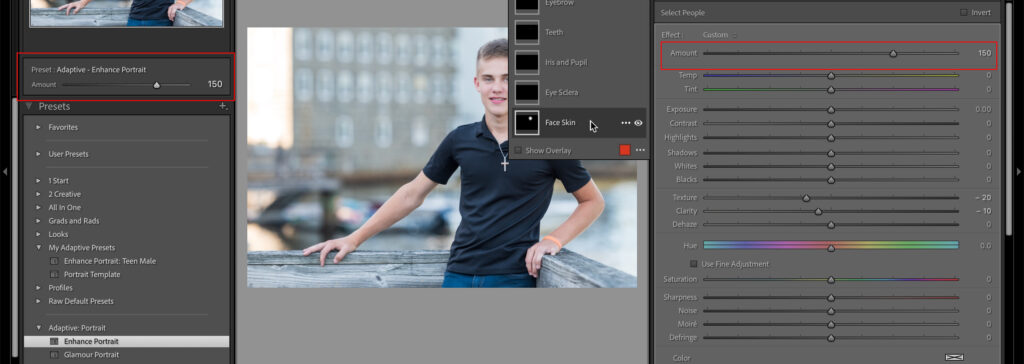
In addition, notice that at the top of the Presets panel the Amount slider should be enabled for all the included Adaptive presets, which means you can fine tune them after they’ve been applied for even more control. Let’s say you apply the Smooth Hair preset, then move the Amount slider to 78, if you look at the top of the Masking panel, you’ll see the Amount slider there corresponds to that same amount. If you apply Enhance Portrait and move the Amount slider to 150, then each respective mask created by that preset will see its settings moved to 150 as well, but without affecting any of the other masks created by other presets or manually by you. What amazing control!
So that’s just the presets provided by Adobe. Come back next week to learn how to start creating your own custom adaptive presets!
The post Adaptive Presets in Lightroom Classic: Part 1 appeared first on Lightroom Killer Tips.
By accepting you will be accessing a service provided by a third-party external to https://kendallcameraclub.org/