9 Tips For Amazing iPhone Street Photos In Bad Weather
Do you avoid taking photos in bad weather? If so, you’re missing out on many creative photo opportunities… especially when it comes to street photography. So here are 9 tips for taking incredible iPhone street photos in bad weather!
1. Brave The Rain For Fascinating iPhone Street Photography
Does a rainy day put you off taking photos?
If so, you’re definitely not alone! But rain offers so many amazing opportunities for street photography.
And the best thing? You don’t even have to get wet!
When it rains in the city, I usually find a covered area to shoot from. There are plenty of awnings, bus stops, archways, and doorways to keep you dry.
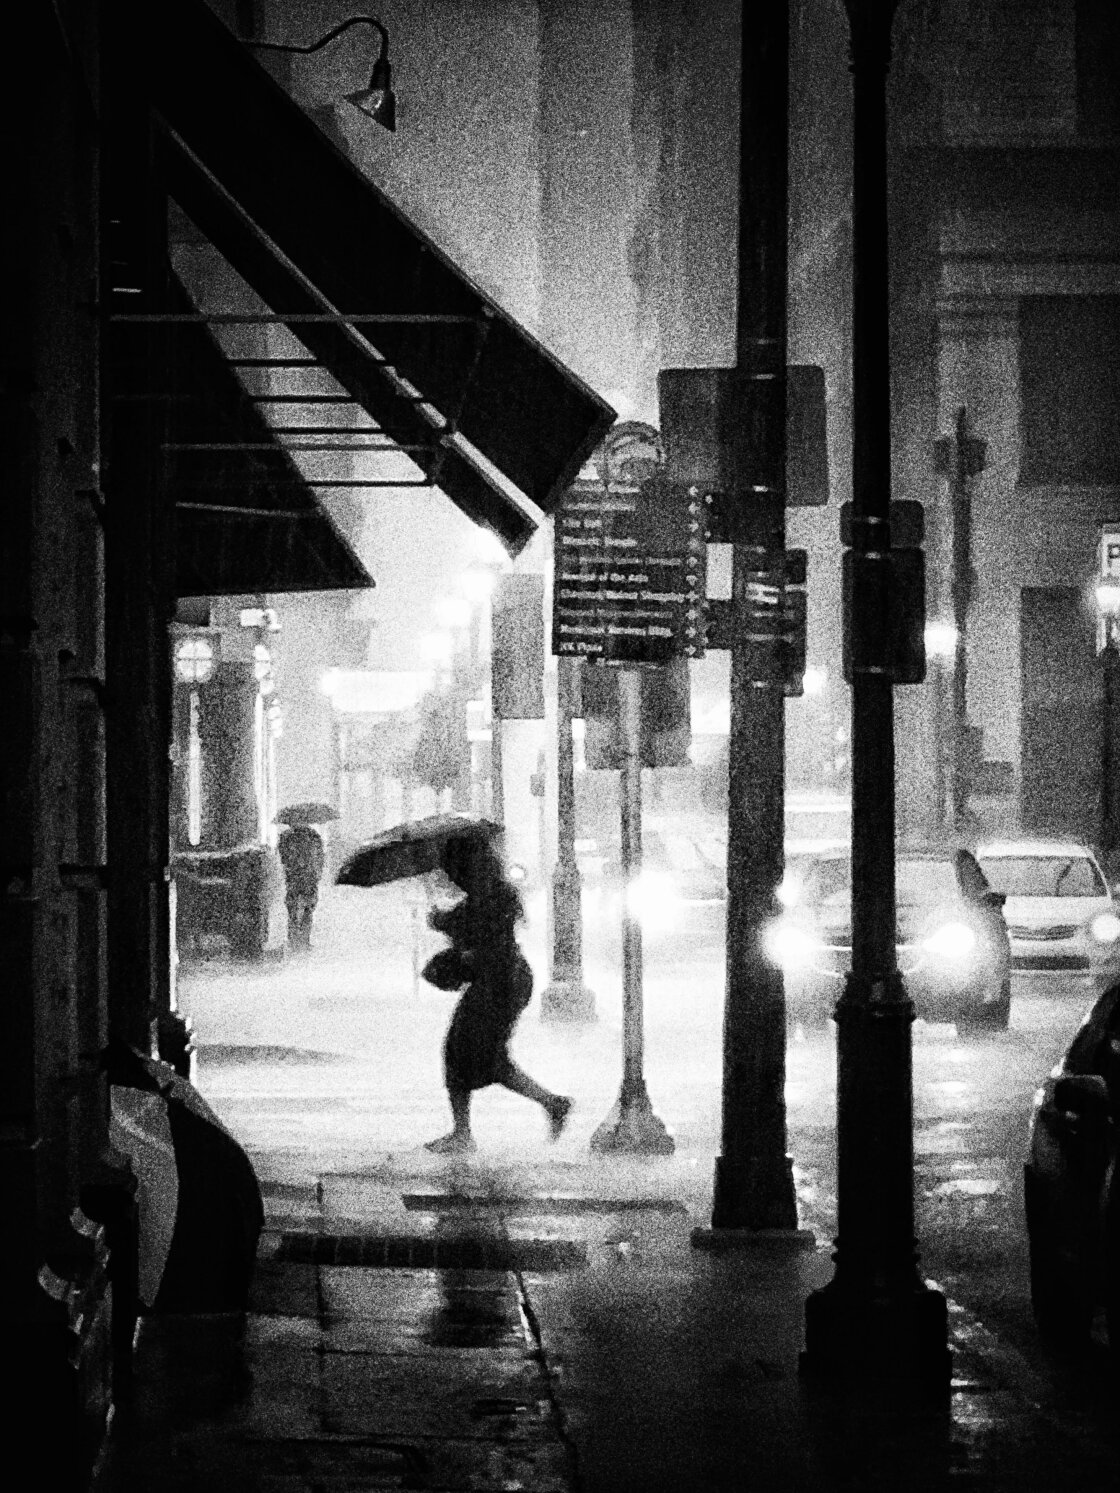
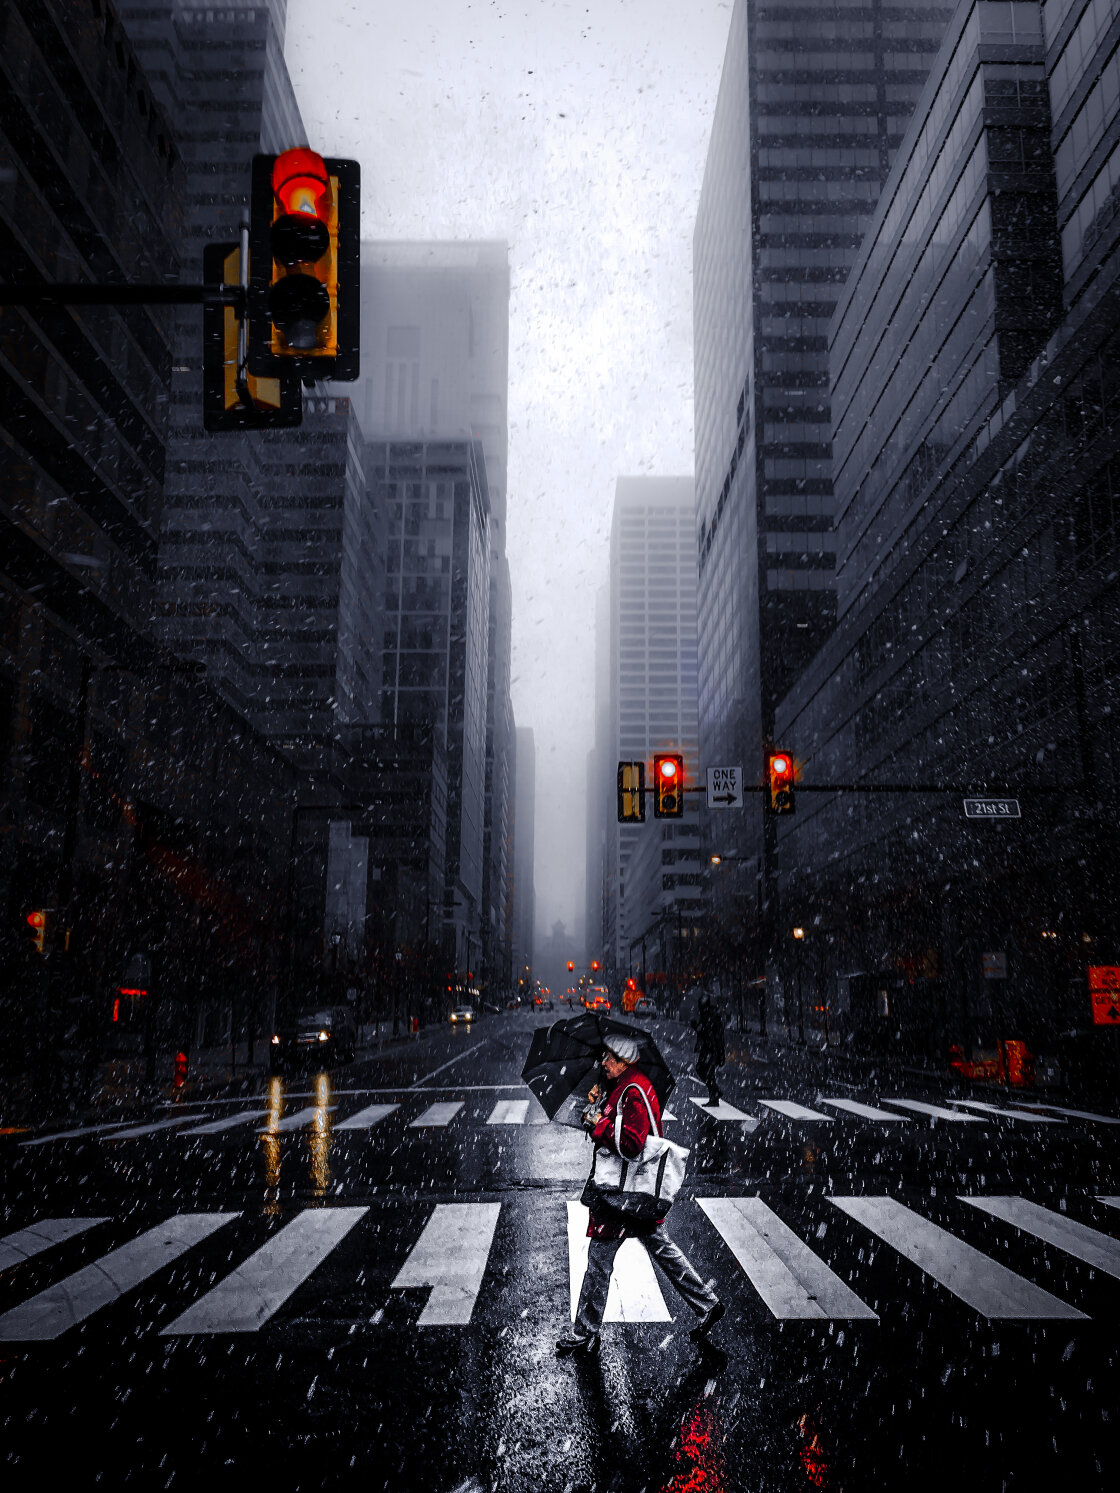
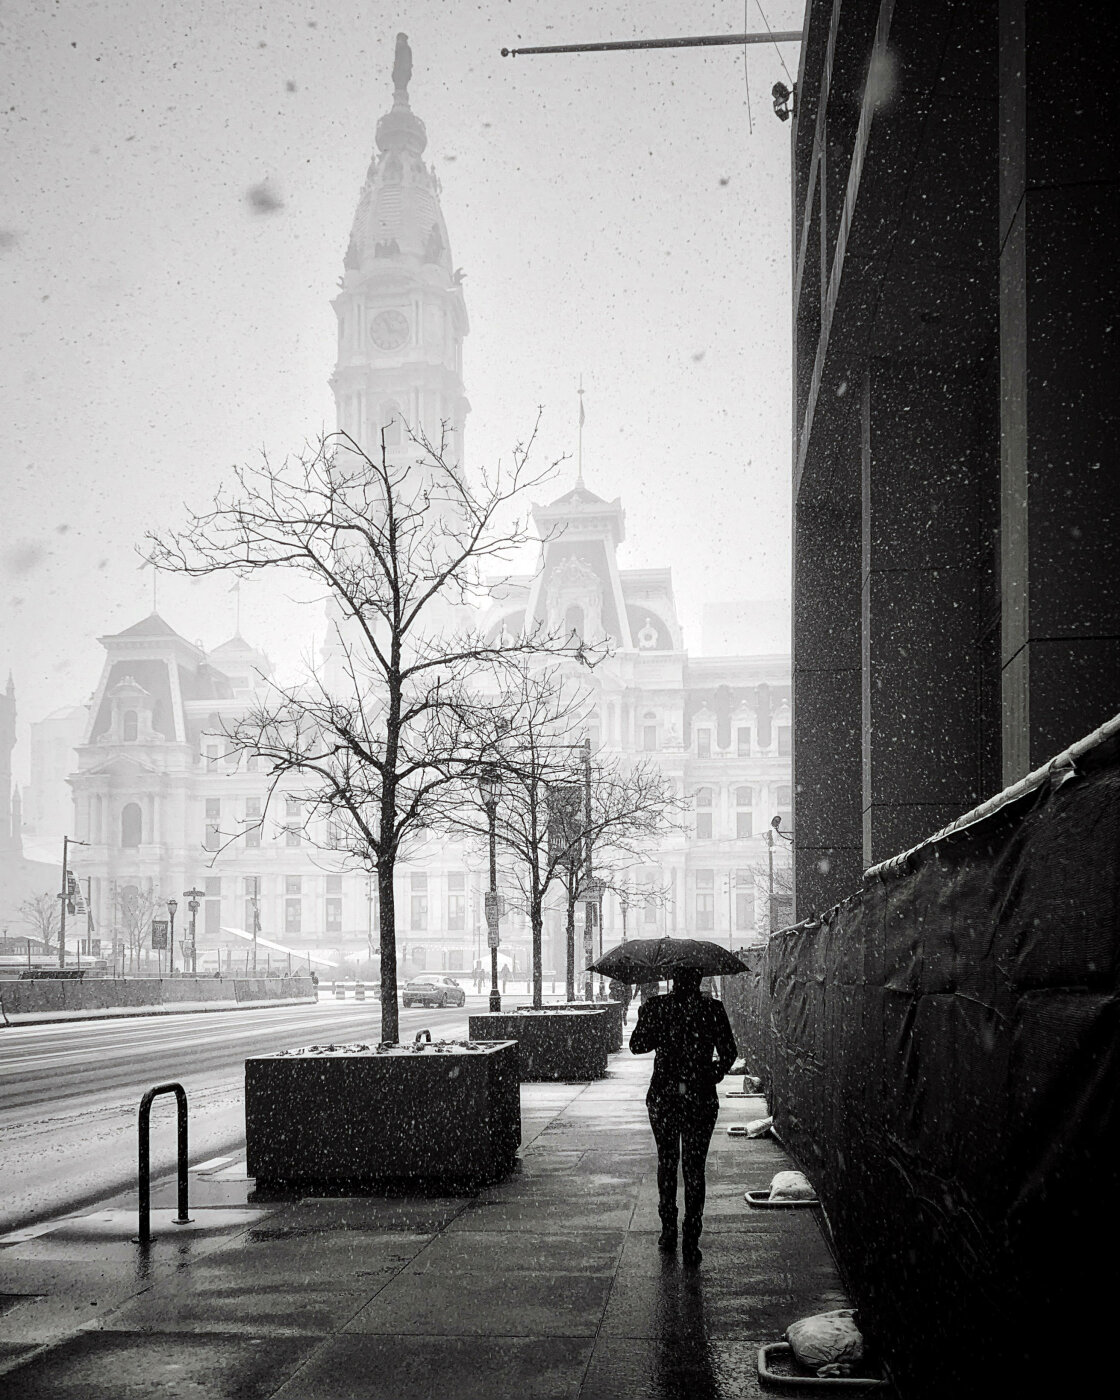
One of the great things about rain is that people use umbrellas!
The bold shape and colors of umbrellas allow you to create a strong focal point in your image.
And they’re perfect for adding an interesting storytelling element to your iPhone street photos.

So the next time it rains, don’t stay at home. Head into the city for some spectacular rain photography!
2. Get Creative With Your iPhone Rain Photography
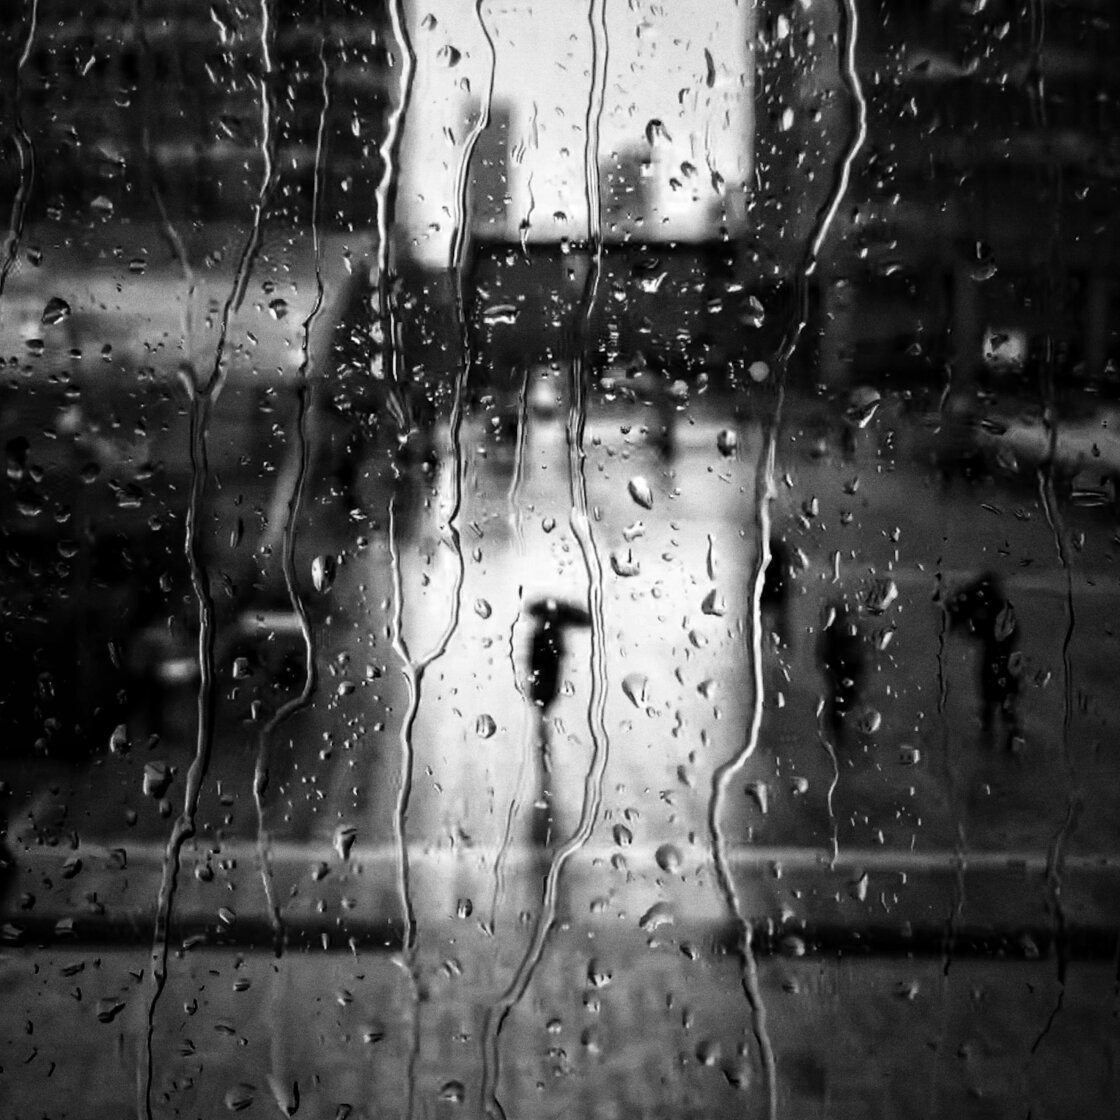
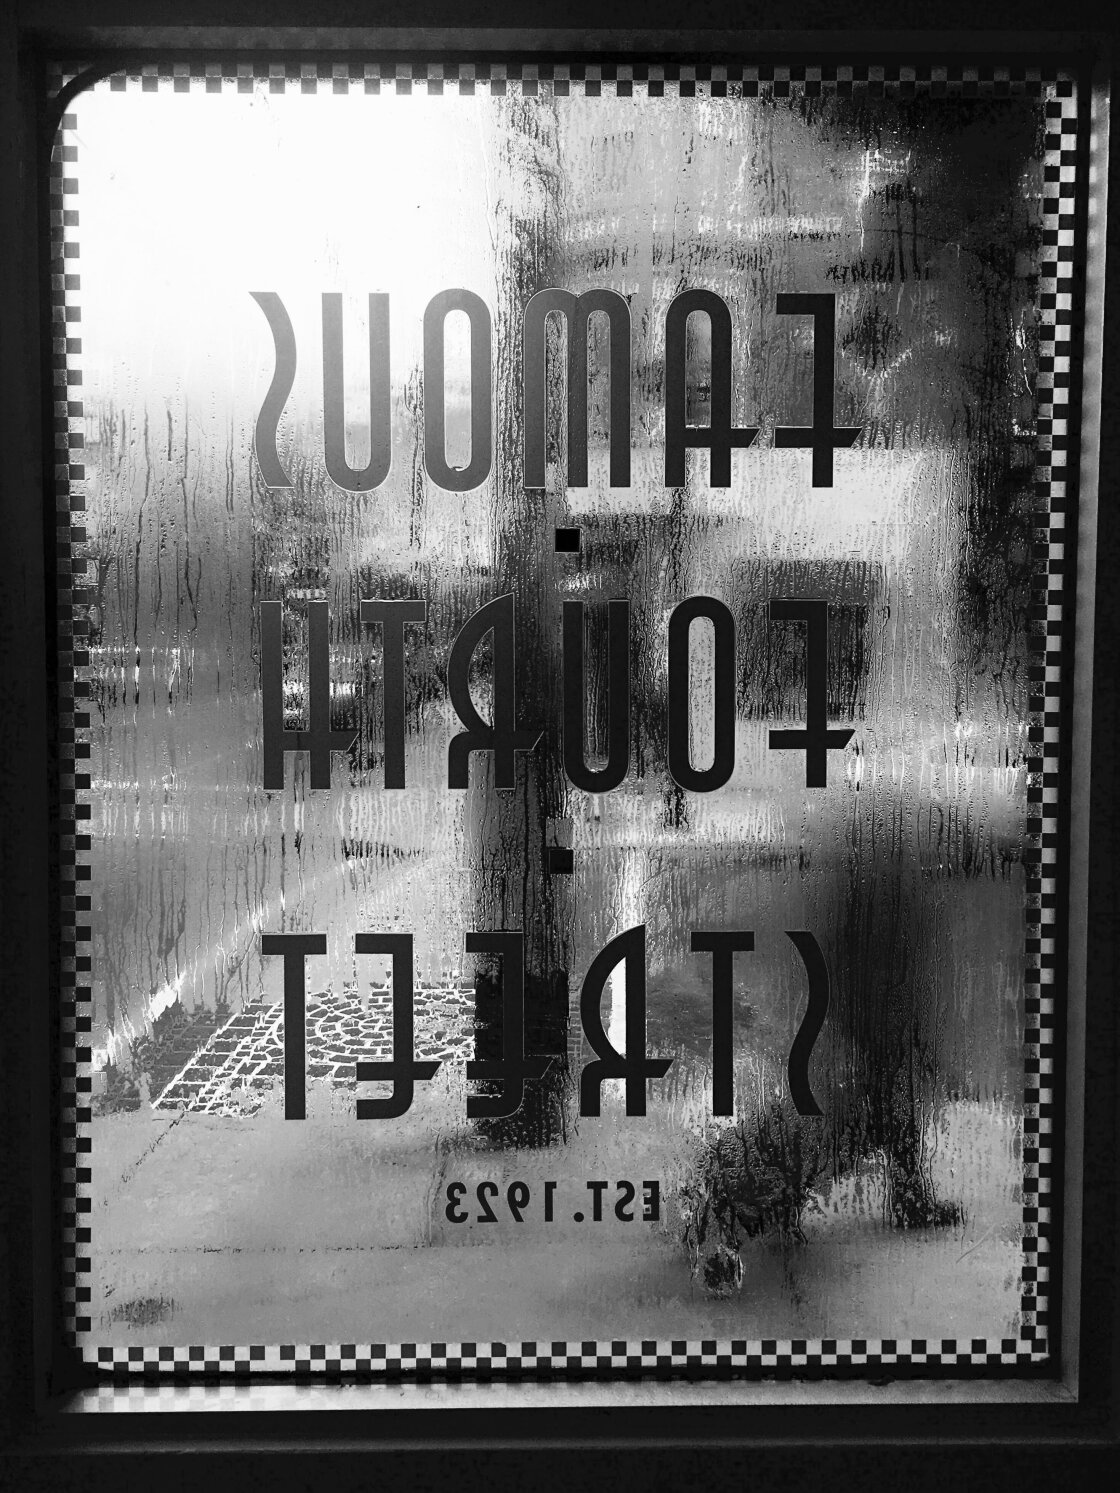
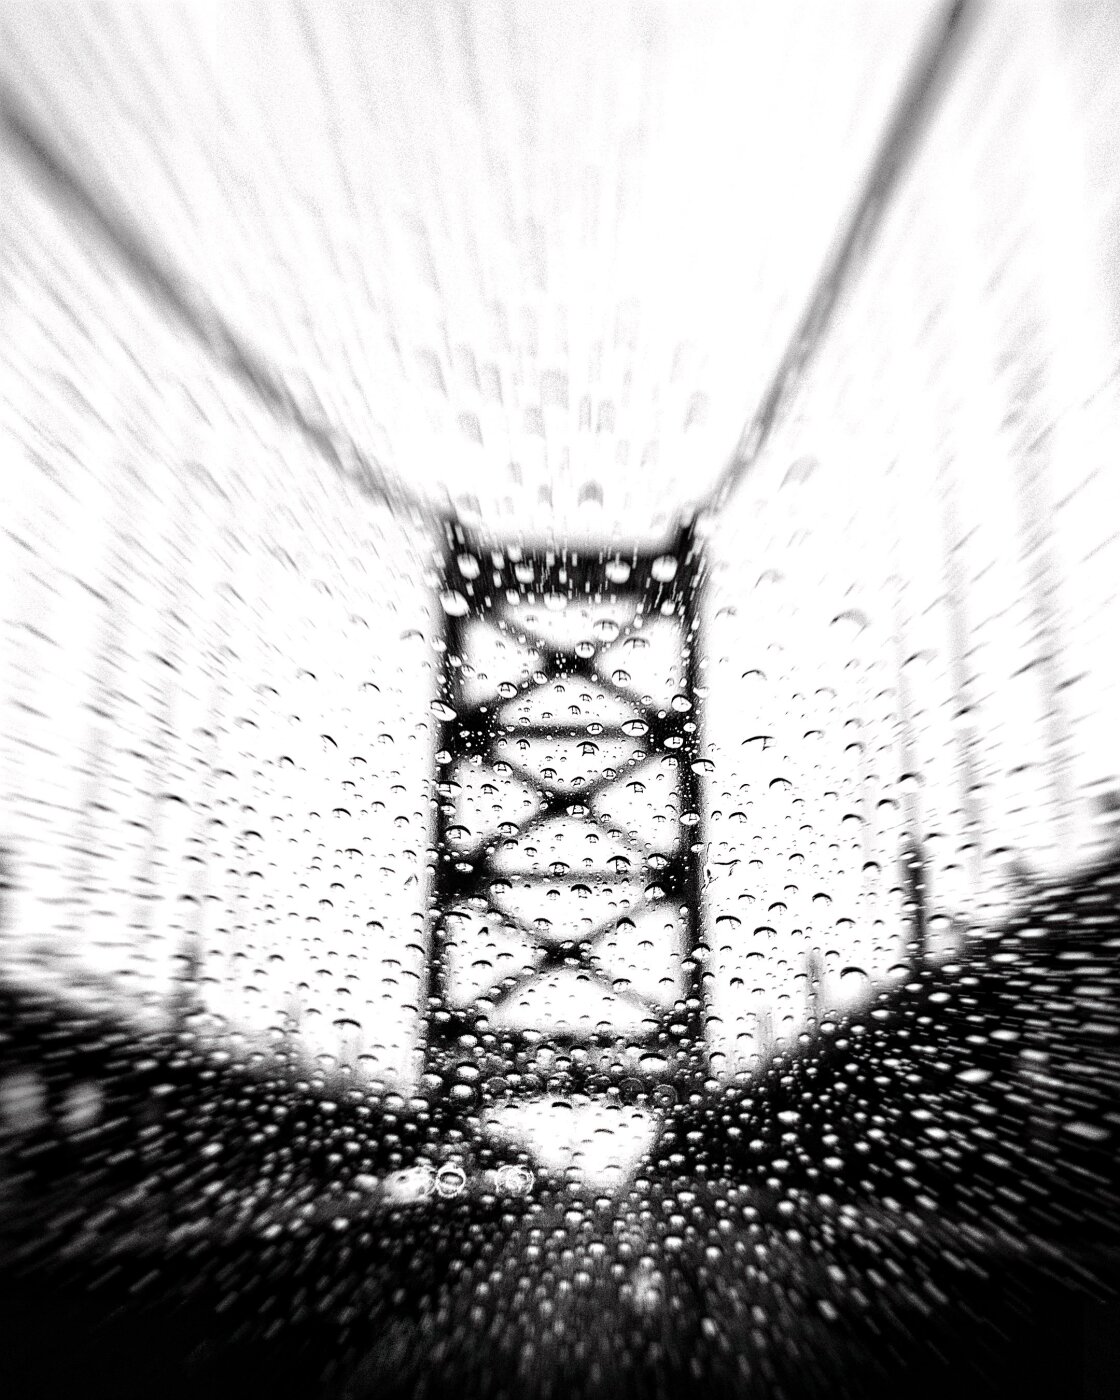
If you want to get really creative, try shooting photos through raindrops on a window.
You could sit in a cafe and capture photos as people walk past the window. Or shoot through the glass of a bus stop.
You could even hop on a bus and take photos through the windows as you pass by interesting scenes.
A great way to capture creative window shots is to get your camera lens quite close to the glass.
Compose your shot, then tap the camera screen to set focus on the raindrops in the foreground.
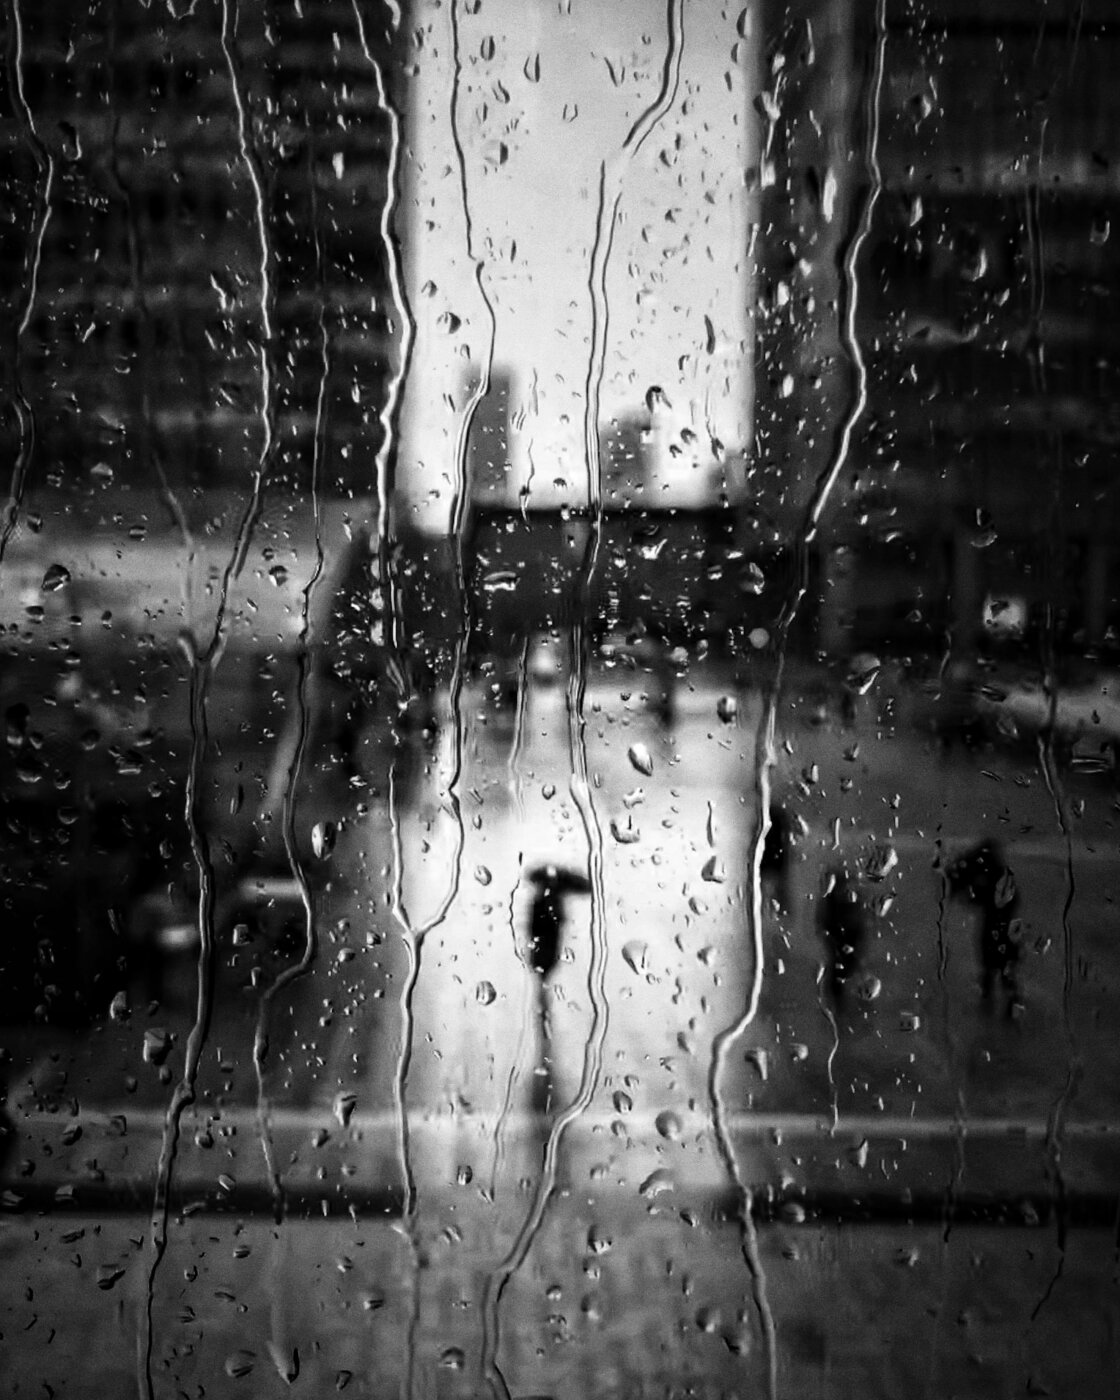
When you do this, the background will appear beautifully blurred. And the image will have a wonderful abstract quality that really draws the viewer in.
As you can see, taking street photos in bad weather adds a whole new level of creativity.
And once you start shooting in the rain, this might become your favorite kind of weather for iPhone street photography!
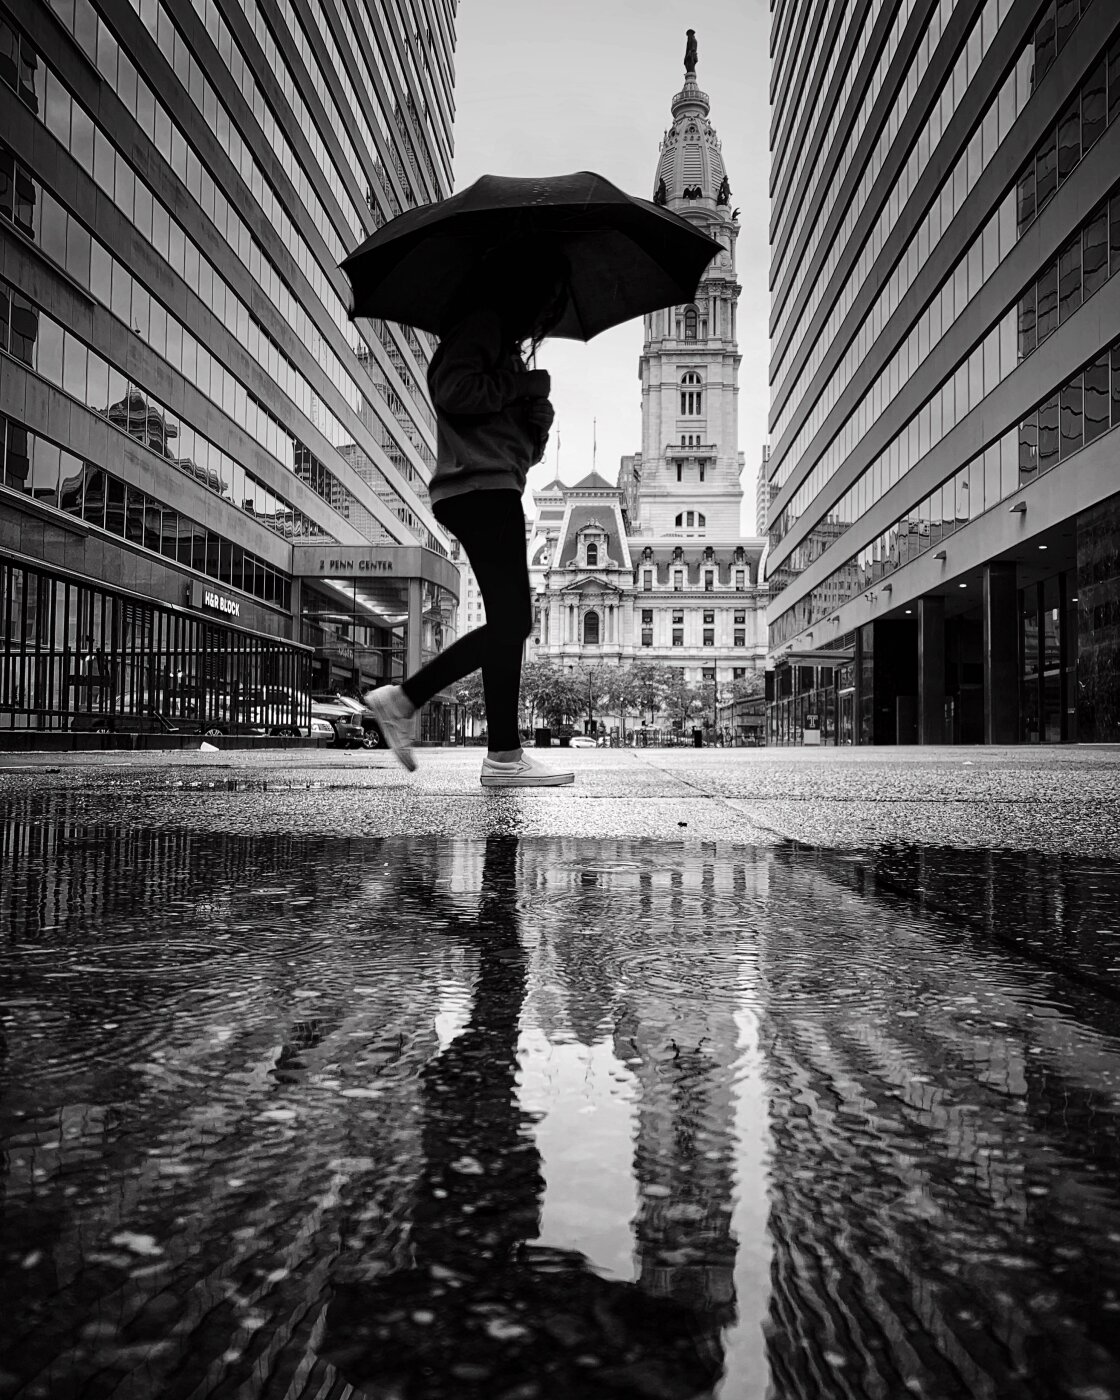
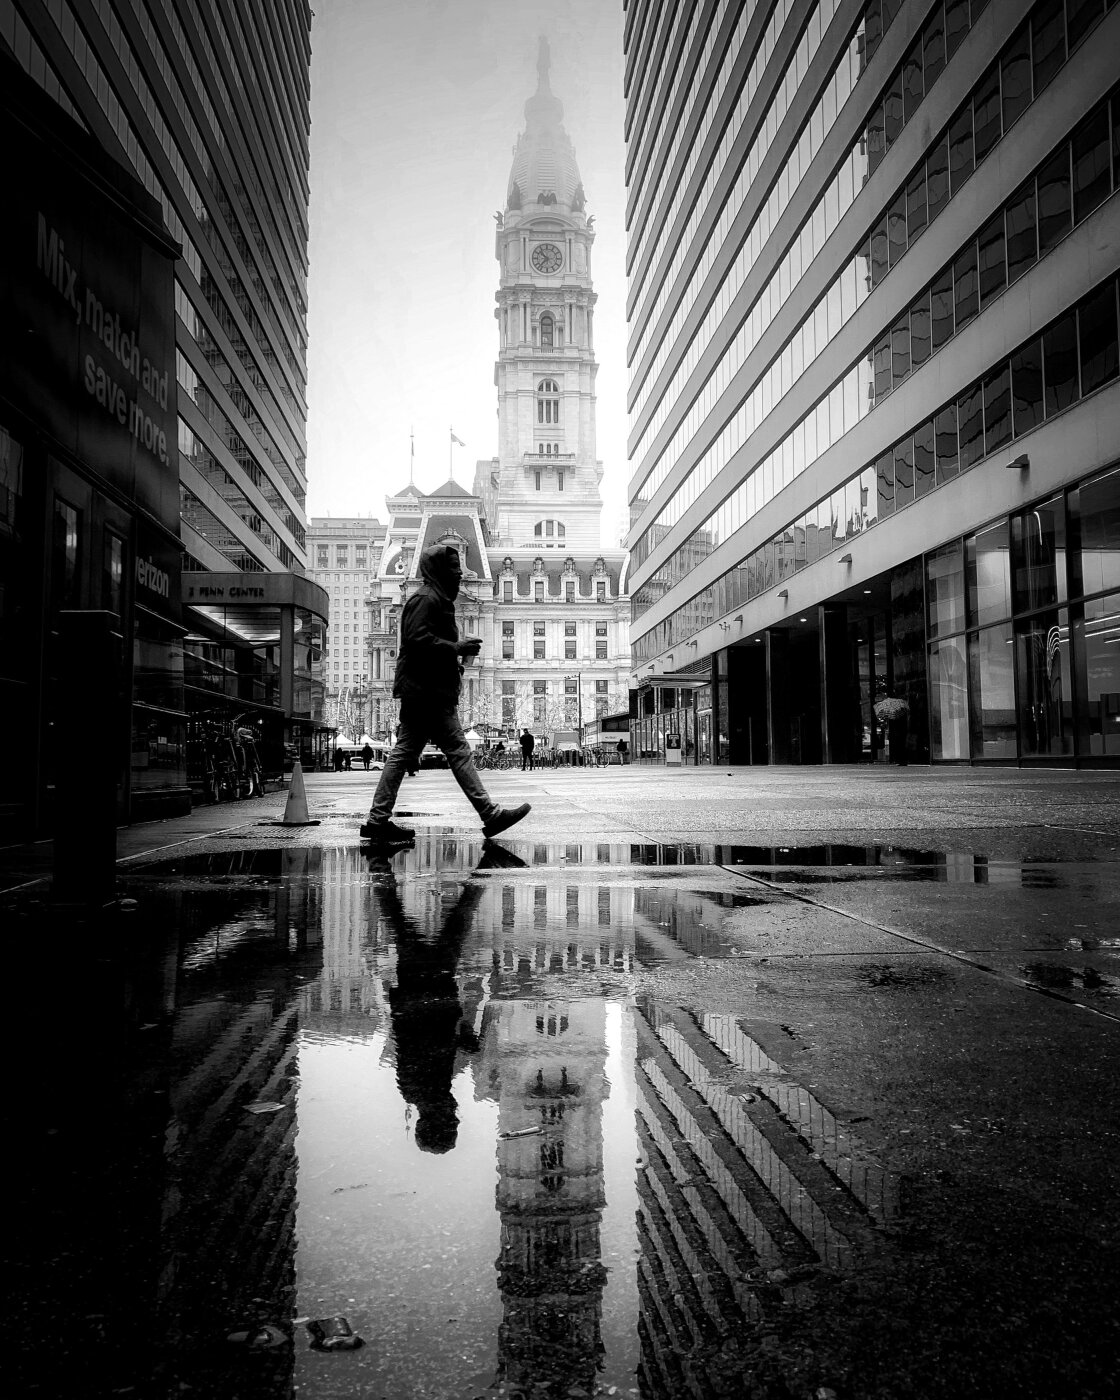
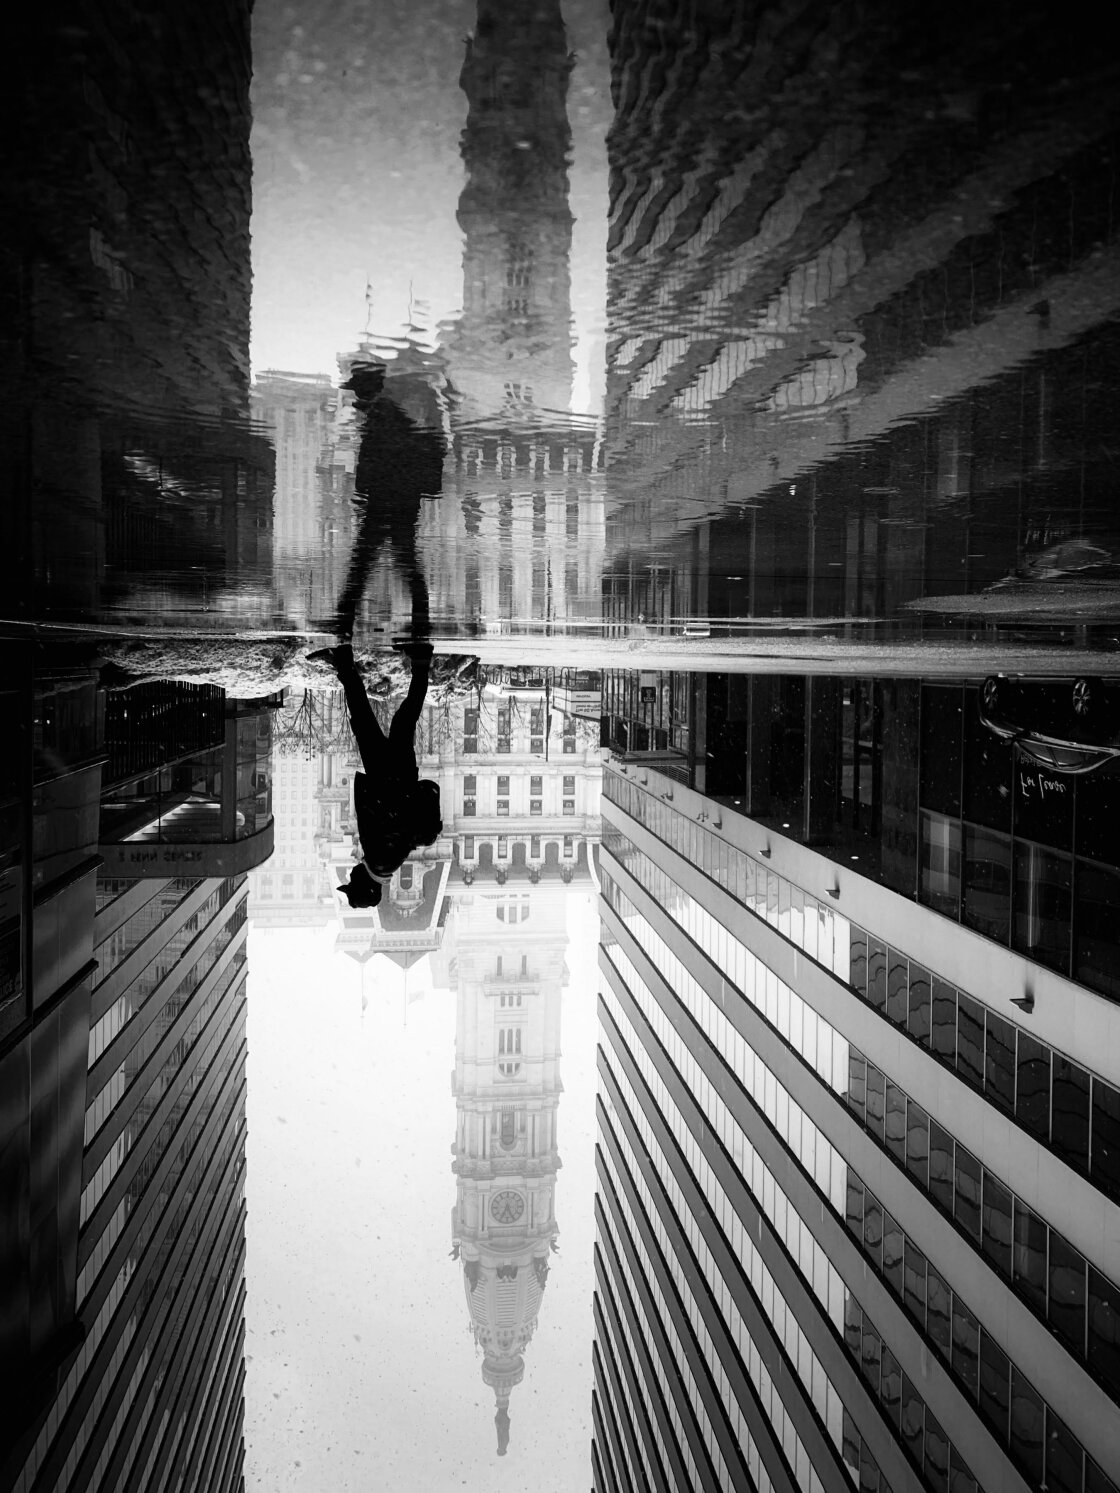
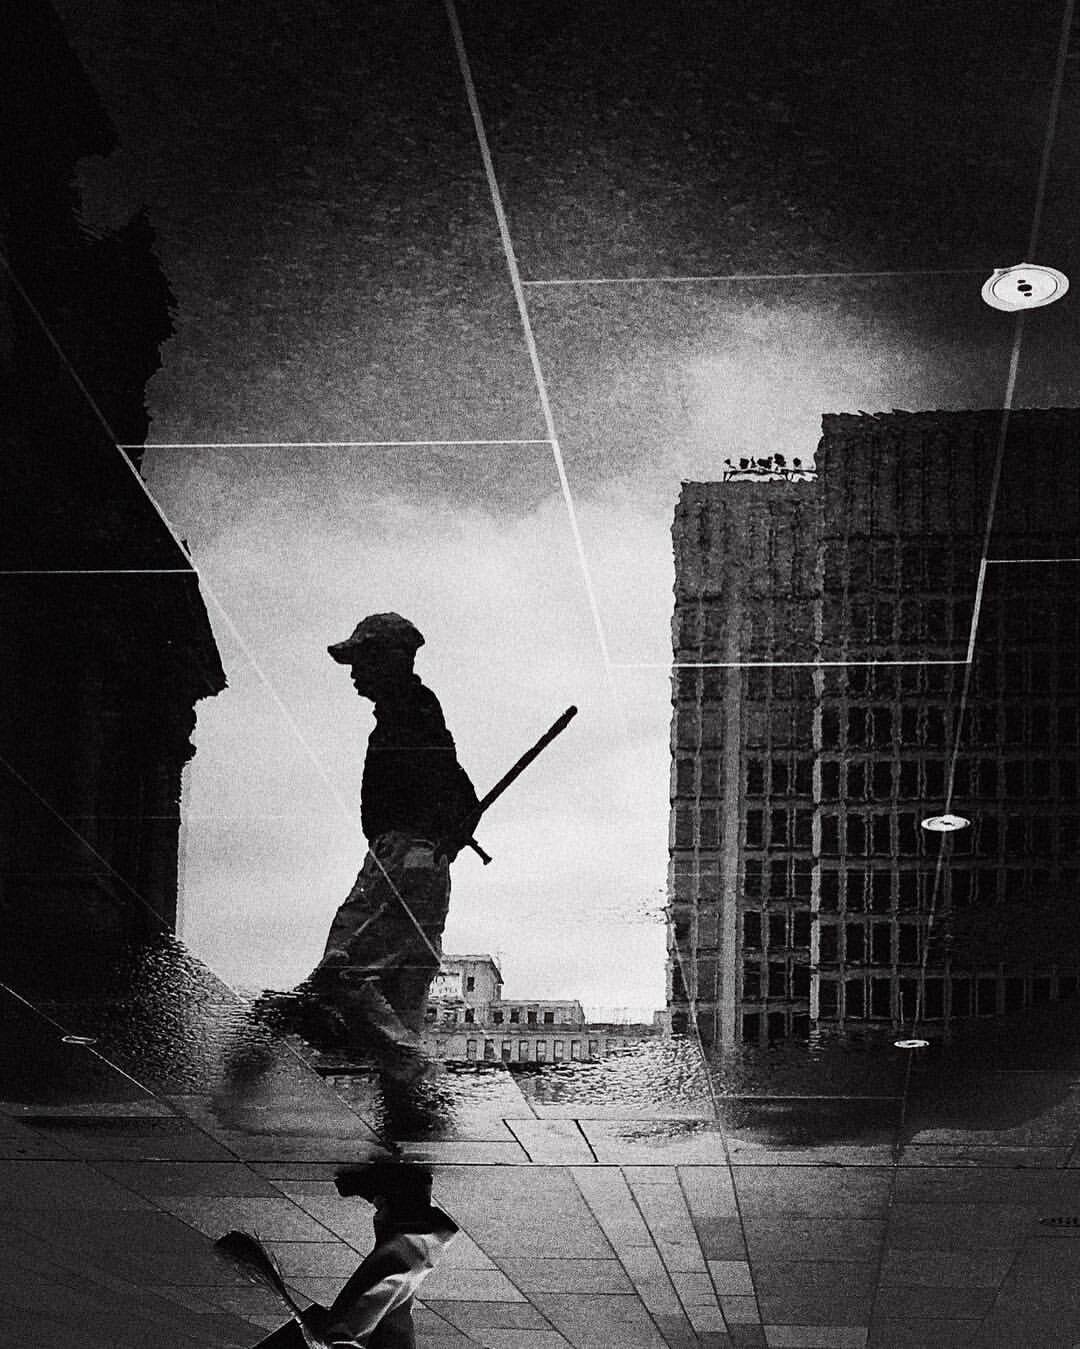
3. Capture Stunning Puddle Reflection Photos
When the rain stops, you’ll have another opportunity to capture some fascinating street photos.
All you need to do is walk around the city and look for reflections in puddles!
Try to find reflections that include buildings or architecture. These add interest to the reflection and help you create a stronger composition.
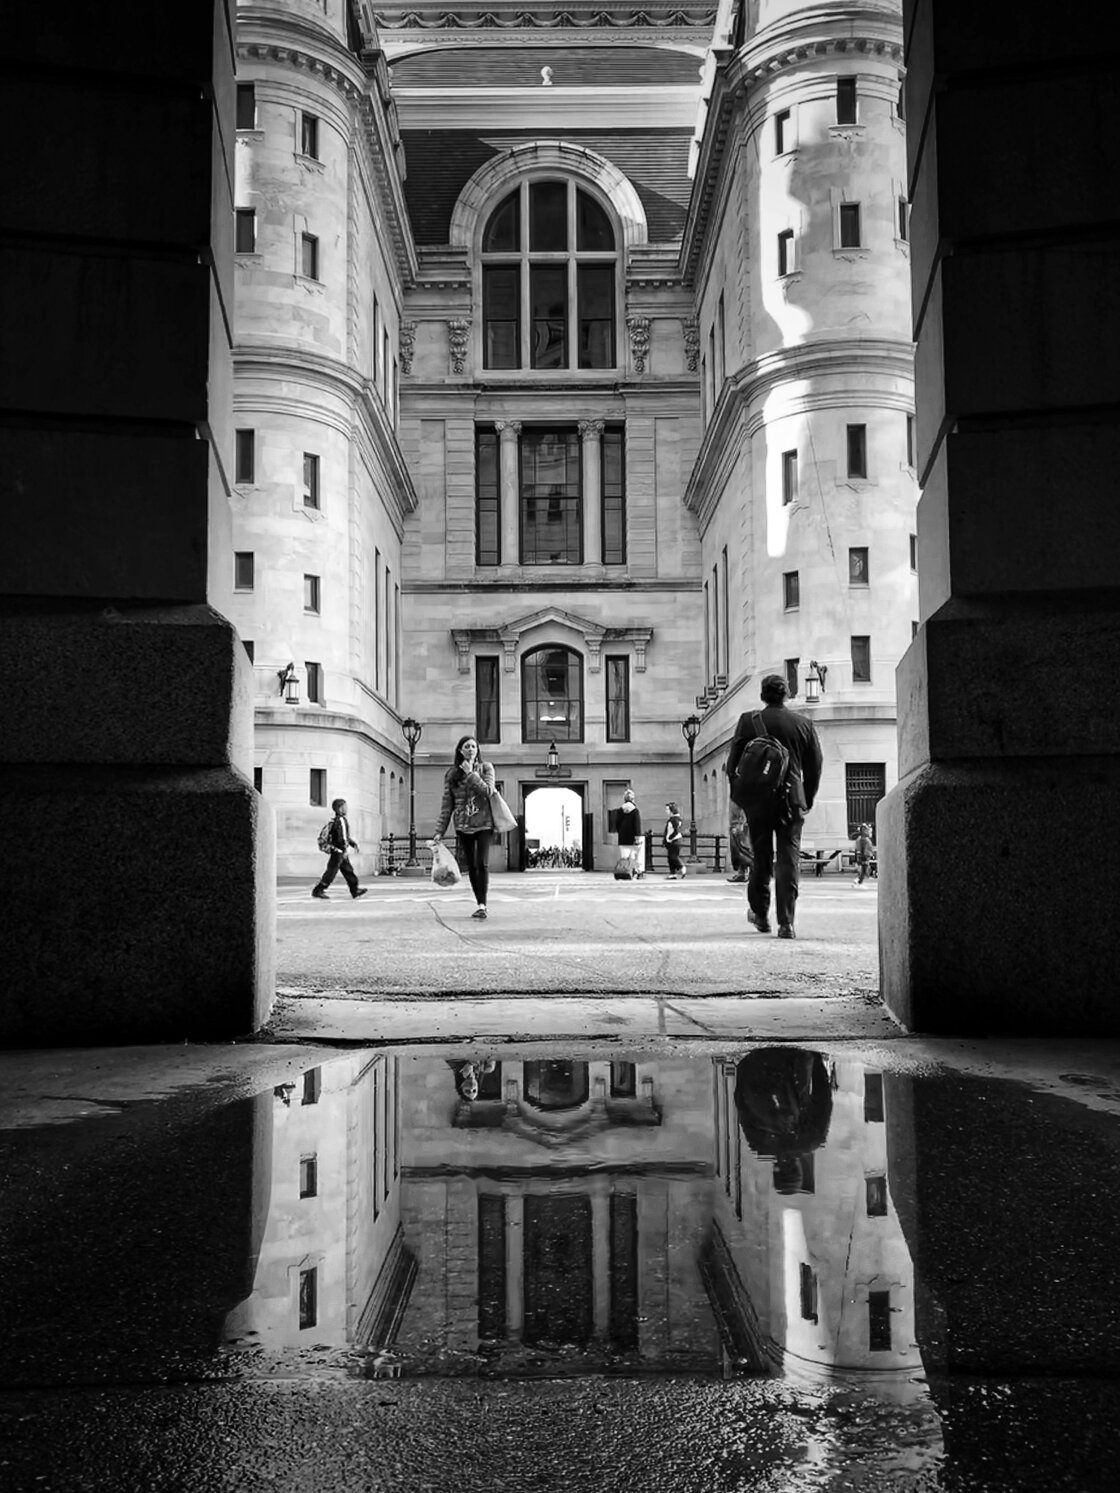
You’ll need to crouch down low to get more of the reflection in your frame.
You might get some funny looks, but don’t worry about that. You’re about to capture some really stunning photos!
Flip your iPhone upside down to get the lens really close to the water. Then adjust the camera angle until you’re happy with the composition.
When a person walks by, take multiple photos as they walk through the frame. You can use burst mode to help you capture the subject in the perfect position.
To activate burst mode, drag the shutter button towards the image thumbnail (bottom left if holding the phone vertically). Or if you’re using an older iPhone, just hold down the shutter button.
Your iPhone will take multiple photos until you release the shutter button. You can then choose the best shots from the burst and discard the rest.
4. Add A Creative Twist To Your iPhone Reflection Photos
After you’ve taken your puddle reflection shots, try this simple photo editing trick to make it even more interesting:
Flip your photo upside down so that the reflection appears at the top!
You can do this in any photo editing app, including the built-in Photos app on your iPhone.
Flipping your reflection photos creates a more intriguing image as the viewer tries to work out what’s going on.
It’s simple but very effective!
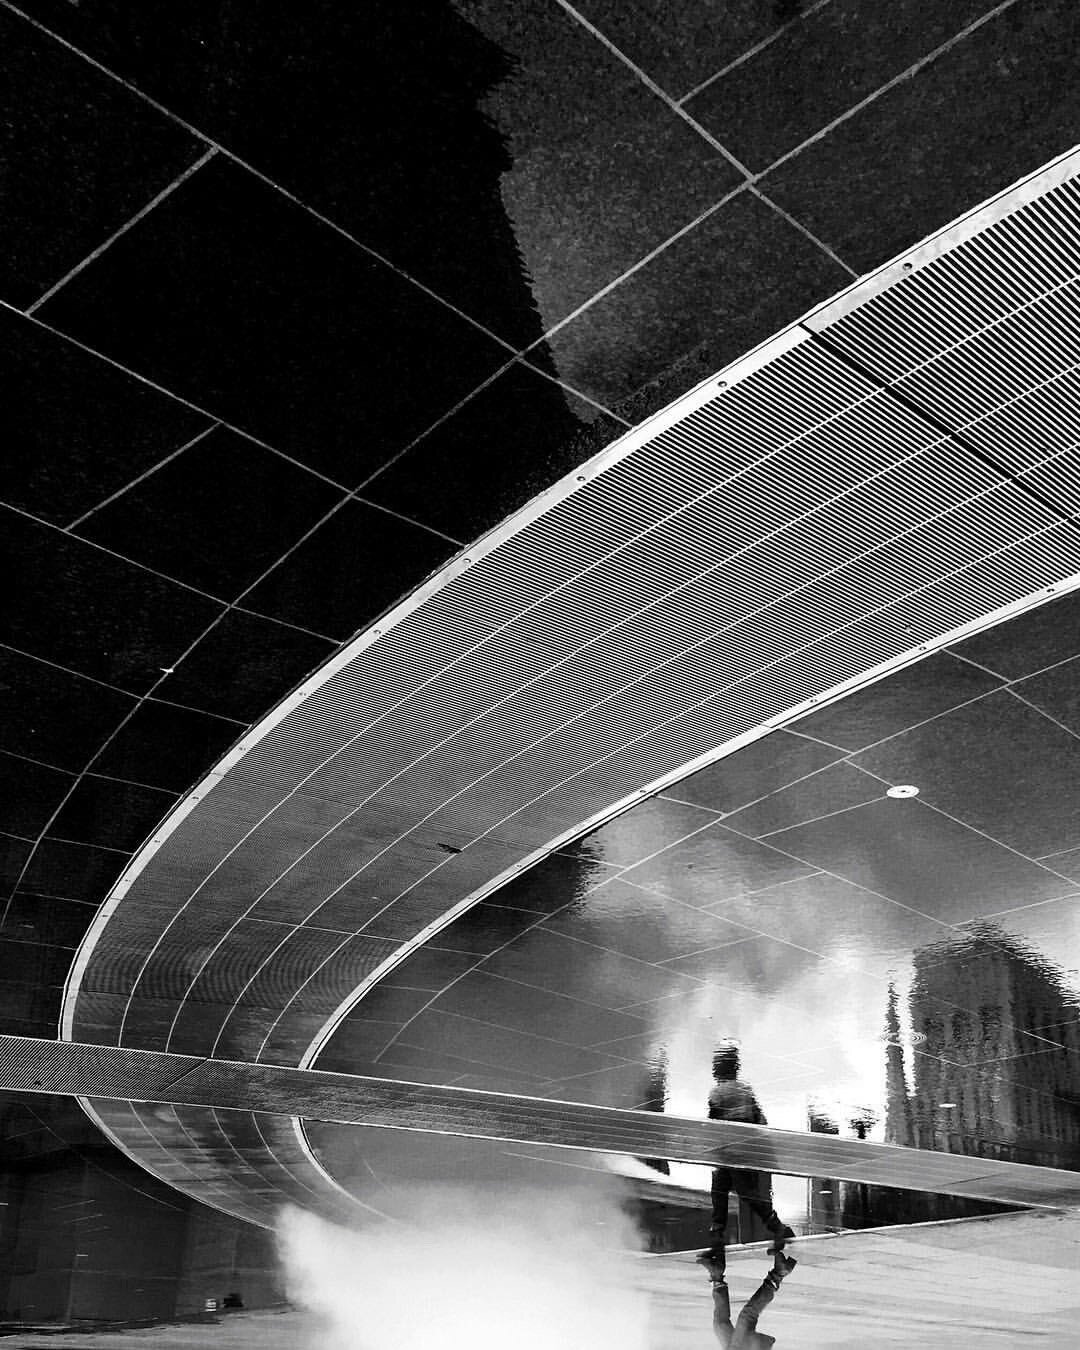
One last thing to think about is how much of the reflection you include in your photo.
You could compose the shot 50-50 so that half of the image is taken up with reflection. This is great for creating striking symmetrical compositions.
But don’t be afraid to fill most of the frame with the reflection. In the image below, I included just the legs of the man walking by, while the rest of the frame is filled with reflection.
Creating unusual compositions like this is a great way to capture more unique reflection photos.
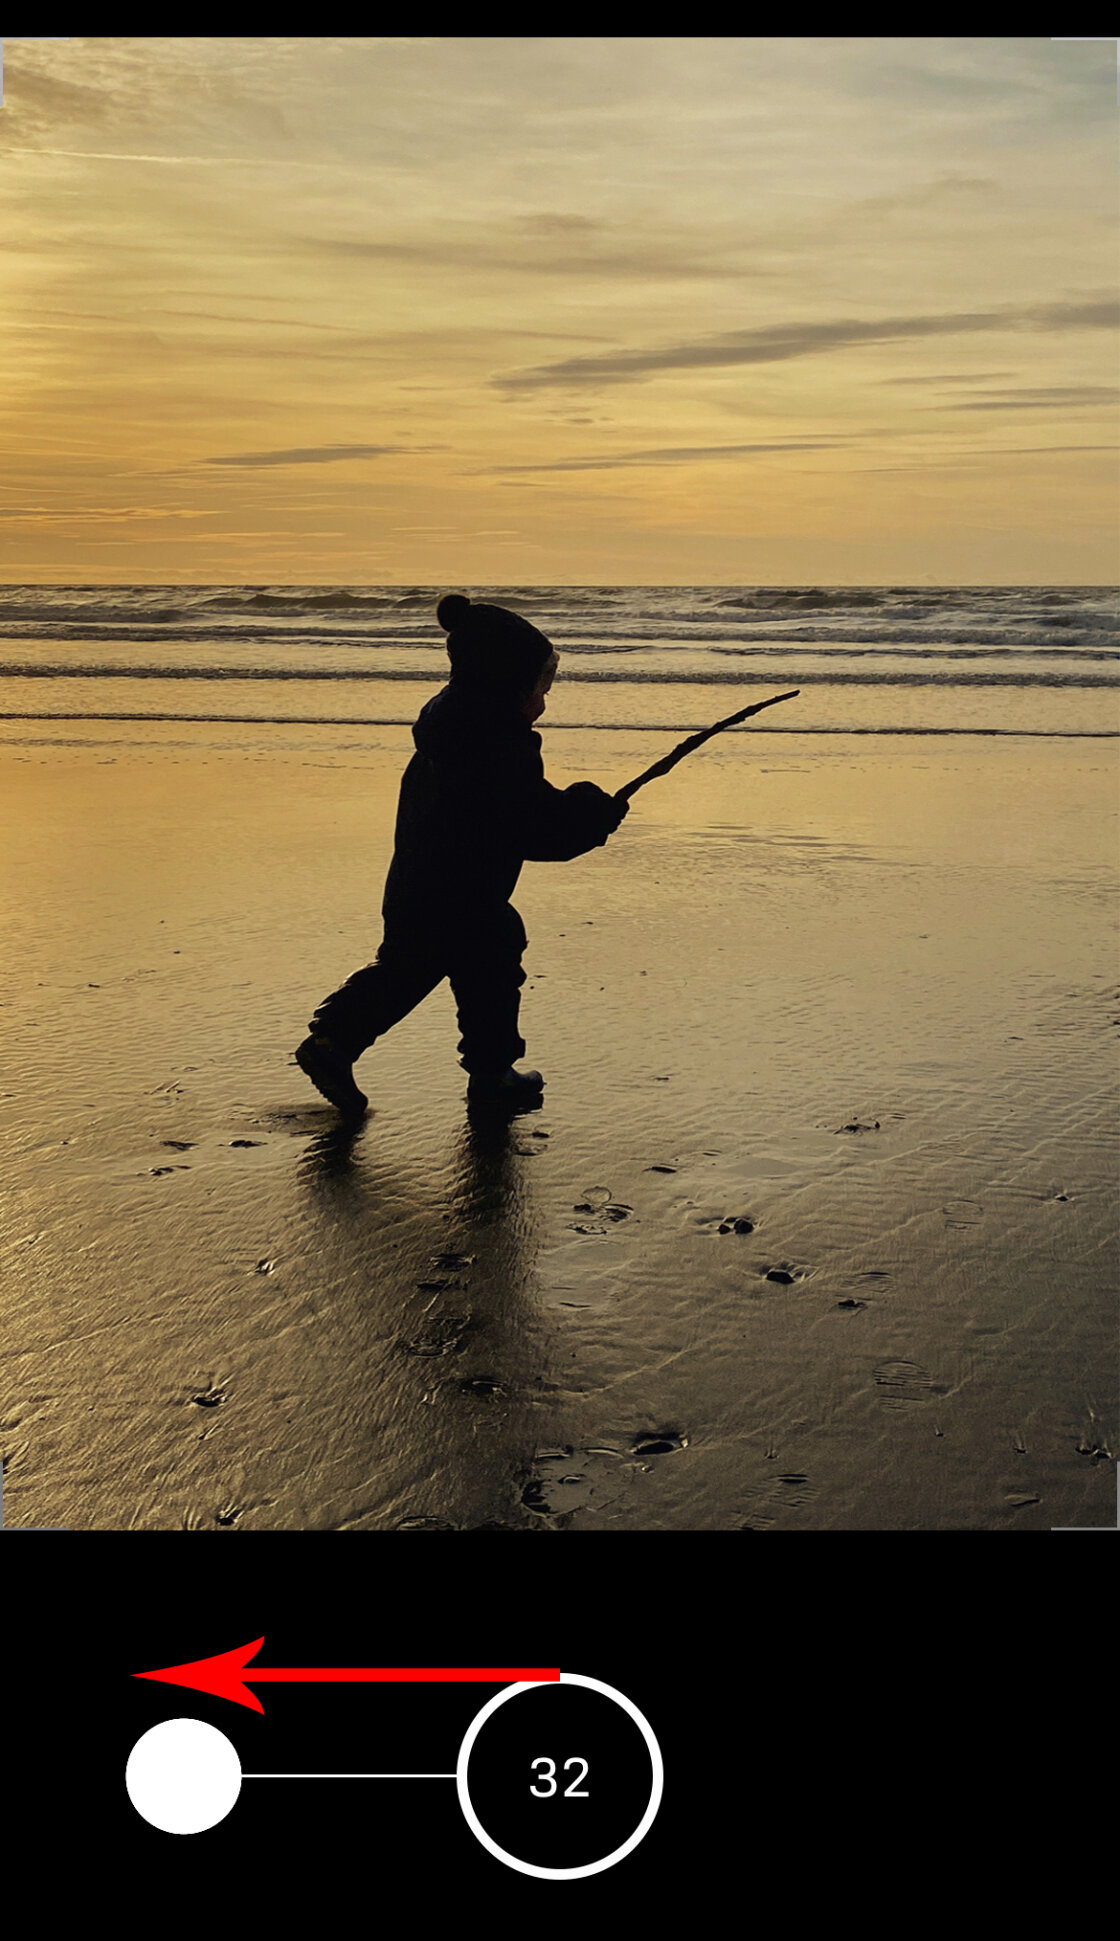
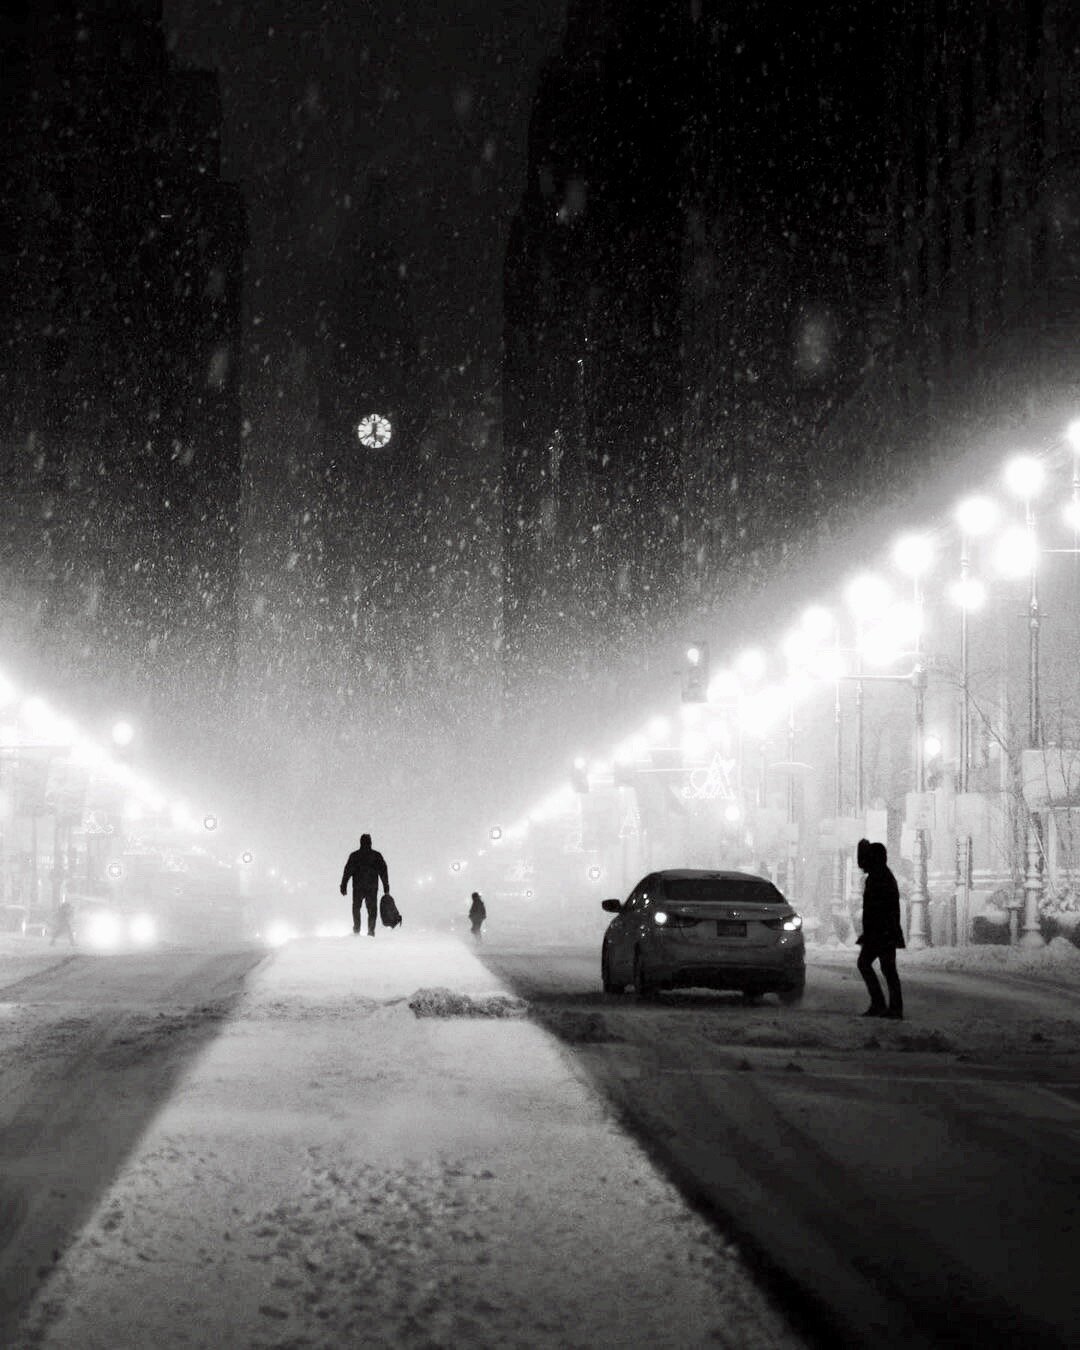
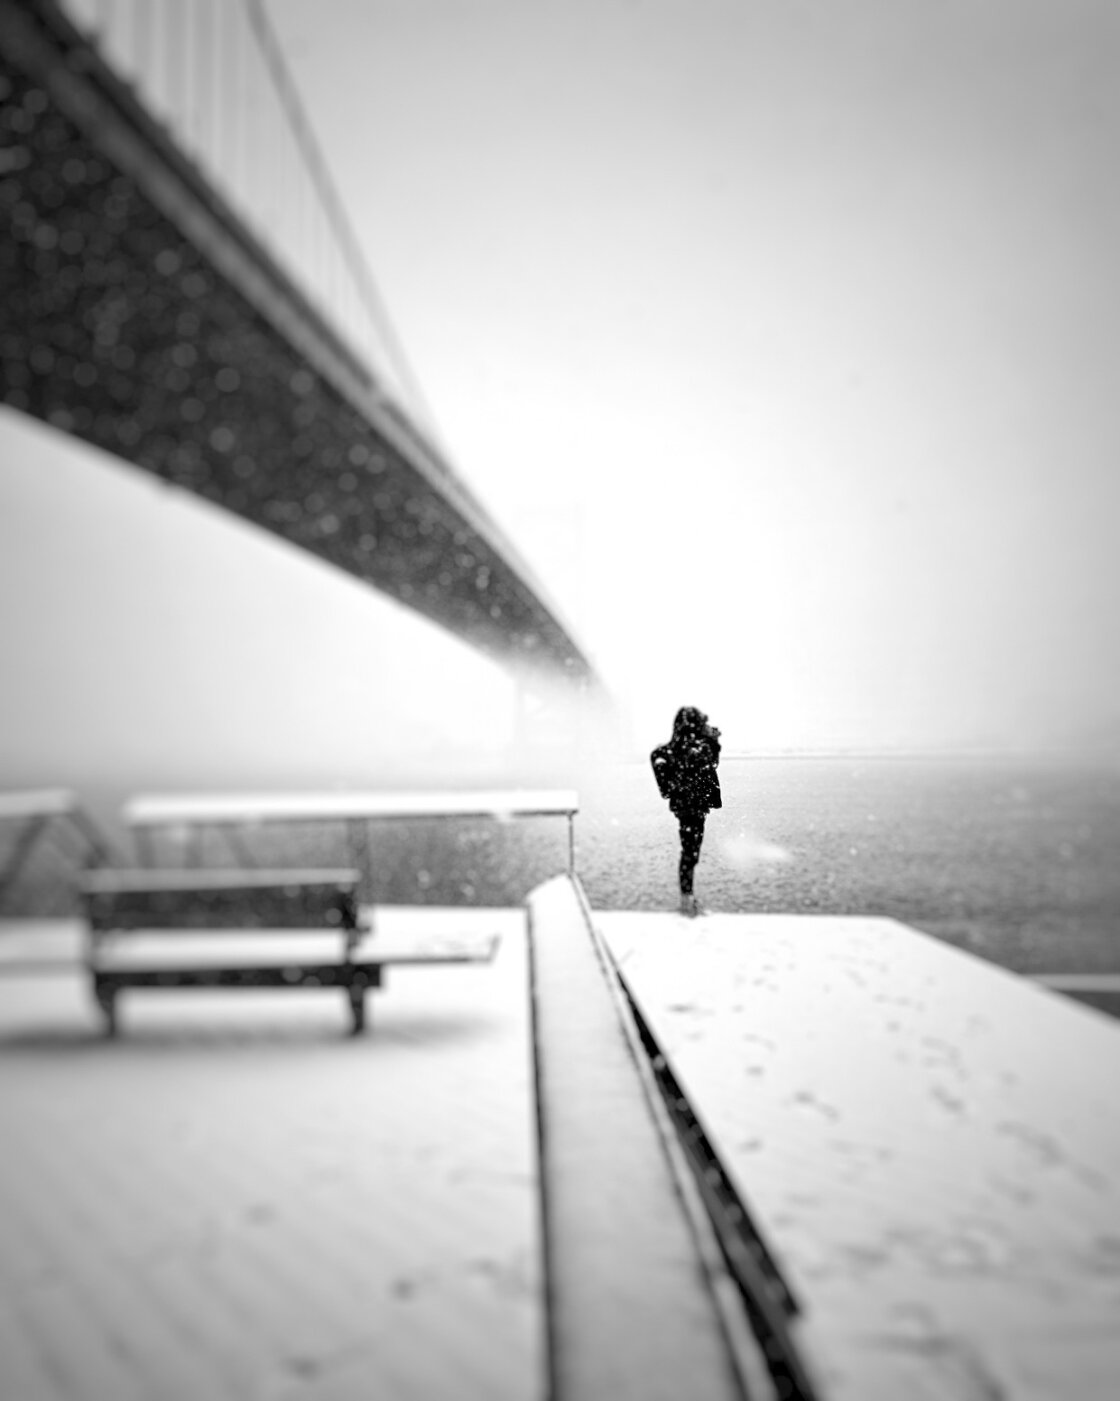
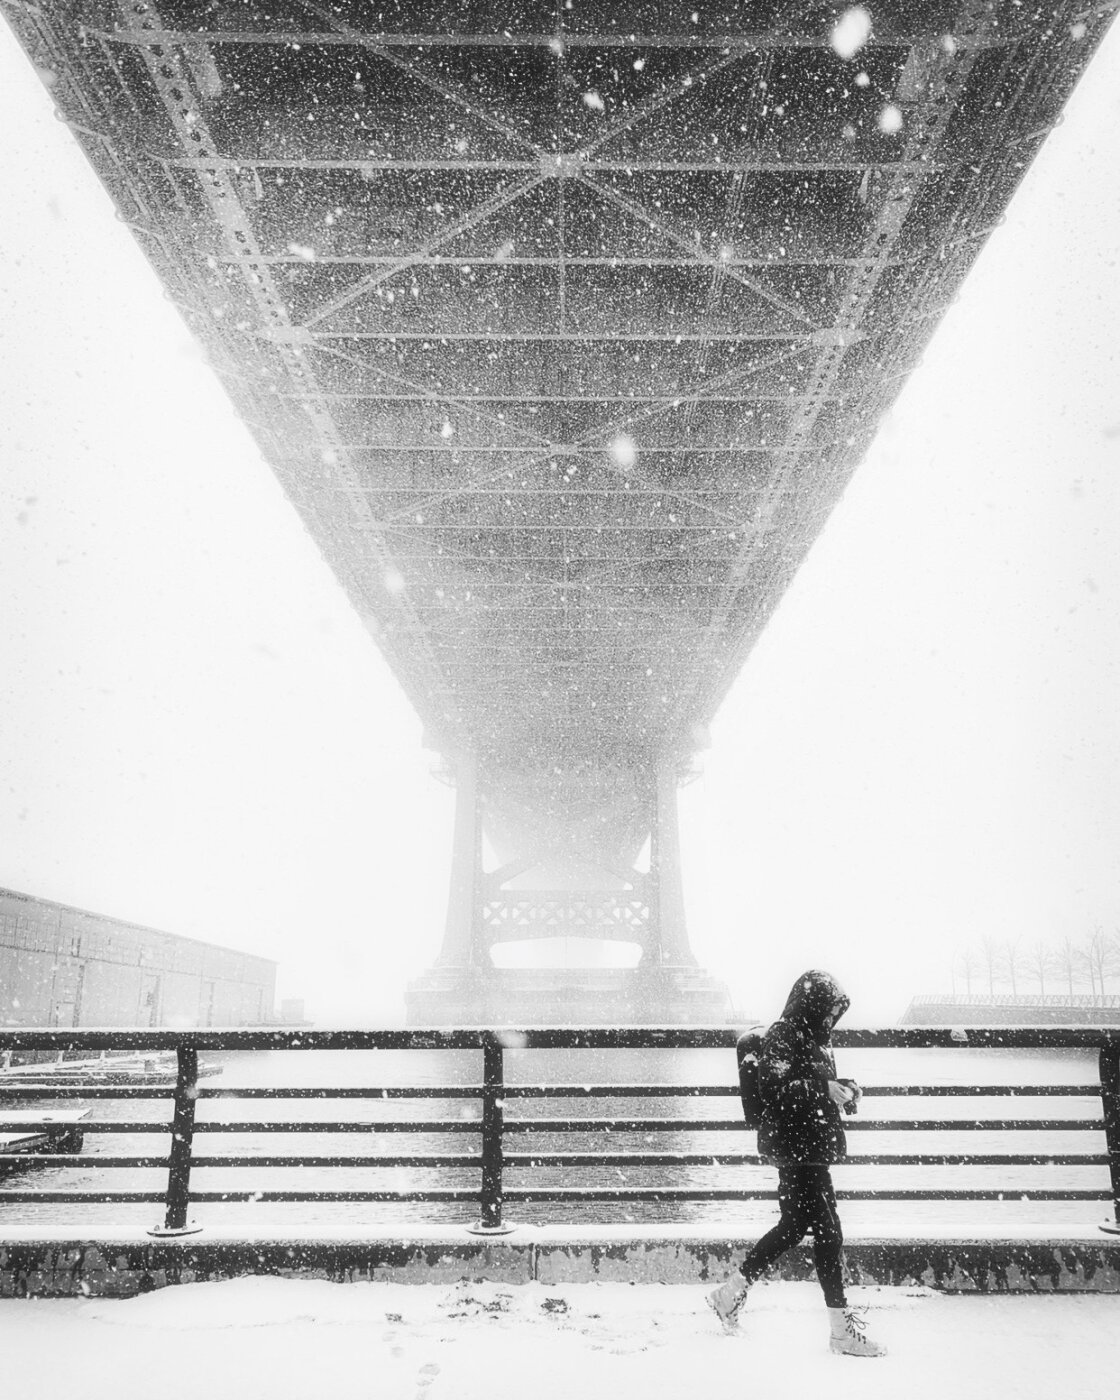
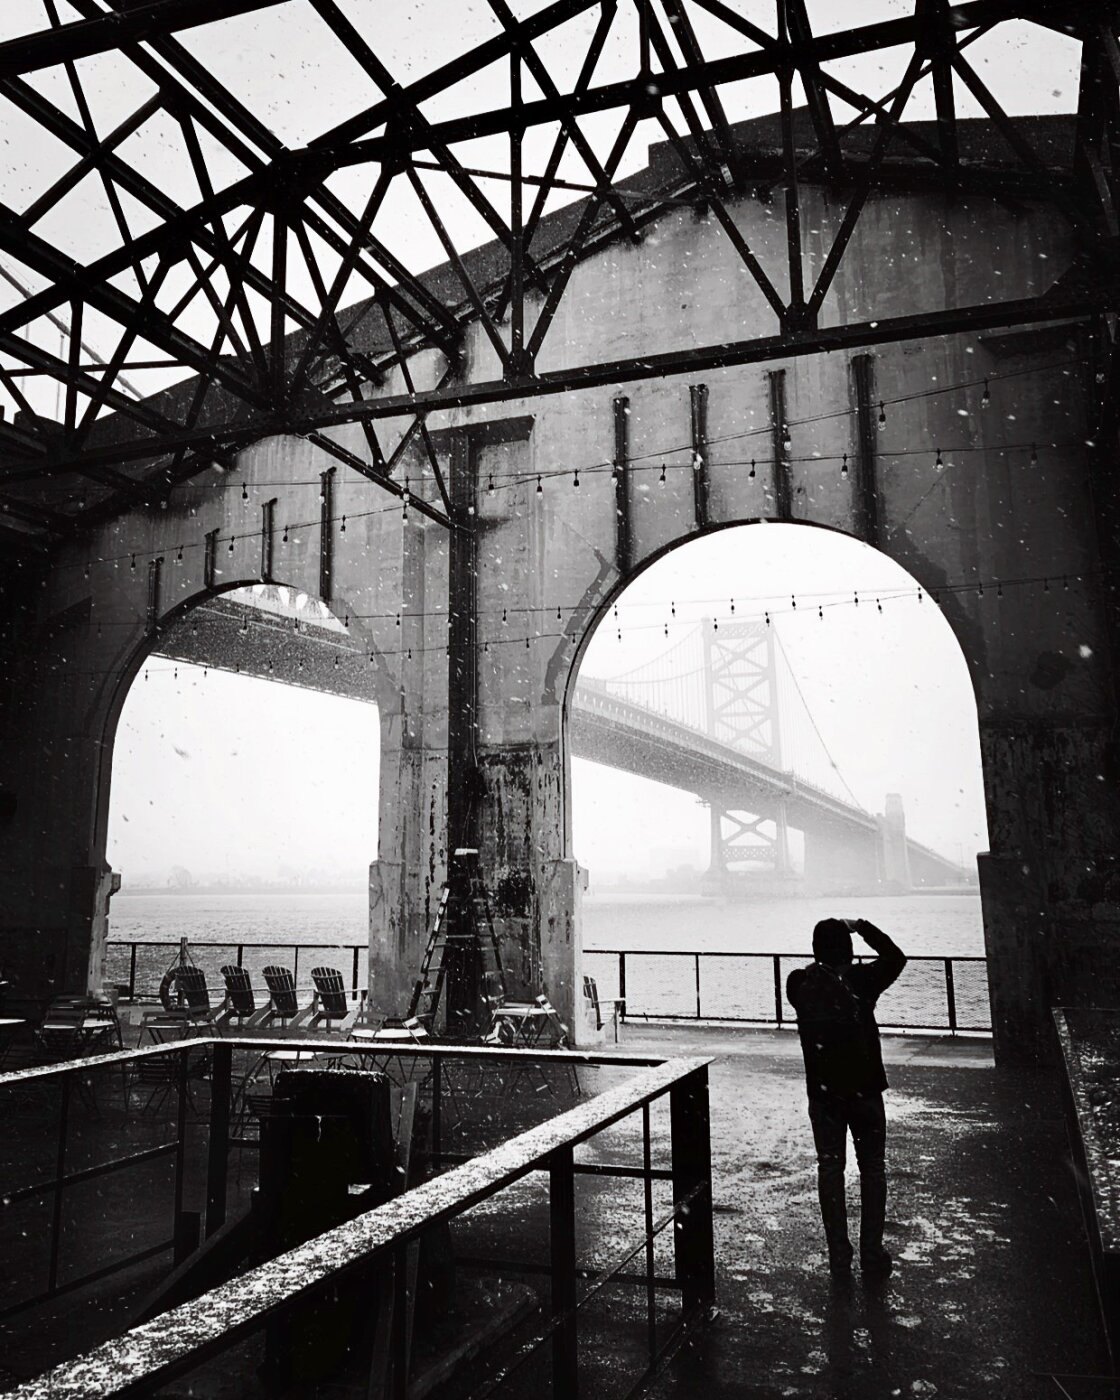
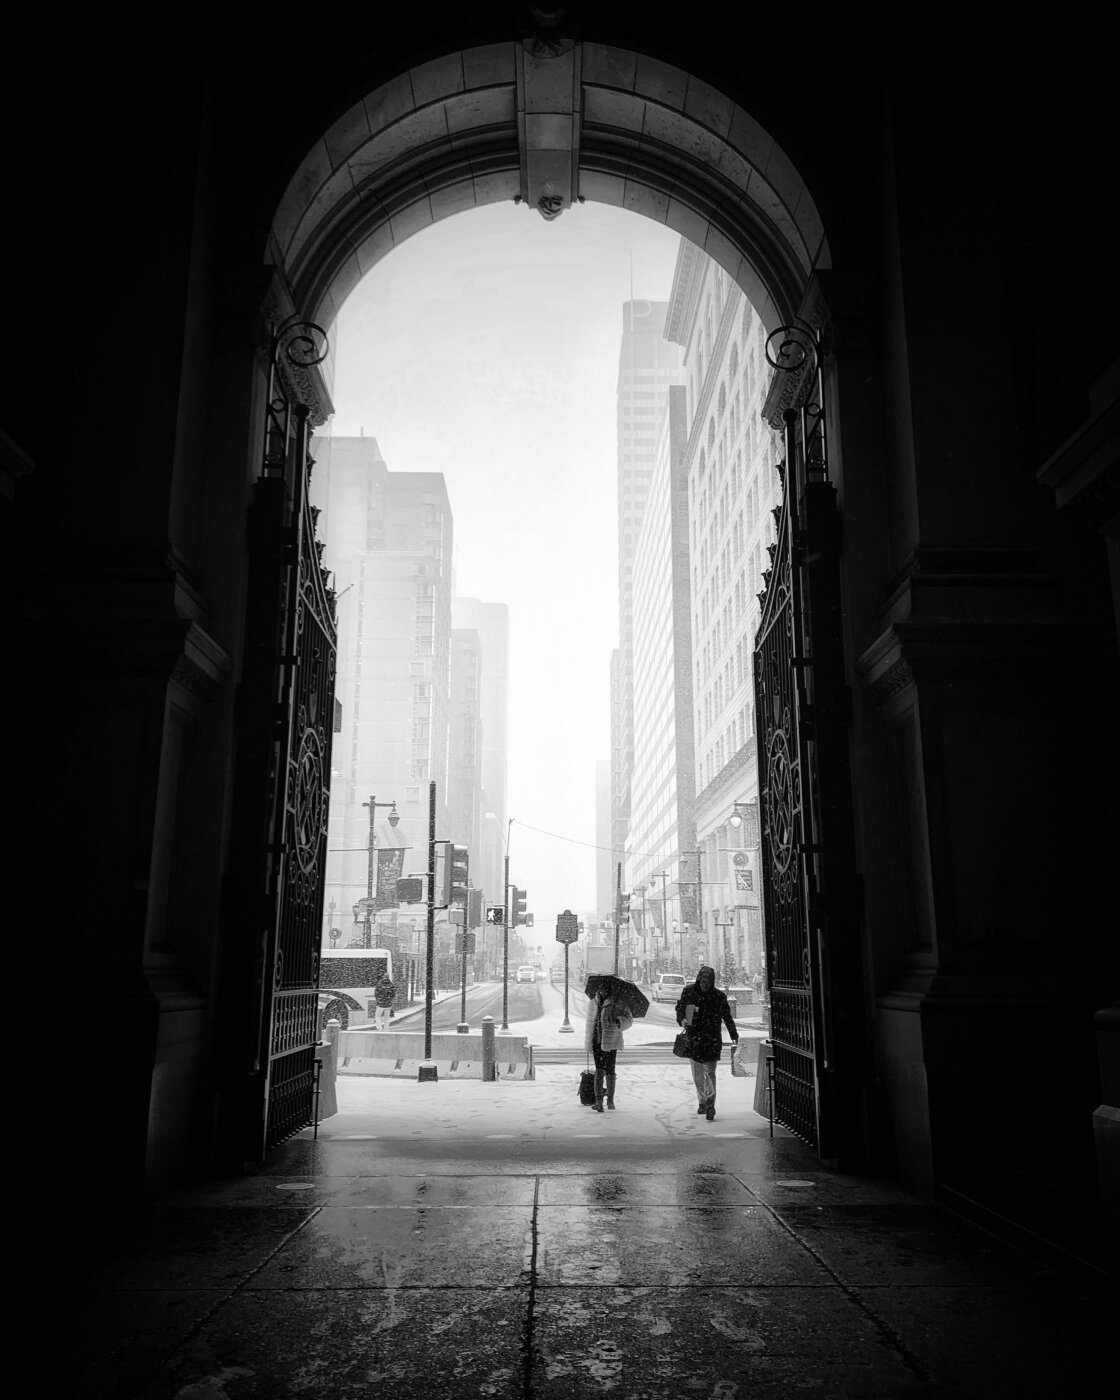
5. Capture Snowy Scenes For Wonderful Storytelling
Snow is my favorite weather for street photography!
It completely transforms the city, turning familiar places into brand new environments to shoot.
And it’s perfect for capturing interesting stories of people as they fight the winter elements.
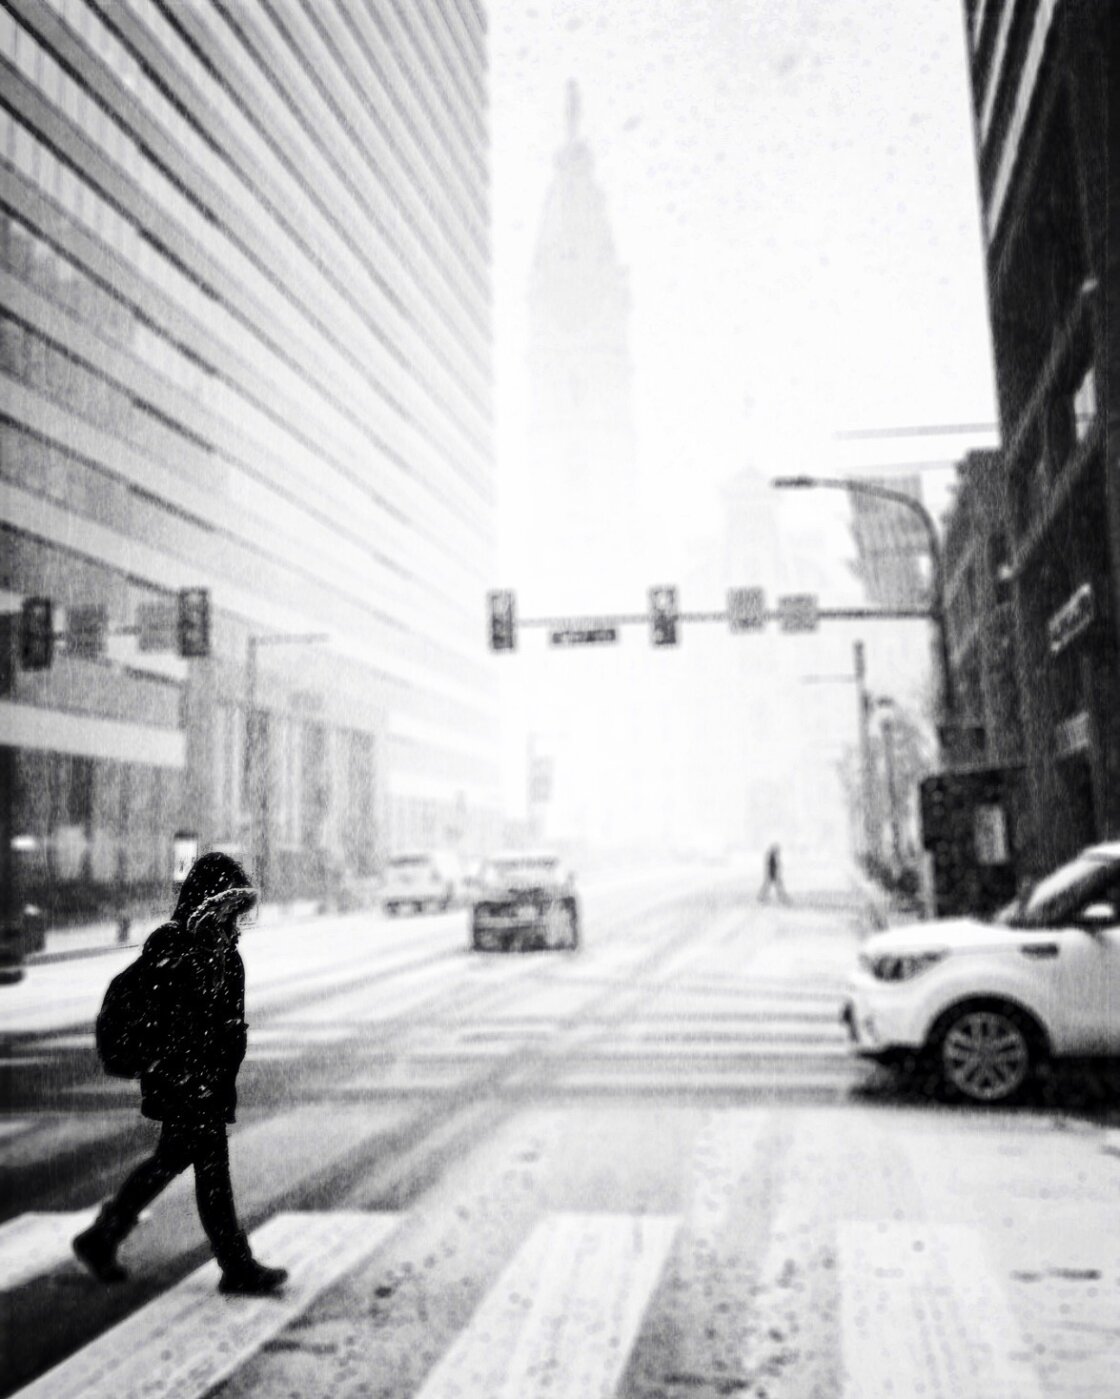
So wrap up warm and head into the city with your iPhone to capture some incredible winter photography!
Start by finding a good place to set up your shot.
Instead of always walking around searching for a scene, I like to go to my usual spots or ‘fishing holes.’ These are places that I’ve photographed many times, so composing my shot is easy.
I like to use the architecture of the city to frame my subject or create an interesting backdrop.
Buildings, bridges, and crosswalks make great backgrounds for your snowy street photography.
If you want to capture falling snowflakes in your photos, you’ll need a darker background so that the white snowflakes show up.
Once you’ve found a good location, compose your shot and wait for a person to enter the scene.
Ideally, you want someone who has something visually interesting about them… something that tells a story.
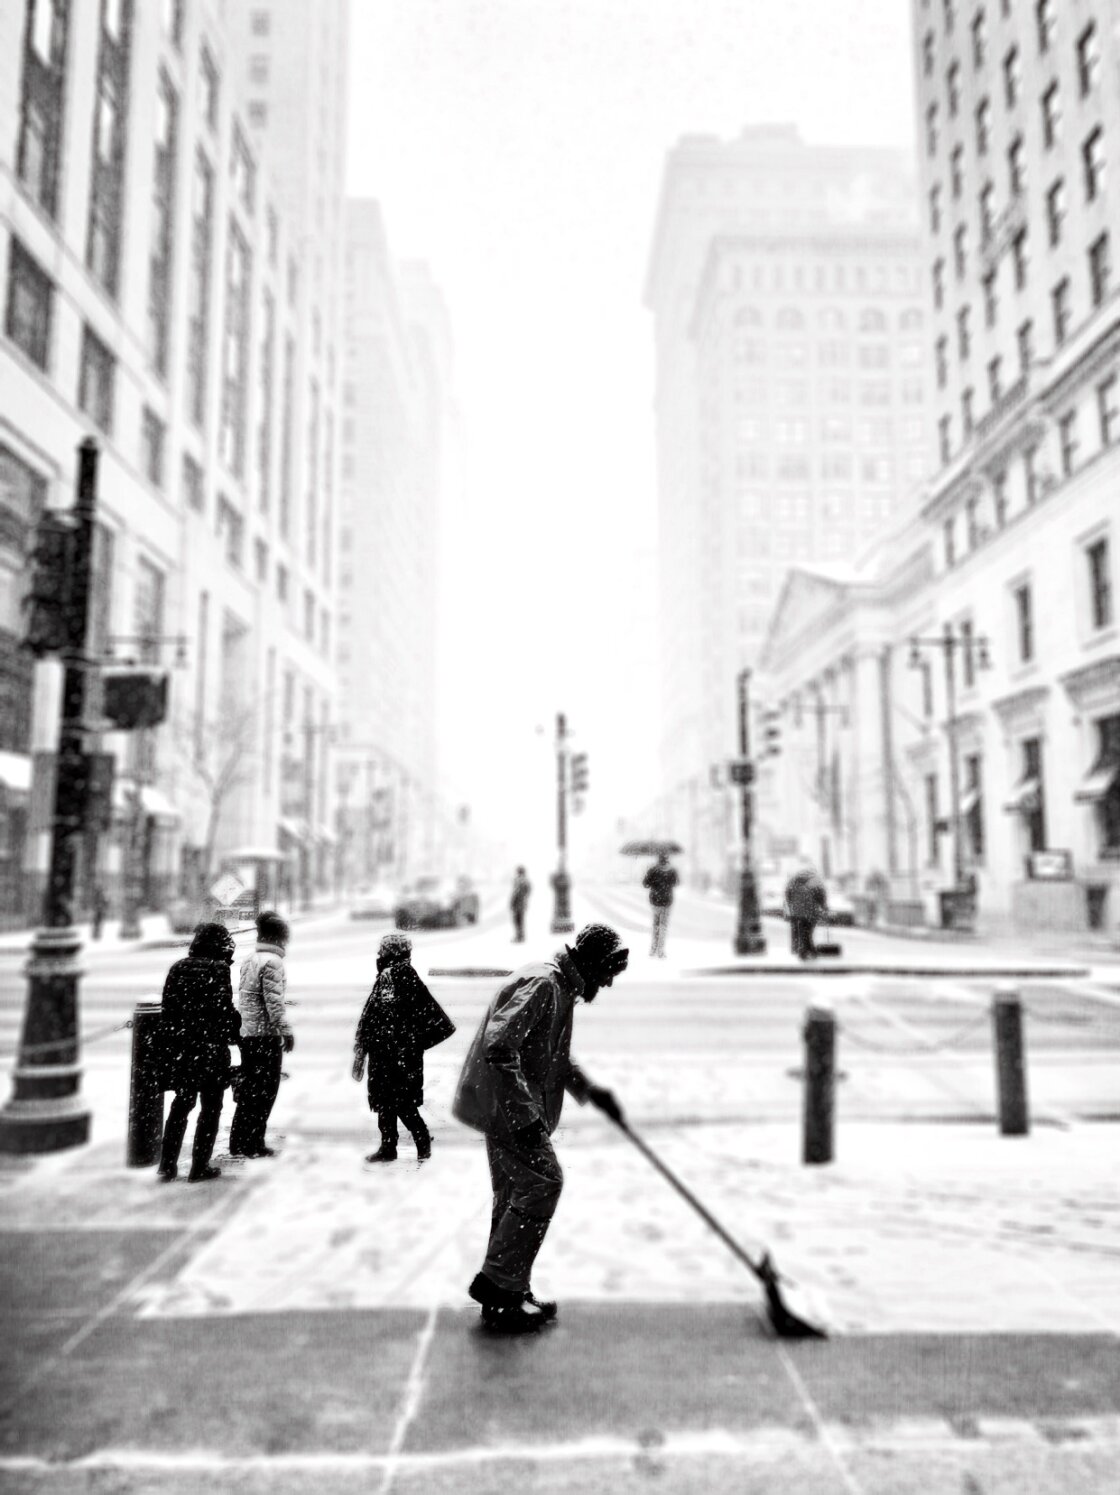
Perhaps they’re holding an umbrella, wearing a hat, or wrapped up in a colorful coat. Maybe they’re working out on the streets to sweep up the snow. Or perhaps their body language tells a story of fighting the elements on a cold winter’s day.
Take a few shots as the person walks past. Or use burst mode to capture a series of photos as they move through the frame.
6. Adjust Exposure For Perfect Snow Photography
When you’re doing snow photography, keep in mind that snow can affect the exposure (brightness) of your photos.
If most of the scene is white, it can trick your camera into under-exposing the shot. This can result in a photo where the snow looks grey instead of white.
But here’s the good news! You can easily adjust your iPhone camera’s exposure.
Simply tap on the camera screen to set focus on your subject, then swipe up to make the image brighter (or down to make it darker).
You can also use exposure to create different moods in your photos.
If you want a bright and airy image, swipe up to increase the exposure. For a dark and moody photo, swipe down to reduce it.
Of course, you can also use photo editing apps to adjust exposure after taking the photo. But it’s always better to get it right in-camera!
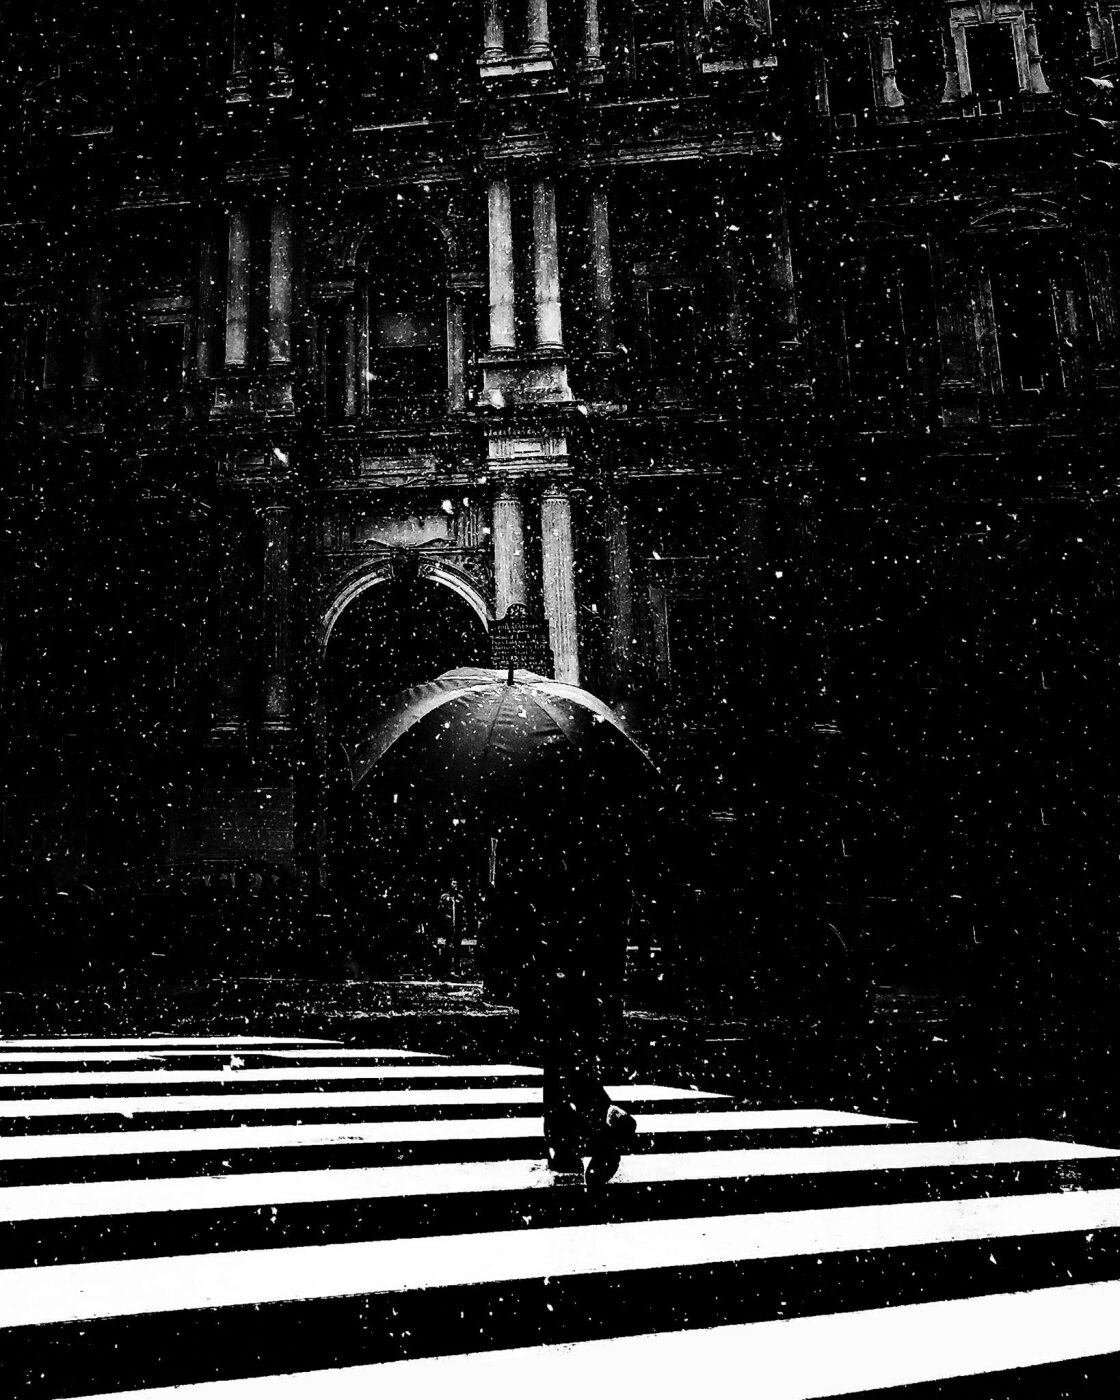
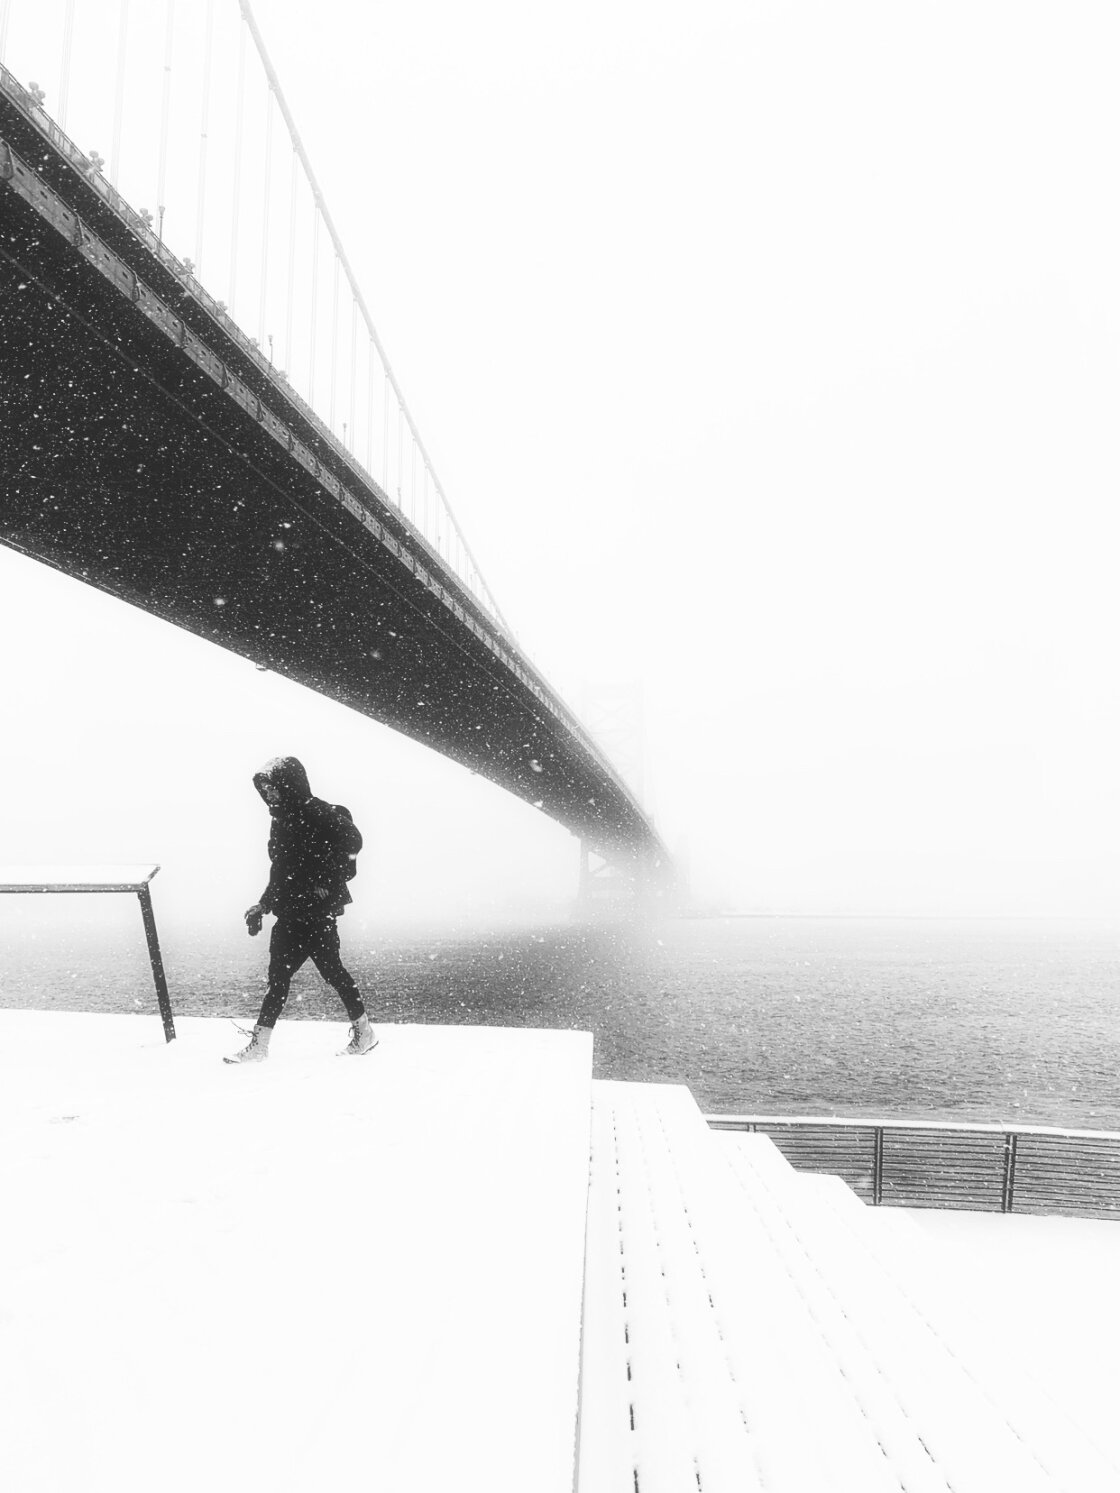
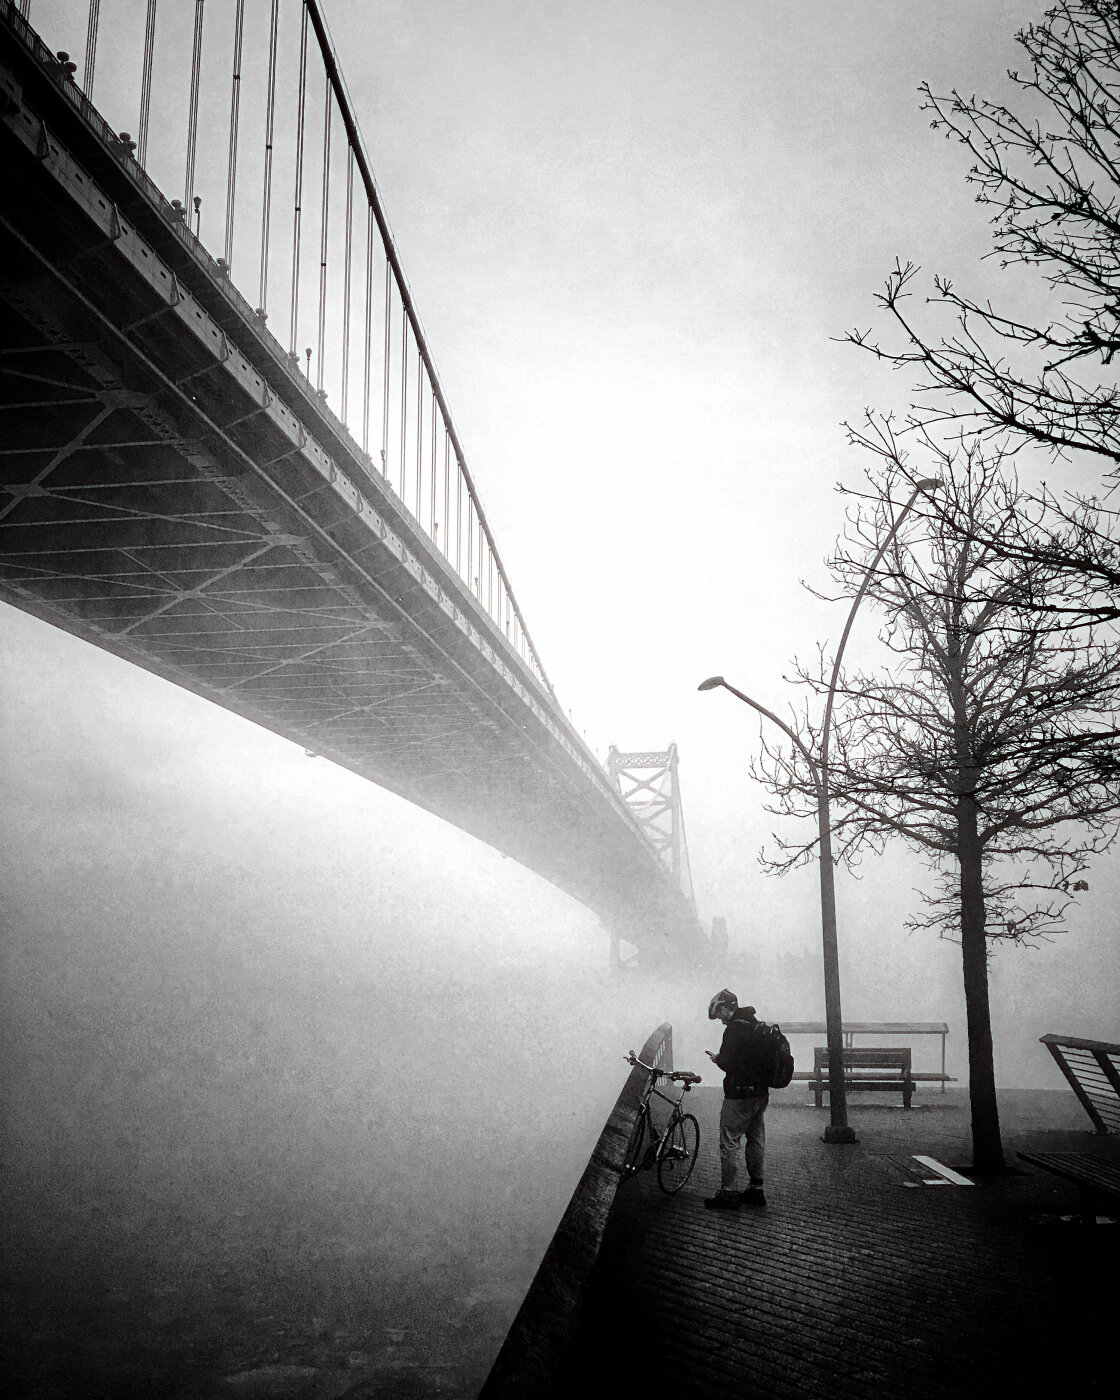
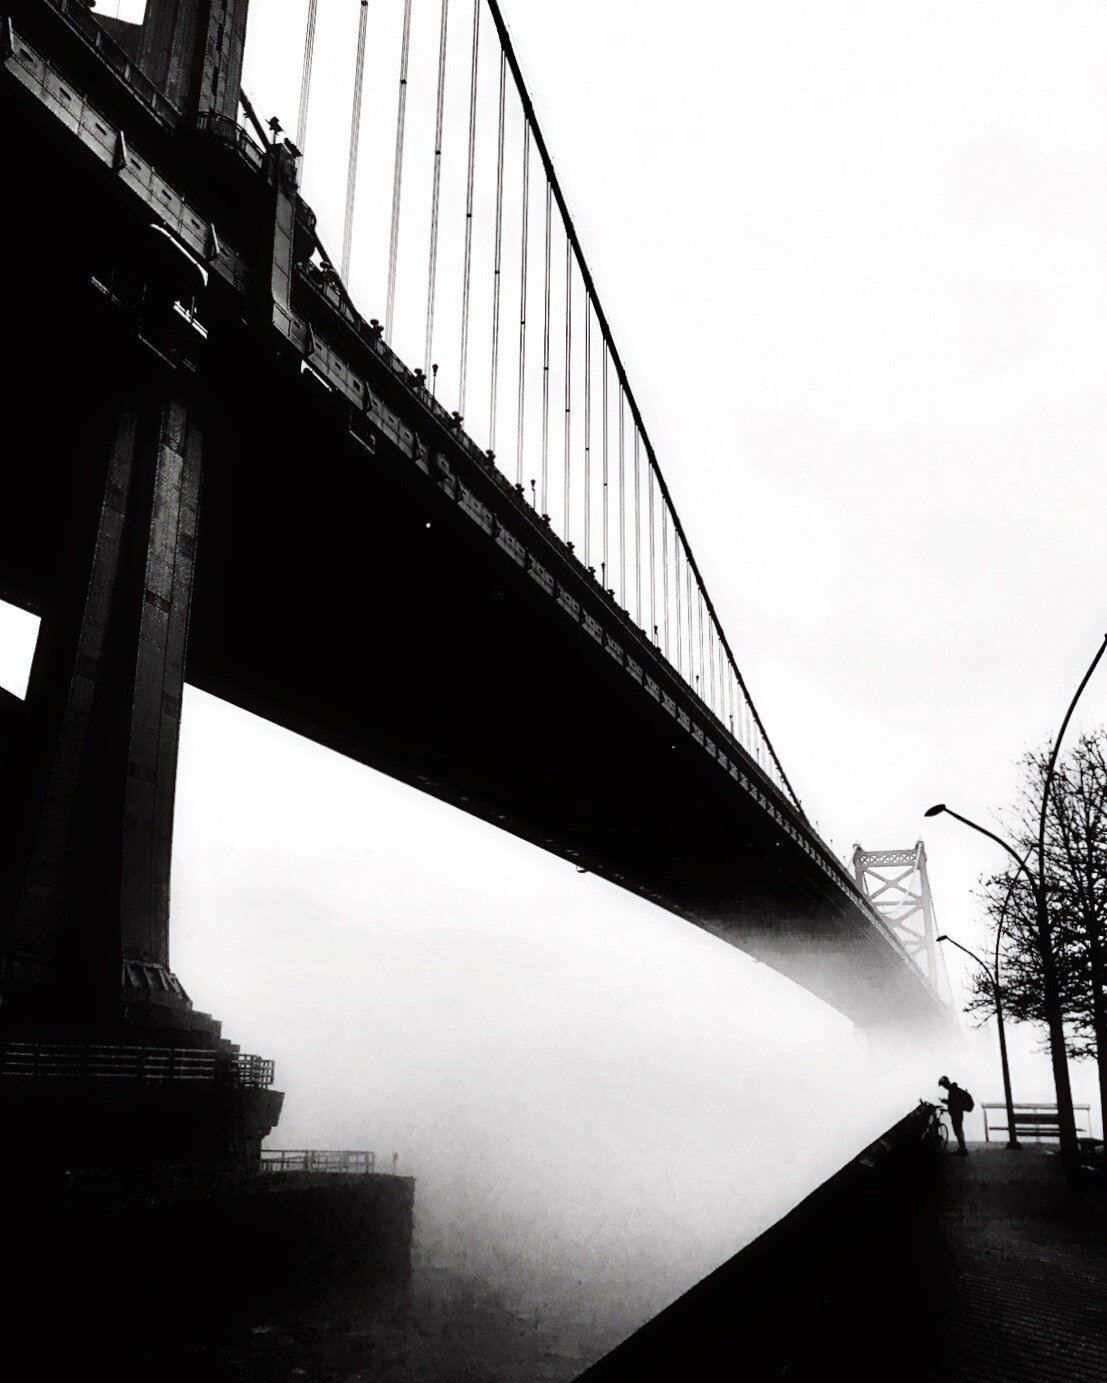
7. Shoot In Fog To Add A Sense Of Mystery
Fog offers another great way to capture street photos in bad weather. It’s perfect for moody street photography with an added sense of mystery!
I will literally drop everything I’m doing to capture some mysterious photos in the fog!
Fog adds a grey, murky feel to your images. That might sound unappealing, but the results can be dramatically beautiful.
Your photos will have a dream-like quality to them… which is quite unusual in street photography.
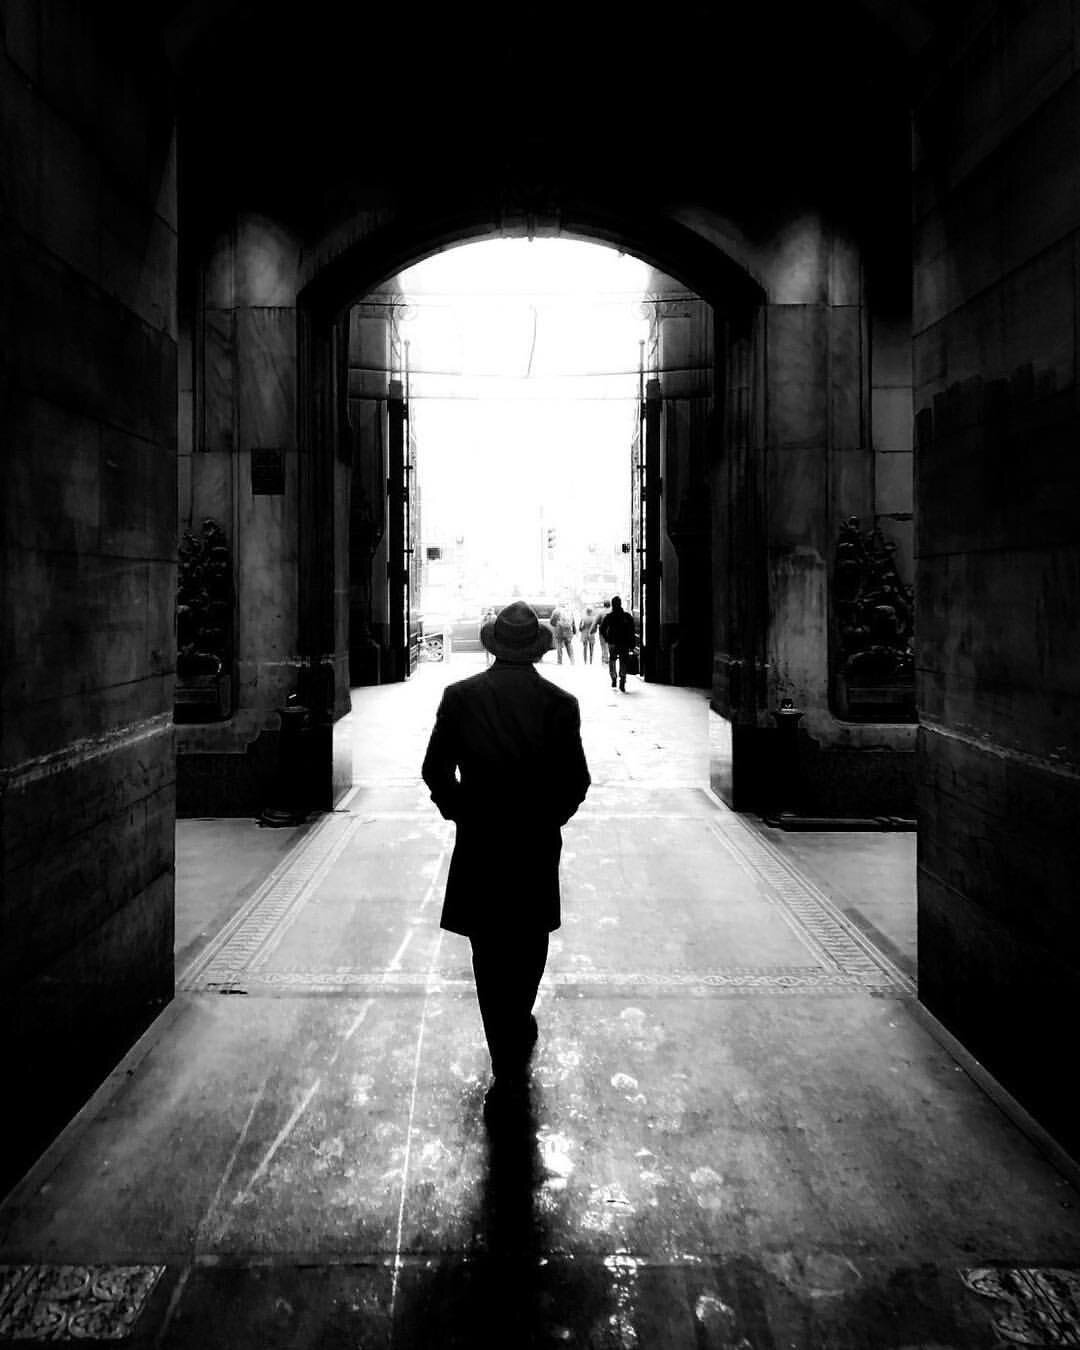
The key to great photography in fog is to have an interesting subject in the foreground.
A lone figure is perfect for fog photography. It adds to the eery atmosphere!
So be patient. And keep your eyes peeled for a person that stands out against the fog.
It also helps to have some kind of architectural element that gradually fades into the fog.
A bridge or road will create a strong leading line in your composition. And as it fades into the distance, you’ll get an amazing sense of depth in the scene.
Compose your shot so that the person in the foreground stands out against the brighter background. You might need to shoot from a low angle to achieve this.
Having a bright background also allows you to capture your subject as a dark silhouette. This is a great way to create dramatic and mysterious street photos.
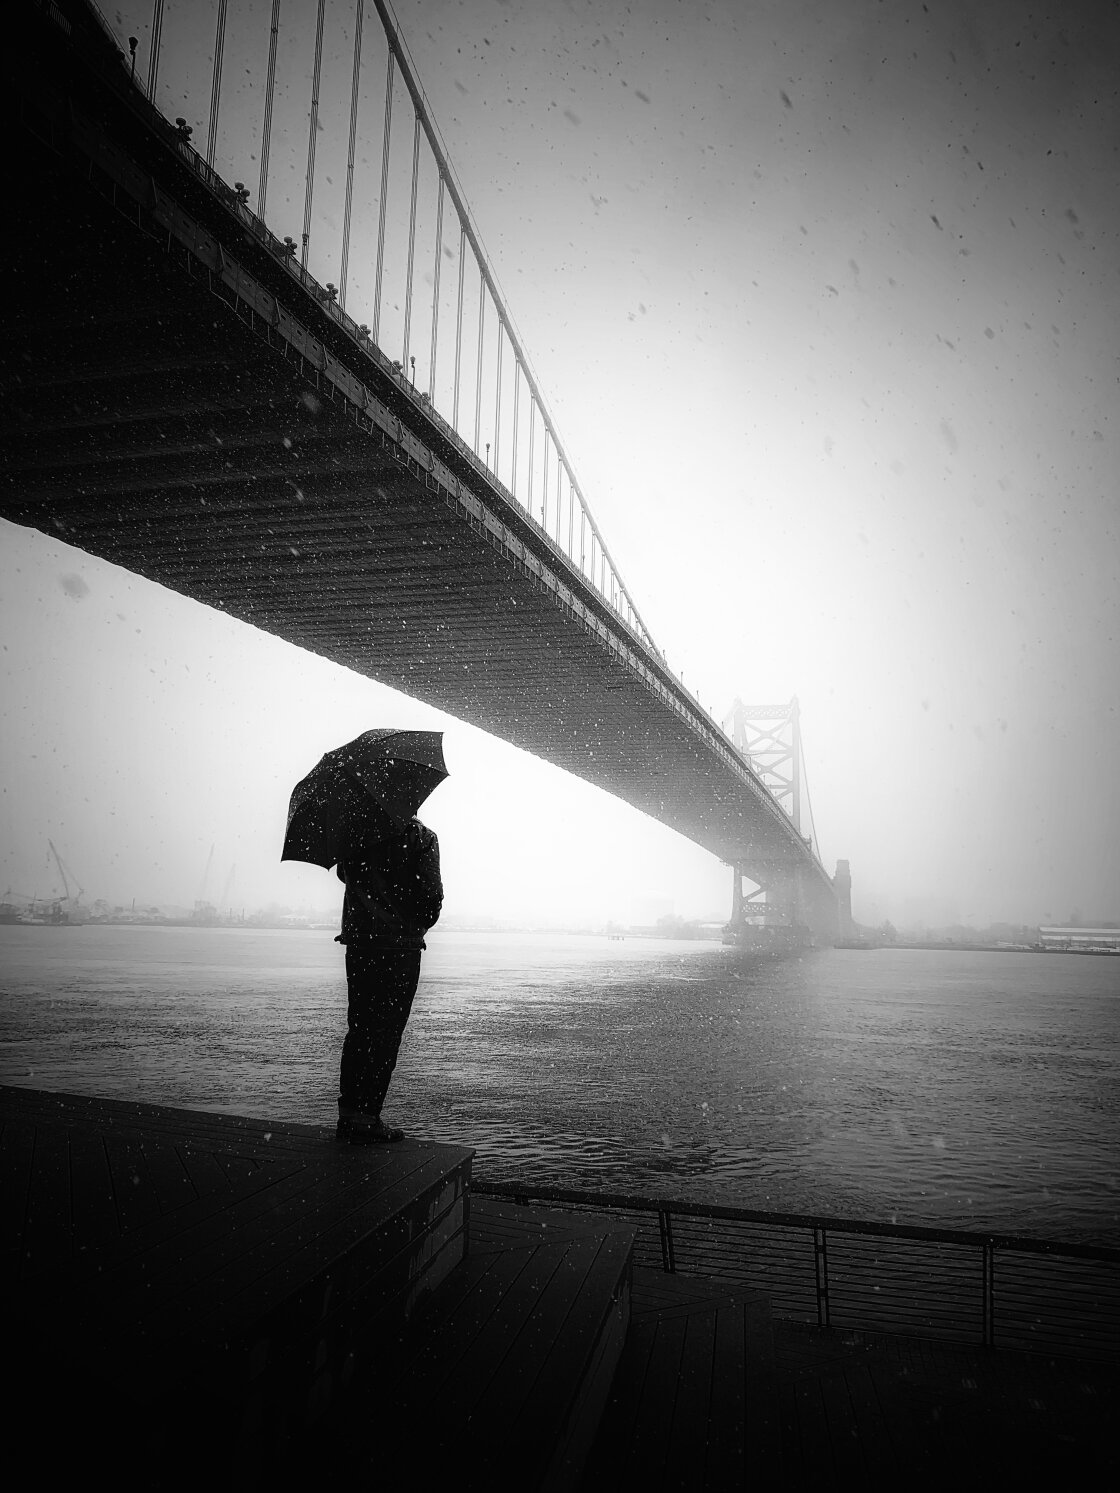
To create a silhouette, ensure the subject’s outline is clearly defined against the brighter fog.
Tap to set focus on your subject, then swipe down to reduce exposure so the subject appears dark or completely black.
Don’t worry if the silhouette doesn’t look perfect when taking the shot. You can always edit the photo later to increase the contrast, making the silhouette darker and the foggy background brighter.
8. Convert Your Bad-Weather Street Photos To Black & White
There is one downside of doing street photography in rain, snow, and fog. The colors in your photos can end up dull and ‘muddy.’
But here’s an easy solution that will transform your moody-weather photos:
Convert your images to black and white!
A black and white edit accentuates the tones and textures in your image. And it creates wonderfully moody images that convey emotions and stories.
For successful black and white photography, you need a good amount of contrast in your scene. That means you need bright highlights as well as dark shadows.

As you become more familiar with black and white photography, you’ll begin to notice areas of contrast in a scene.
While I shoot in color, I see only the many shades of blacks, whites, and grays.
As you’re walking about the city, try to pick out areas of contrast that might look good in your black and white photos.
Notice bright areas such as the sky, natural sunlight, street lamps, and headlights from passing cars.
Then look for dark areas such as shadows cast on buildings, the darkness inside a tunnel or archway, etc.
You can then choose a location that has both bright and dark areas, knowing that the photo will look great when you convert it to black and white!
Capturing a lone figure against a well-lit background also works well.
Just make sure you adjust the exposure so the subject appears as a dark silhouette against the brighter background.
9. Experiment With Black & White Photo Editing Apps
There are many editing apps for converting your iPhone photos to black and white.
Some of my favorites are Lightroom, Snapseed, and Blackie. But you can also use filters in the built-in Photos app to quickly turn your photo black and white.
Each app brings something different to the final edit. So experiment with different apps and settings until you achieve a look that you like.
For example, you might prefer clean, crisp edits with high contrast levels.
Or perhaps you’ll go for a grainy, grungy look that emulates the look of old film.
There’s no right or wrong. It all comes down to personal preference and what kind of look will suit the photo you’re editing.
And of course, if you prefer to keep your moody-weather photos in color, that’s perfectly okay too!
About the Photographer
Andrew Gimblet is a fine art street photographer from Philadelphia, USA. He loves to venture out in ‘bad’ weather, using his iPhone to capture lone figures against the backdrop of the city. When he’s in the streets, he’s constantly people-watching and looking for ways to use light and shadow to create stunning black and white street photos. You can see more of Andrew’s compelling iPhone photos on Instagram.
The post 9 Tips For Amazing iPhone Street Photos In Bad Weather appeared first on iPhone Photography School.
About the author

By accepting you will be accessing a service provided by a third-party external to https://kendallcameraclub.org/