8 Tips For Golden Hour Landscape Photography On iPhone
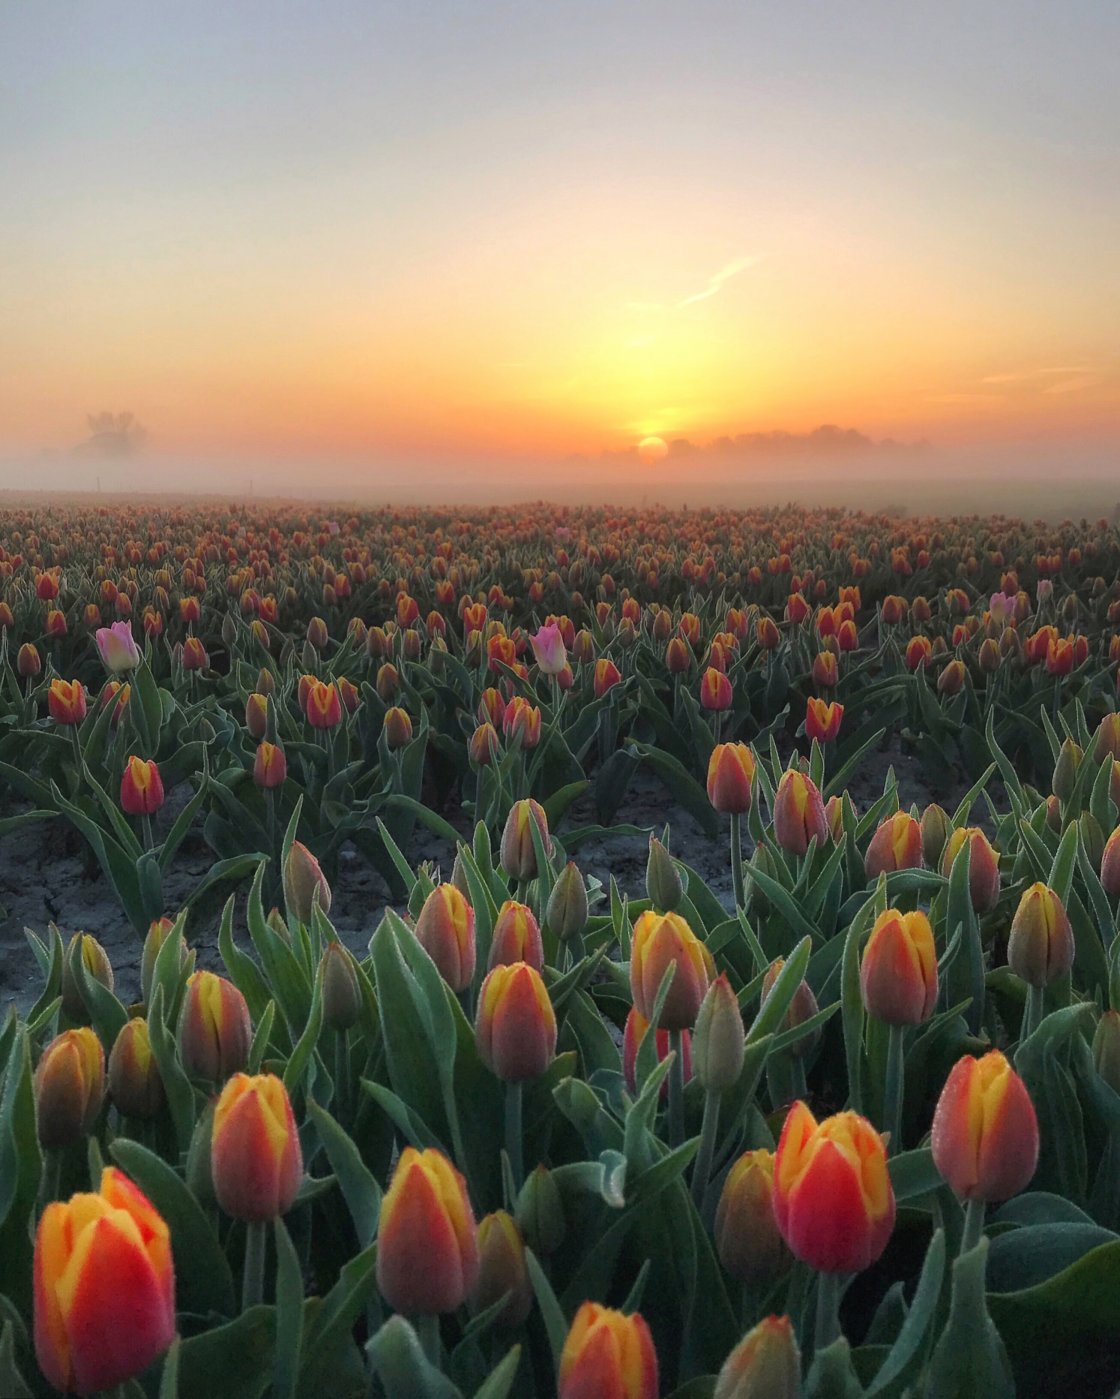
Do you struggle to take beautiful sunrise and sunset pictures with your iPhone? It might seem challenging… but with a few simple tips, you can create stunning photos with beautiful golden light. I recently interviewed Linda Smit – a mobile photography workshop leader with a passion for sunrise and sunset photos. In this article, Linda shares 8 tips for improving your golden hour landscape photography. Read on to discover how to capture the magic of golden hour with your iPhone!
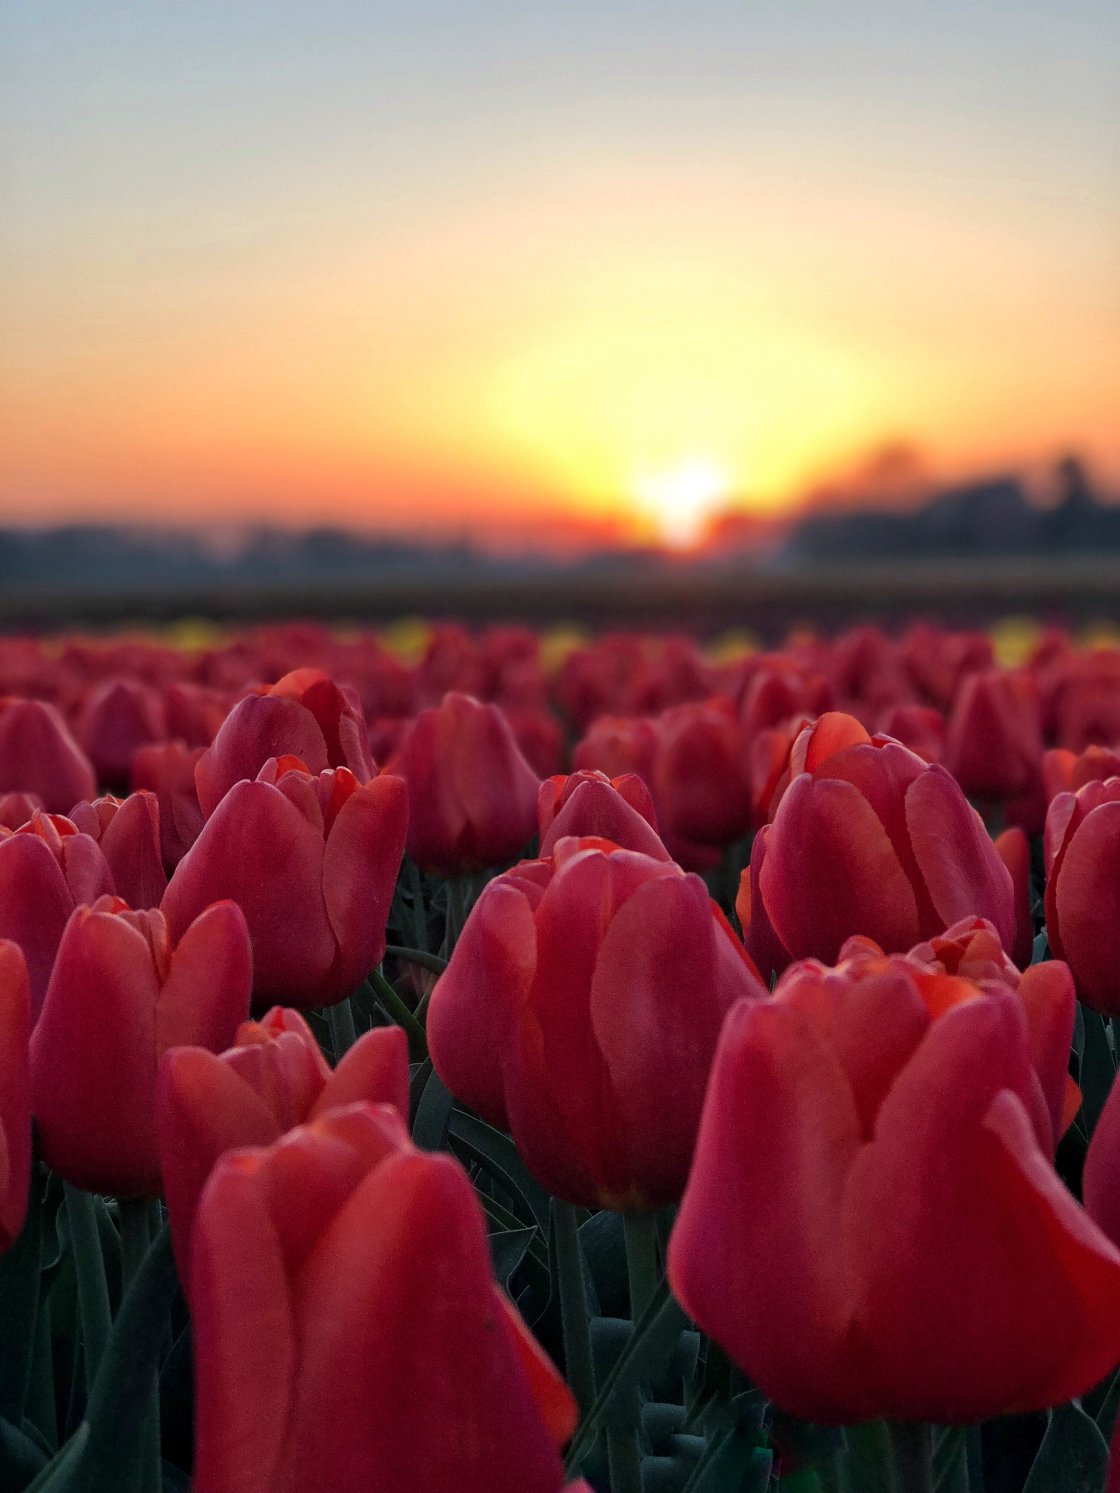
1. Be Ready For The Beautiful Golden Light Of Sunrise & Sunset
Do you want to capture gorgeous golden light in your landscape photos?
Then you have to be ready with your camera when the light is just right.
When the sun is low in the sky, it lights up the scene with beautiful warm colors. That’s why sunrise and sunset are called the “golden hours.”
But the light changes very quickly as the sun rises or sets. So you’ll need to get to your location in time to find some good compositions before the perfect light hits.
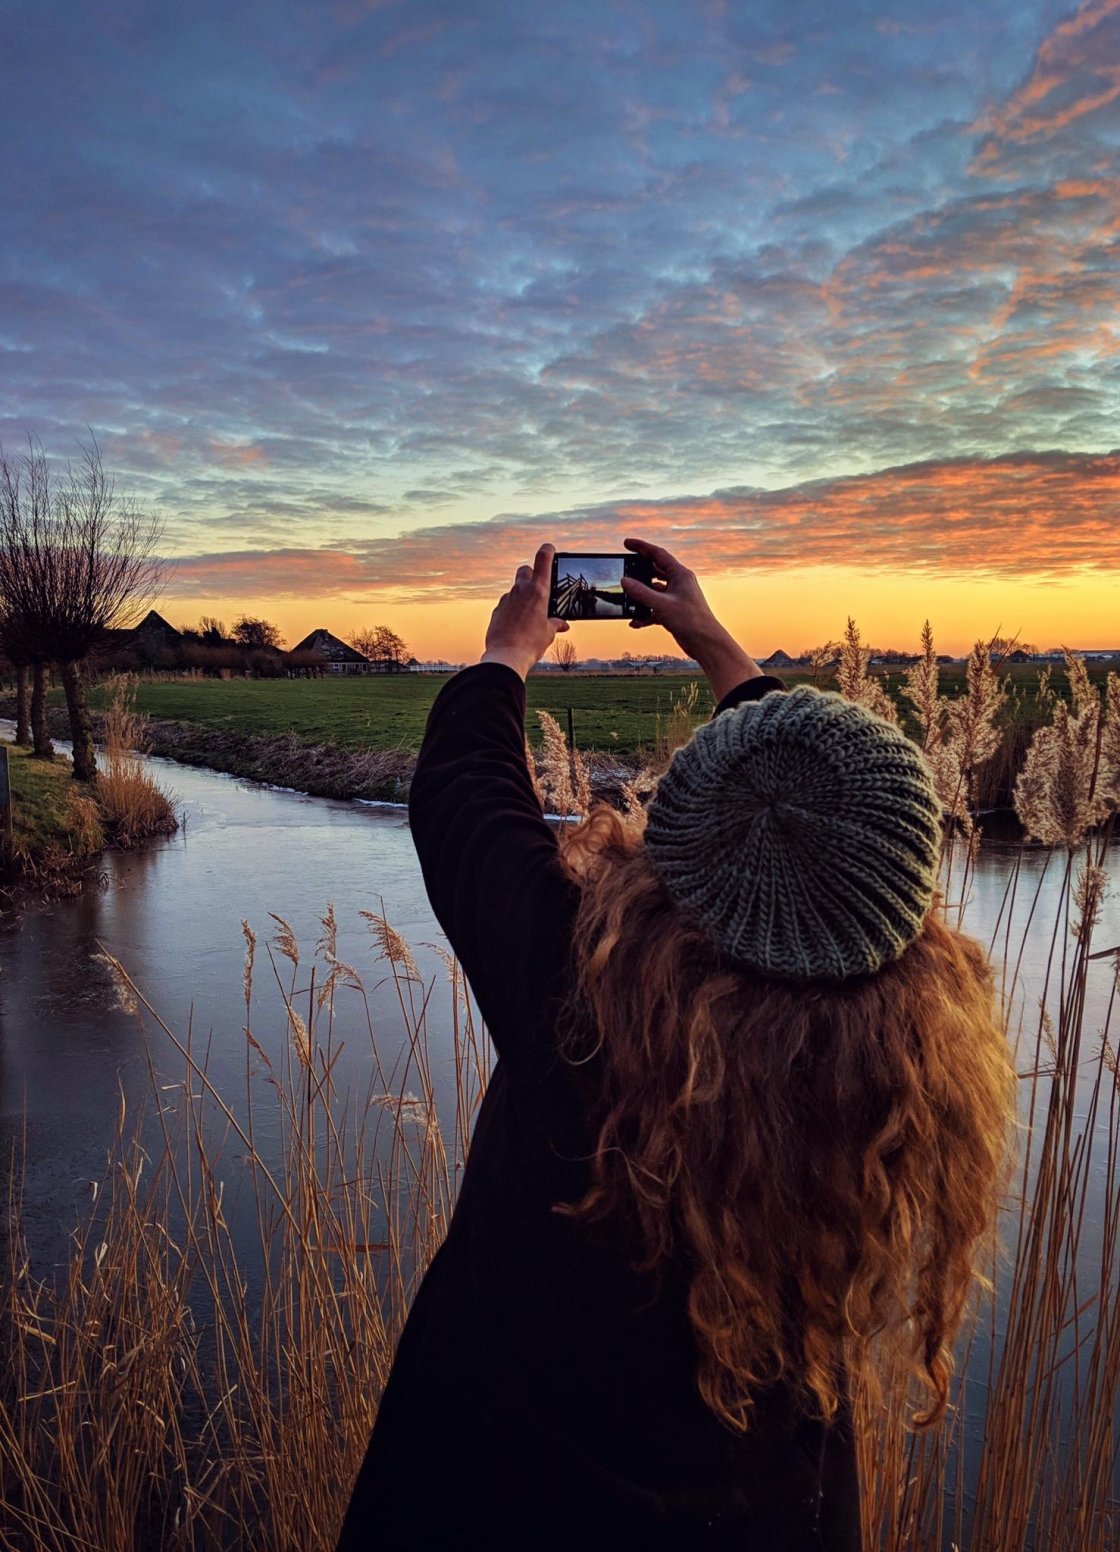
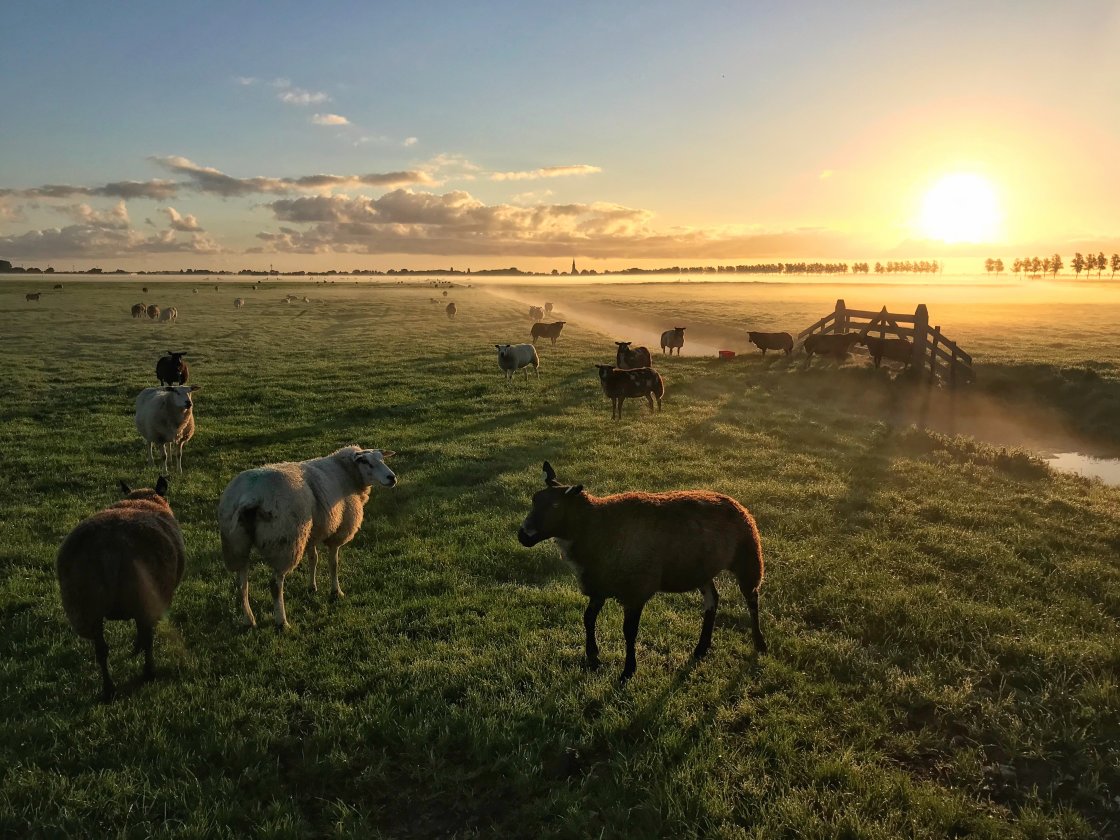
I love to shoot during sunrise. Early morning light is so beautiful.
I’d recommend going out with your iPhone 30 minutes before sunrise… just when the sky is beginning to look a bit pink.
Start taking photos just before the sun peeks above the horizon. Then keep shooting as the sun comes up.
Make the most of the scene by exploring different angles and compositions.
And take lots of photos to capture the stunning range of colors as the sun rises above the horizon.
When the sun gets higher in the sky, the light becomes brighter and the golden colors begin to fade.
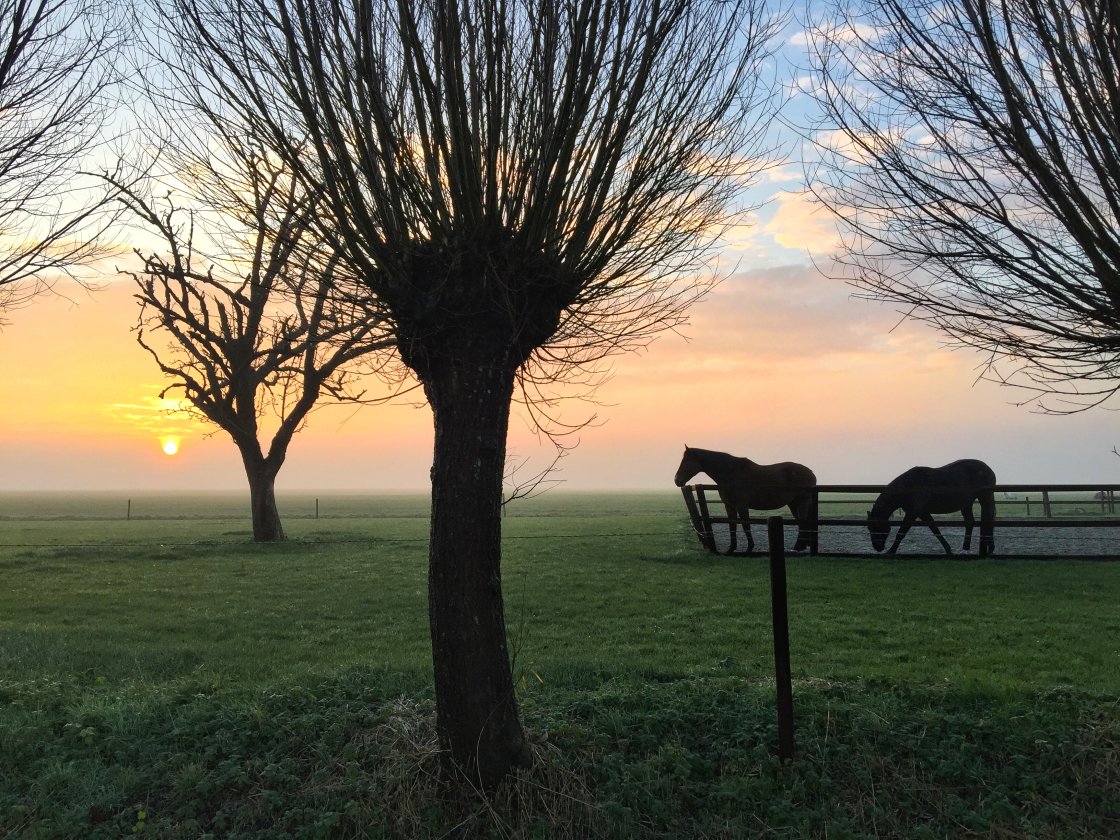
But you can still capture some wonderful final shots if you find some trees.
Position the sun behind a tree, and capture the rays of light that appear through the branches.
If you’re not keen on getting up before sunrise, don’t worry! Sunset offers another chance to shoot amazing golden hour landscape photography.
Go out about one hour before sunset, and capture the spectacular colors as the sun goes down.
The closer the sun gets to the horizon, the more dramatic the colors become.
If you’re at the beach or a wide-open landscape, you’ll often get the best results when the sun is very low in the sky.
But if you’re shooting in a forest or around trees, it can be more beautiful when the sun is a little bit higher.

No matter where you’re shooting, remember to take lots of photos!
The light changes so quickly during the golden hours. And you want to capture all of those beautiful colors in your iPhone photos.
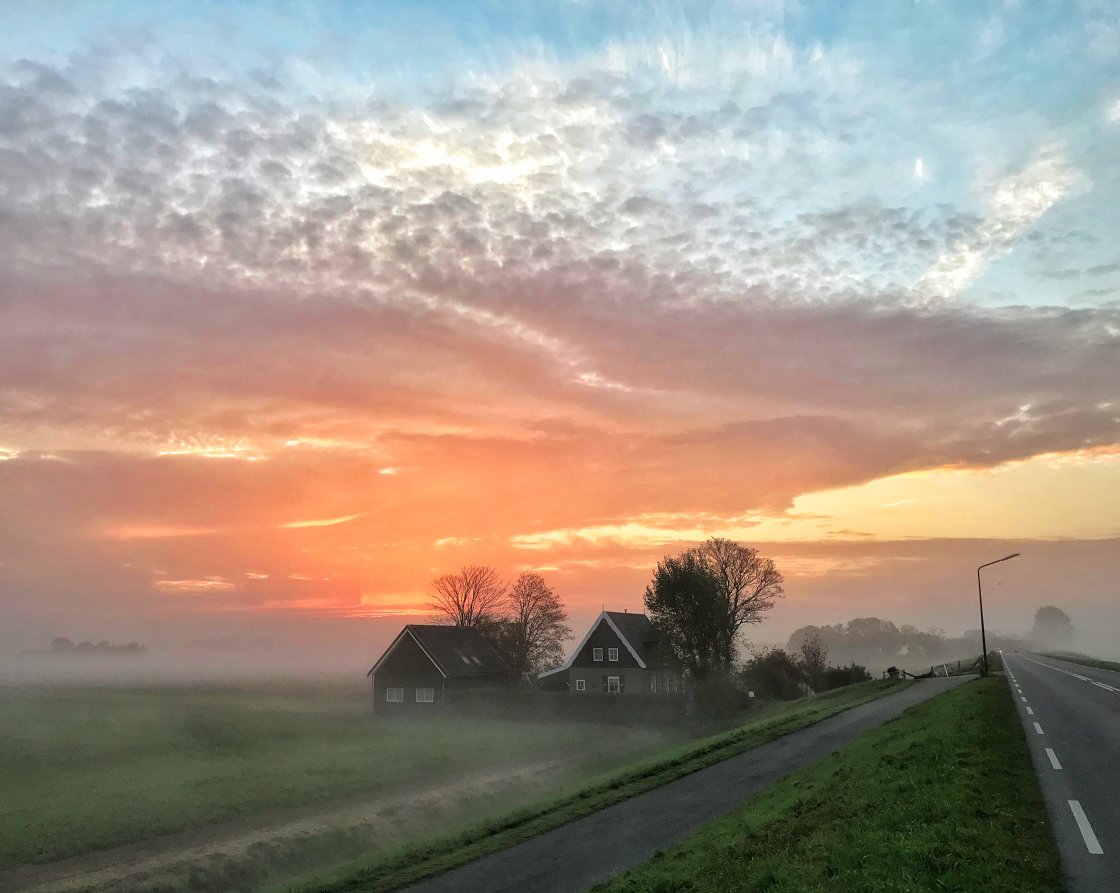
2. Use Clouds To Add Interest & Drama To The Sky
Not all sunrises and sunsets make great pictures.
So, what do you need for the perfect golden hour landscape photo?
You need clouds!
The most stunning golden hour photos usually have some clouds in the sky.
I’m not talking about thick cloud-cover. A completely overcast sky is no good as it won’t let the beautiful colors of the sunlight through.
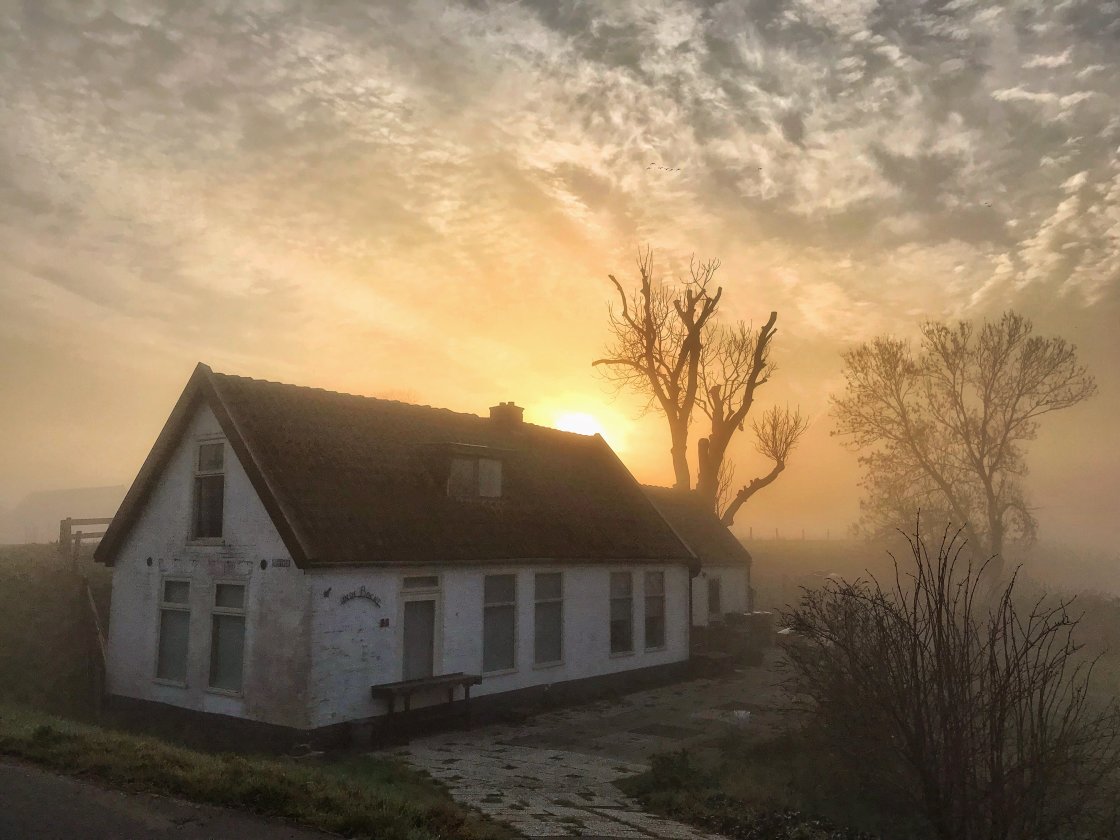
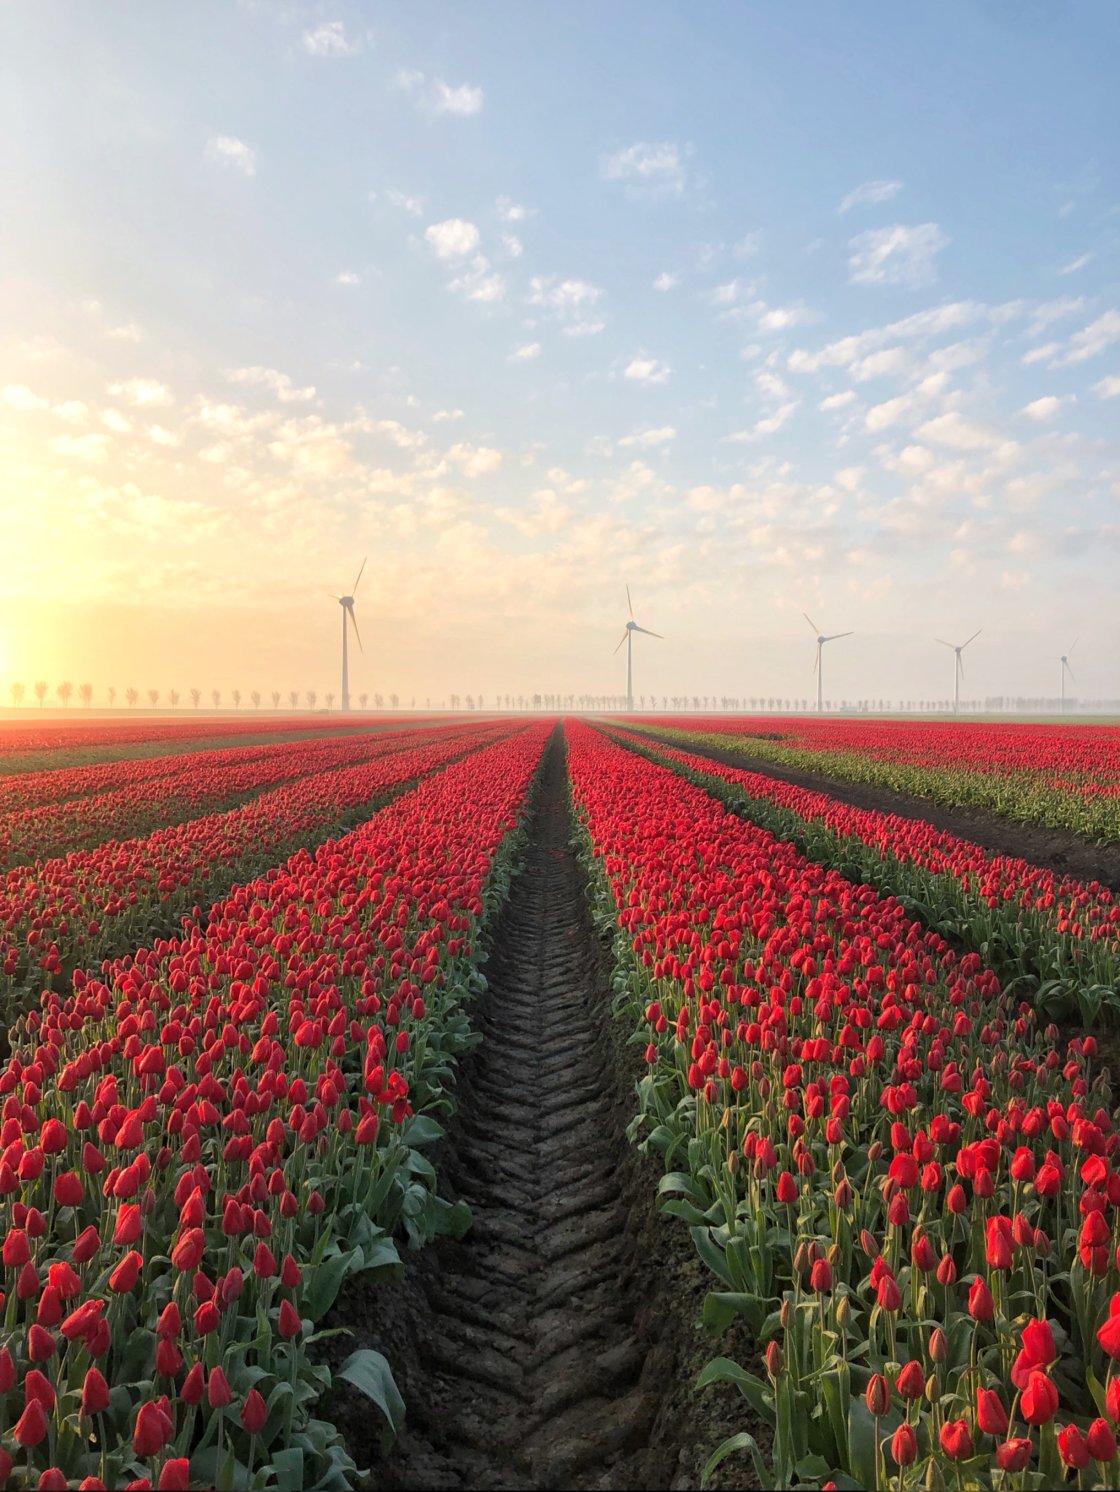
But some interesting cloud formations will catch the magnificent colors of sunrise and sunset… pinks, purples, oranges, yellows, and reds.
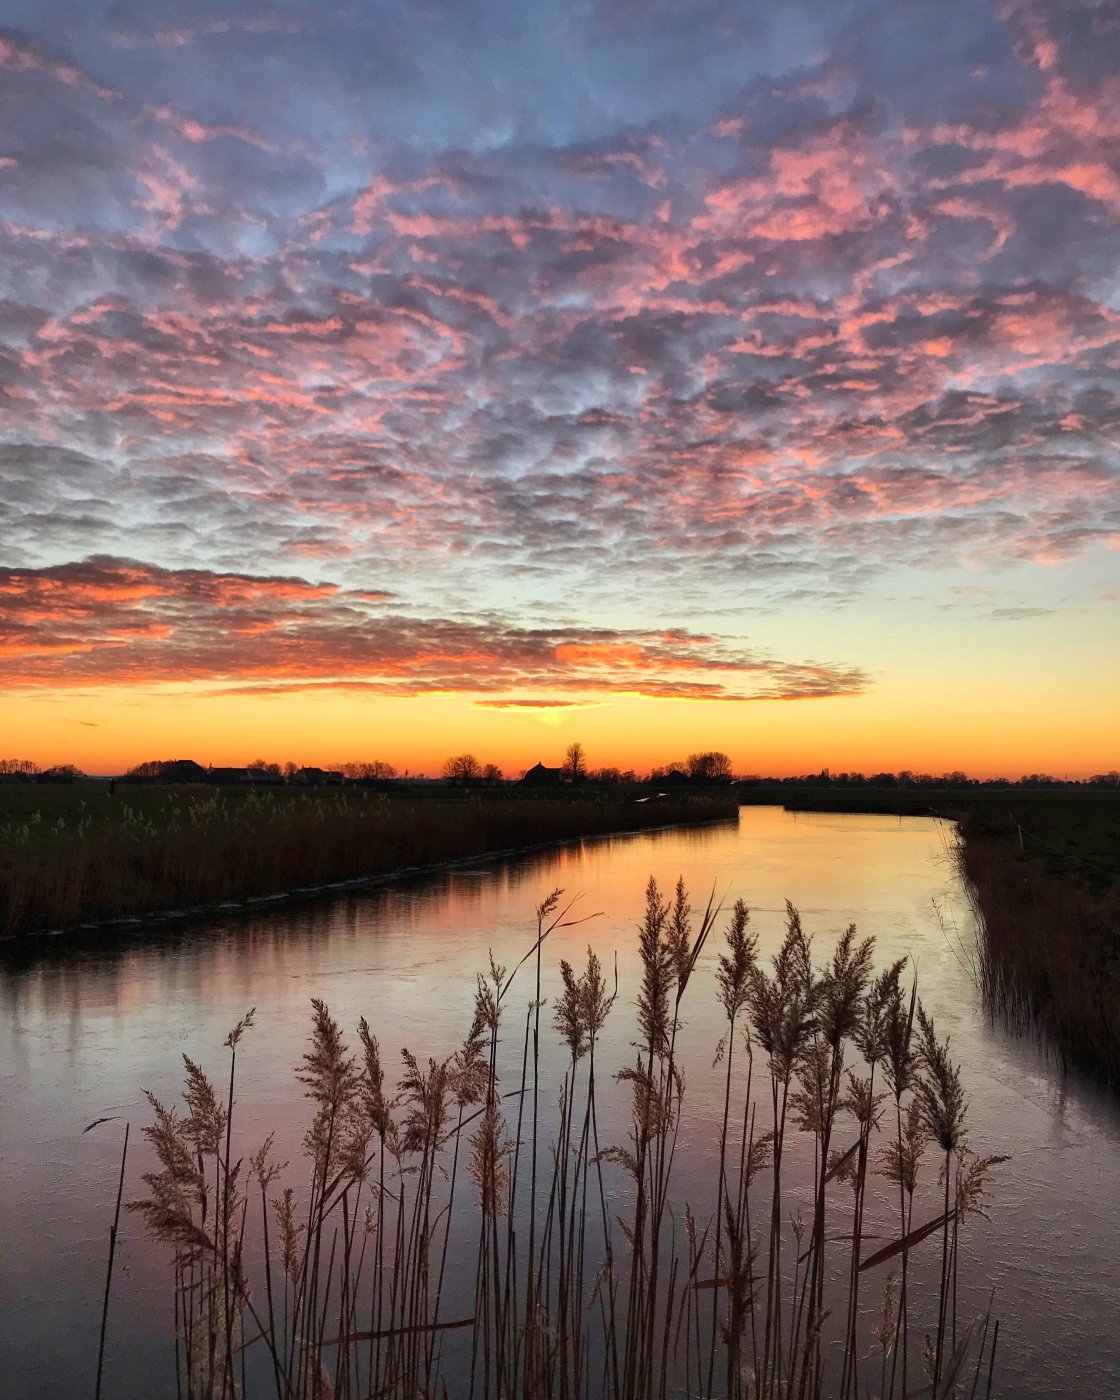
Clouds add wonderful visual interest to your golden hour landscape photography.
They make the sky more dramatic… and more beautiful.
The same photo without these cloud formations would look very different.
On a clear, cloudless day, you’ll still get some beautiful golden colors near the horizon. But if there are clouds, the entire sky will be filled with spectacular, colorful detail.
So, next time you’re shooting during golden hour, pay close attention to the sky.
Are there any clouds? What type of clouds are they?
How do the clouds change color as the sun gets closer to the horizon?
Is the sun about to peek out from behind a cloud? Is it going to cast dramatic rays of light over the scene?
Pay attention to the sky… and you’ll soon discover that clouds are perfect for golden hour landscape photography!
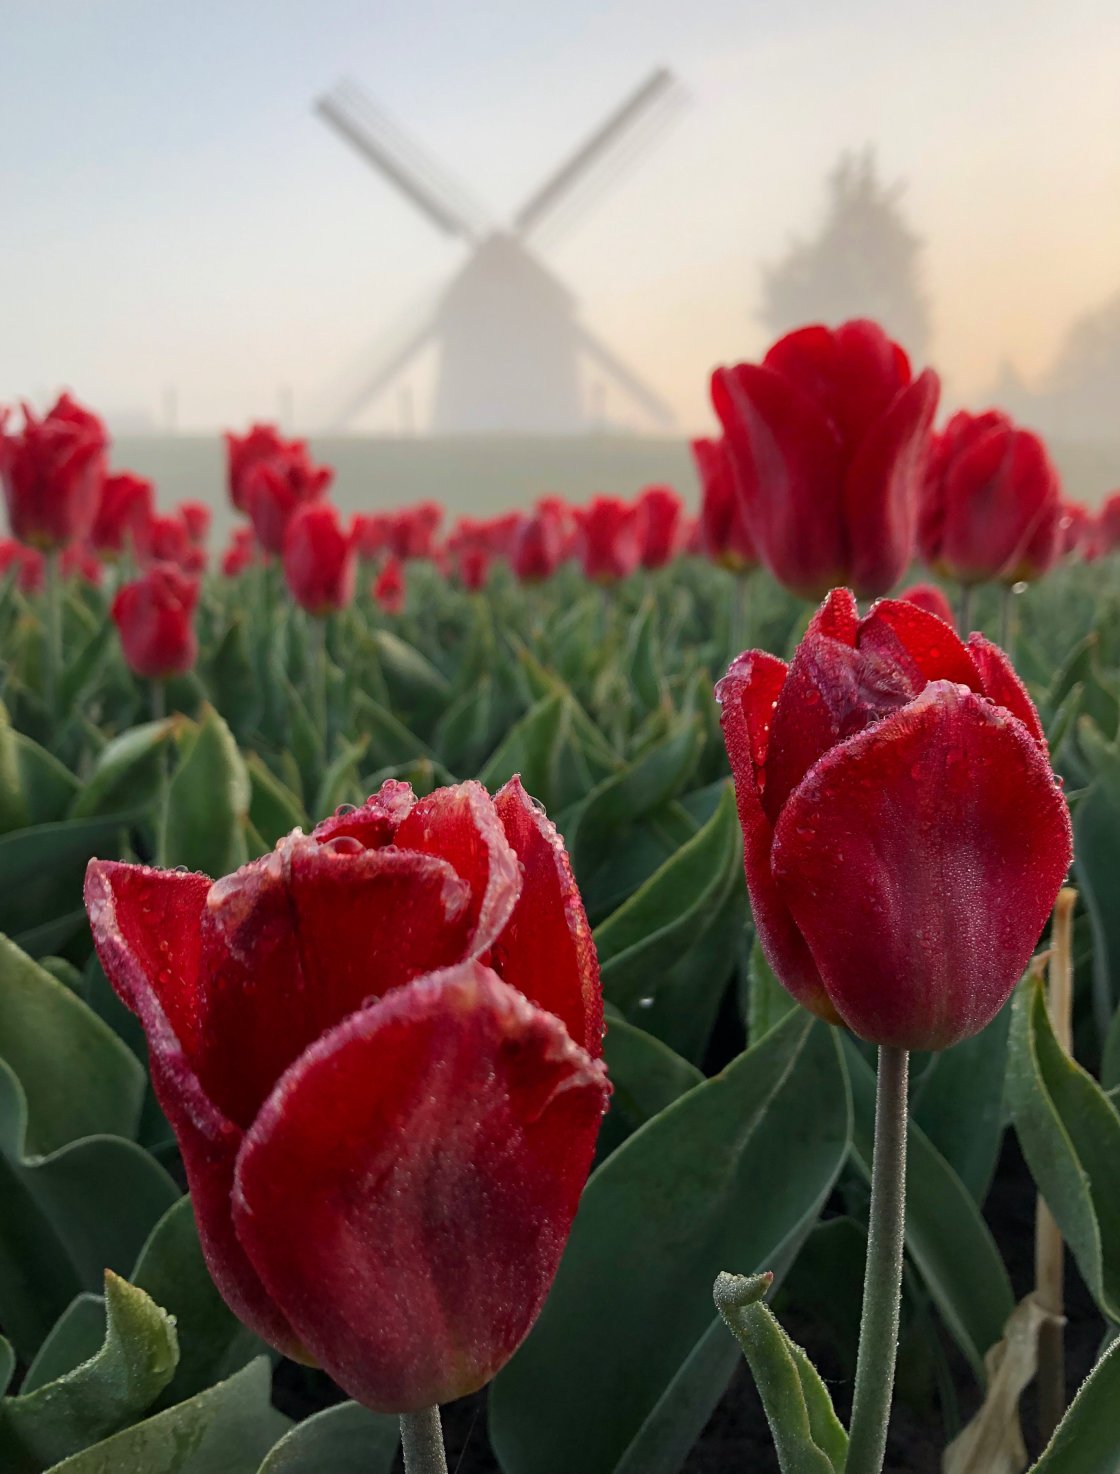
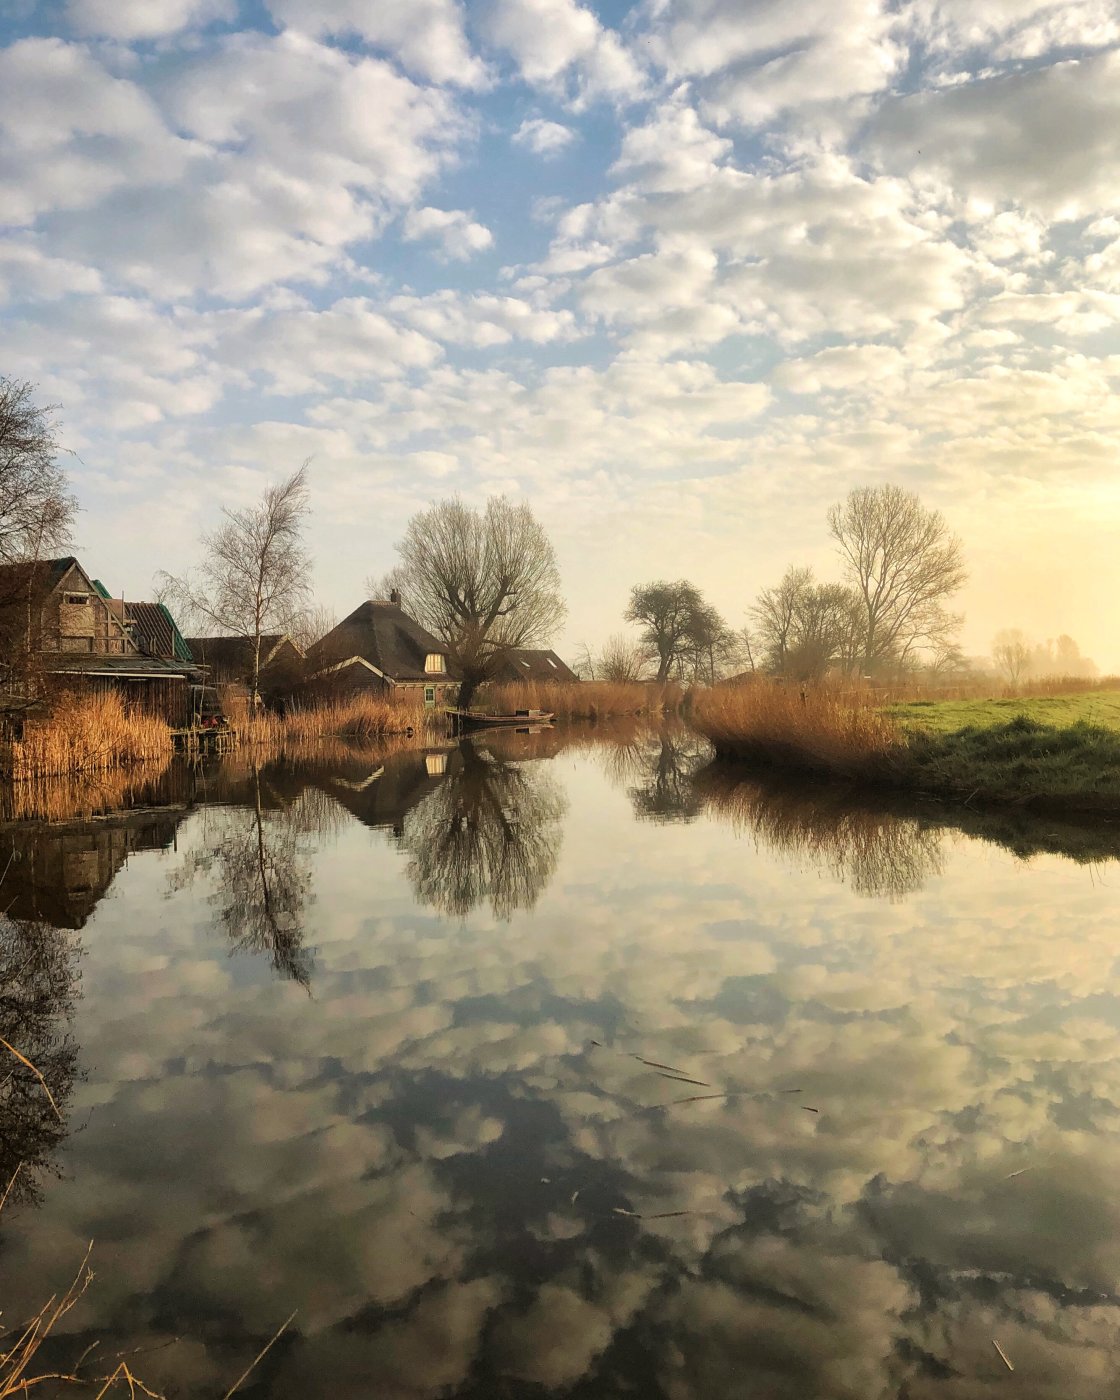
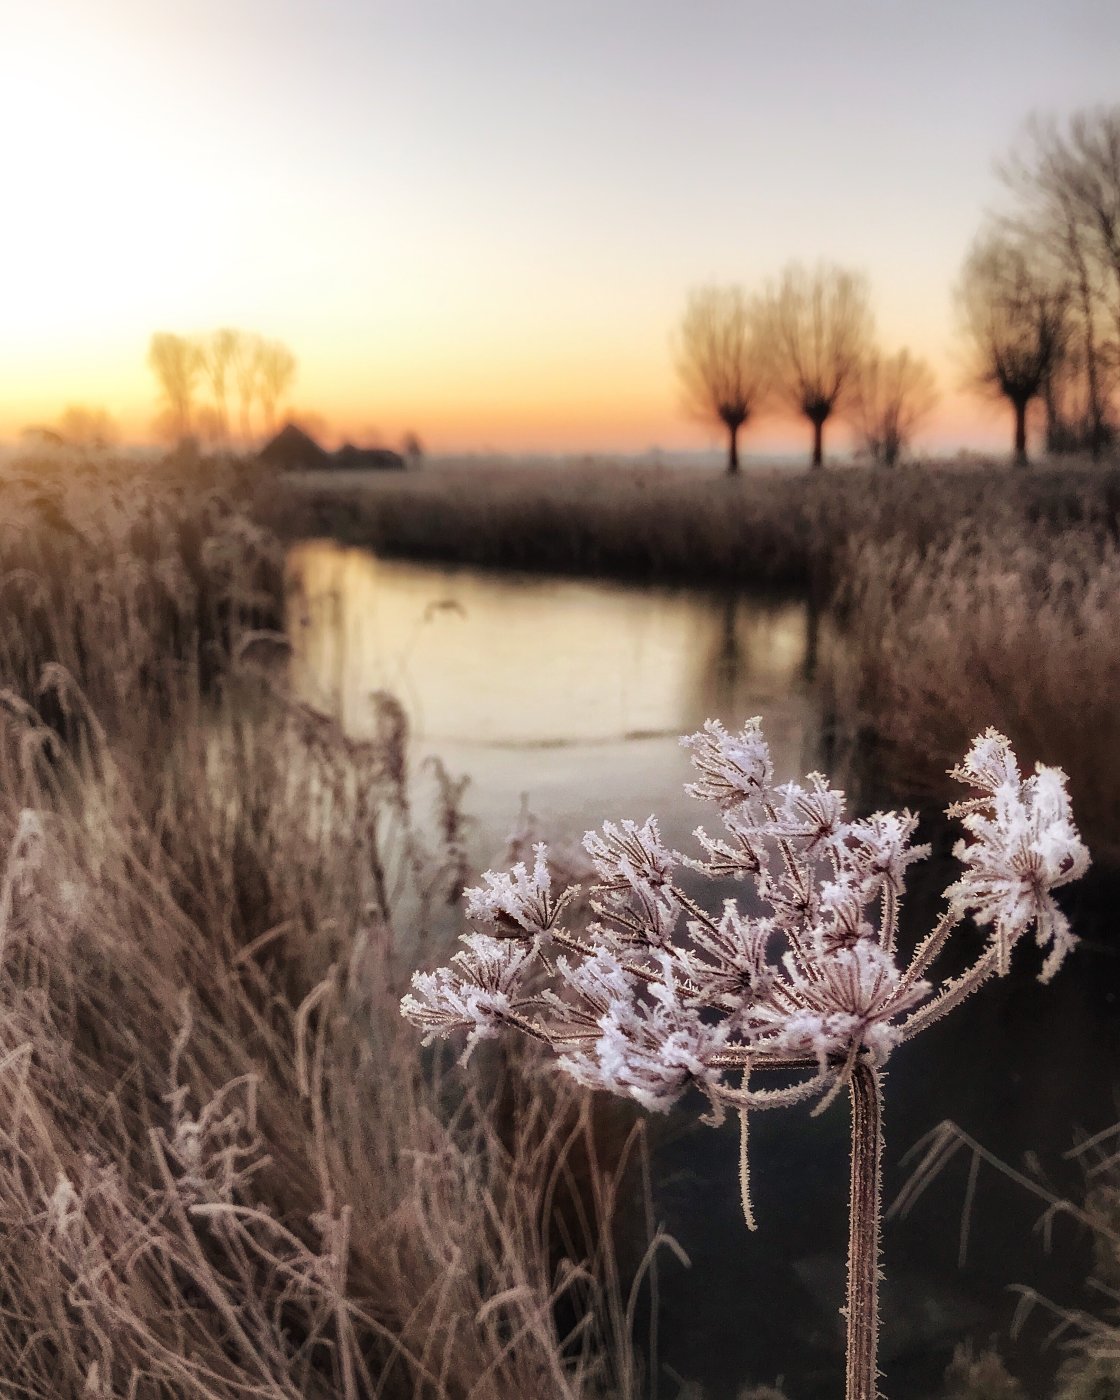
3. Shoot In Mist & Fog For Wonderfully Moody Landscape Photography
Here’s another secret for fascinating golden hour landscape photography:
Seek out mist and fog.
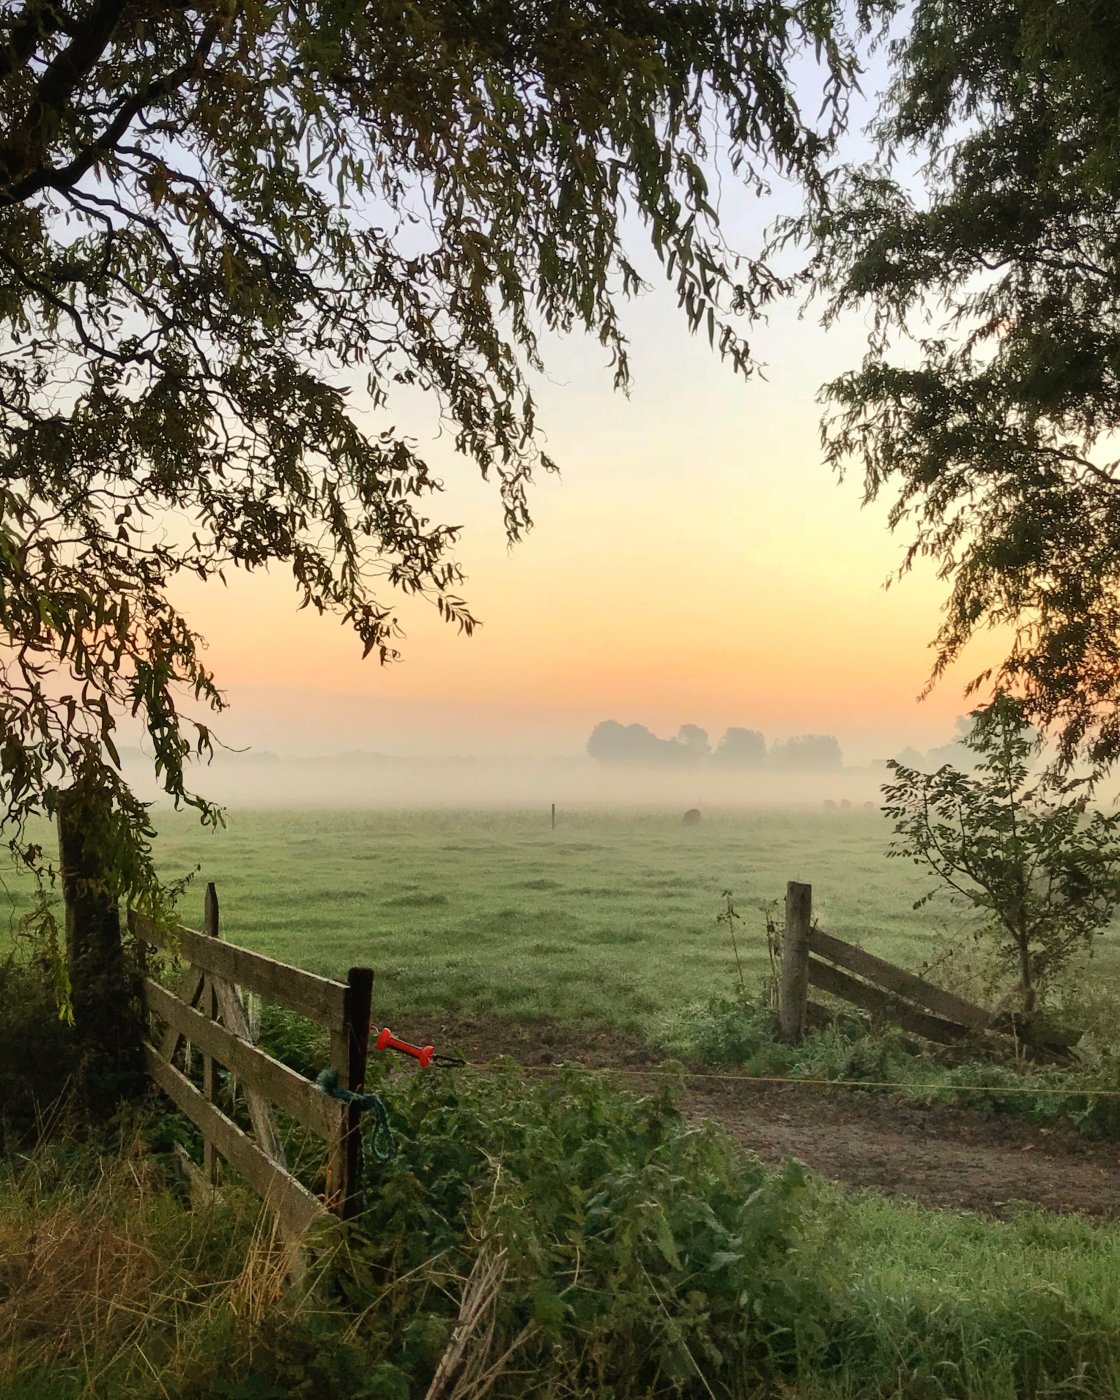
Mist creates compelling landscape photos. It adds a wonderfully moody atmosphere and a little sense of mystery.
And when you add in the golden light of sunrise and sunset, you’ll have a winning combination.

The scene will be bathed in a soft, warm glow which looks so beautiful.
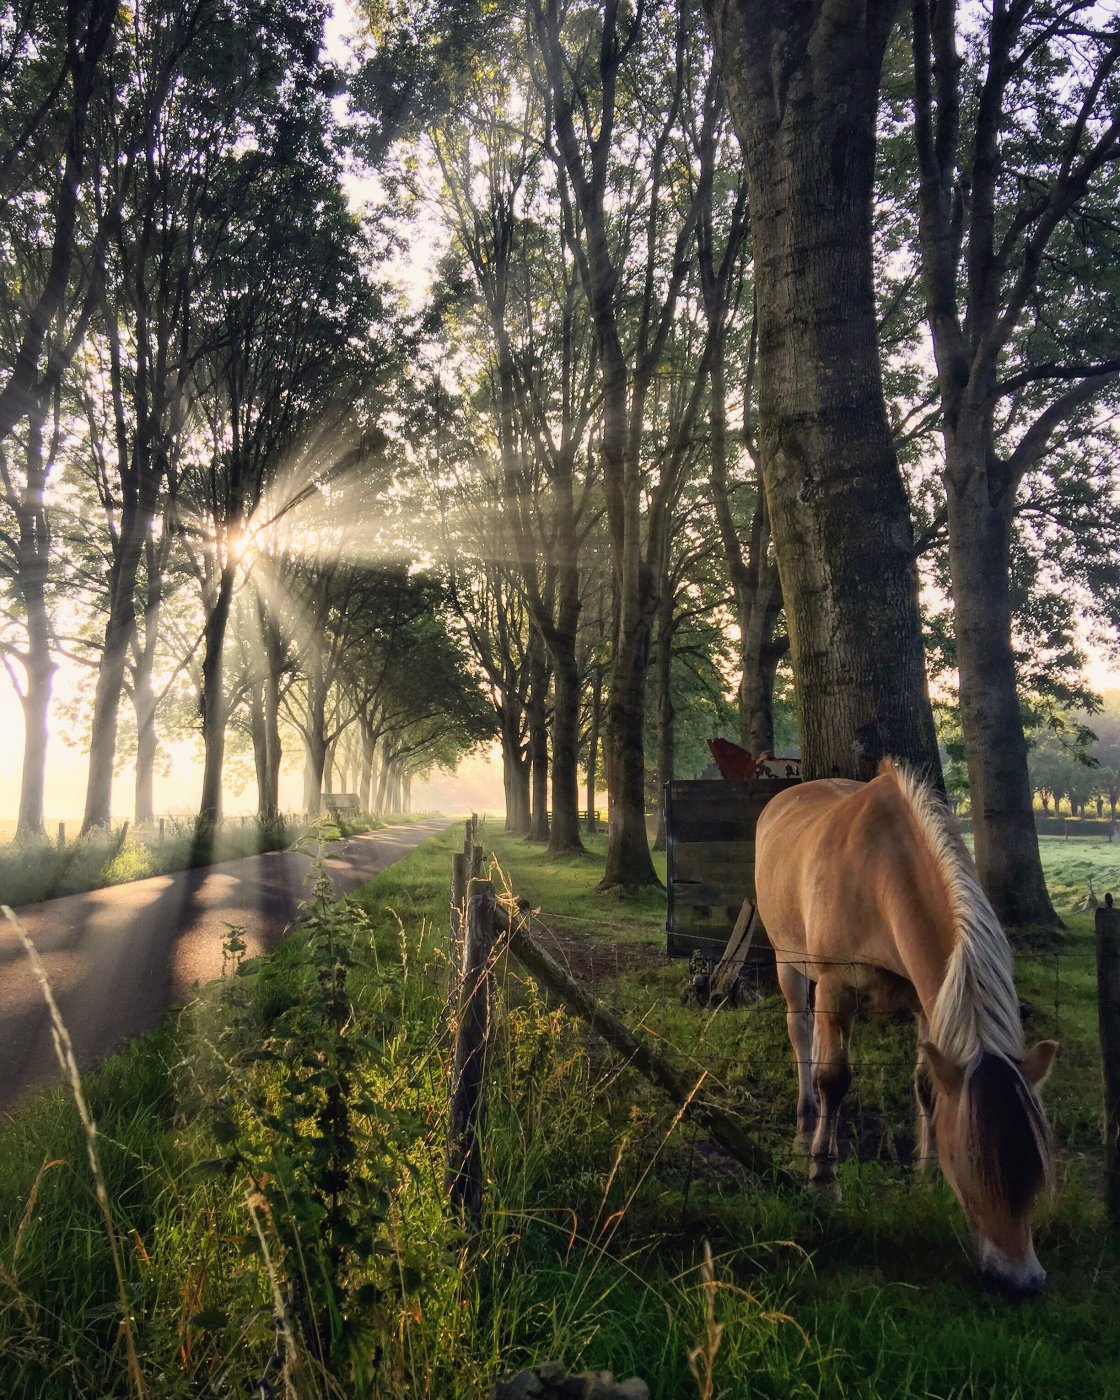
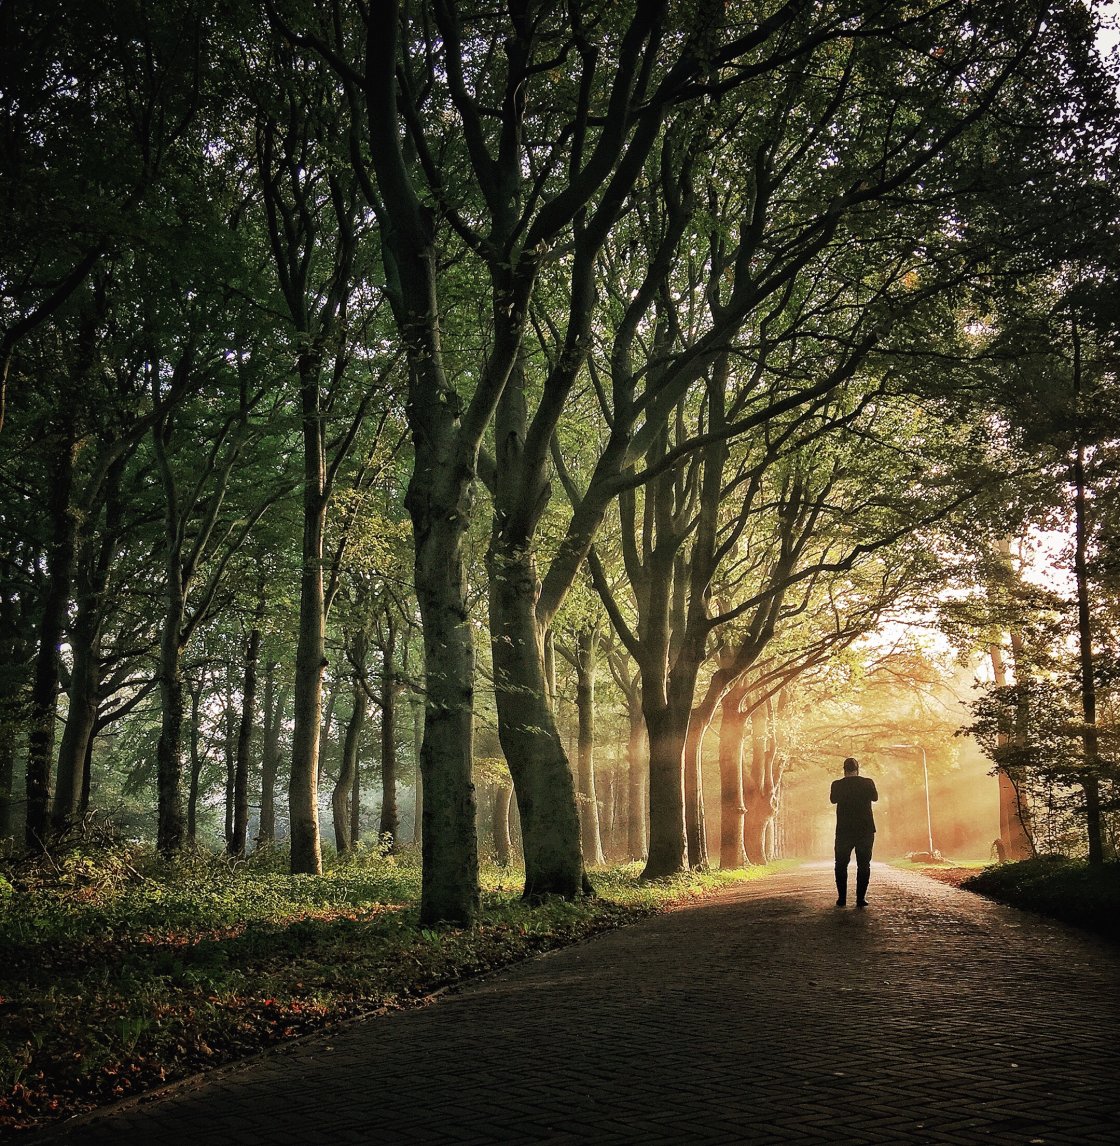
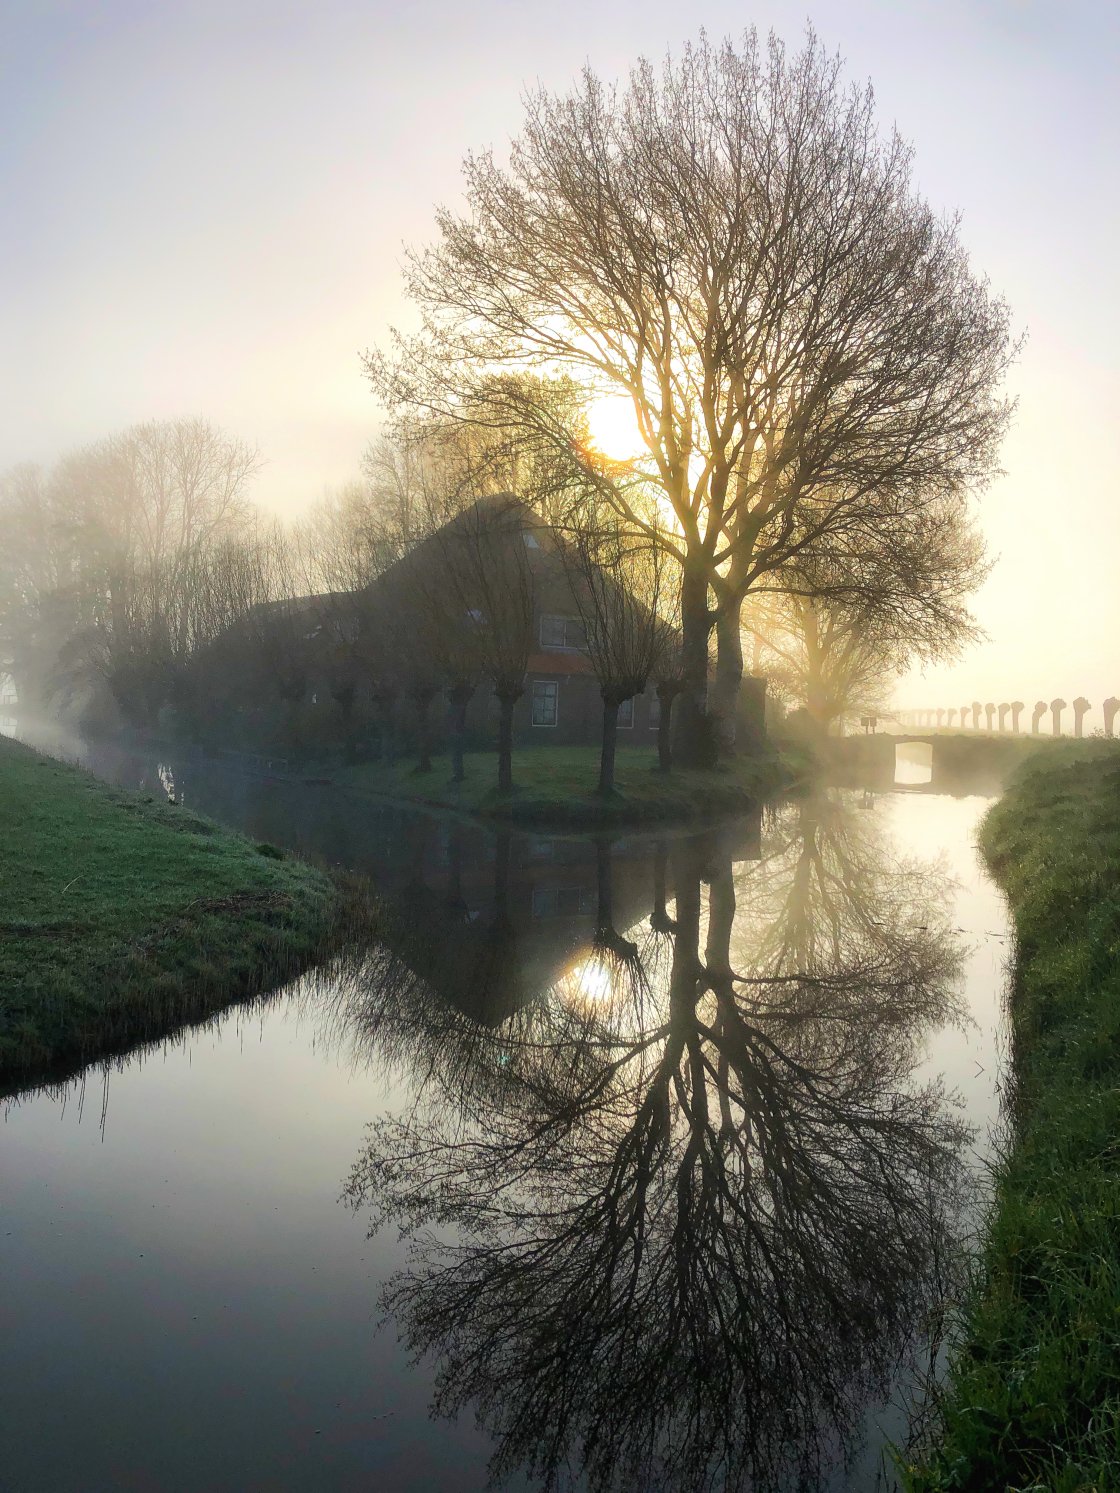
If you’re shooting around trees, you can also capture magical rays of light shining through the mist.
To capture these light rays, the sun needs to be a little higher in the sky. You want the sun to be shining at an angle through the tree branches.
If you’re shooting directly into the light, position a tree branch in front of the sun. Adjust the angle of your iPhone until you see the rays of light appear.
You can also compose your shot with the sun shining in from one side. This casts the rays of light across the scene.
Mist is more common at sunrise than sunset, so you’ll need to get up early!
Check the weather forecast to find out if there’s a chance of mist. If there’s a big temperature difference between day and night, there’s a good chance you might get mist in the morning.
Just remember, for the best misty golden hour photos, you need a combination of sun and mist.
If it’s completely overcast, the mist will appear dark and gray. And you won’t get those golden light rays.
For the best photos, you need the sun to shine through the mist and cast its warm glow over the scene.

This magical combination of mist and sun will result in truly stunning landscape photos!
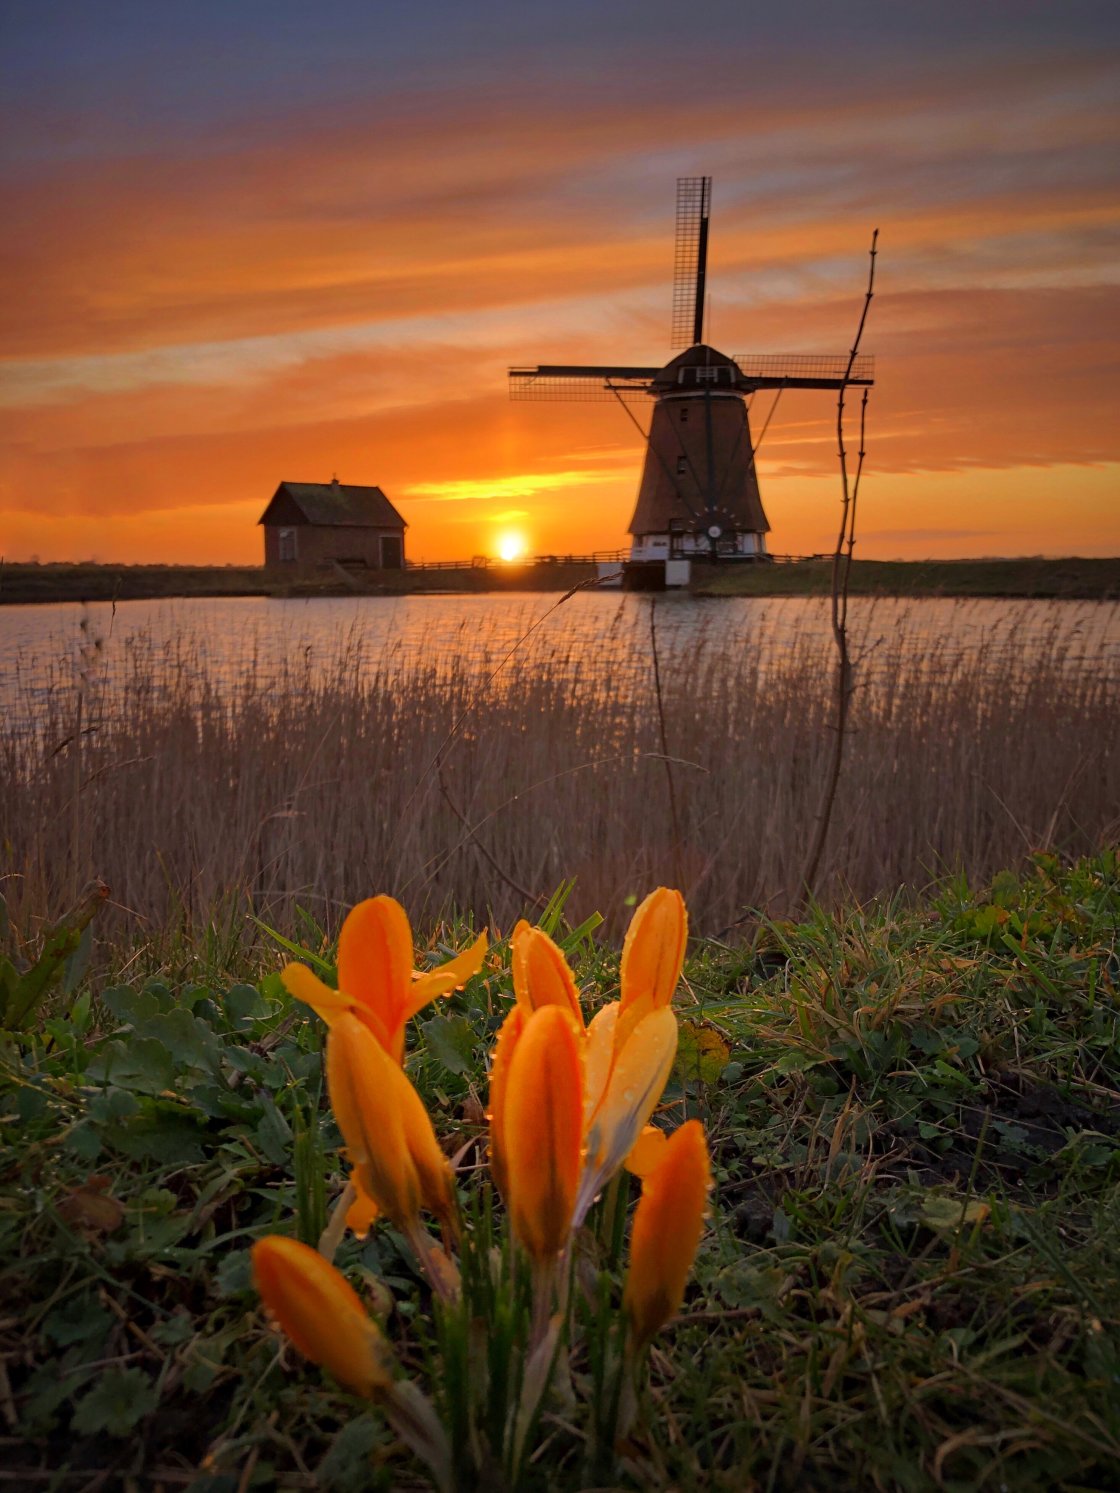
4. Include An Interesting Object As A Focal Point In Your Photo
A beautiful sunrise or sunset is the starting point for a great landscape photo. But you need more than just a beautiful sky.
You need a focal point… some kind of object that grabs the viewer’s attention and gives them something to focus on.
Before you take your photo in that breathtaking golden light, take a look around.
What could you use as a focal point in your photo?
What could you include that would add a point of interest to your composition?
What could tell a story about the landscape you’re photographing?
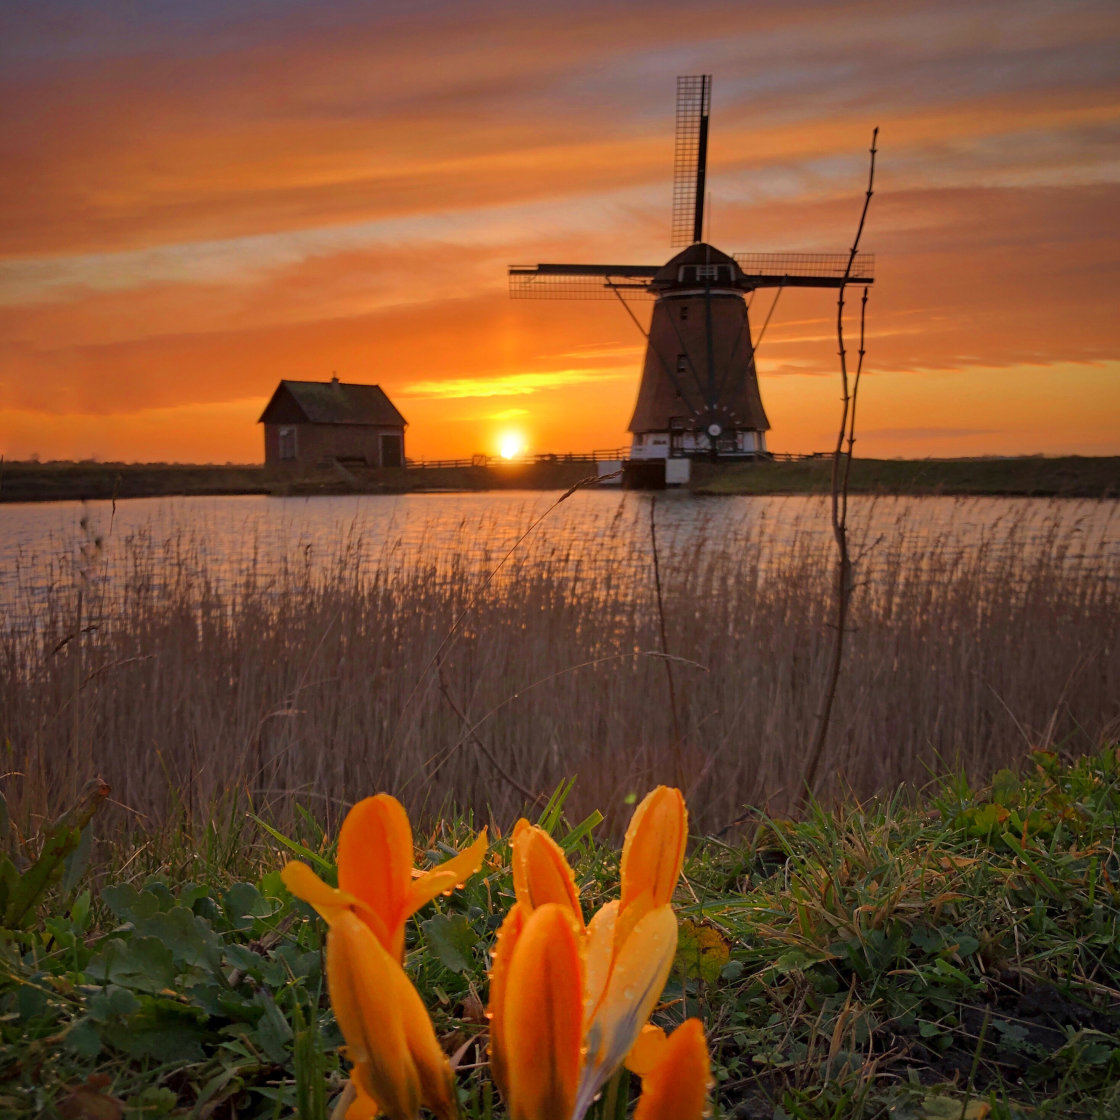
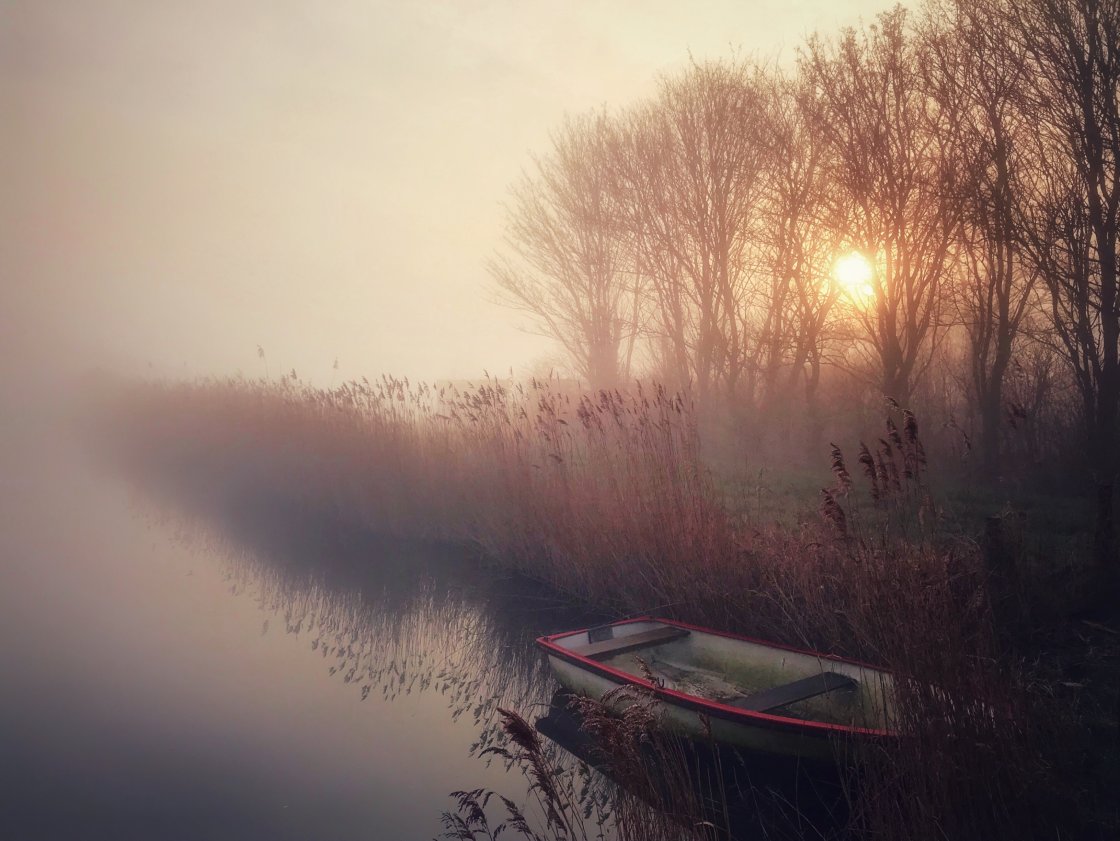
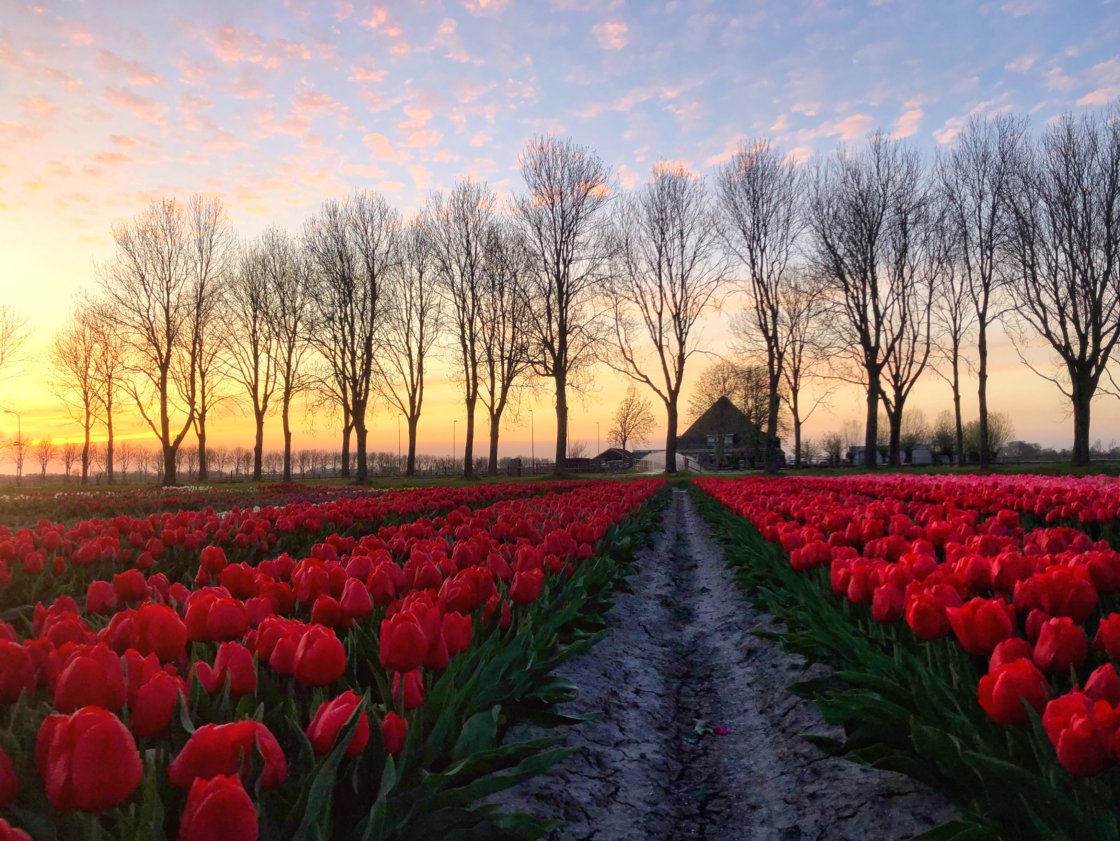
Maybe there’s a tree, a house, or a boat in the scene. Perhaps there’s a person or animal that you could include.
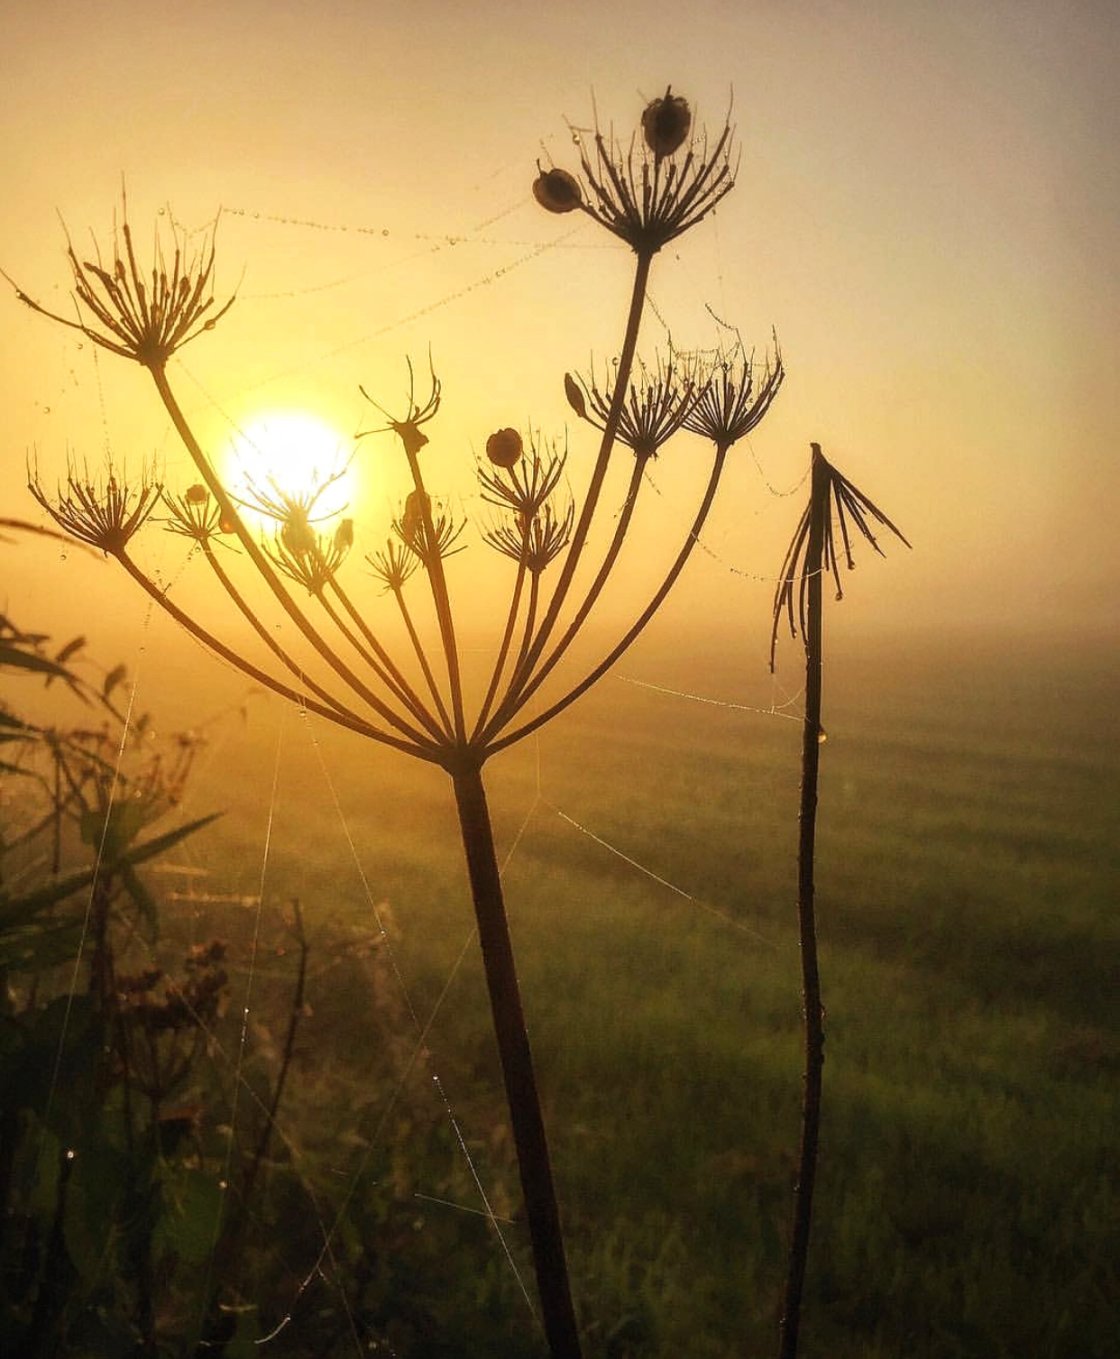
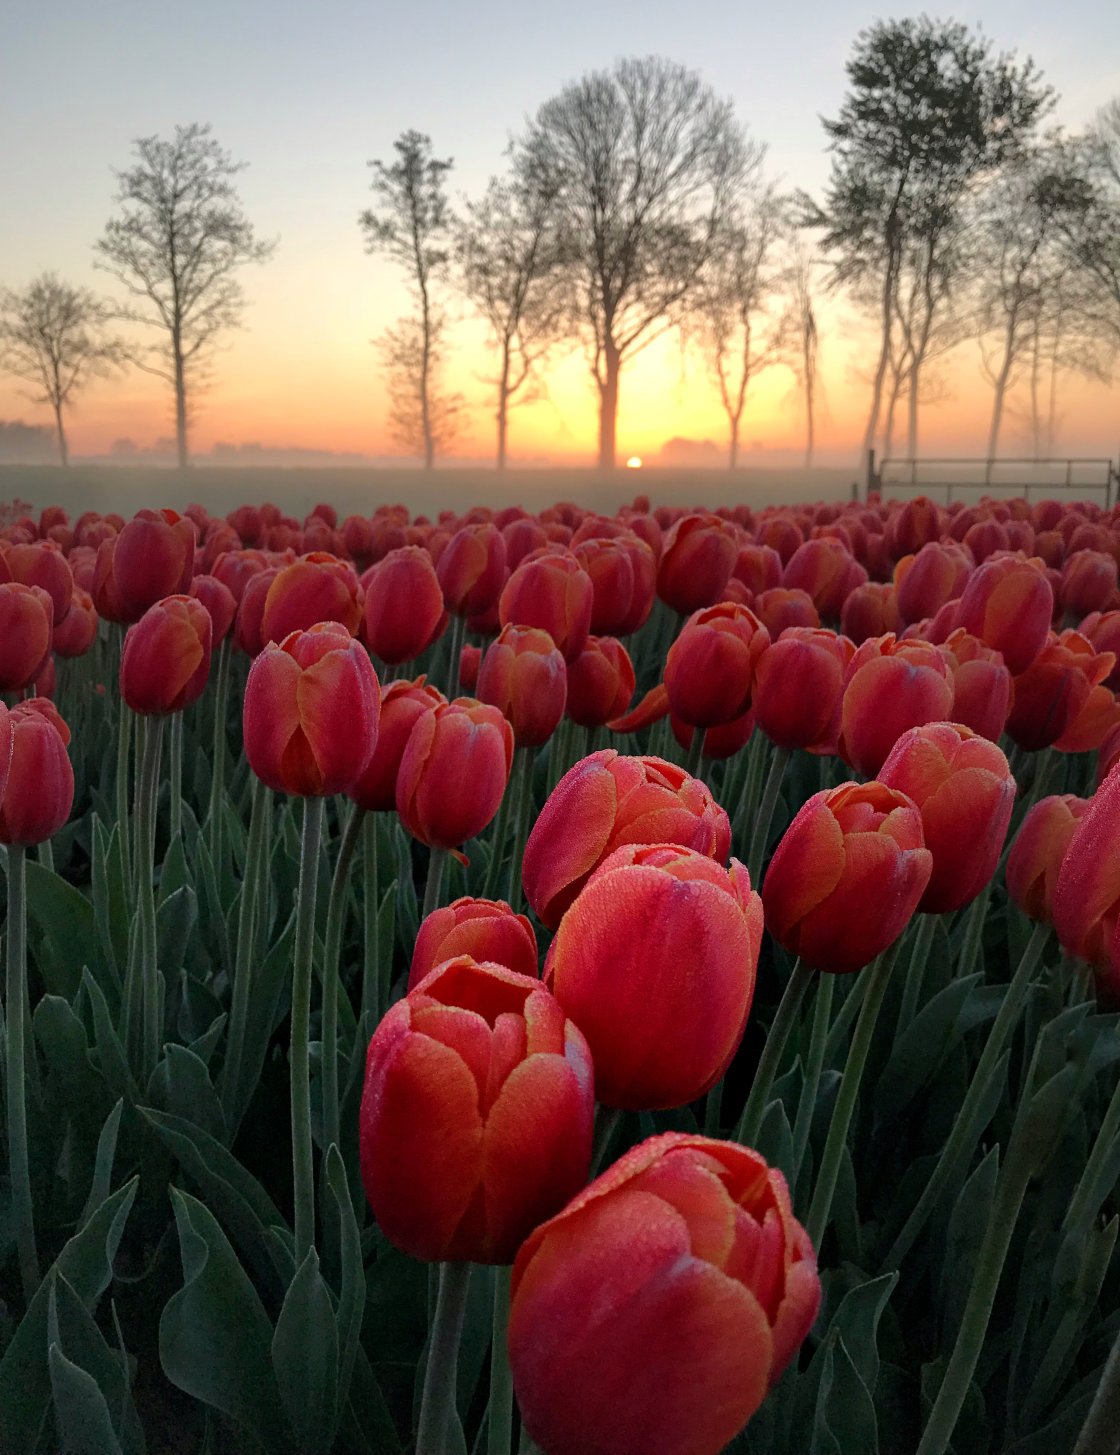
Look for smaller objects too. Flowers, leaves, feathers, and spider webs make beautiful focal points in a landscape photo.
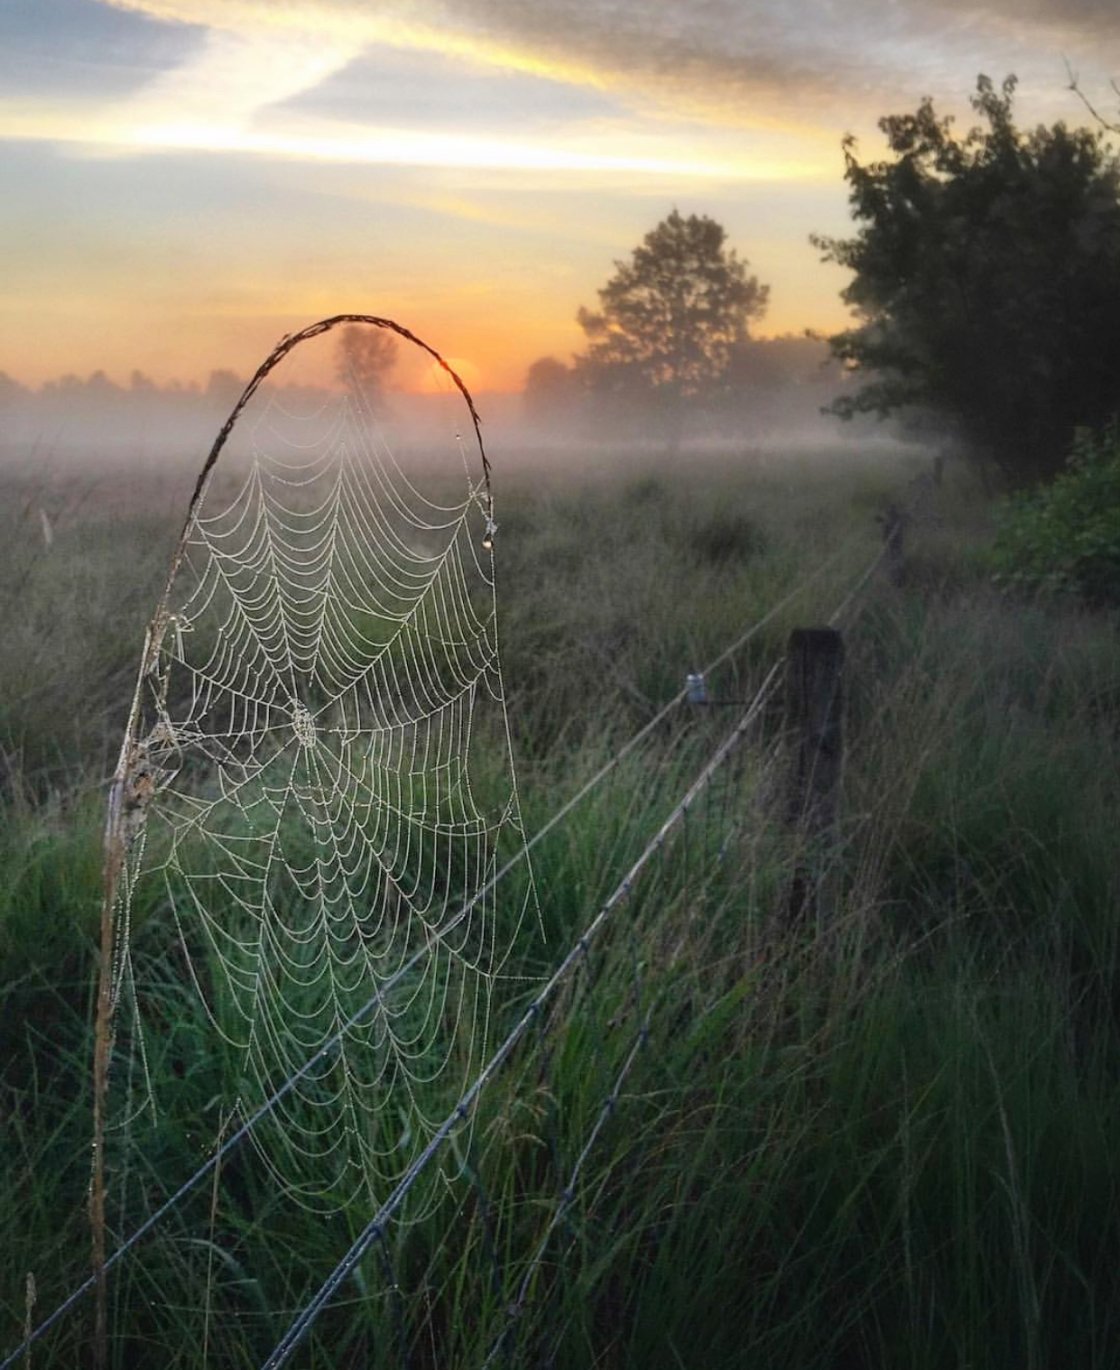
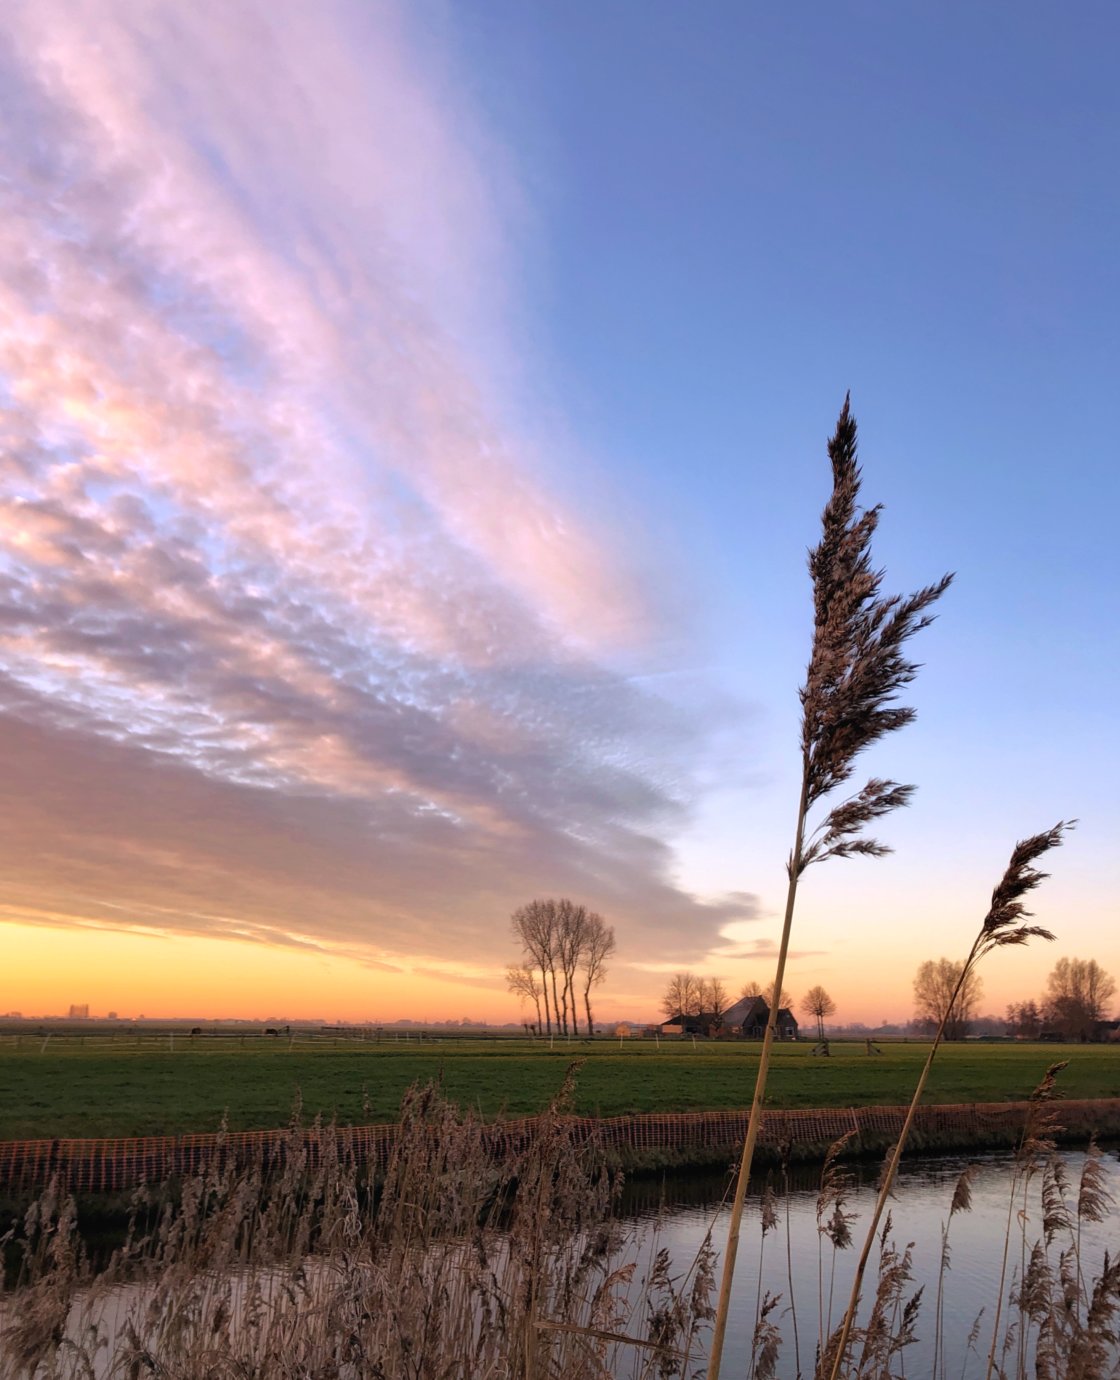
As you can see, a focal point allows you to create more powerful golden hour photos.
It’s not just a sunrise or sunset picture now. That beautiful light becomes the backdrop for a far more interesting image.
When you’ve chosen a focal point, explore the best way to frame up your shot for a pleasing composition.
Try shooting from different perspectives.
Get closer to your subject.
Get down on your knees and shoot from a low angle.
Look for a more unique viewpoint.
Use the rule of thirds to position your subject off-center, rather than in the middle of the frame.
Switch on the iPhone camera grid (Settings > Camera > Grid) to help you compose your shot.

With the grid visible, you can position your subject where two gridlines intersect.
It’s also a good idea to place the horizon off-center.
If the sky is more interesting, fill two thirds of the photo with sky.
If the foreground is more interesting, compose your shot with one third sky and two thirds foreground.
These little things make a big difference to the final composition.
So it’s definitely worth taking your time to compose a more unique and impressive shot.
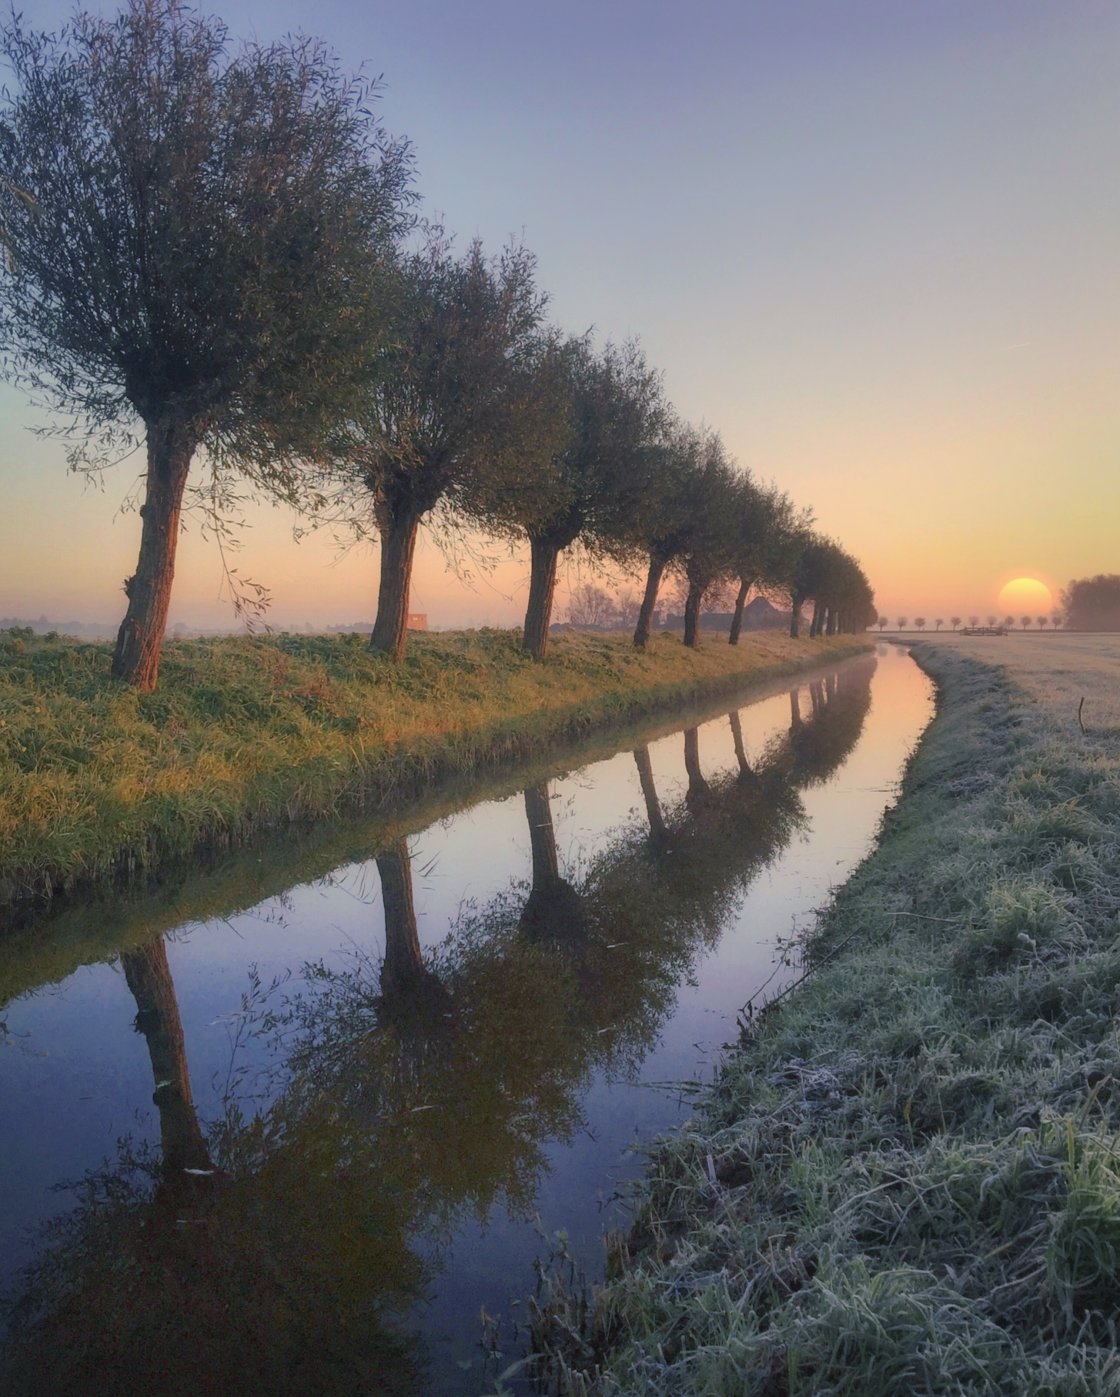
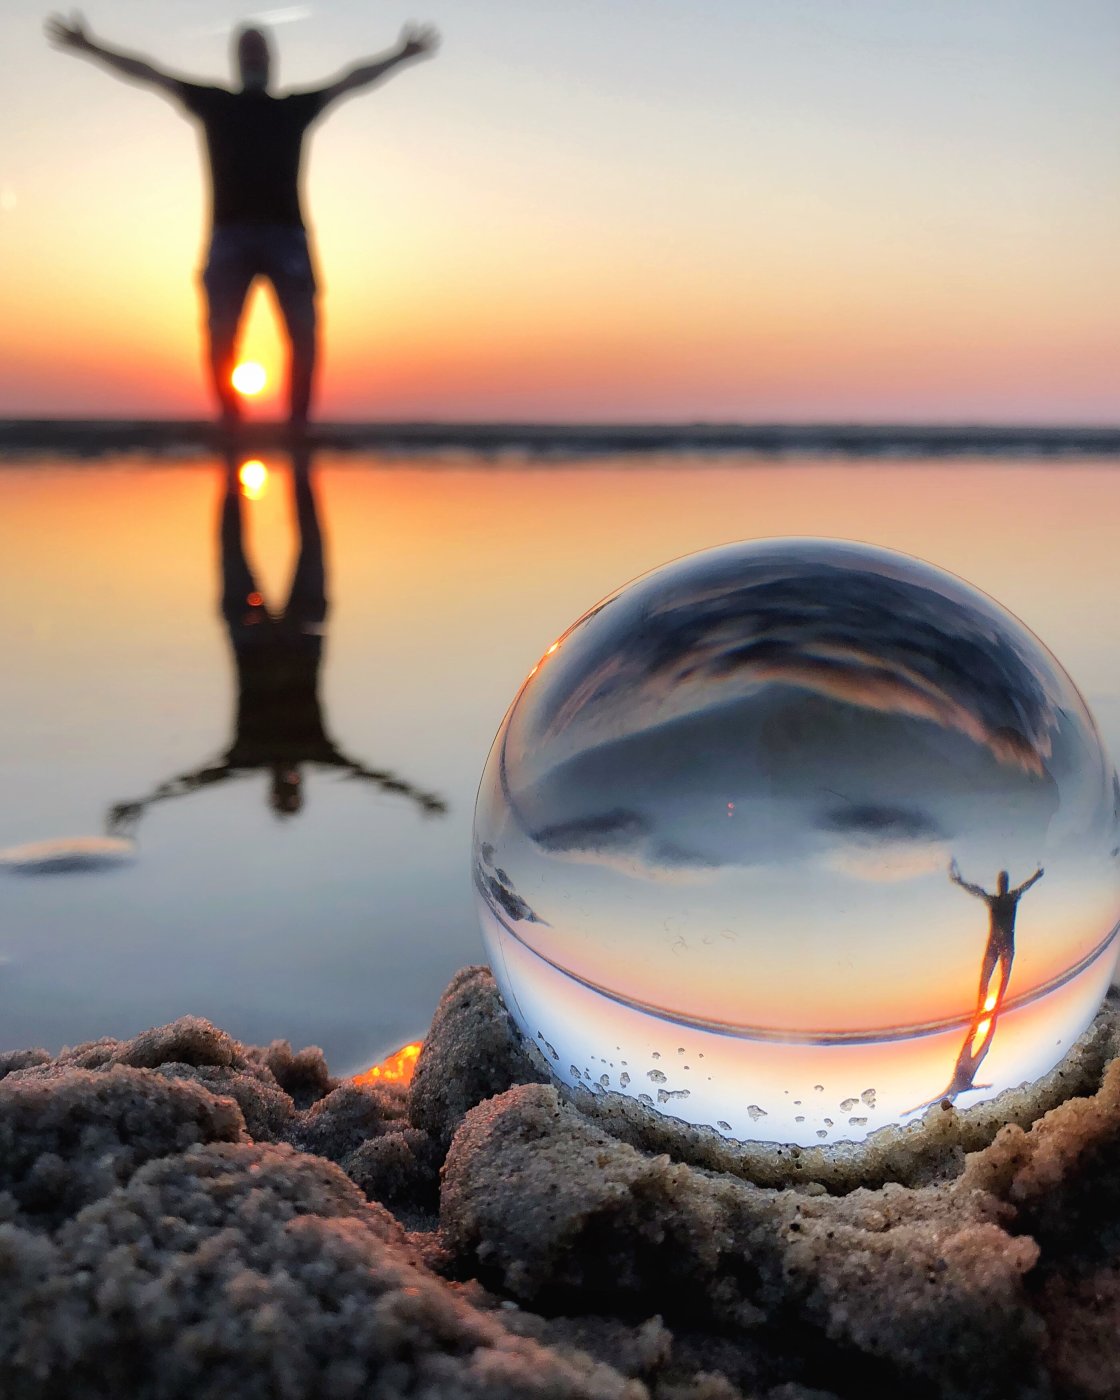
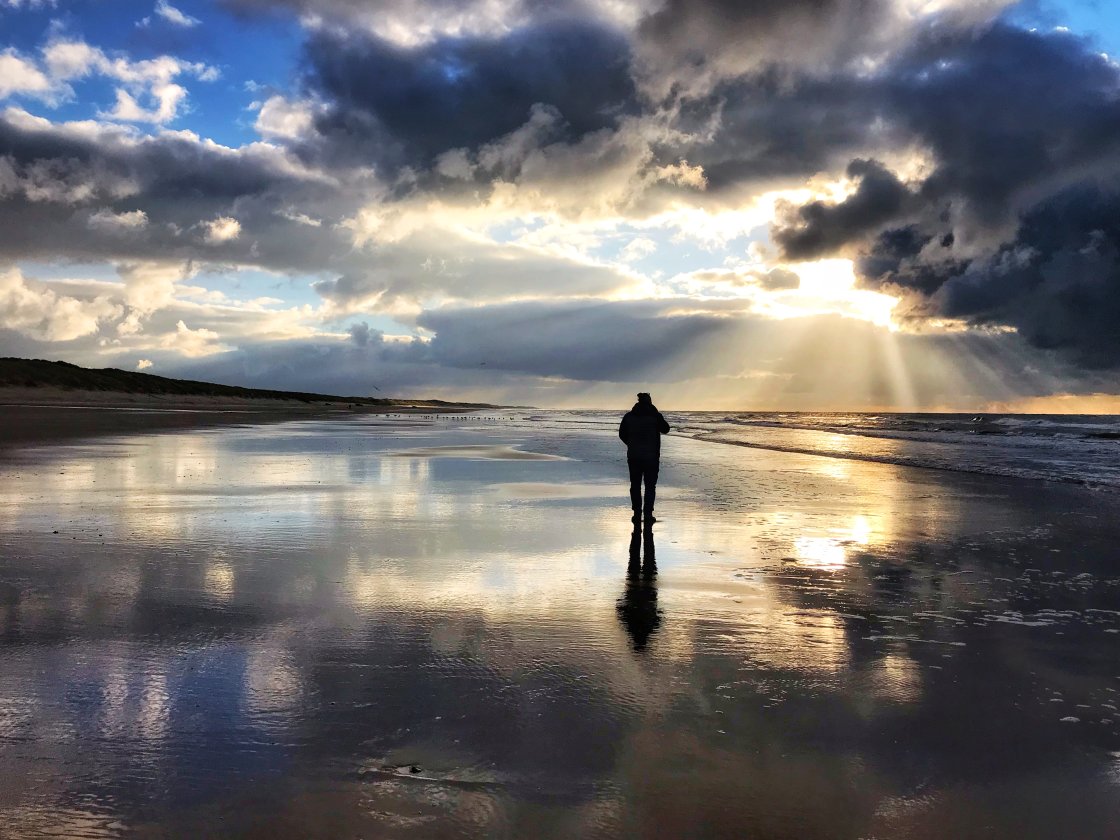
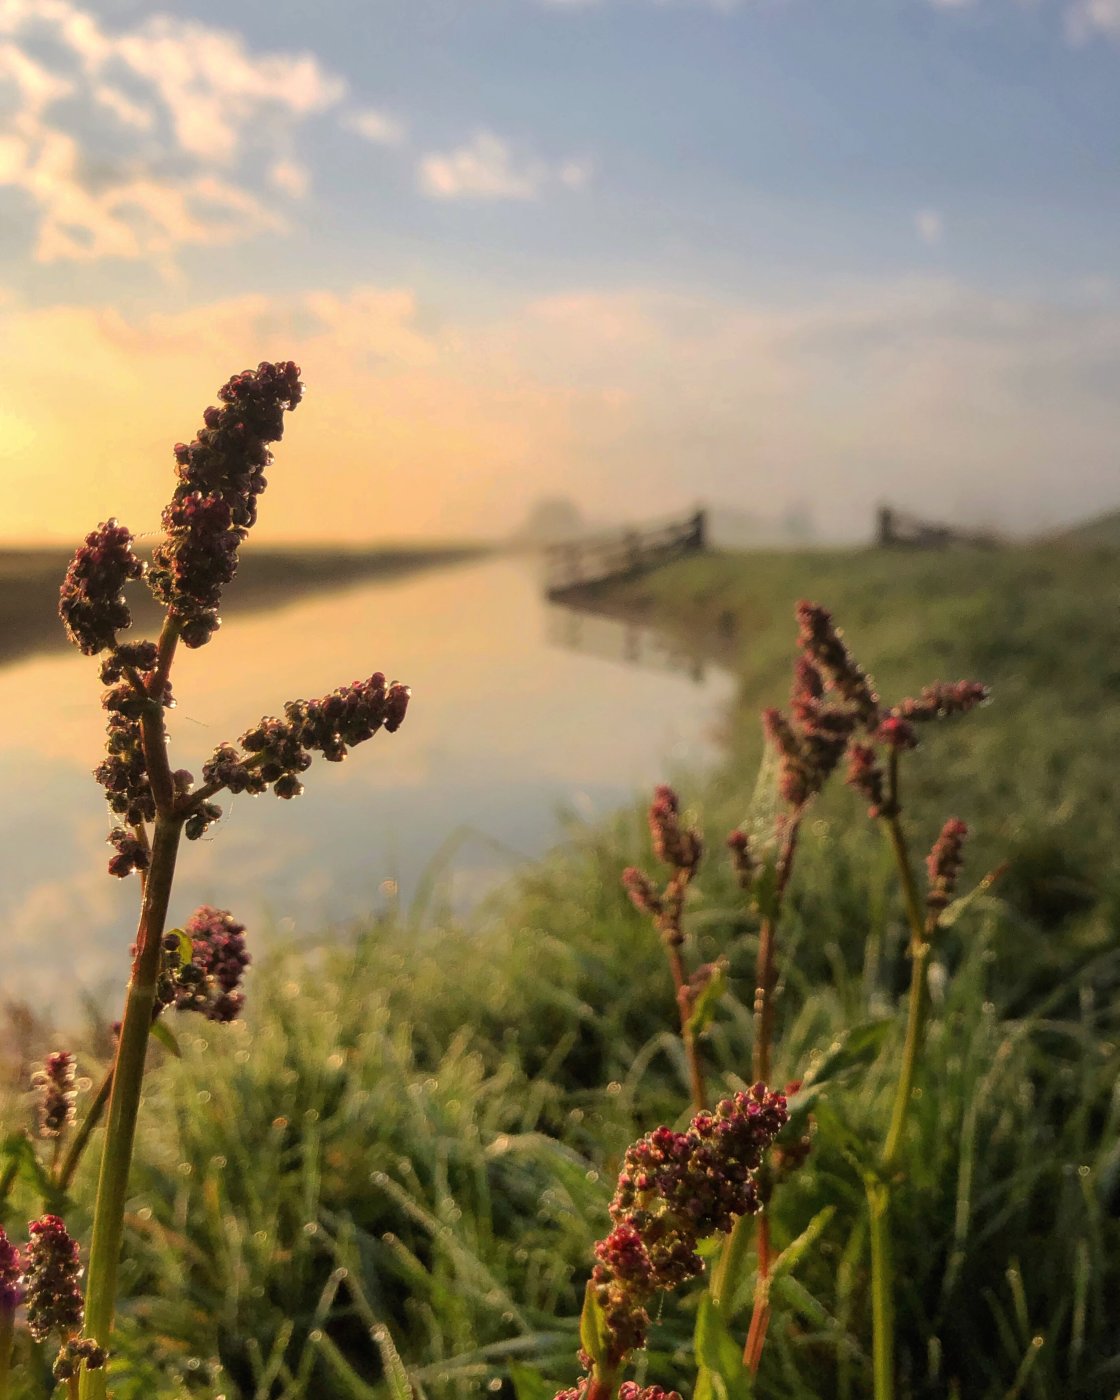
5. Capture Reflections For Breathtaking Golden Hour Landscape Photography
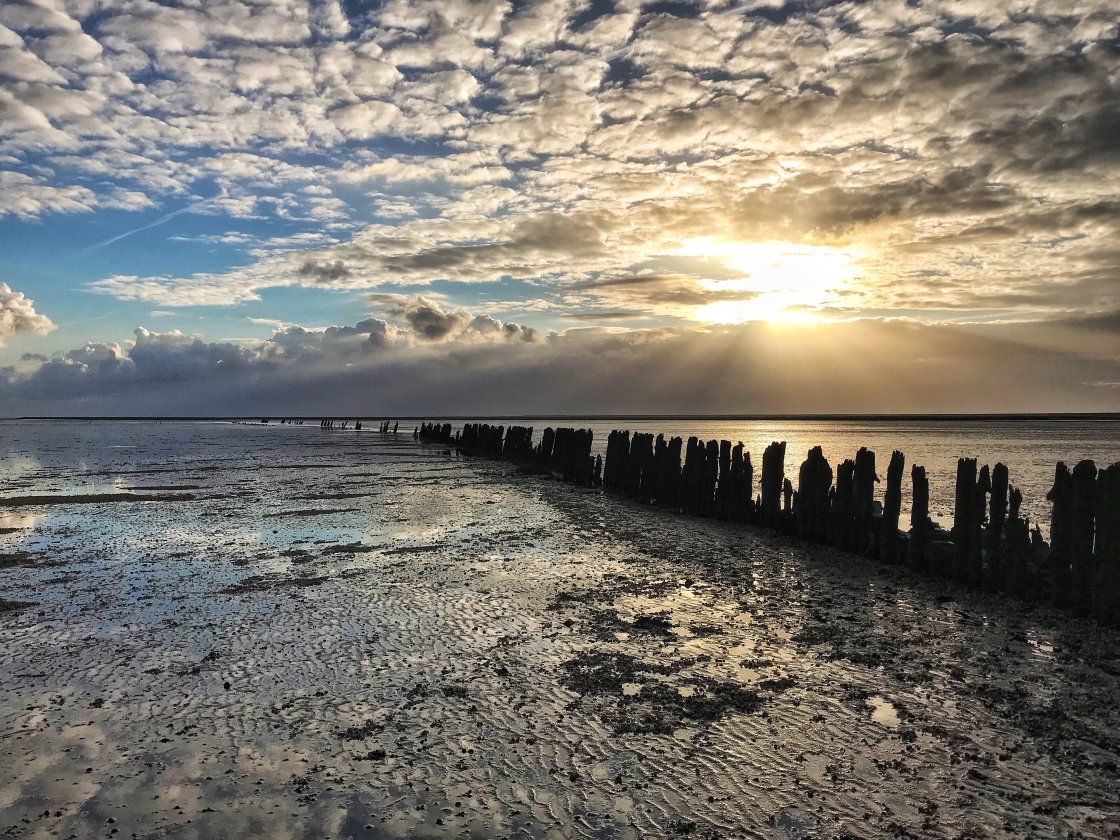
Reflections offer an amazing opportunity to create captivating photos… especially at sunrise and sunset.
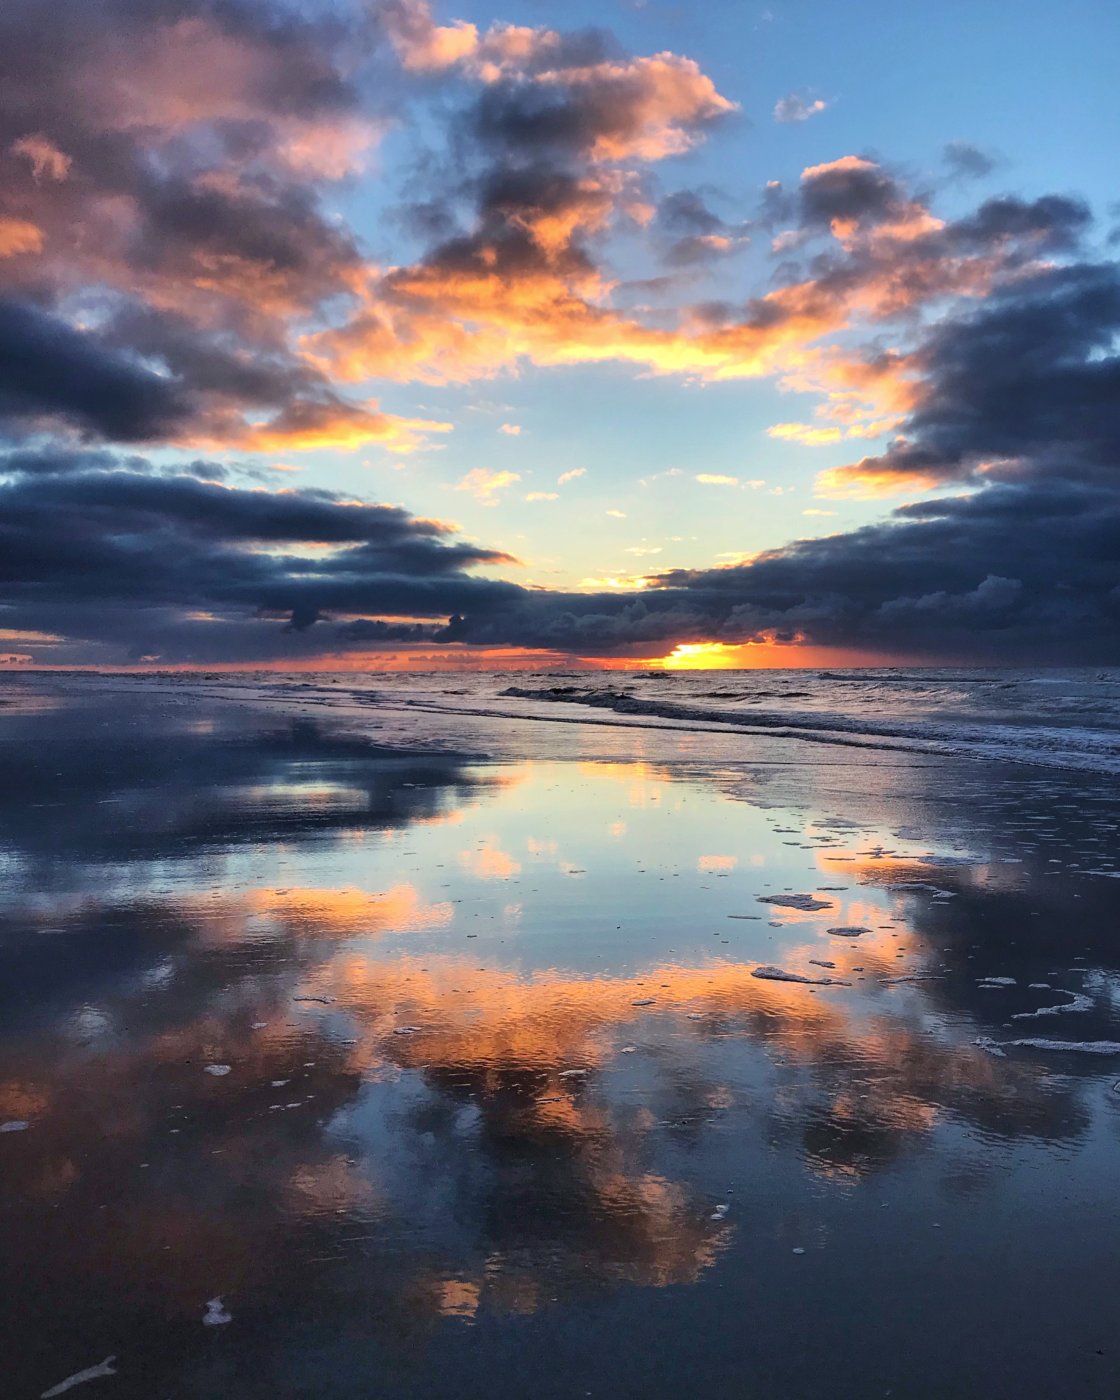
All you need is some water, such as a lake, canal, or wet sand at the beach. You could even use a small puddle!
You’ll get the best reflections when there’s no wind. If it’s windy, there might be too many ripples in the water to capture a good reflection.
So, what’s the best way to compose a reflection photo?
In landscape photography, we often use the rule of thirds when composing our image. In other words, we position the horizon nearer the top or bottom of the frame.
But with reflection photography, central composition is the best option.
Placing the horizon across the center of the frame creates a perfectly symmetrical image.
Symmetry is very powerful in photography. It instantly catches the viewer’s attention.
When you find a reflection, experiment with shooting from different heights. Bringing your iPhone closer to the water will change what you see in the reflection.
If you struggle to fit the scene and its reflection into the frame, don’t worry! The iPhone offers some simple solutions.
One option is to switch to Pano mode in the iPhone Camera app.

This mode lets you pan horizontally or vertically to capture a wider or taller photo. Shooting a panoramic image lets you choose exactly how much of the scene you include in your photo.
If you have the iPhone 11 camera with the Ultra Wide 0.5x lens, you could use that lens to capture more of the scene. Simply tap 0.5x at the bottom of the Camera app to switch to the Ultra Wide lens.
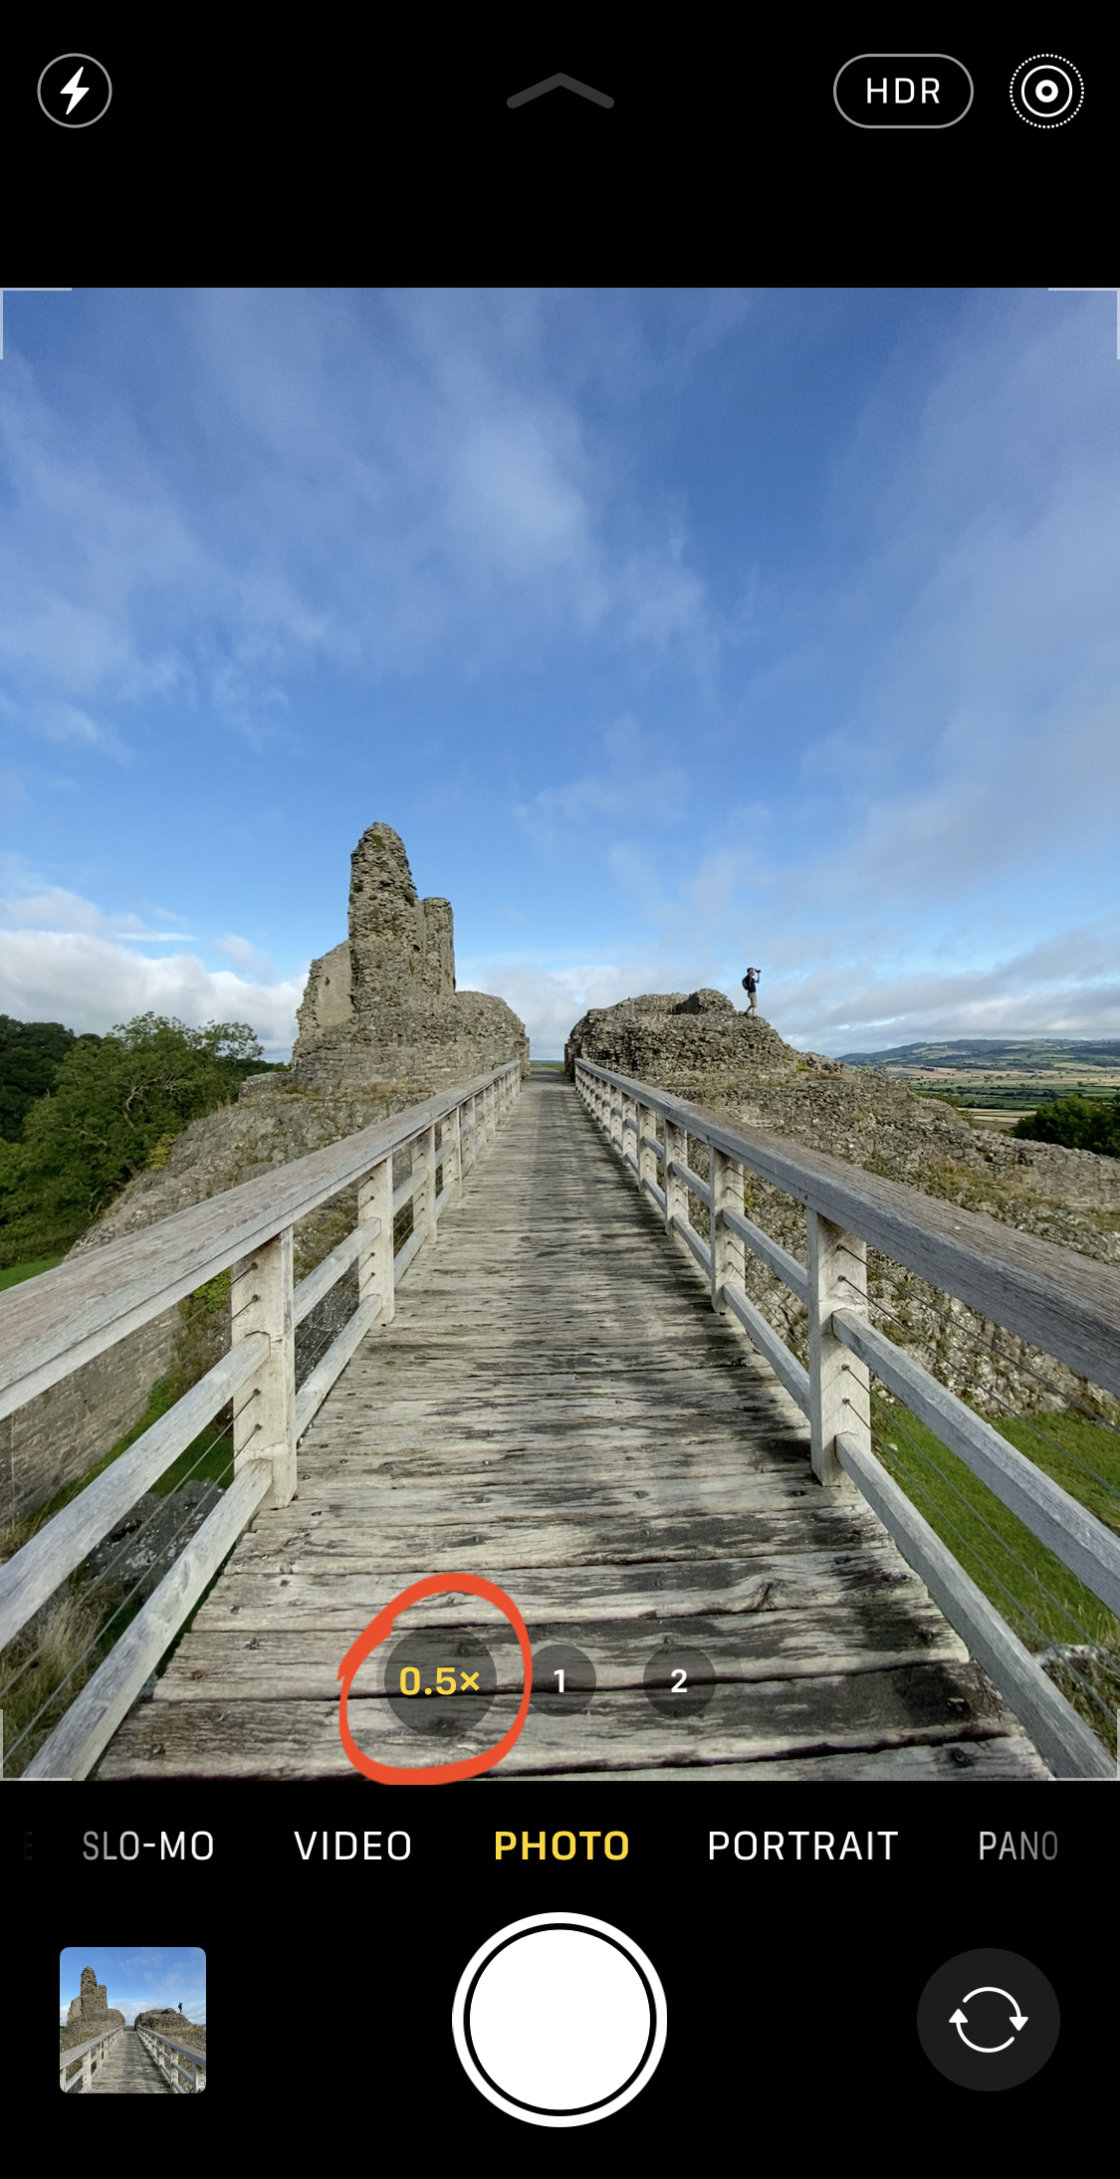
If you have an older iPhone, you could try using an add-on wide-angle lens instead.
As you can see, reflections add so much to sunrise and sunset pictures.
So when you’re shooting during golden hour, try to find some water… even if it’s just a small puddle!
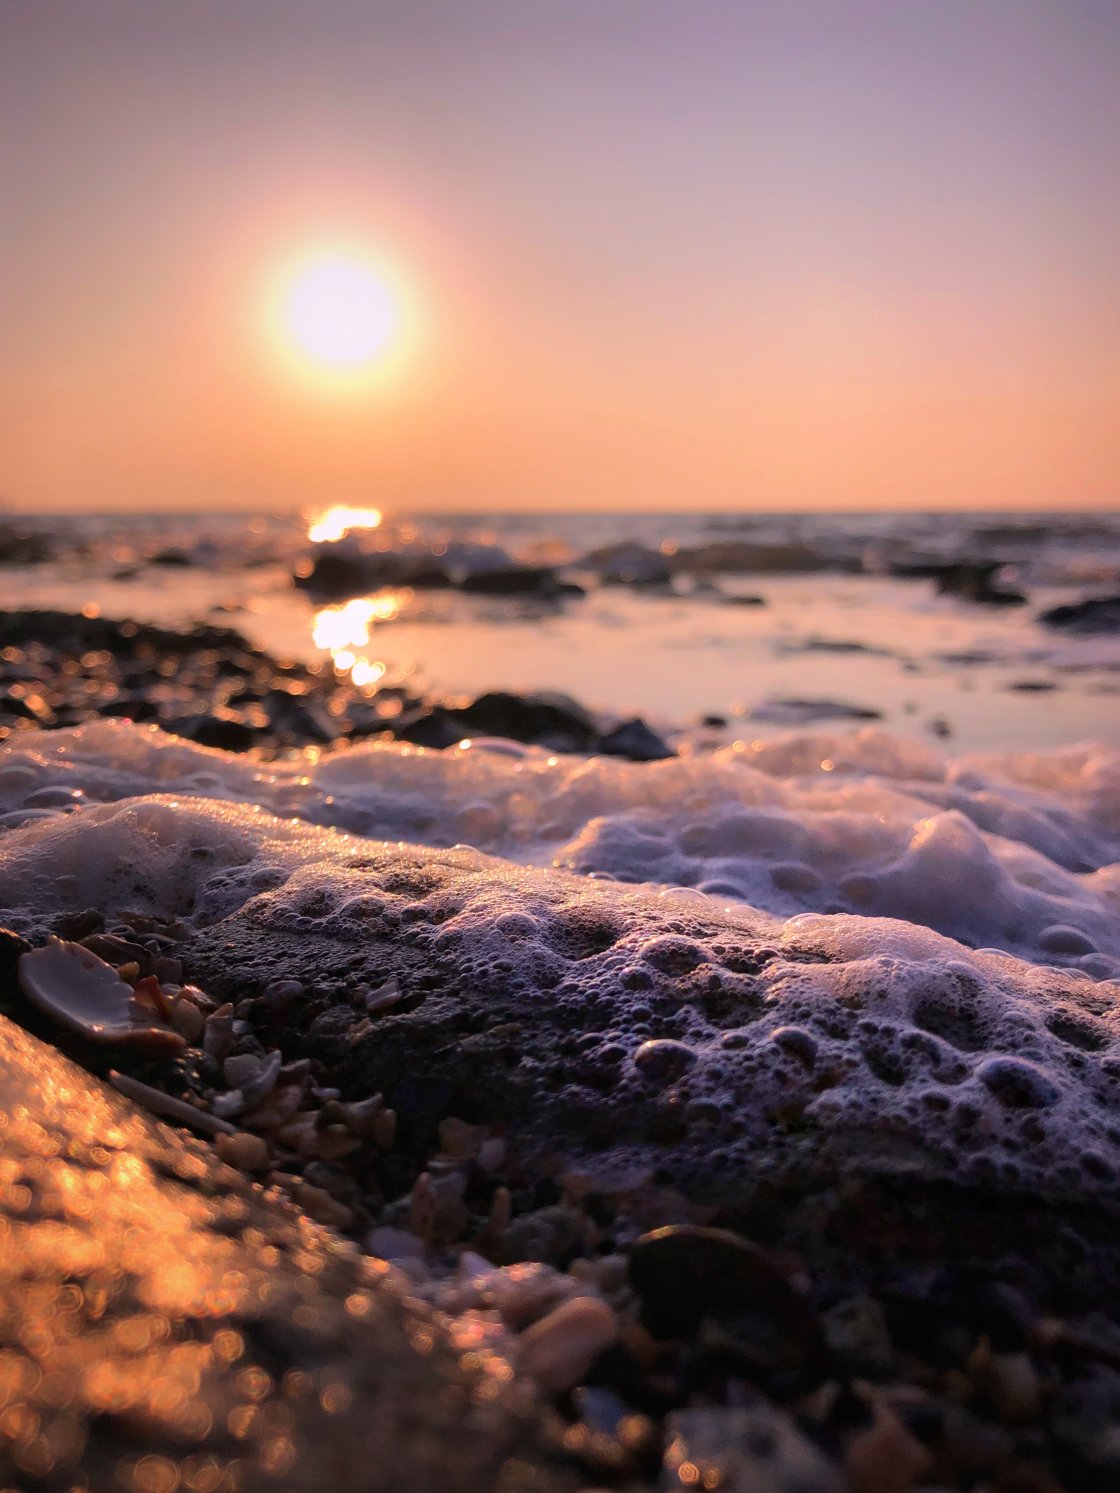
6. Shoot Perfectly Exposed Sunrise & Sunset Pictures
Shooting towards the sun can be tricky.
If you’re not careful, the bright light will overpower your photo. And if the sky is too bright, you’ll lose that amazing color.
Getting the correct exposure (brightness) is essential for stunning golden hour photography.
So, how do you capture perfectly lit sunset and sunrise photos?
First, be aware that the sun gets brighter as it rises in the sky.
Therefore, you have a better chance of capturing a well-exposed photo when the sun is close to the horizon.
Even then, the sun might cause the sky to look too bright in your photo.
However, the iPhone camera makes it easy to adjust exposure when taking a picture.
To bring the exposure (brightness) down, tap on the brightest part of the sky (or tap and hold to lock focus and exposure).
Tapping a bright area of the scene ensures the bright parts of the image are properly exposed.
Of course, the sun will still look very bright. But the surrounding sky should have plenty of color and detail.
If necessary, you can swipe up or down to adjust exposure further. Swipe up to make the image brighter. Or swipe down to make it darker.
If the sun is still very bright and overpowering, you have a few more options.
One simple technique is to frame your shot with the sun just out of the frame. You’ll still get the amazing sunset colors, but the sun won’t overpower your shot.
Another option is to block the sun with an object in the scene, such as a tree, a building, or a person.

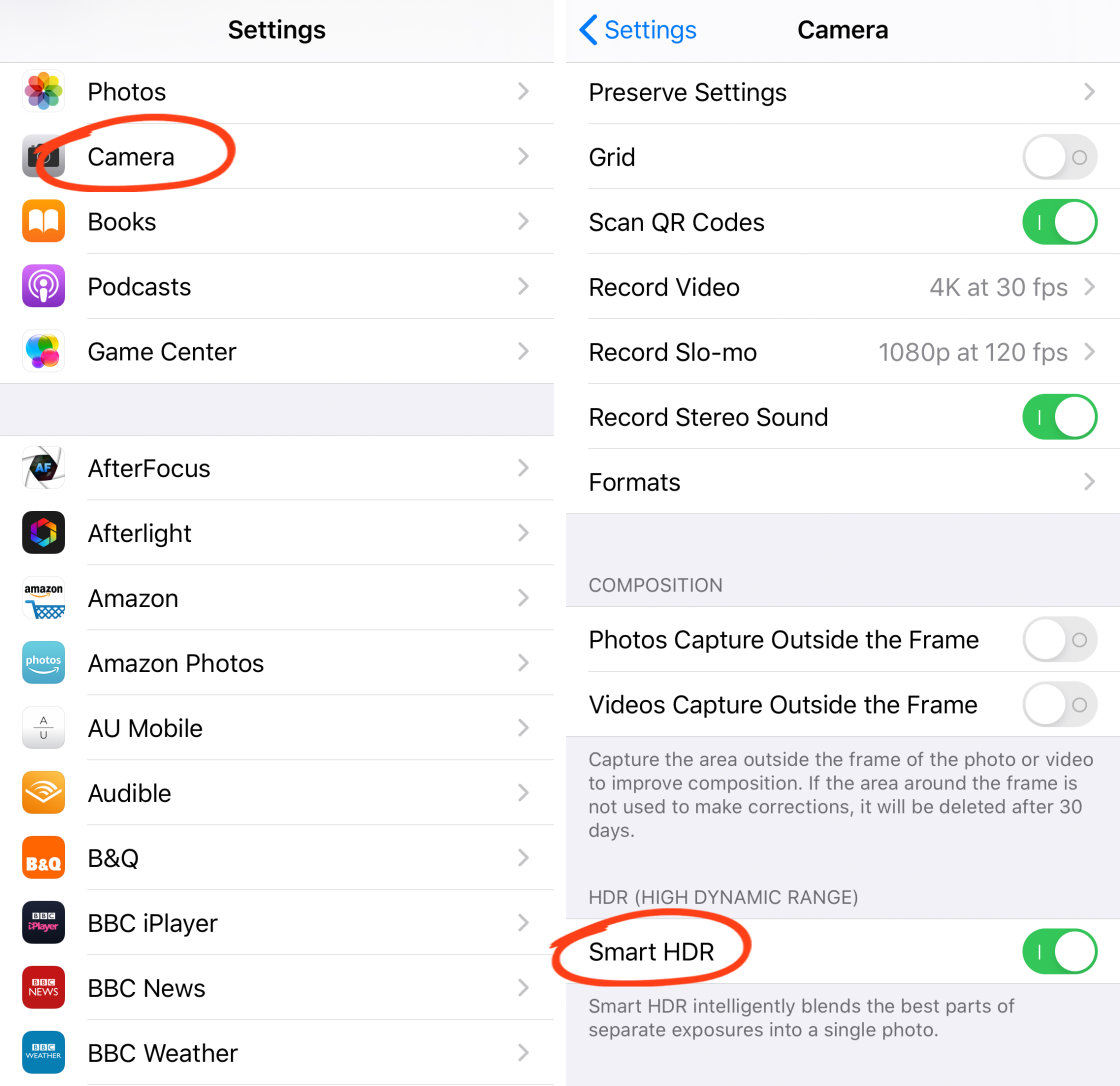
While we’re talking about exposure, it’s also worth mentioning HDR.
HDR stands for High Dynamic Range. The iPhone HDR camera feature lets you capture more detail in both the bright and dark areas of your photo.
It’s perfect for high-contrast scenes, such as landscapes.
For that reason, I recommend shooting with HDR switched on.
HDR settings vary slightly between iPhone models. You can find the HDR settings by going to Settings > Camera > HDR.
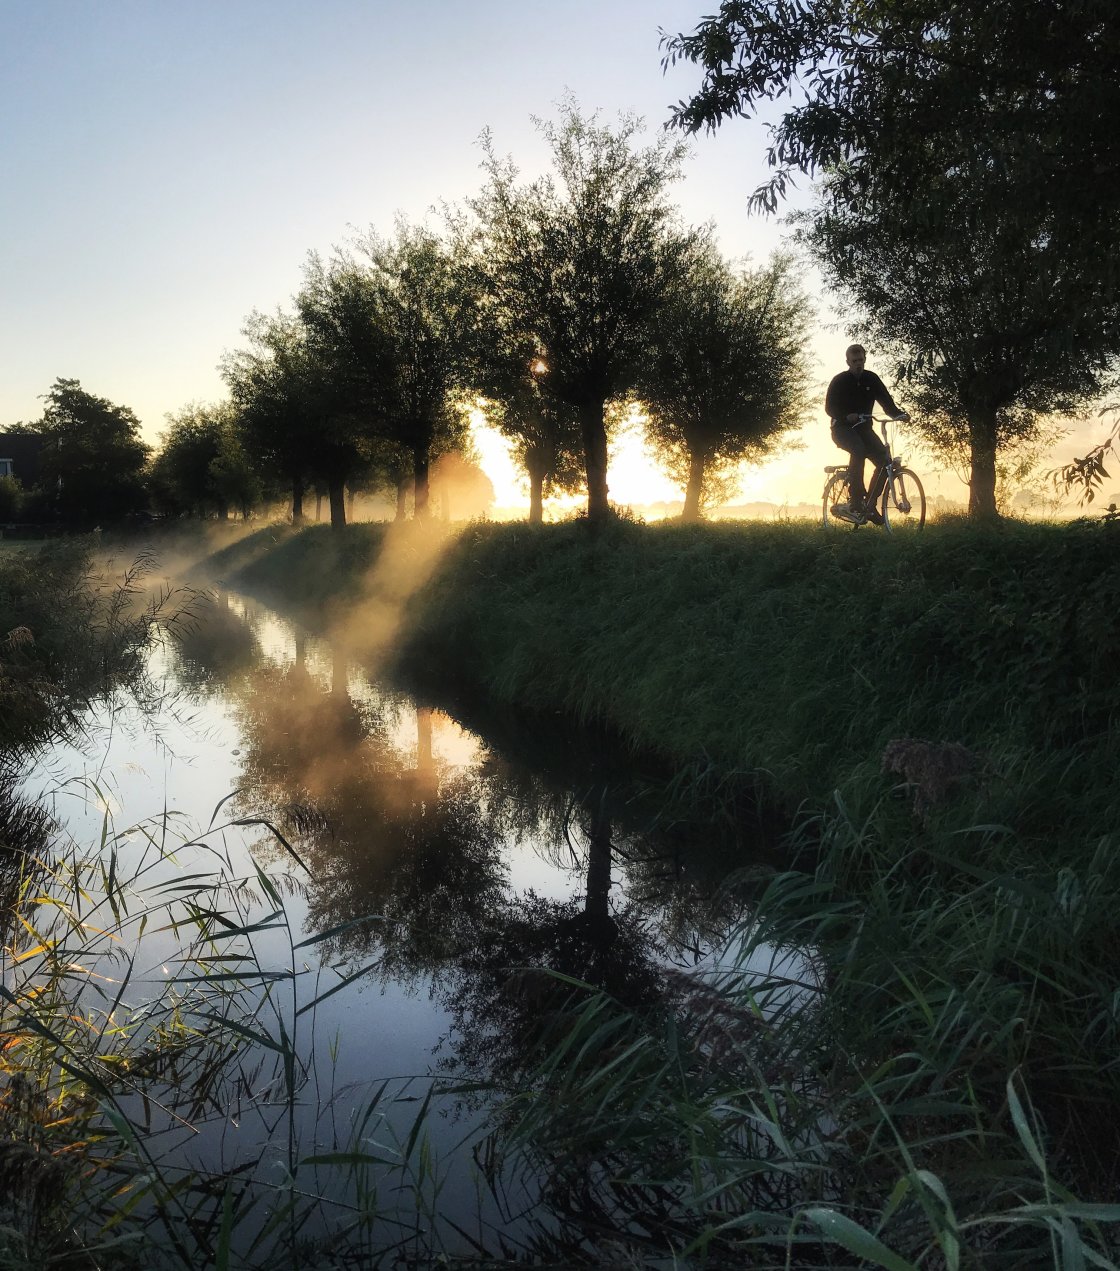
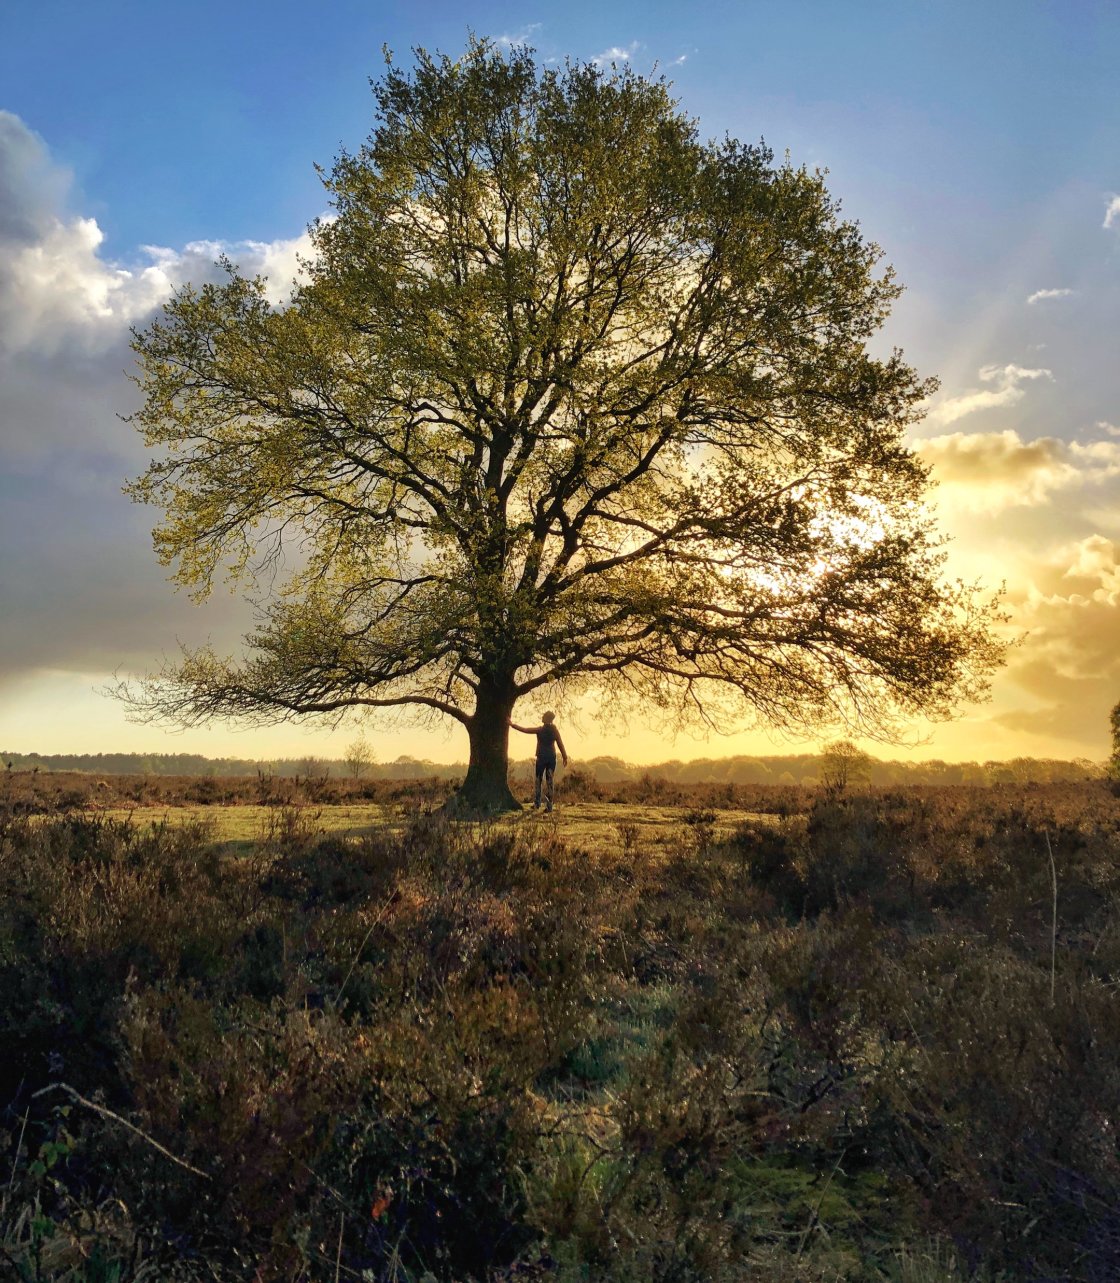
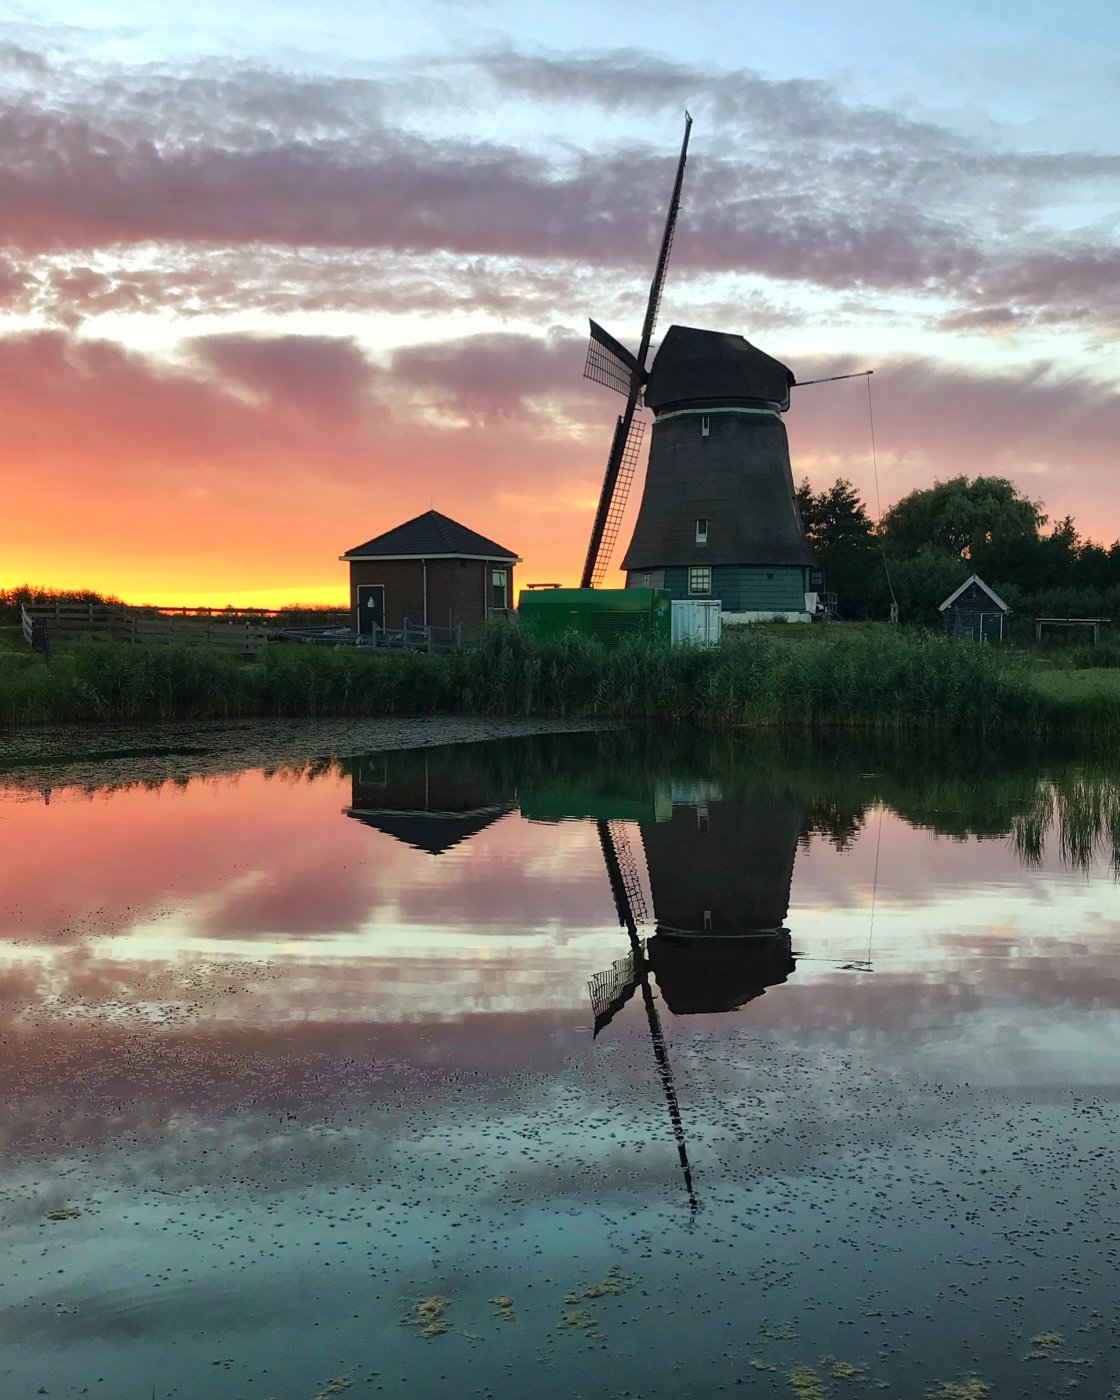
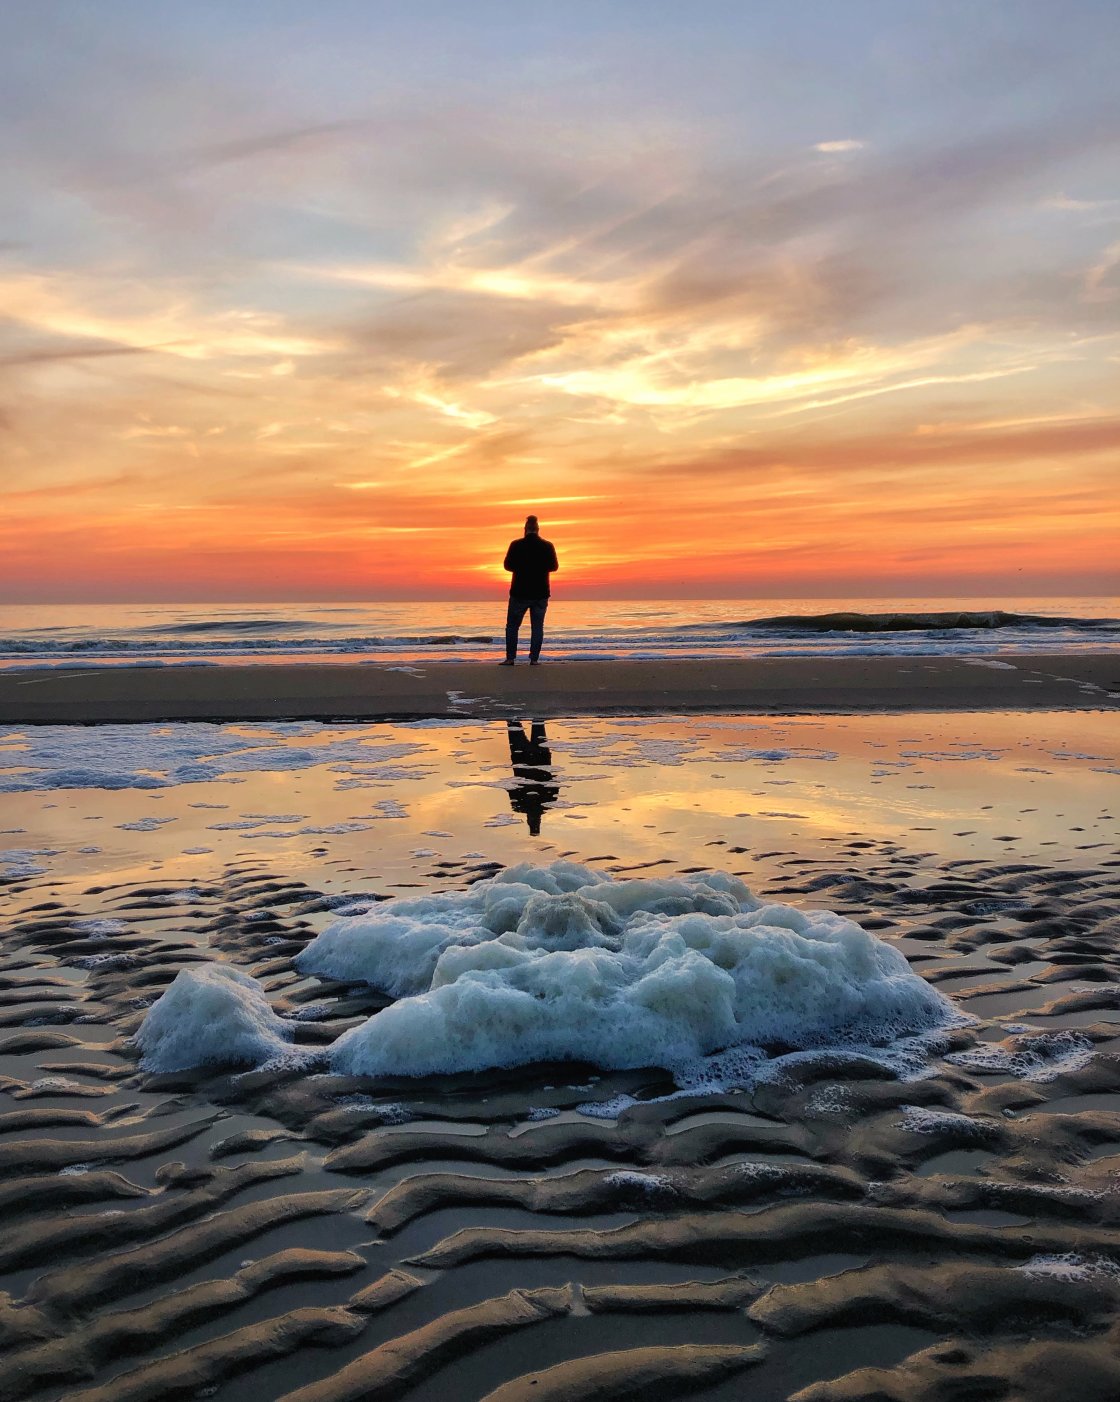
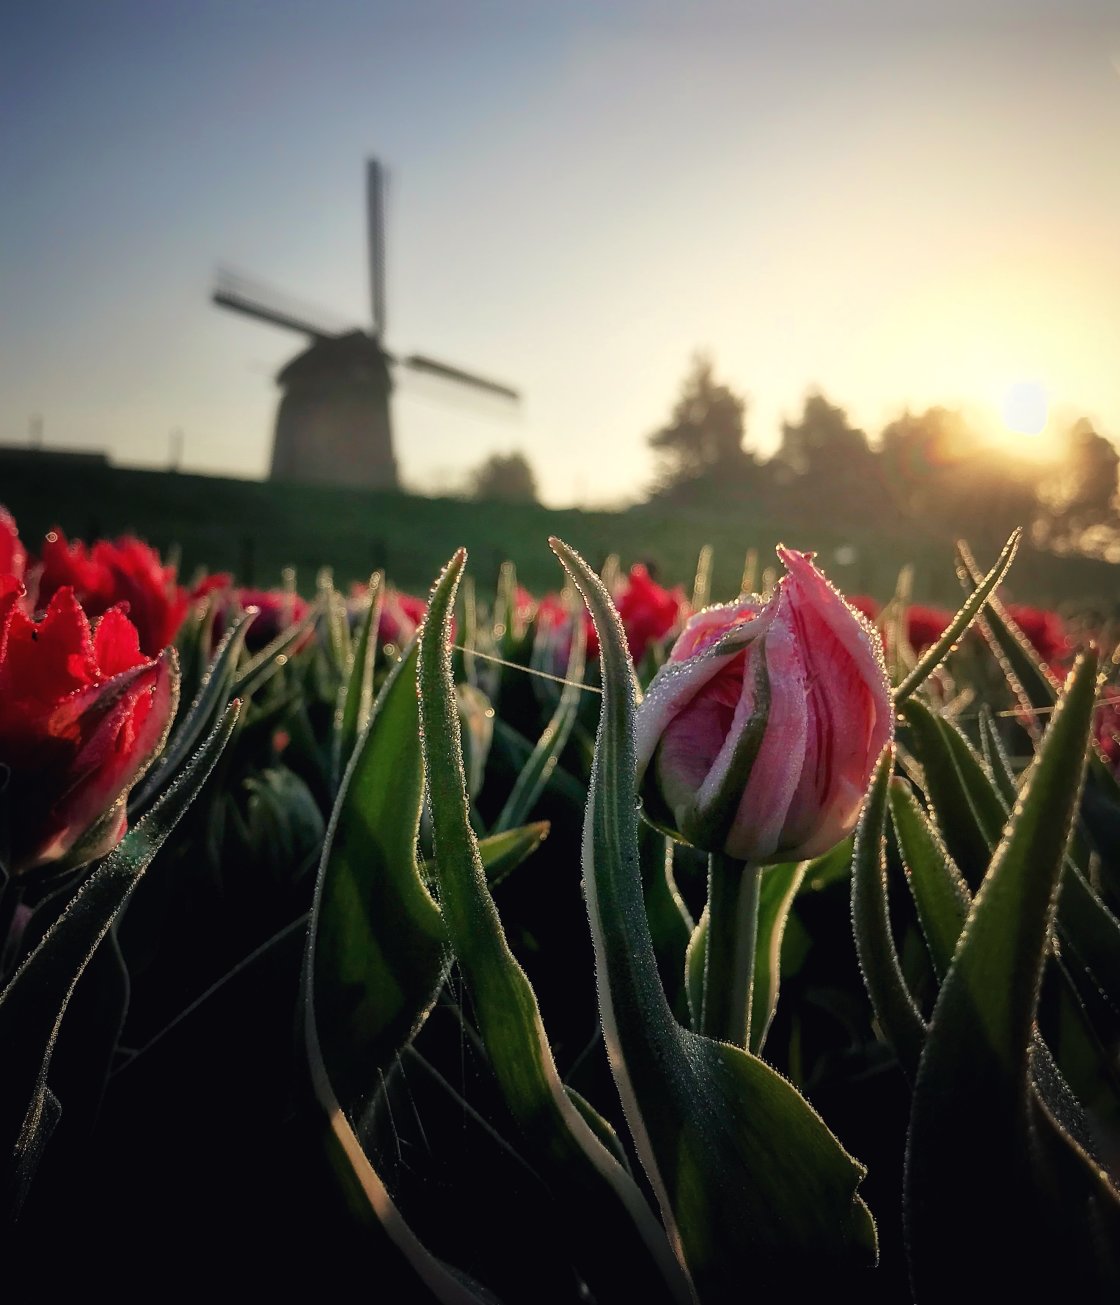
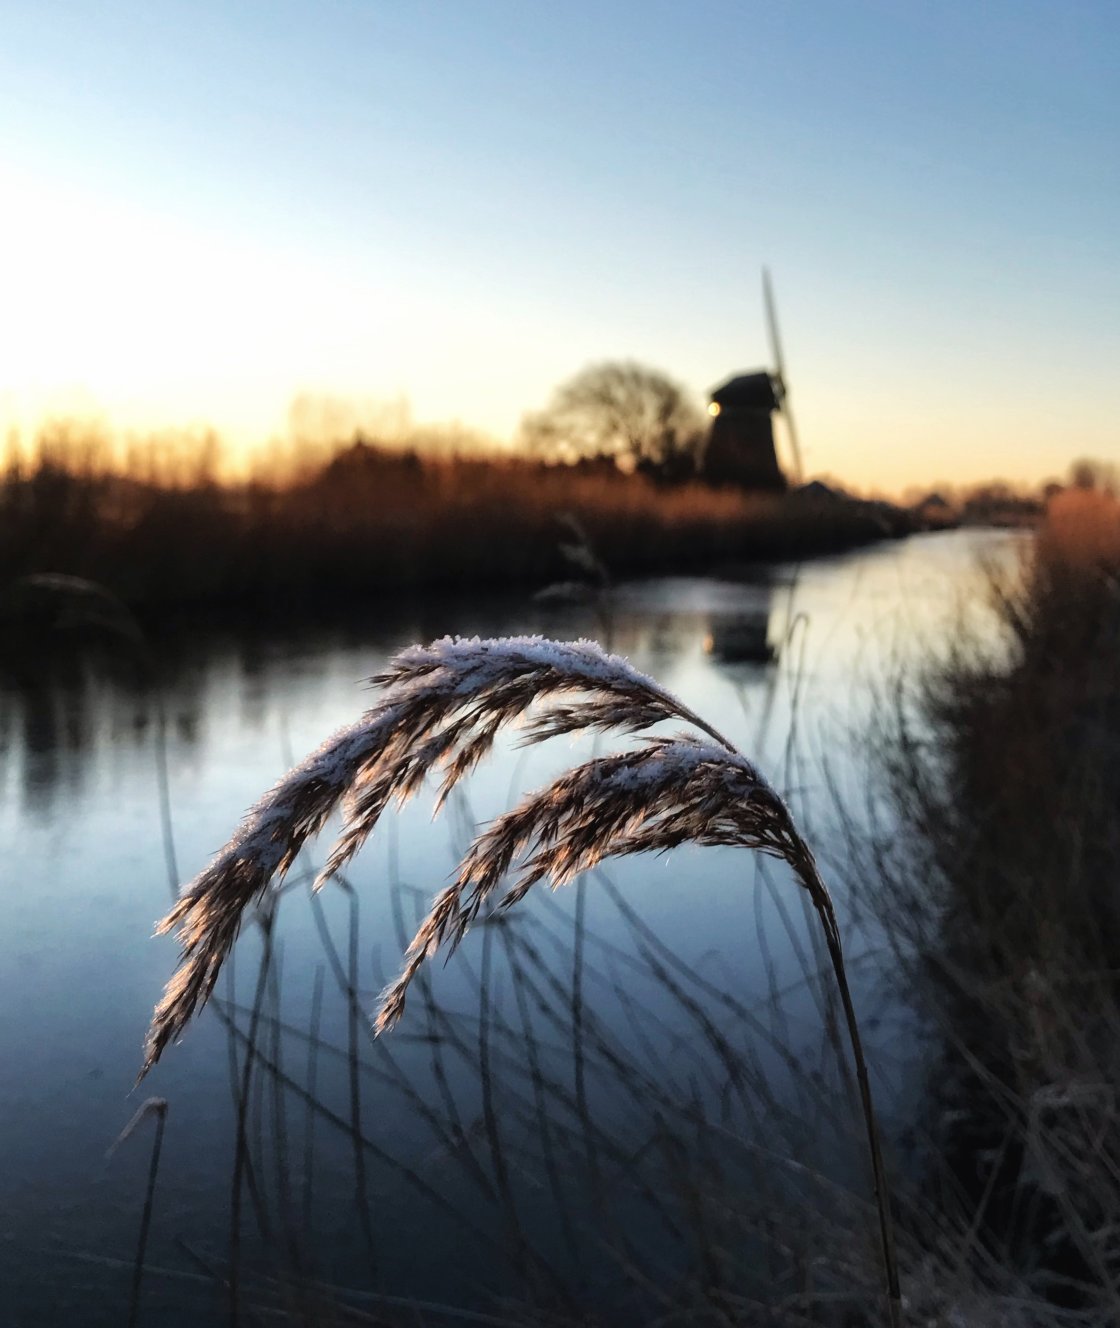
7. Create Stunning Golden Hour Silhouette Photos
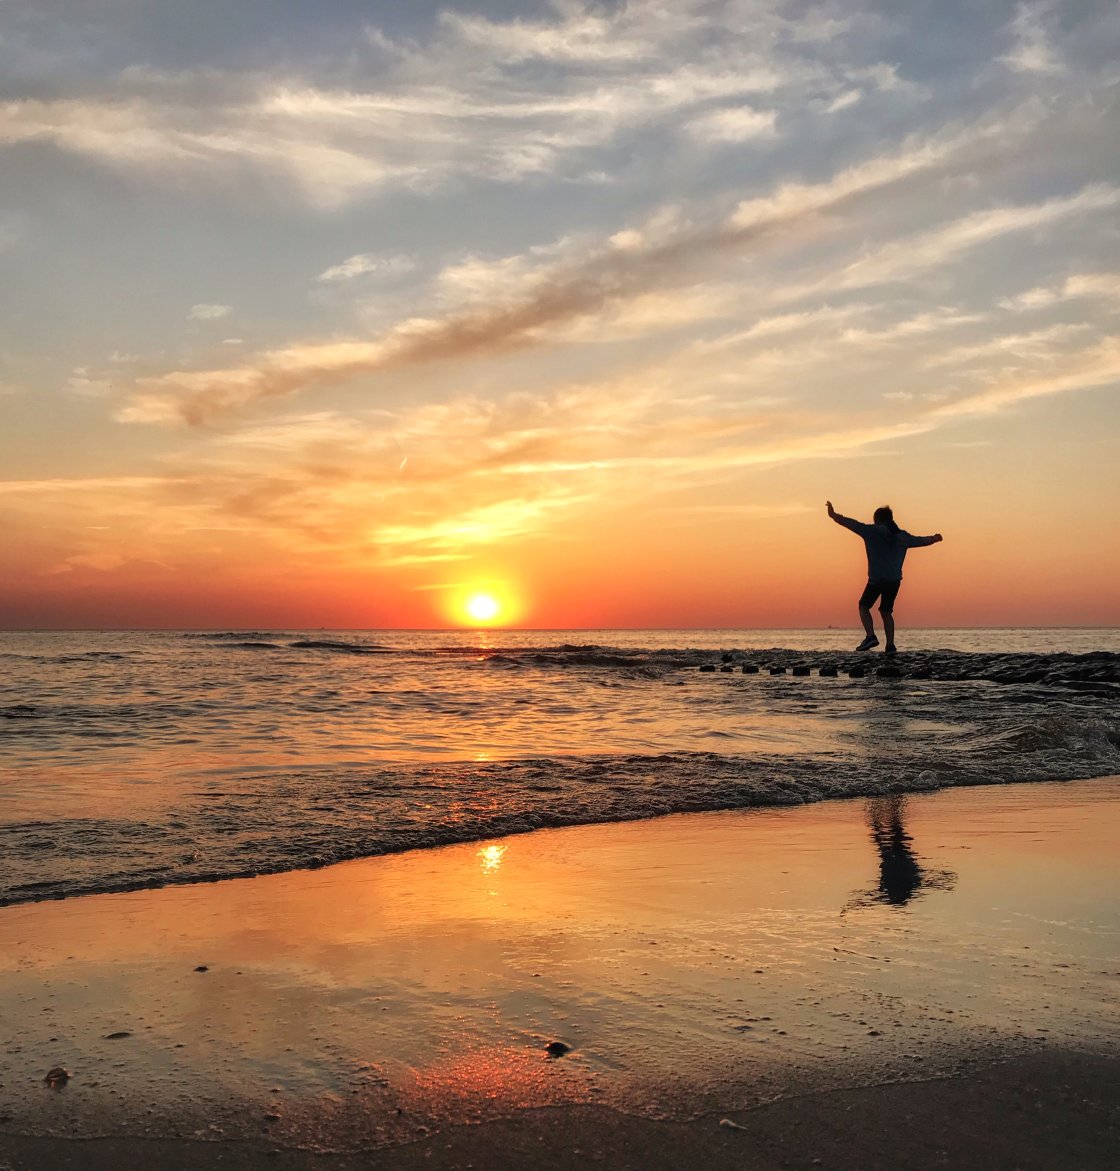
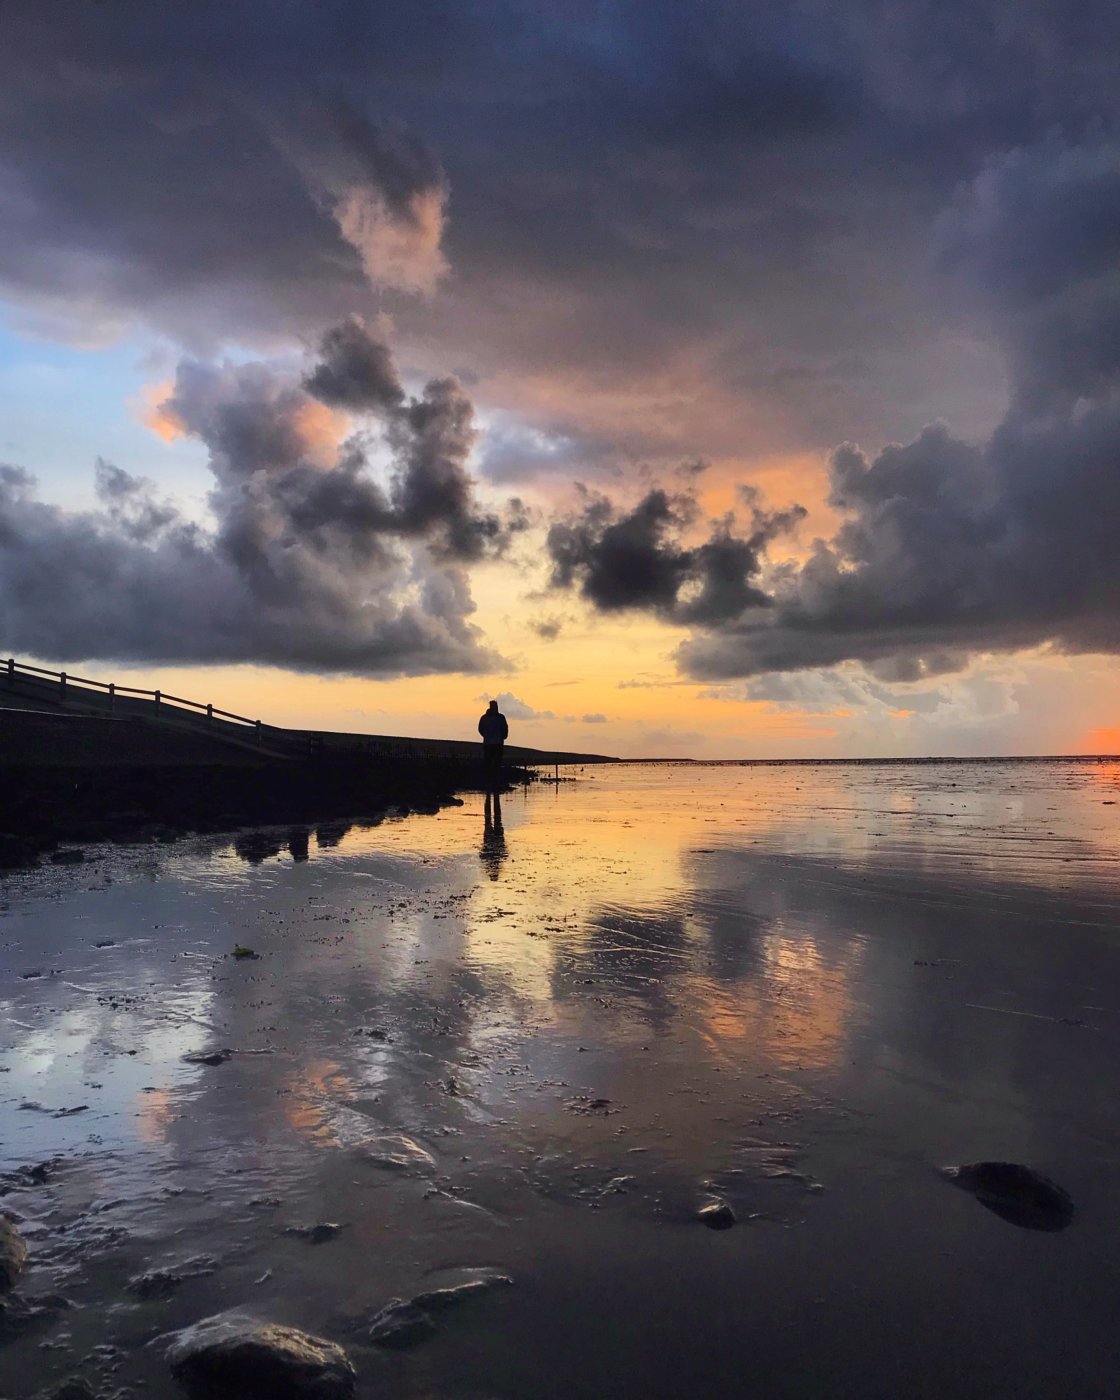
Golden hour is the perfect time to create powerful silhouette photos.
The beautiful sky makes the perfect backdrop for a dark silhouetted subject.

So, how do you create a silhouette photo?
It’s actually easier than it looks!
All you need to do is position your subject against a bright background.
The low sun at sunrise and sunset provides the perfect conditions for silhouette photography.
Start by pointing your camera towards the sun.
Next, ensure your subject is positioned with the sun or bright sky behind them. People, trees, and windmills make great silhouette subjects.
Crouch down low to get more of the bright sky behind your subject.
Now, you just need to get the exposure right.
Remember, you want the subject to appear very dark or completely black.
All you need to do is tap on a bright part of the sky. The sky will be properly exposed and the subject should appear dark.
If necessary, swipe down on the screen to reduce exposure even more.
Don’t worry if it doesn’t look perfect when you take the shot. A photo editing app like Snapseed makes it easy to add some more contrast.
For example, you can darken the shadows to make the silhouette blacker. Or brighten the highlights to make the sky pop a bit more.
As you can see, silhouettes make striking sunset and sunrise photos. And it’s so easy to create them with the iPhone!
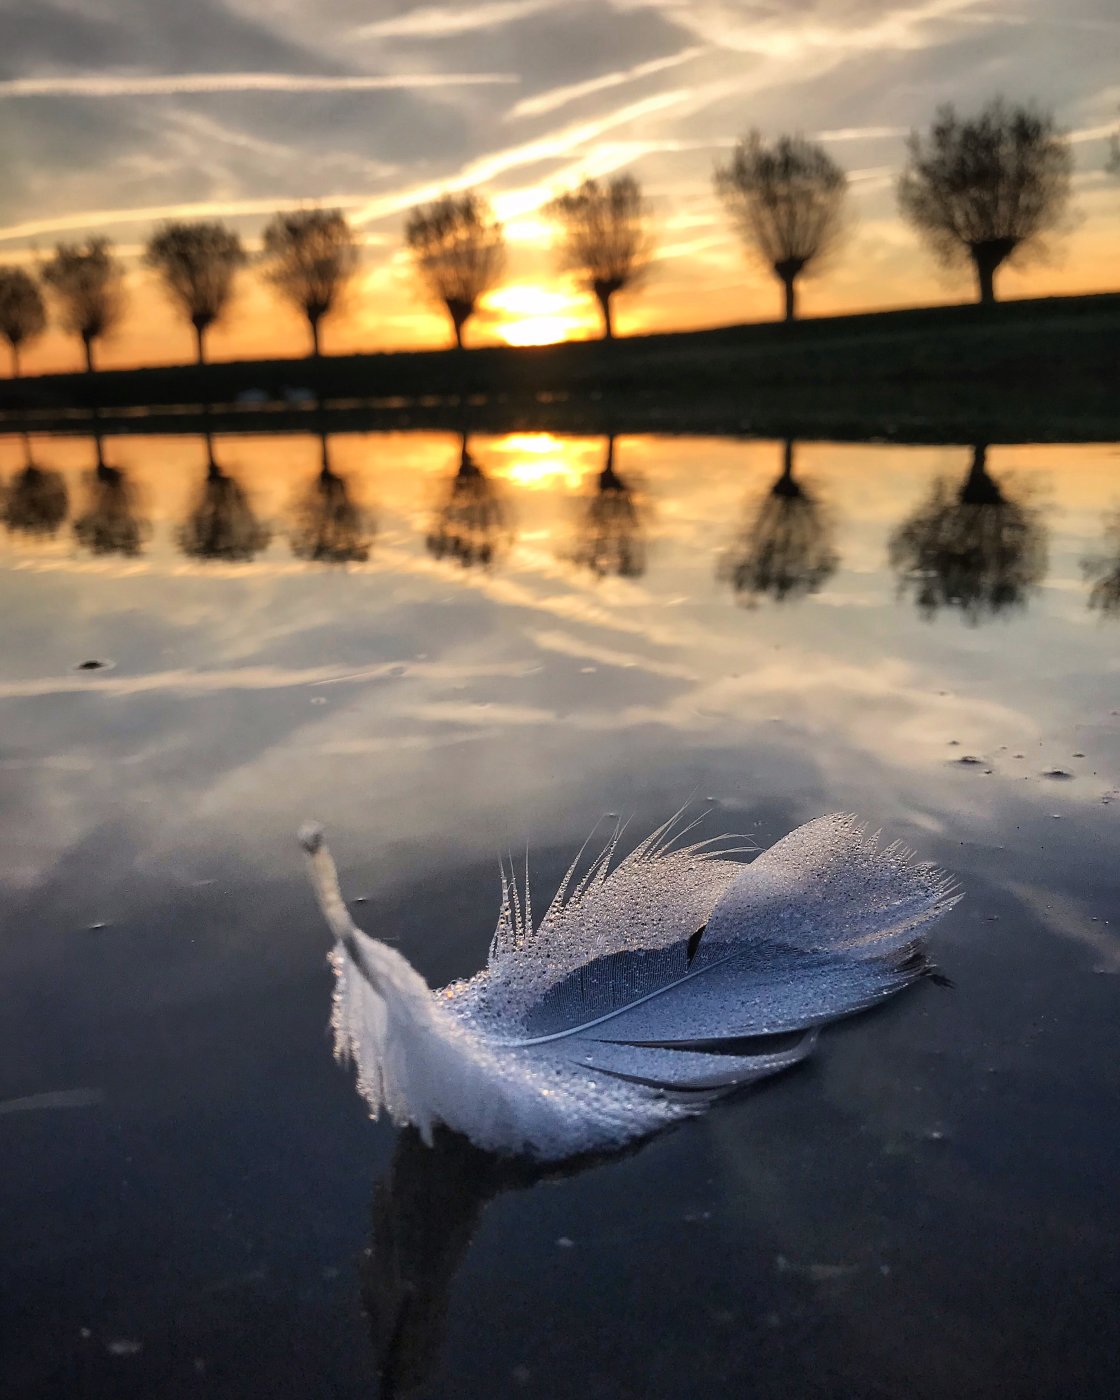
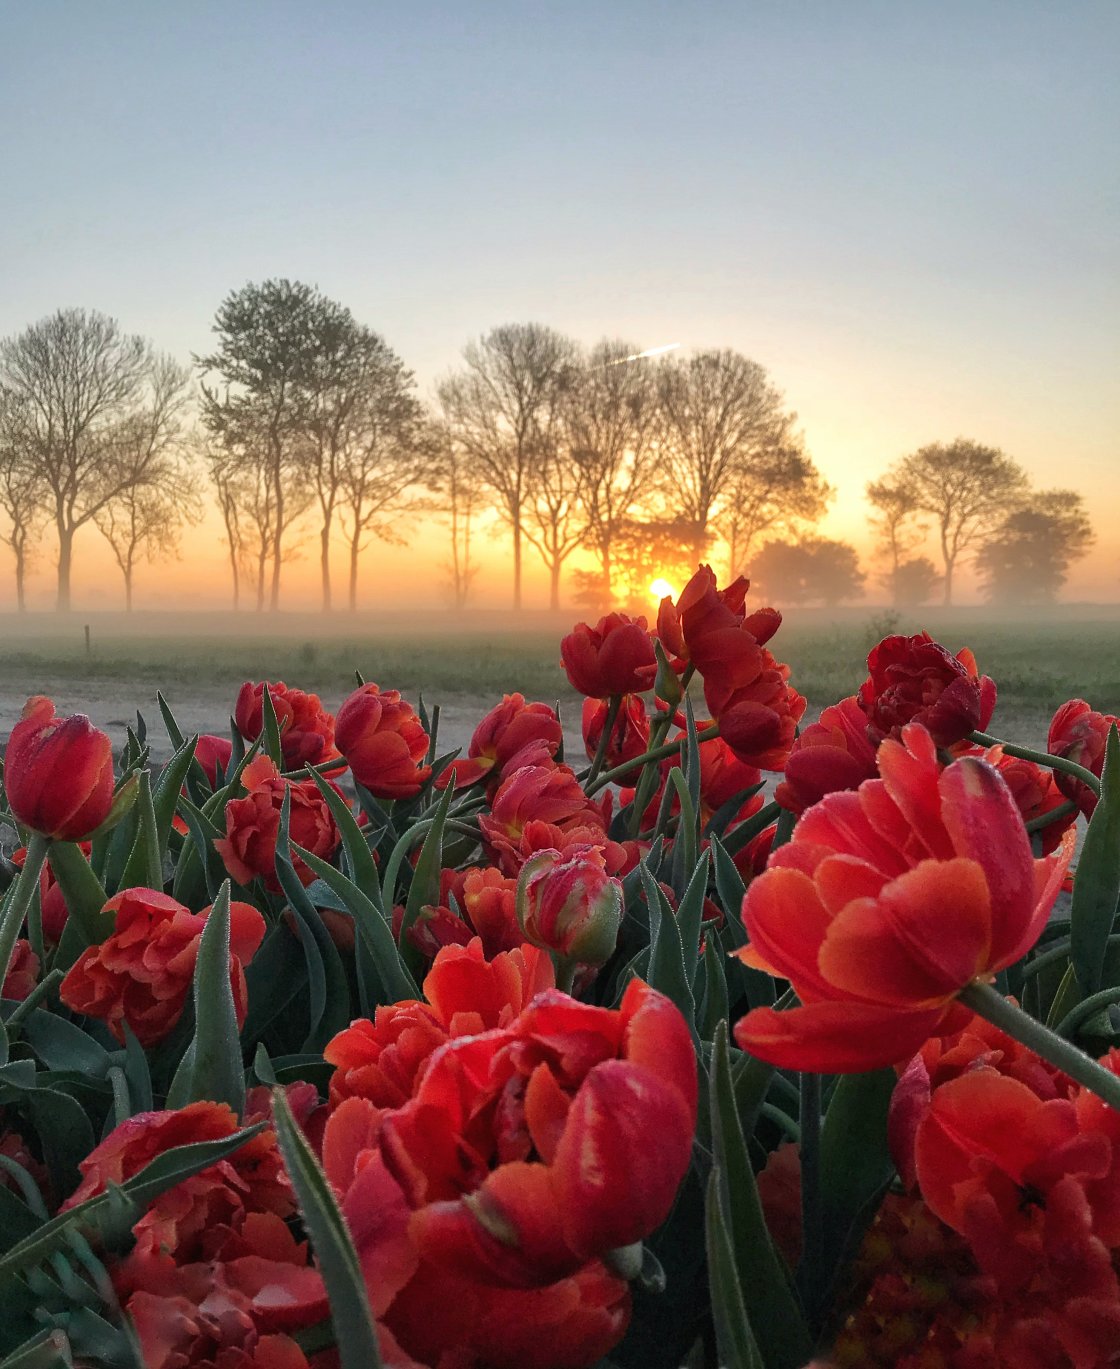
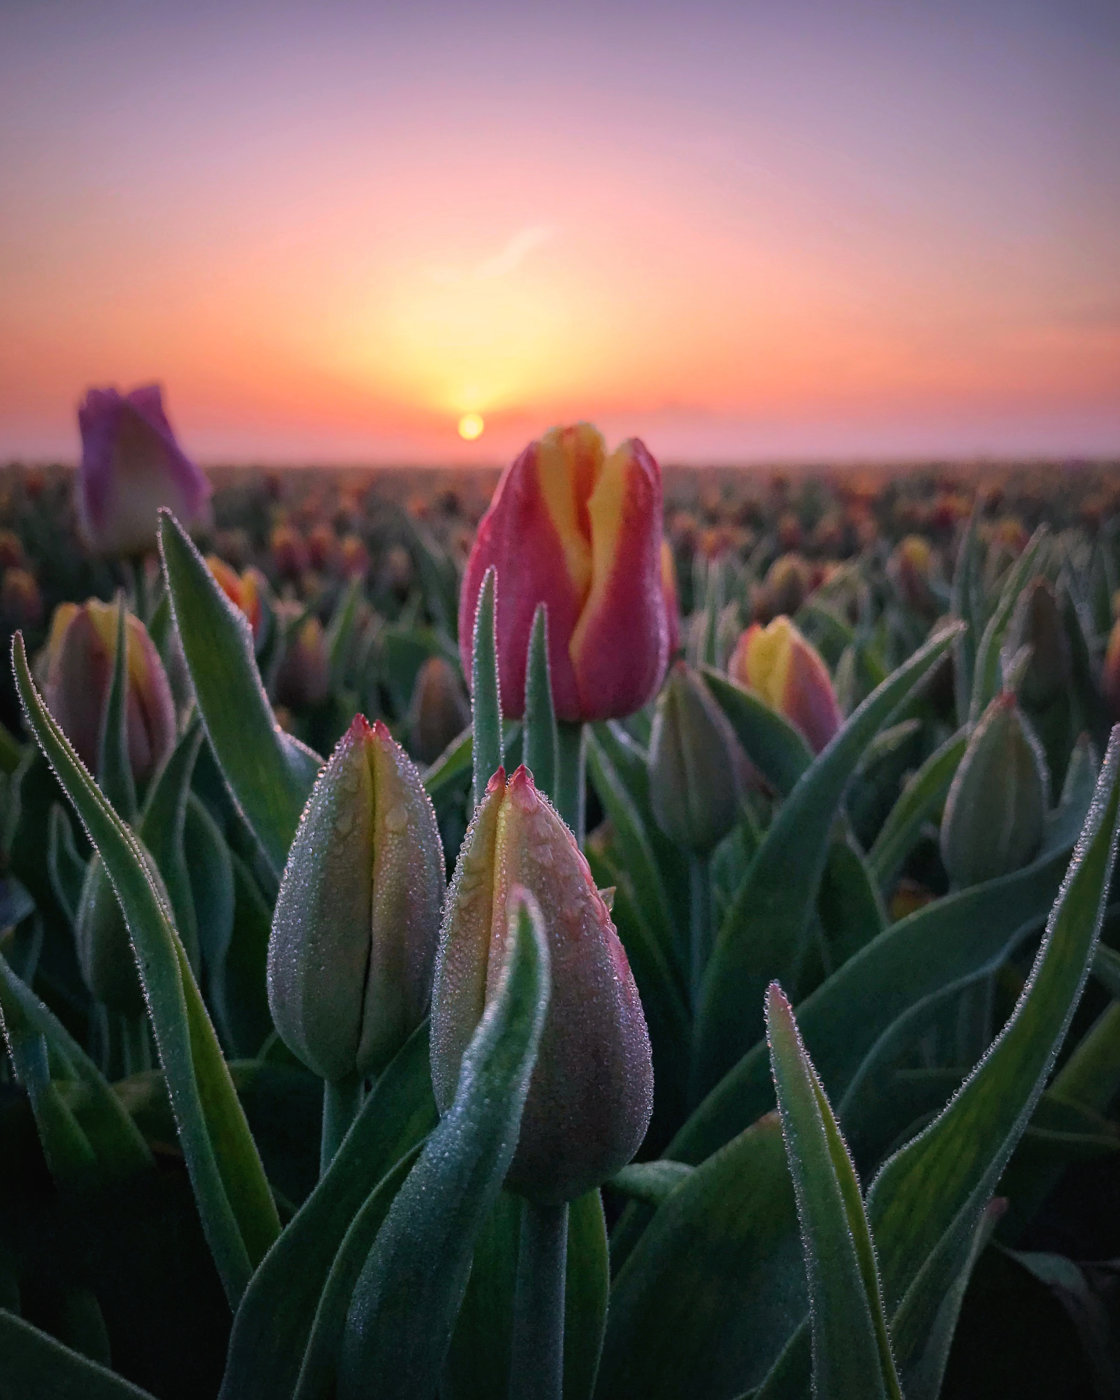
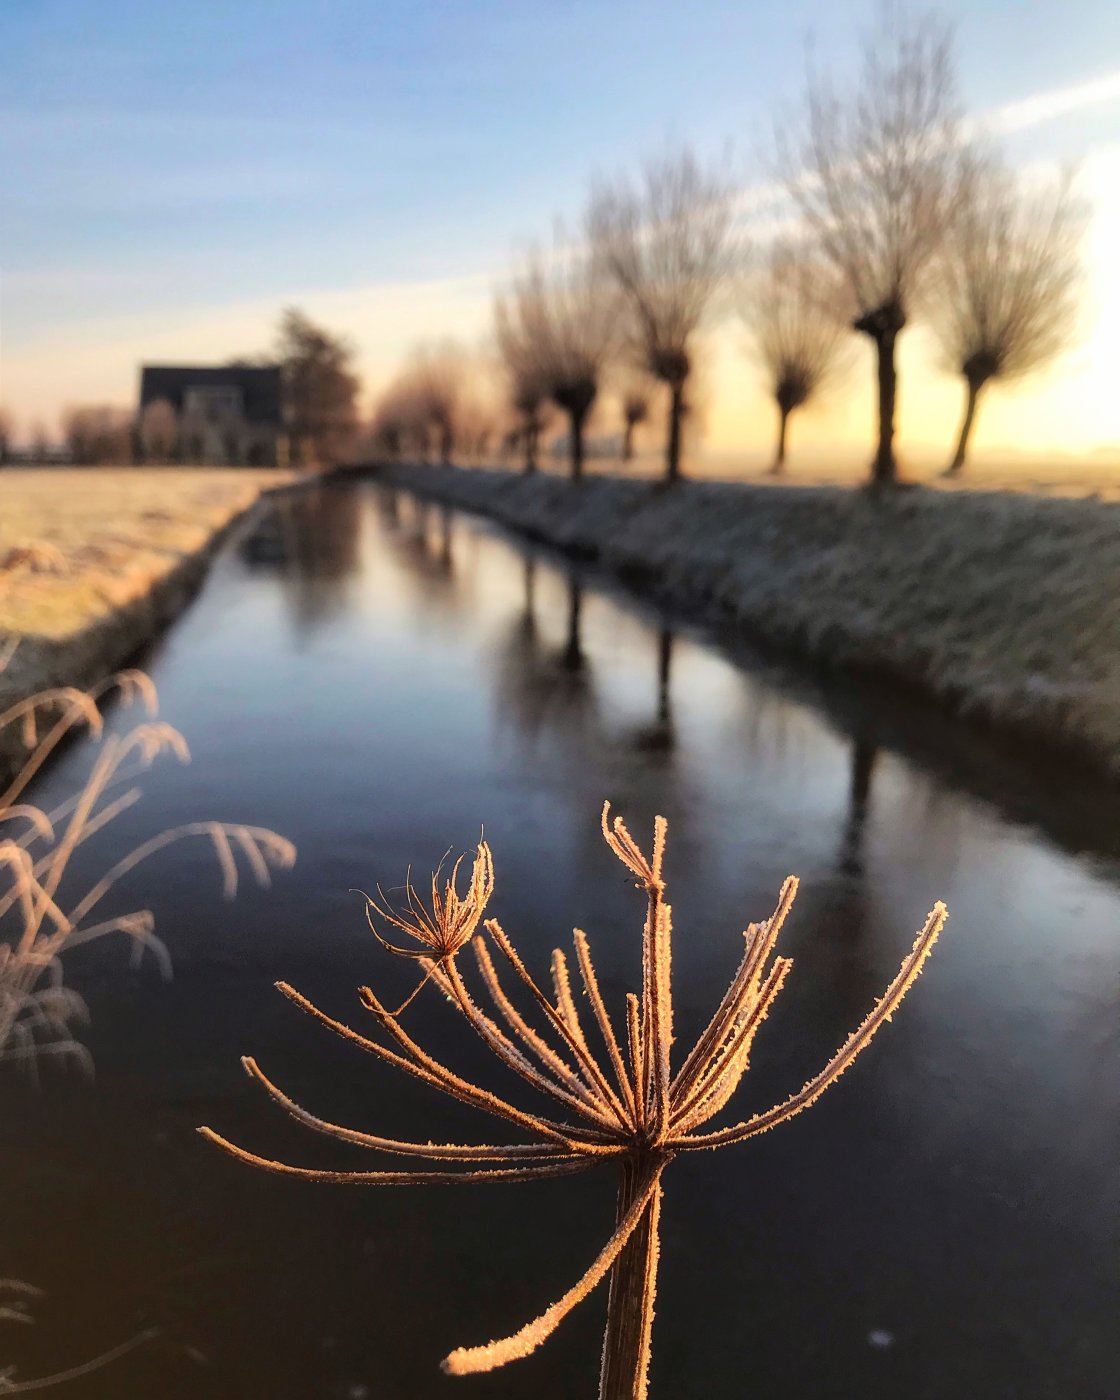
8. Get Close To Your Subject To Create A Gorgeous Blurred Background
When you think of landscape photography, you probably think of a wide-open scene with everything in sharp focus.
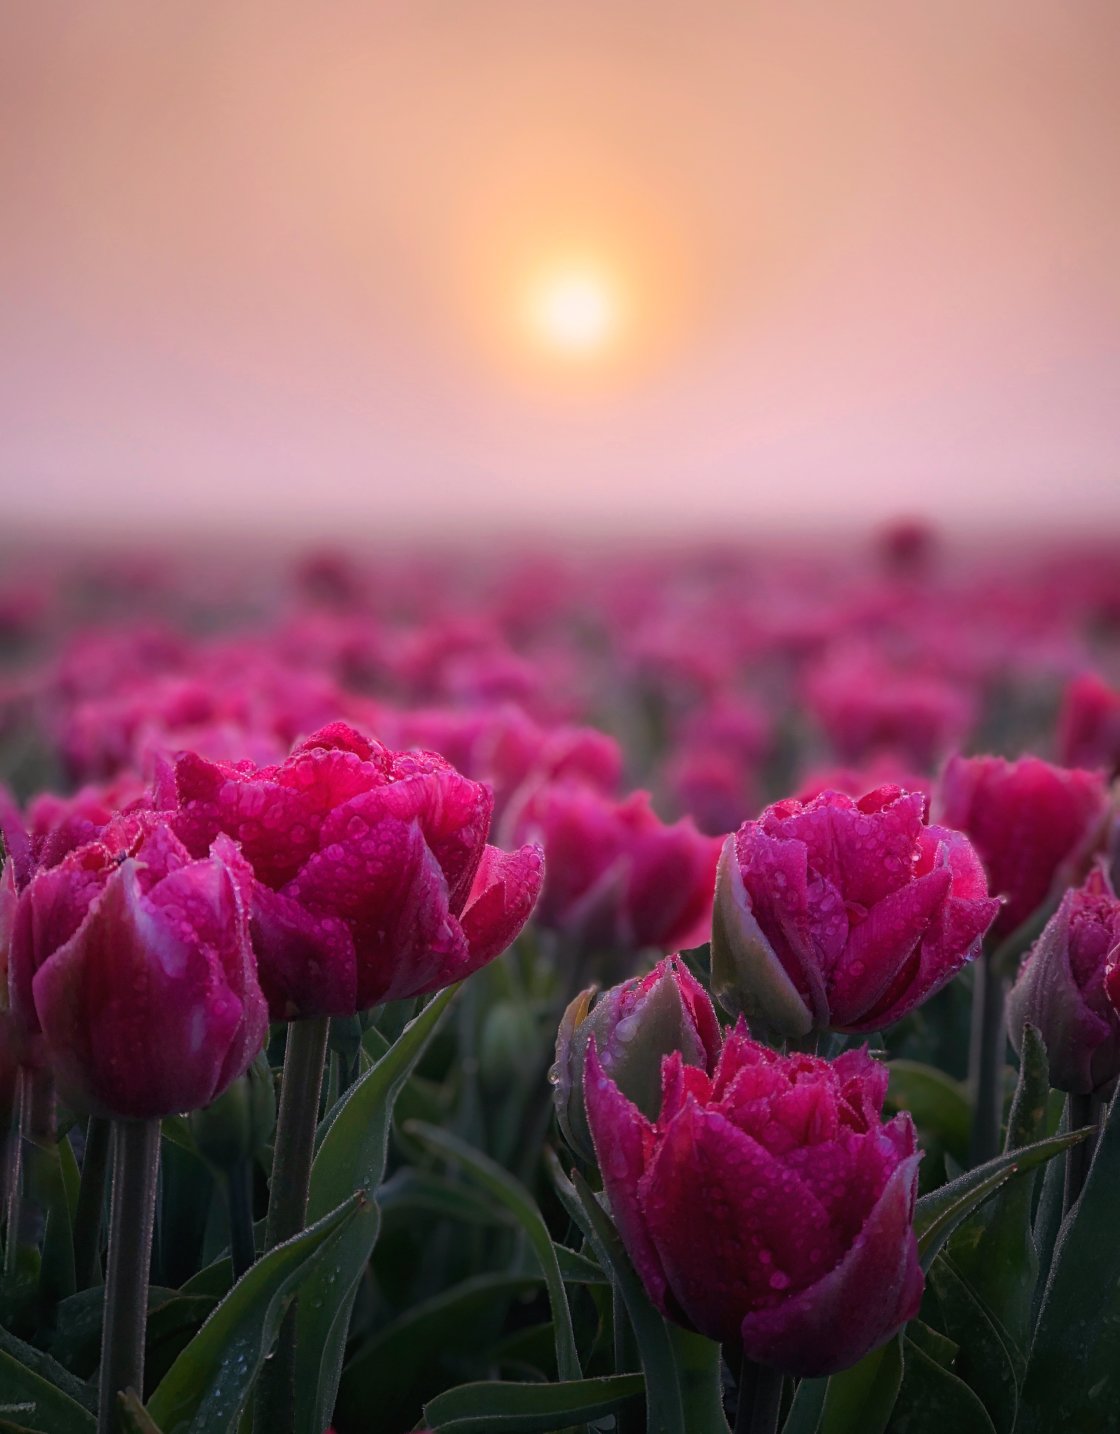
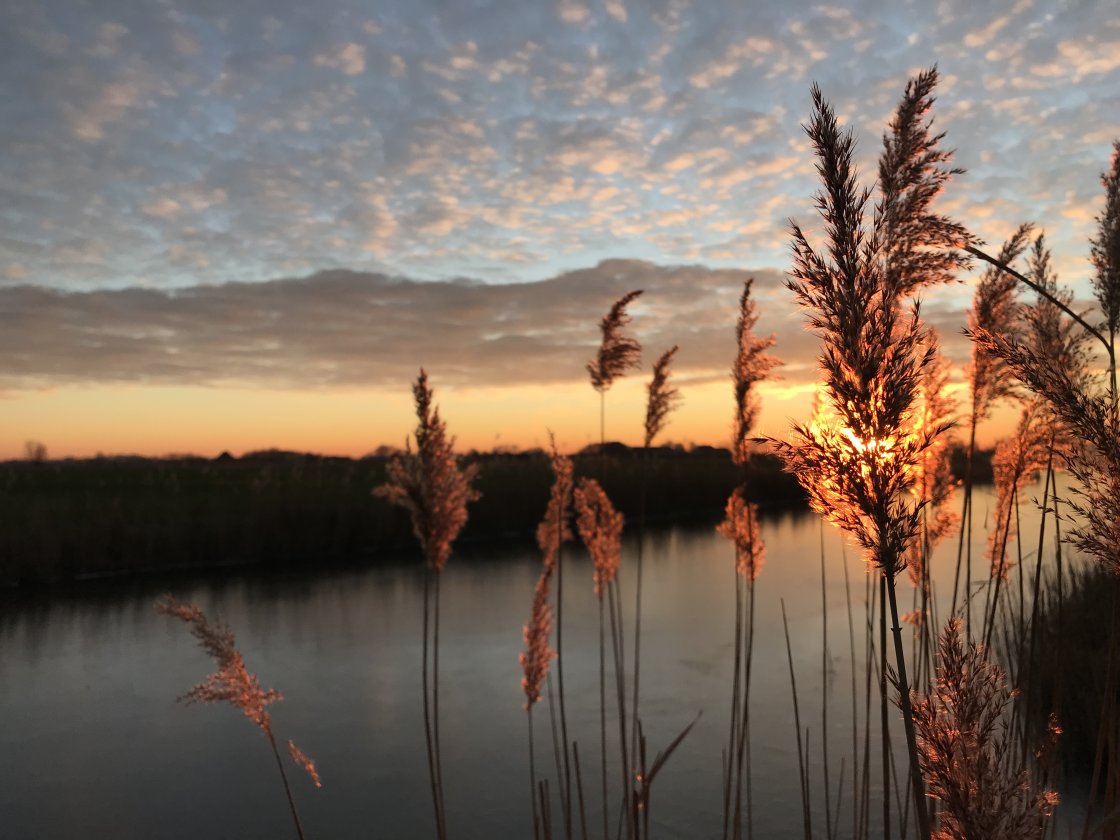
But don’t be afraid to shoot some close-up photos with a shallow depth of field.
The closer you get to a foreground subject, the more blurry the background becomes.
This shallow depth of field, where only a small part of the image is in focus, is often used in portrait photography. But it can be effective in landscape photography too… especially at sunrise and sunset.
The golden light creates a beautiful backdrop, even though the detail is out of focus.
A shallow depth of field draws attention to a certain aspect of the landscape, such as a flower, a spider web, or dew drops.
If your subject is close to the ground, get down on your knees so you can shoot from a low angle.
You need to get low so you can include the scenery and golden sky in the background.
Ensure the scene isn’t too busy behind your subject. Even though it will be out of focus, you’ll still be able to see some detail. And if there’s too much going on in the background, your shot will look messy.
Adjust your angle until you have some clear space, such as the sky, a field, or some water, behind the subject.
Position the iPhone camera lens just a few inches from the foreground subject. Then tap to set focus on the subject.
This ensures the camera focuses exactly where you want it.
Your subject should now appear sharp, and the background will be out of focus.
Landscape photos with a shallow depth of field can be really powerful.
The blurred background focuses the viewer’s attention on a single foreground object. But the little bit of detail in the background adds to the story of the photo.
So even though the background is out of focus, it’s still a very important element in your image.
Once you start shooting shallow depth of field photos, you’ll discover a whole new side to landscape photography.
You’ll no longer just look for those wide sweeping vistas. You’ll start to notice the smaller details too.
You’ll stop.
You’ll look around.
And you’ll become aware of the beautiful things in nature… even the tiniest details.
And that’s the most amazing thing about landscape photography.
You come away with a deep appreciation of nature… as well as beautiful photos, of course!
The post 8 Tips For Golden Hour Landscape Photography On iPhone appeared first on iPhone Photography School.
About the author

By accepting you will be accessing a service provided by a third-party external to https://kendallcameraclub.org/