6 Tips for Stunning Abstract Photography (+ Examples)
The post 6 Tips for Stunning Abstract Photography (+ Examples) appeared first on Digital Photography School. It was authored by Peter West Carey.

Abstract photography is a lot of fun (and often jaw-droppingly beautiful). But how can you create gorgeous abstract shots of your very own?
In this article, I share plenty of practical tips, tricks, and techniques for amazing abstract shots. I also share plenty of inspirational examples.
By the time you’re done reading, you’ll know how to capture beautiful abstracts, whether you use a smartphone, a DSLR, or a large-format film camera.
Let’s get started!
1. Move your camera while you shoot
The simplest method for creating abstract photos – and one that’s loved by most abstract shooters – is to blur everything…
…simply by moving your camera as you take a photo.
The idea is to set your camera to its Manual or Shutter Priority mode. Then dial in a lengthy shutter speed (often in the area of 1/10s, though you can experiment with longer speeds, too).
Start moving your camera from side to side or up and down, then hit the shutter button – and keep moving your camera until the image is complete. You’ll get different results depending on the direction of your movement, the length of the shutter speed, and the look of your subject – but pretty much every image created using this technique looks super cool.

A few pieces of advice:
First, do your motion-blur photography (also known as intentional camera movement photography) when the light is low. That way, you can keep your shutter speed long enough to capture a beautiful blurry effect.
Second, lower your ISO to its base level (generally ISO 100). That way, you get the longest shutter speed possible.

Third, if you can’t get a fast-enough shutter speed out in the open, try heading into the shade. You might also add a neutral density filter over your lens. Here, the quality of the filter isn’t hugely important, as you’ll be aiming for lots of blur anyway – so feel free to grab a cheap ND filter off of Amazon or eBay.
Fourth, look for colorful subjects that will stand out, even when blurred. Flowers are great for ICM photography, as are leaves in the fall, water at sunset, iridescent rocks, and more.

Finally, experiment wildly. Be sure to take various shots while moving your camera in different directions. Then start moving your camera in circles or random wiggles. Over time, you’ll get better at predicting the outcome, though intentional camera movement photography is always a bit of an adventure.

2. Photograph moving subjects
Action photographers spend all day trying to freeze moving subjects, such as birds in flight, cars rushing by, and sports players in mid-jump.
But what if, instead of freezing the subjects, you deliberately let them blur?
This technique complements the intentional camera movement idea I shared above. But instead of moving your camera while the subject remains still, you keep your camera still and let the subject move!
As with ICM photography, you’ll need to slow down your shutter speed. I’d recommend starting at 1/30s, though the specifics will depend heavily on your subject’s movement (experimentation is key!).
Colorful subjects work great; I love to photograph fast-moving trains, for instance, with their colorful signs:

Cars are another nice motion-blur subject, and you can literally spend the whole day standing by the roadside and shooting colorful cars on the move.
By the way, a tripod can be helpful here, especially if you want to capture a sharp background with a blurry subject (as I did in the train shot above).
But you can also do motion-blur shots while handholding, and the effects can be very cool.
A word of warning: Watch out for whites, yellows, and other ultra-bright colors. They’ll fill your sensor with too much data too fast, and they will cover over any other colors that you may have in your shot. Instead, find subjects that feature lots of evenly toned colors, and you’ll get great results.
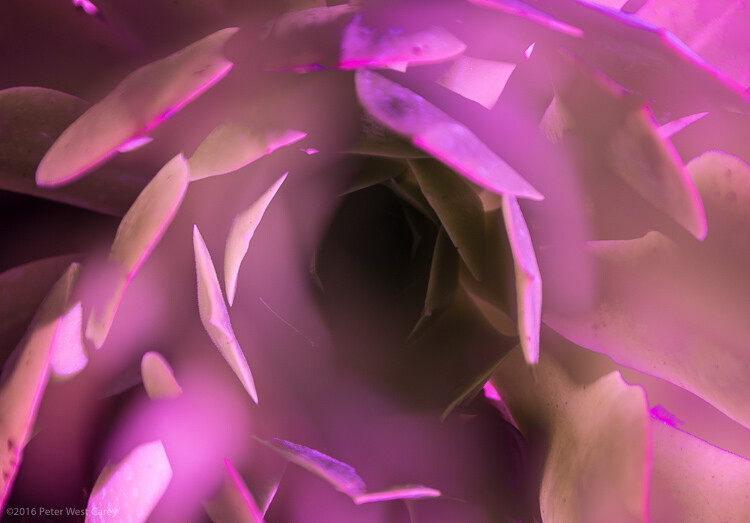
3. Zoom in
Abstract photography is all about focusing purely on colors and forms, rather than grounding your subject in the wider scene.
And while you can always remove key details by blurring the subject, another way to get wonderfully abstract shots is to simply get in close – so close that the viewer can’t tell what you photographed.
Here, a macro lens or a telephoto lens will be a big help. (Though if you don’t have either, don’t worry; simply pick your closest-focusing lens and have fun).
As you get in close, try to think of your subject, not in terms of its real-life identity, but in terms of its geometry and its colors. Aim to use key compositional principles – such as the rule of thirds or symmetry – to create a balanced image. Enhance dynamism with diagonals.
Do what you can to fill the frame with your subject. Once you’ve filled the frame, it becomes far more difficult for the viewer to understand what they’re looking at – and they’ll start to think about your image as an abstract photo, not a photo “of” something.
Let me show you an example. What do you see below? Just a sea of blue with some lines, right?

Now let me show you the larger context:

Looking at the larger photo, you can probably tell that I’ve photographed the ocean (albeit with some motion blur – see the technique shared in the previous tip!). It’s only by getting closer that I’ve managed to decontextualize the scene and capture a truly abstract shot.
4. Shoot through items
You can create a beautiful background blur by using a wide aperture (also known as a shallow depth of field effect).
But did you know that you can also create a beautiful foreground blur using the same method?
When shooting with a wide aperture – and therefore a shallow depth of field – elements close to the camera will be blurred, just the same as if they were positioned far behind the subject. And you can use that to create a beautiful painterly effect.
Photographers often refer to this technique as “shooting through,” because to make it work, you must shoot through an element toward your subject. And it’s very easy to do: Simply find the subject you want to capture, then reposition your camera so that an element near the lens intrudes into the frame.
Note that your “shooting-through” item can be anything, but for the most painterly effects, I’d recommend using something translucent or patchy. If you like to shoot in nature, you might position a few leaves or flowers in front of your lens, then shoot through toward other flowers, a beautiful landscape scene, or even a bird.
And if you like to shoot in a studio, you can position a subject, such as food or a bottle, on a table, then shoot through colored glass, tissue paper, and other household items.
The more you experiment with foreground objects, the more interesting your results will become! But make sure to use your lens at its widest aperture, and ensure that the “shoot-through” item is sufficiently close to the lens. (Nailing the perfect distance might take some trial and error.)

5. Try multiple exposures
Multiple exposures is a tried-and-tested abstract photography technique, and it’s also pretty easy to pull off, no matter your camera model.
The idea here is to capture multiple images, then combine them into a final file, though you can do this in two ways: in-camera, using your camera’s multiple-exposure function, or in an editing program like Adobe Photoshop.
Personally, I tend to do this in-camera, but if you want more flexibility, working in Photoshop is the better route.
When it comes to actually capturing your photos, you’ll need to take at least two shots for blending. You can work with the same subject (e.g., shoot one image from above and one image from the side), or you can work with two completely different subjects (e.g., a person and a lake).
I generally take one shot of a subject. Then I’ll shoot two more images of the same subject, but I’ll change the point of focus so my initial subject becomes blurry.
The end result is always a bit of a surprise; sometimes I get a soft-focus look, and other times the subject remains fairly in focus. (When the latter happens, I’ll often try to zoom way in to take the subject more out of context and create an abstract result.)
If you work in Photoshop, you can always add additional blur when editing. I also recommend playing around with blend modes; options such as Screen, Lighten, Darken, Multiply, and Soft Light will each create different – and often unique – effects.
6. Have fun with post-processing
You know how people sometimes complain about photos being overprocessed?
While overprocessing can be a problem – especially when beginners crank up the saturation and sharpness to an unbelievable level – in abstract photography, it’s not really something to worry about. Instead of thinking about overprocessing, look at abstract editing as a time to cast off your processing restraints and have fun.
For instance, try softening your images to make them more ethereal (by adding Gaussian blur or negative Clarity):

Or apply different color effects (by adjusting color temperature sliders, using a color-grading panel, or working with overlays).
Here, I used the white balance tools in Lightroom to create three different versions of the same shot:


Once you’ve imported your photos, go wild!
Abstract photography tips: final words

Abstract photography is one of the most enjoyable genres of photography…
…so grab your camera, find some subjects, and do some abstract shooting. Remember the tips and techniques I shared, and with a little effort, your photos will turn out amazing.
Now over to you:
Which of these tips do you plan to use first? What abstract photos do you plan to take? Share your thoughts in the comments below!
The post 6 Tips for Stunning Abstract Photography (+ Examples) appeared first on Digital Photography School. It was authored by Peter West Carey.
About the author

By accepting you will be accessing a service provided by a third-party external to https://kendallcameraclub.org/